2009 FORD SUPER DUTY fuse
[x] Cancel search: fusePage 2 of 418

Locks and Security 153
Keys 153
Locks 153
Anti-theft system 165
Seating and Safety Restraints 169
Seating 169
Safety restraints 178
Airbags 190
Child restraints 200
Tires, Wheels and Loading 222
Tire information 224
Tire inflation 227
Tire Pressure Monitoring System (TPMS) 242
Vehicle loading 253
Trailer towing 259
Trailer brake controller-integrated 264
Recreational towing 271
Driving 272
Starting 272
Brakes 277
Traction Control™ 279
Transmission operation 282
Reverse sensing system 289
Reverse camera 292
Roadside Emergencies 313
Getting roadside assistance 313
Hazard flasher control 314
Fuel pump shut-off switch 315
Fuses and relays 316
Changing tires 325
Wheel lug nut torque 341
Jump starting 342
Wrecker towing 347
Table of Contents
2
2009 F-250/350/450/550(f23)
Owners Guide, 1st Printing
USA(fus)
Page 12 of 418

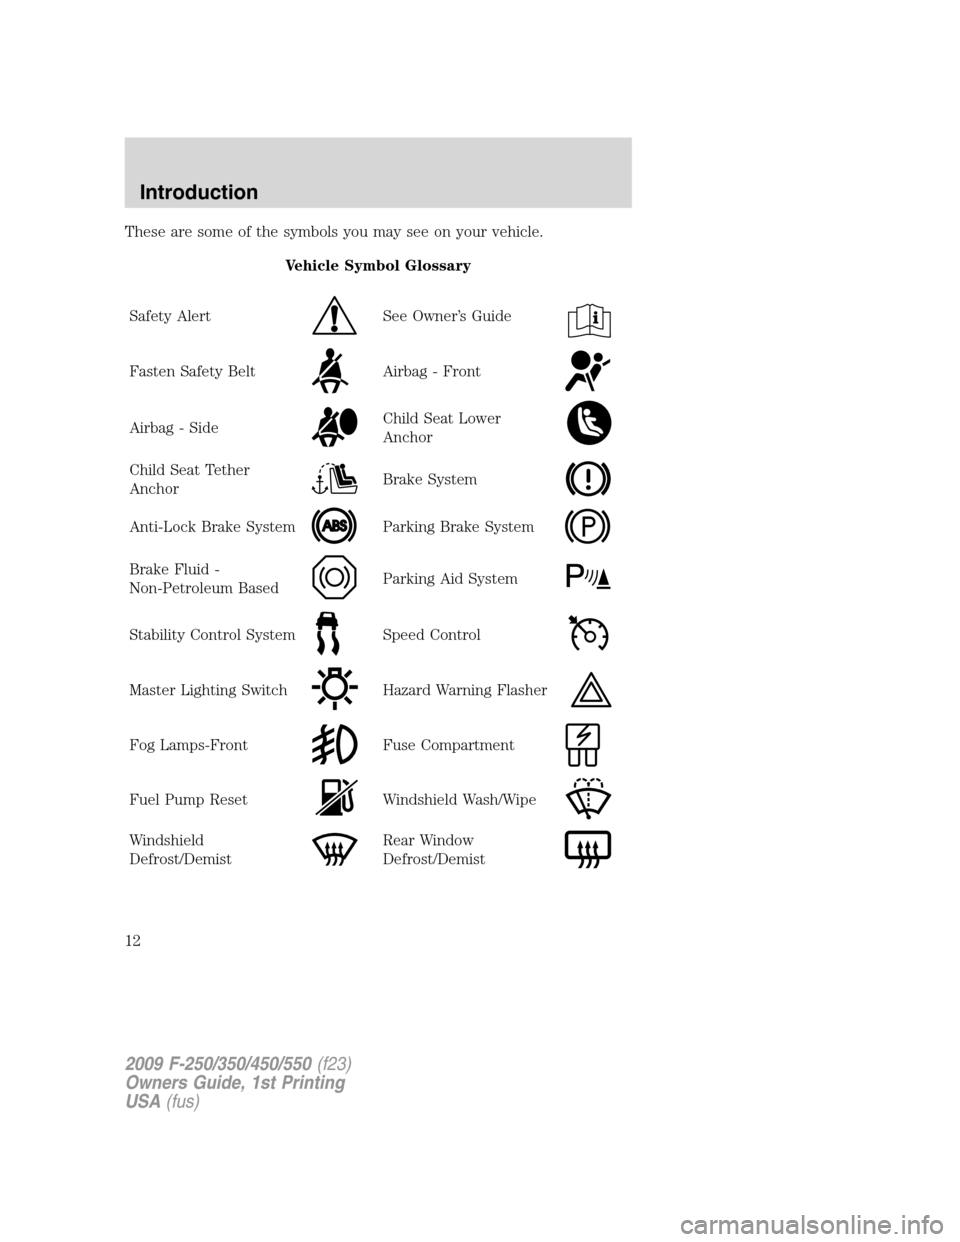
These are some of the symbols you may see on your vehicle.
Vehicle Symbol Glossary
Safety Alert
See Owner’s Guide
Fasten Safety BeltAirbag - Front
Airbag - SideChild Seat Lower
Anchor
Child Seat Tether
AnchorBrake System
Anti-Lock Brake SystemParking Brake System
Brake Fluid -
Non-Petroleum BasedParking Aid System
Stability Control SystemSpeed Control
Master Lighting SwitchHazard Warning Flasher
Fog Lamps-FrontFuse Compartment
Fuel Pump ResetWindshield Wash/Wipe
Windshield
Defrost/DemistRear Window
Defrost/Demist
2009 F-250/350/450/550(f23)
Owners Guide, 1st Printing
USA(fus)
Introduction
12
Page 107 of 418

Under-seat storage
Flip the rear seat cushion up to
access the rear under-seat storage
area. SeeSeatingin theSeating
and safety restraintschapter for
more information.
Use the vehicle’s ignition key to
lock/unlock the compartment.
Release the lid latches to open the
storage area.
AUXILIARY POWER POINT (12VDC)
Power outlets are designed for accessory plugs only. Do not insert
any other object in the power outlet for this will damage the
outlet and blow the fuse. Do not hang any type of accessory or
accessory bracket from the plug. Improper use of the power
outlet can cause damage not covered by your warranty.
The auxiliary power point is located
on the instrument panel.
On SuperCab and Crew Cab
models,another power point is
located on the rear of the center
console (if equipped).
Do not use the power point for
operating the cigarette lighter
element (if equipped).
To prevent the fuse from being
blown, do not use the power point(s) over the vehicle capacity of
12 VDC/180W. If the power point or cigar lighter socket is not working, a
2009 F-250/350/450/550(f23)
Owners Guide, 1st Printing
USA(fus)
Driver Controls
107
Page 108 of 418

fuse may have blown. Refer toFuses and relaysin theRoadside
Emergencieschapter for information on checking and replacing fuses.
To have full capacity usage of your power point, the engine is required to
be running to avoid unintentional discharge of the battery. To prevent
the battery from being discharged:
•do not use the power point longer than necessary when the engine is
not running,
•do not leave battery chargers, video game adapters, computers and
other devices plugged in overnight or when the vehicle is parked for
extended periods.
Always keep the power point caps closed when not being used.
Cigar lighter (if equipped)
Do not plug optional electrical accessories into the cigarette lighter
socket.
Do not hold the lighter in with your hand while it is heating, this will
damage the lighter element and socket. The lighter will be released from
its heating position when it is ready to be used.
Note:Improper use of the lighter can cause damage not covered by your
warranty, and can result in fire or serious injury.
POWER WINDOWS
WARNING:Do not leave children unattended in the vehicle and
do not let children play with the power windows. They may
seriously injure themselves.
WARNING:When closing the power windows, you should verify
they are free of obstructions and ensure that children and/or
pets are not in the proximity of the window openings.
Press and pull the window switches
to open and close windows.
•Push down (to the first detent)
and hold the switch to open.
•Pull up (to the first detent) and
hold the switch to close.
A
U
T
O
2009 F-250/350/450/550(f23)
Owners Guide, 1st Printing
USA(fus)
Driver Controls
108
Page 122 of 418

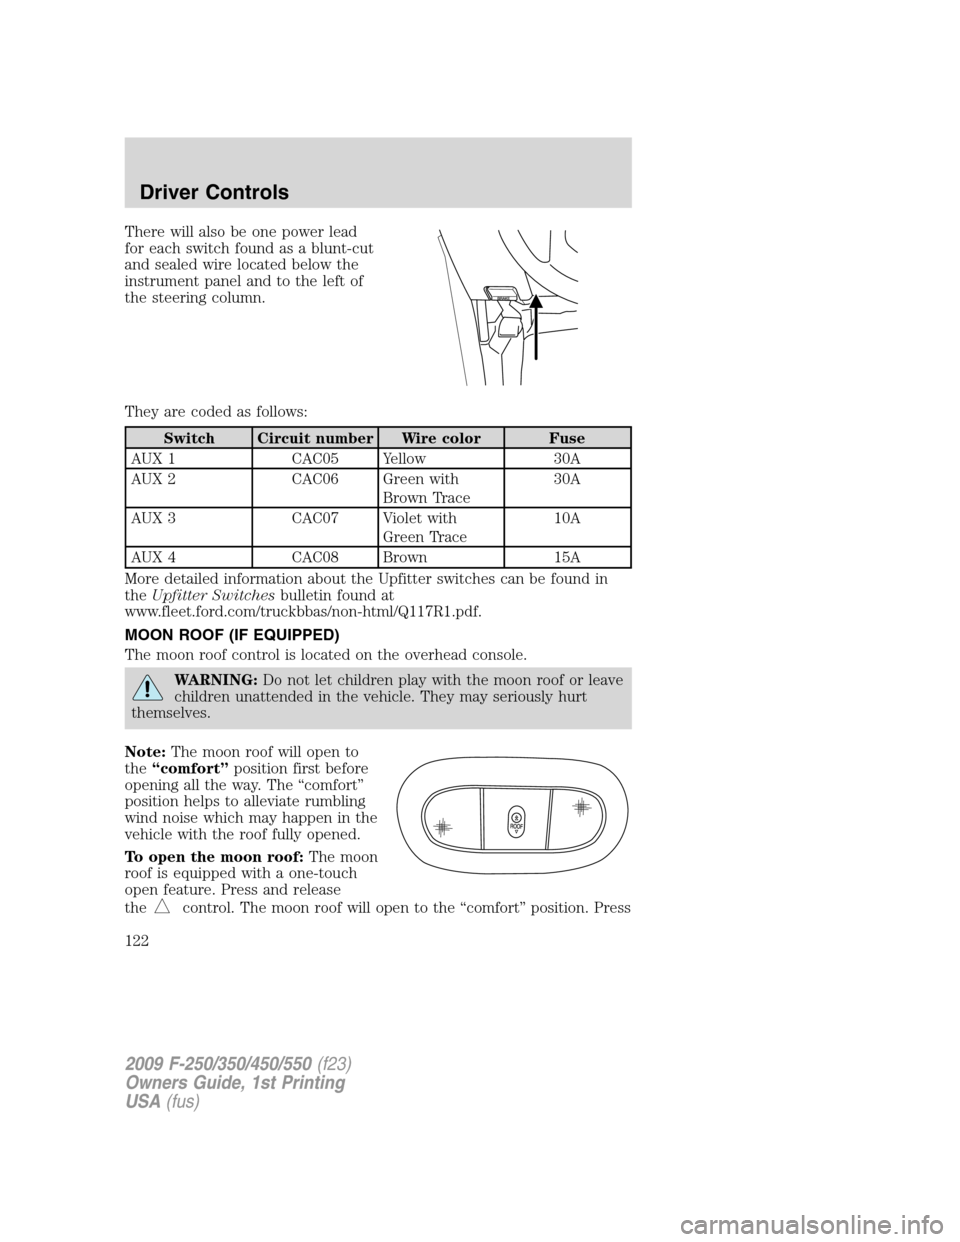
There will also be one power lead
for each switch found as a blunt-cut
and sealed wire located below the
instrument panel and to the left of
the steering column.
They are coded as follows:
Switch Circuit number Wire color Fuse
AUX 1 CAC05 Yellow 30A
AUX 2 CAC06 Green with
Brown Trace30A
AUX 3 CAC07 Violet with
Green Trace10A
AUX 4 CAC08 Brown 15A
More detailed information about the Upfitter switches can be found in
theUpfitter Switchesbulletin found at
www.fleet.ford.com/truckbbas/non-html/Q117R1.pdf.
MOON ROOF (IF EQUIPPED)
The moon roof control is located on the overhead console.
WARNING:Do not let children play with the moon roof or leave
children unattended in the vehicle. They may seriously hurt
themselves.
Note:The moon roof will open to
the“comfort”position first before
opening all the way. The “comfort”
position helps to alleviate rumbling
wind noise which may happen in the
vehicle with the roof fully opened.
To open the moon roof:The moon
roof is equipped with a one-touch
open feature. Press and release
the
control. The moon roof will open to the “comfort” position. Press
2009 F-250/350/450/550(f23)
Owners Guide, 1st Printing
USA(fus)
Driver Controls
122
Page 191 of 418

WARNING:When possible, all children 12 years old and under
should be properly restrained in a rear seating position.
WARNING:The National Highway Traffic Safety Administration
(NHTSA) recommends a minimum distance of at least 10 inches
(25 cm) between an occupant’s chest and the driver airbag module.
WARNING:Never place your arm over the airbag module as a
deploying airbag can result in serious arm fractures or other
injuries.
To properly position yourself away from the airbag:
•Move your seat to the rear as far as you can while still reaching the
pedals comfortably.
•Recline the seat slightly one or two degrees from the upright position.
WARNING:Do not put anything on or over the airbag module.
Placing objects on or over the airbag inflation area may cause
those objects to be propelled by the airbag into your face and torso
causing serious injury.
WARNING:Do not attempt to service, repair, or modify the
airbag supplemental restraint systems or its fuses. Contact your
authorized dealer as soon as possible.
WARNING:The front passenger airbag is not designed to offer
protection to an occupant in the center front seating position.
WARNING:Modifying or adding equipment to the front end of
the vehicle (including frame, bumper, front end body structure
and tow hooks) may affect the performance of the airbag system,
increasing the risk of injury. Do not modify the front end of the
vehicle.
WARNING:Additional equipment such as snowplow equipment
may effect the performance of the airbag sensors increasing the
risk of injury. Please refer to theBody Builders Layout Bookfor
instructions about the appropriate installation of additional equipment.
2009 F-250/350/450/550(f23)
Owners Guide, 1st Printing
USA(fus)
Seating and Safety Restraints
191
Page 283 of 418

2. Apply the brake. Use a tool (or a
small screwdriver) to pry out the
access cover. Insert the tool into the
access hole and slide the white
override button towards the left.
Move the gear shift lever into N
(Neutral) while holding the white
override disc towards the left.
3. Start the vehicle.
If it is necessary to use the above procedure to move the gearshift lever,
it is possible that a fuse has blown or the vehicle’s brakelamps are not
operating properly. Refer toFuses and relaysin theRoadside
Emergencieschapter.
WARNING:Do not drive your vehicle until you verify that the
brakelamps are working.
WARNING:Always set the parking brake fully and make sure
the gearshift is latched in P (Park). Turn the ignition to the off
position and remove the key whenever you leave your vehicle.
WARNING:If the parking brake is fully released, but the brake
warning lamp remains illuminated, the brakes may not be
working properly. See your authorized dealer as soon as possible.
2009 F-250/350/450/550(f23)
Owners Guide, 1st Printing
USA(fus)
Driving
283
Page 311 of 418

•The snow plow prep package includes a unique powertrain control
strategy which is required for diesel engine cooling during highway
driving with the snowplow raised.
Operating the vehicle with the snowplow attached
Do not use your vehicle for snow removal until it has been driven at
least 500 miles (800 km).
The attached snowplow blade restricts airflow to the radiator, and may
cause the engine to run at a higher temperature: Attention to engine
temperature is especially important when outside temperatures are
above freezing. Angle the blade to maximize airflow to the radiator and
monitor engine temperature to determine whether a left or right angle
provides the best performance.
Follow the severe duty schedule in yourscheduled maintenance
informationfor engine oil and transmission fluid change intervals.
Snowplowing with your airbag-equipped vehicle
Your vehicle is equipped with a driver and passenger airbag
Supplemental Restraint System (SRS) The SRS is designed to activate in
certain frontal and offset frontal collisions when the vehicle sustains
sufficient longitudinal deceleration.
Careless or high speed driving while plowing snow which results in
sufficient vehicle decelerations can deploy the airbag. Such driving also
increases the risk of accidents.
WARNING:All occupants of the vehicle, including the driver,
should always properly wear their safety belts, even when an air
bag supplemental restraint system (SRS) is provided.
Never remove or defeat the “tripping mechanisms” designed into the
snow removal equipment by its manufacturer. Doing so may cause
damage to the vehicle and the snow removal equipment as well as
possible airbag deployment.
WARNING:Do not attempt to service, repair, or modify the air
bag supplemental restraint system (SRS) or its fuses. See your
Ford or Lincoln Mercury dealer.
2009 F-250/350/450/550(f23)
Owners Guide, 1st Printing
USA(fus)
Driving
311