2009 FORD SUPER DUTY clock
[x] Cancel search: clockPage 27 of 418
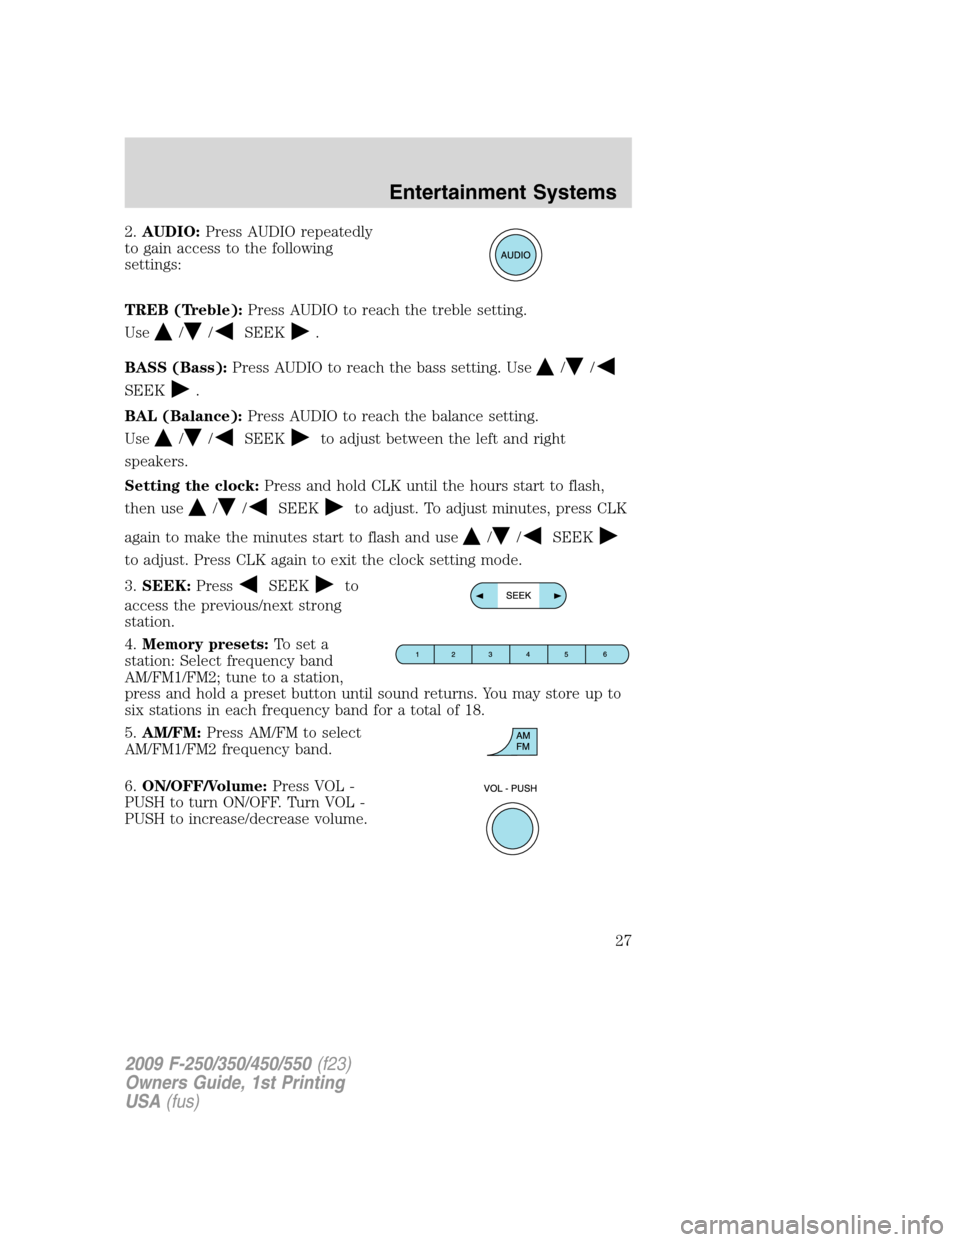
2.AUDIO:Press AUDIO repeatedly
to gain access to the following
settings:
TREB (Treble):Press AUDIO to reach the treble setting.
Use
//SEEK.
BASS (Bass):Press AUDIO to reach the bass setting. Use
//
SEEK.
BAL (Balance):Press AUDIO to reach the balance setting.
Use
//SEEKto adjust between the left and right
speakers.
Setting the clock:Press and hold CLK until the hours start to flash,
then use
//SEEKto adjust. To adjust minutes, press CLK
again to make the minutes start to flash and use
//SEEK
to adjust. Press CLK again to exit the clock setting mode.
3.SEEK:Press
SEEKto
access the previous/next strong
station.
4.Memory presets:To set a
station: Select frequency band
AM/FM1/FM2; tune to a station,
press and hold a preset button until sound returns. You may store up to
six stations in each frequency band for a total of 18.
5.AM/FM:Press AM/FM to select
AM/FM1/FM2 frequency band.
6.ON/OFF/Volume:Press VOL -
PUSH to turn ON/OFF. Turn VOL -
PUSH to increase/decrease volume.
2009 F-250/350/450/550(f23)
Owners Guide, 1st Printing
USA(fus)
Entertainment Systems
27
Page 28 of 418
7.CLK (Clock):Press CLK to
toggle between the clock and radio
frequency.
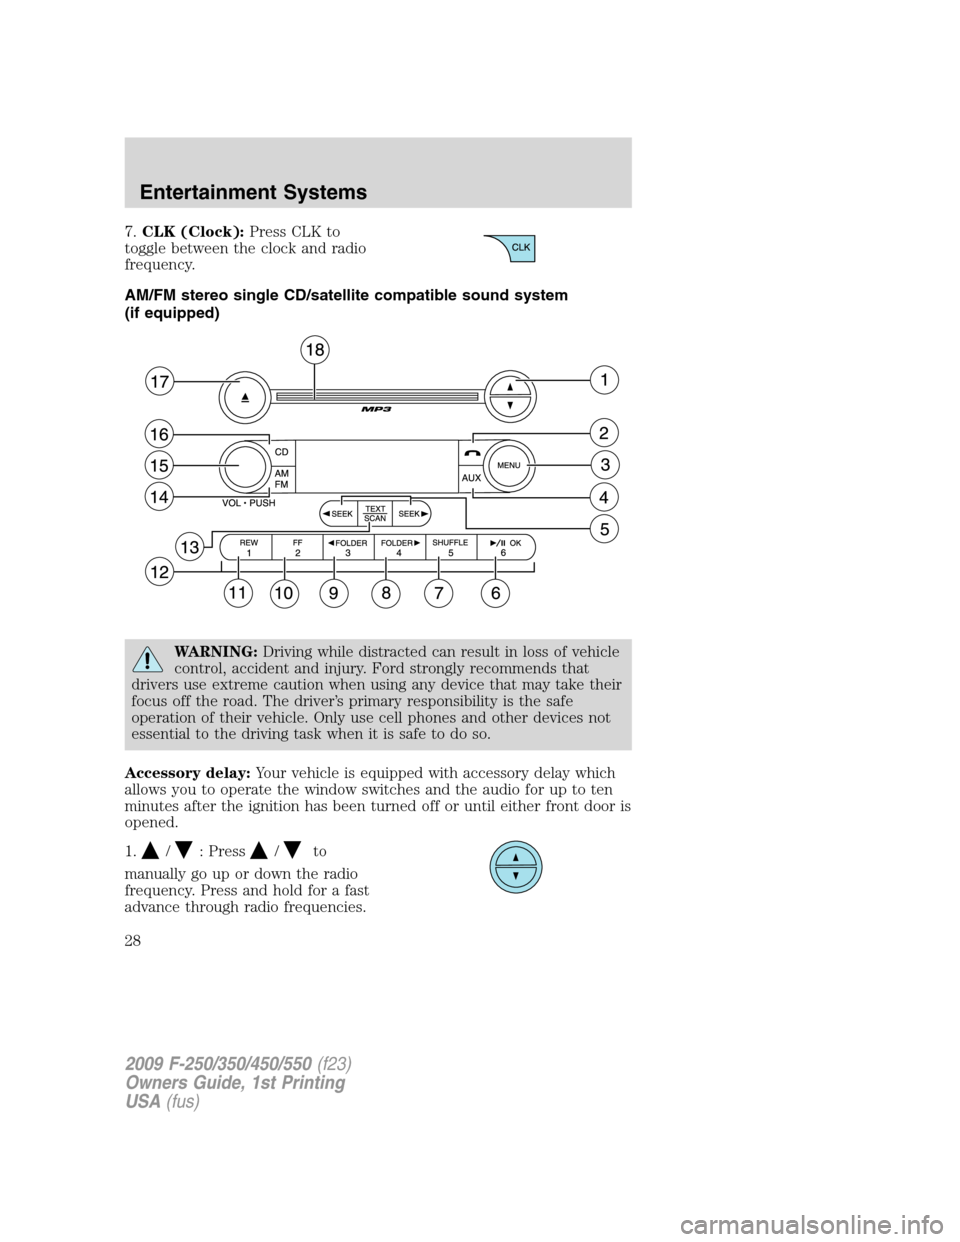
AM/FM stereo single CD/satellite compatible sound system
(if equipped)
WARNING:Driving while distracted can result in loss of vehicle
control, accident and injury. Ford strongly recommends that
drivers use extreme caution when using any device that may take their
focus off the road. The driver’s primary responsibility is the safe
operation of their vehicle. Only use cell phones and other devices not
essential to the driving task when it is safe to do so.
Accessory delay:Your vehicle is equipped with accessory delay which
allows you to operate the window switches and the audio for up to ten
minutes after the ignition has been turned off or until either front door is
opened.
1.
/: Press/to
manually go up or down the radio
frequency. Press and hold for a fast
advance through radio frequencies.
2009 F-250/350/450/550(f23)
Owners Guide, 1st Printing
USA(fus)
Entertainment Systems
28
Page 29 of 418
In satellite radio mode (if equipped), press/to tune to the
next/previous channel.
Satellite radio is available only with a valid SIRIUS radio
subscription. Check with your authorized dealer for availability.
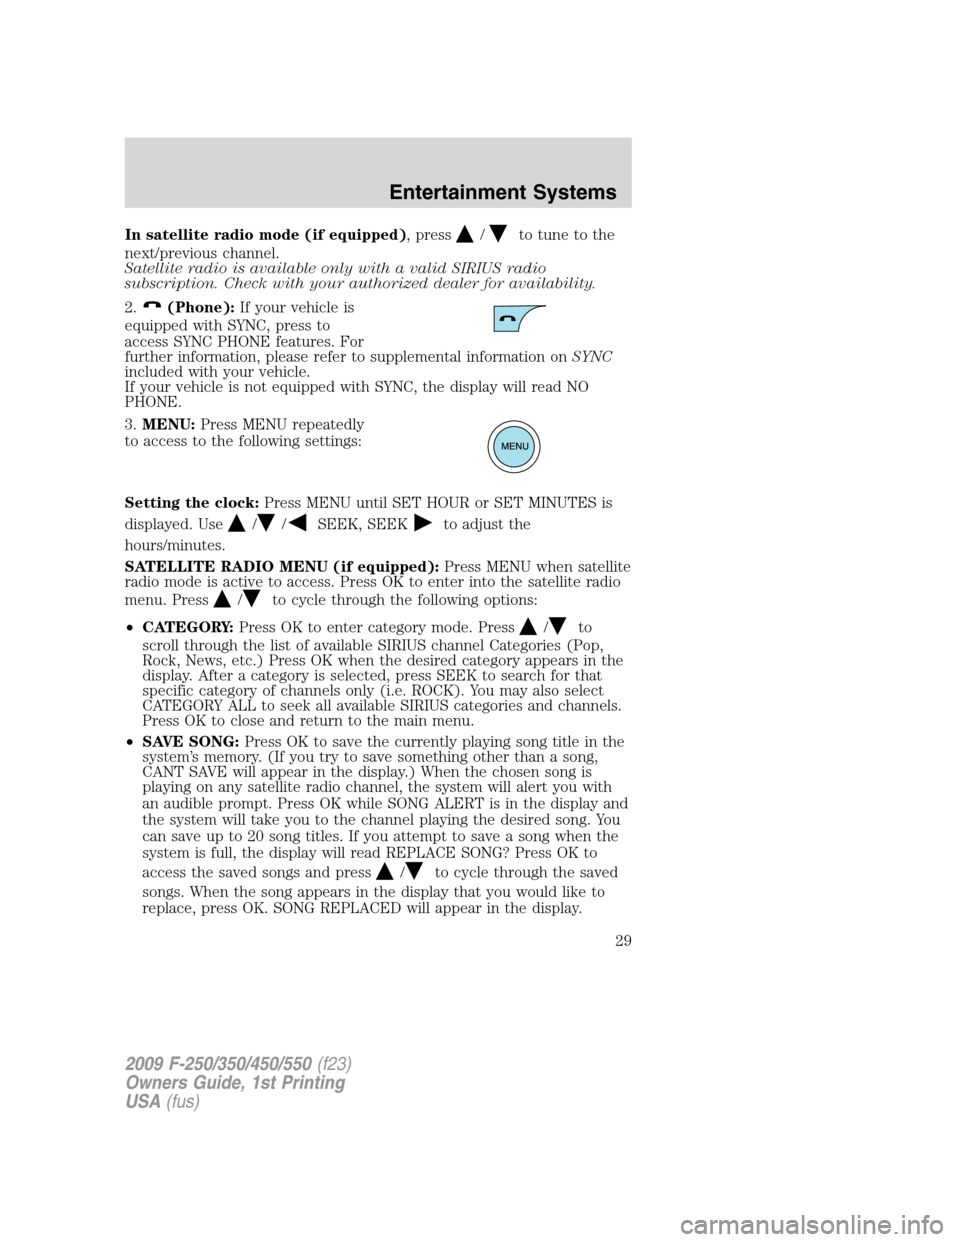
2.
(Phone):If your vehicle is
equipped with SYNC, press to
access SYNC PHONE features. For
further information, please refer to supplemental information onSYNC
included with your vehicle.
If your vehicle is not equipped with SYNC, the display will read NO
PHONE.
3.MENU:Press MENU repeatedly
to access to the following settings:
Setting the clock:Press MENU until SET HOUR or SET MINUTES is
displayed. Use
//SEEK, SEEKto adjust the
hours/minutes.
SATELLITE RADIO MENU (if equipped):Press MENU when satellite
radio mode is active to access. Press OK to enter into the satellite radio
menu. Press
/to cycle through the following options:
•CATEGORY:Press OK to enter category mode. Press
/to
scroll through the list of available SIRIUS channel Categories (Pop,
Rock, News, etc.) Press OK when the desired category appears in the
display. After a category is selected, press SEEK to search for that
specific category of channels only (i.e. ROCK). You may also select
CATEGORY ALL to seek all available SIRIUS categories and channels.
Press OK to close and return to the main menu.
•SAVE SONG:Press OK to save the currently playing song title in the
system’s memory. (If you try to save something other than a song,
CANT SAVE will appear in the display.) When the chosen song is
playing on any satellite radio channel, the system will alert you with
an audible prompt. Press OK while SONG ALERT is in the display and
the system will take you to the channel playing the desired song. You
can save up to 20 song titles. If you attempt to save a song when the
system is full, the display will read REPLACE SONG? Press OK to
access the saved songs and press
/to cycle through the saved
songs. When the song appears in the display that you would like to
replace, press OK. SONG REPLACED will appear in the display.
2009 F-250/350/450/550(f23)
Owners Guide, 1st Printing
USA(fus)
Entertainment Systems
29
Page 36 of 418
Satellite radio is available only with a valid SIRIUS radio
subscription. Check with your authorized dealer for availability.
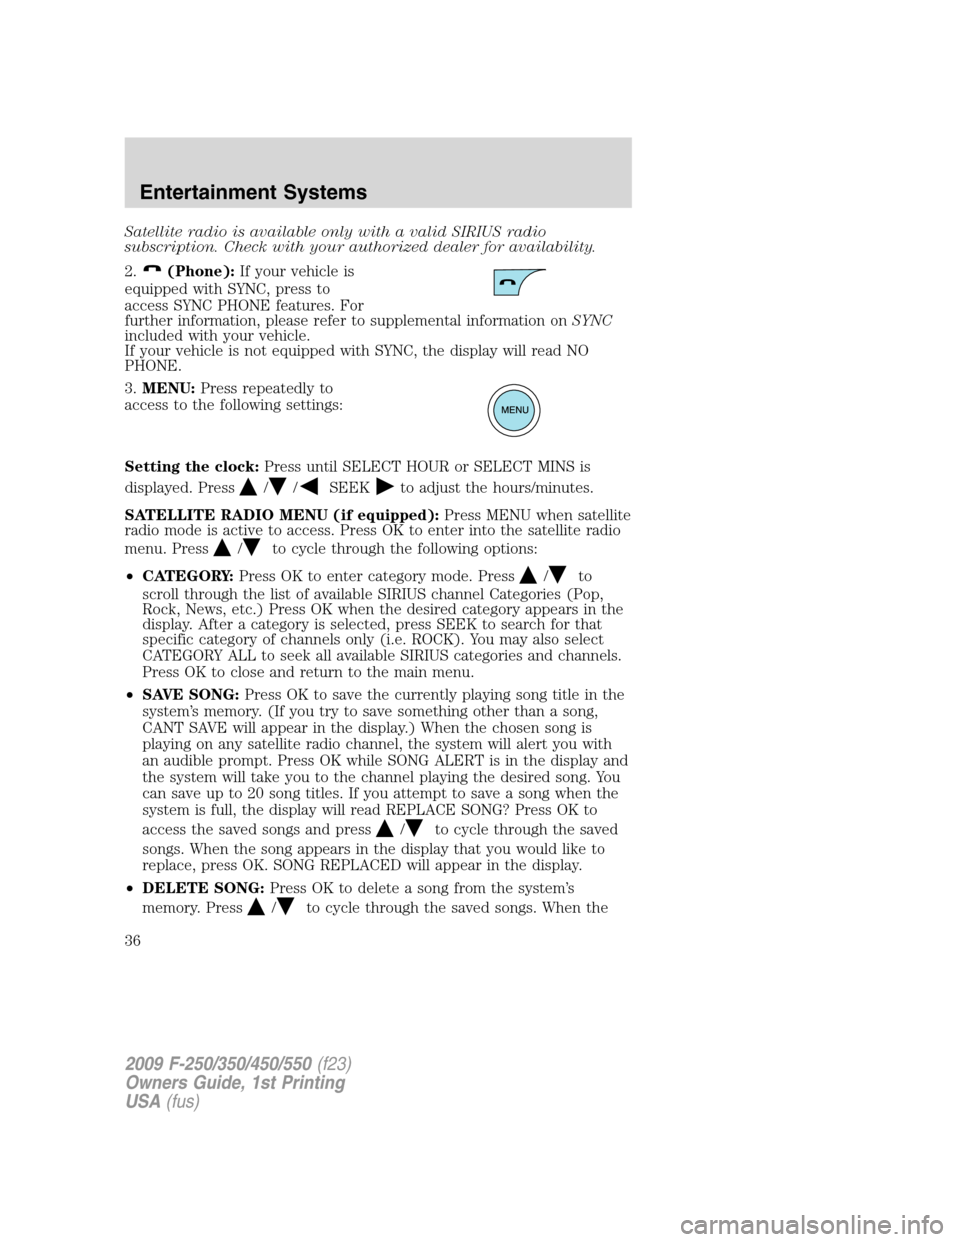
2.
(Phone):If your vehicle is
equipped with SYNC, press to
access SYNC PHONE features. For
further information, please refer to supplemental information onSYNC
included with your vehicle.
If your vehicle is not equipped with SYNC, the display will read NO
PHONE.
3.MENU:Press repeatedly to
access to the following settings:
Setting the clock:Press until SELECT HOUR or SELECT MINS is
displayed. Press
//SEEKto adjust the hours/minutes.
SATELLITE RADIO MENU (if equipped):Press MENU when satellite
radio mode is active to access. Press OK to enter into the satellite radio
menu. Press
/to cycle through the following options:
•CATEGORY:Press OK to enter category mode. Press
/to
scroll through the list of available SIRIUS channel Categories (Pop,
Rock, News, etc.) Press OK when the desired category appears in the
display. After a category is selected, press SEEK to search for that
specific category of channels only (i.e. ROCK). You may also select
CATEGORY ALL to seek all available SIRIUS categories and channels.
Press OK to close and return to the main menu.
•SAVE SONG:Press OK to save the currently playing song title in the
system’s memory. (If you try to save something other than a song,
CANT SAVE will appear in the display.) When the chosen song is
playing on any satellite radio channel, the system will alert you with
an audible prompt. Press OK while SONG ALERT is in the display and
the system will take you to the channel playing the desired song. You
can save up to 20 song titles. If you attempt to save a song when the
system is full, the display will read REPLACE SONG? Press OK to
access the saved songs and press
/to cycle through the saved
songs. When the song appears in the display that you would like to
replace, press OK. SONG REPLACED will appear in the display.
•DELETE SONG:Press OK to delete a song from the system’s
memory. Press
/to cycle through the saved songs. When the
2009 F-250/350/450/550(f23)
Owners Guide, 1st Printing
USA(fus)
Entertainment Systems
36
Page 89 of 418
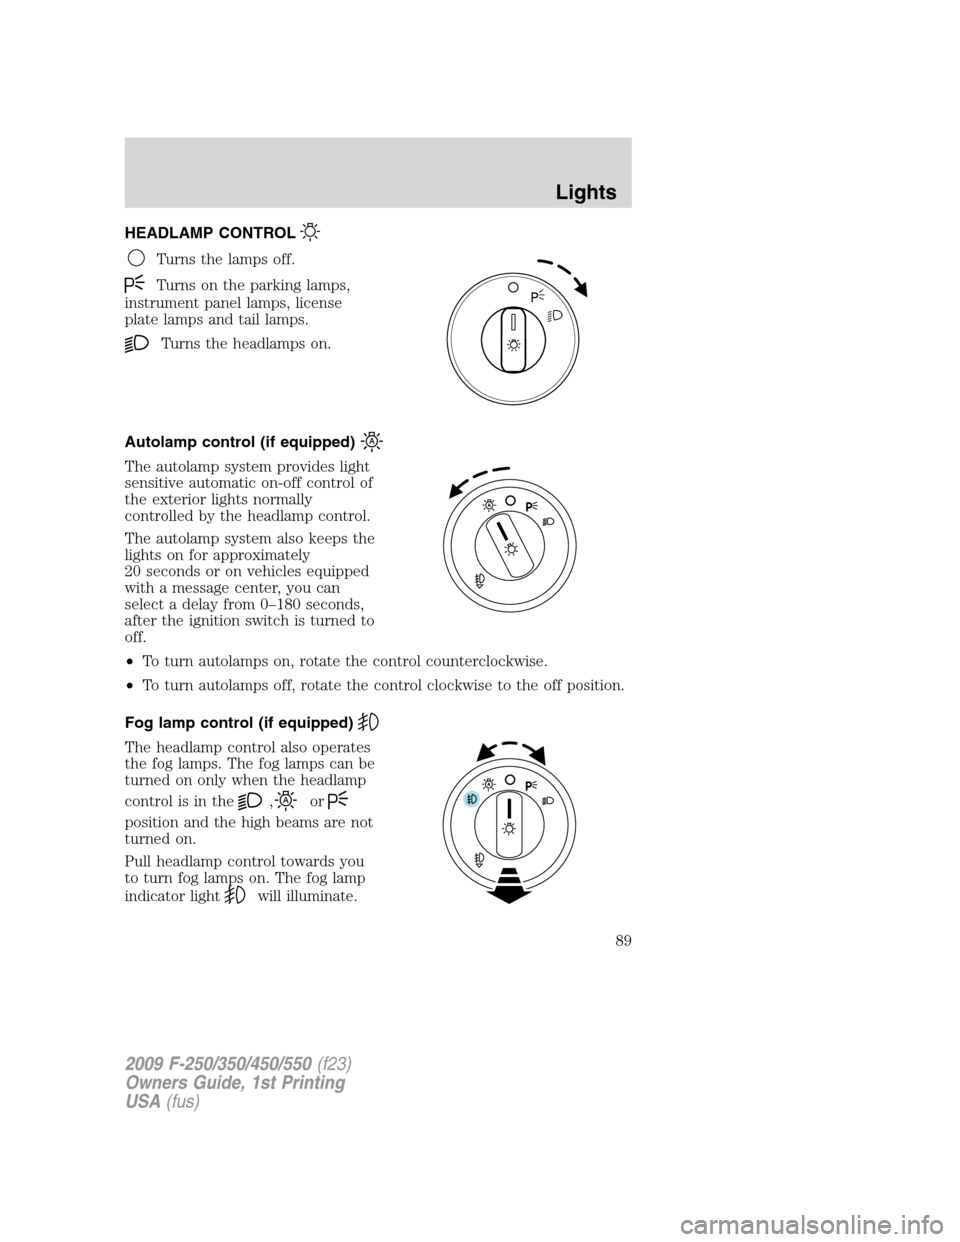
HEADLAMP CONTROL
Turns the lamps off.
Turns on the parking lamps,
instrument panel lamps, license
plate lamps and tail lamps.
Turns the headlamps on.
Autolamp control (if equipped)
The autolamp system provides light
sensitive automatic on-off control of
the exterior lights normally
controlled by the headlamp control.
The autolamp system also keeps the
lights on for approximately
20 seconds or on vehicles equipped
with a message center, you can
select a delay from 0–180 seconds,
after the ignition switch is turned to
off.
•To turn autolamps on, rotate the control counterclockwise.
•To turn autolamps off, rotate the control clockwise to the off position.
Fog lamp control (if equipped)
The headlamp control also operates
the fog lamps. The fog lamps can be
turned on only when the headlamp
control is in the
,or
position and the high beams are not
turned on.
Pull headlamp control towards you
to turn fog lamps on. The fog lamp
indicator light
will illuminate.
2009 F-250/350/450/550(f23)
Owners Guide, 1st Printing
USA(fus)
Lights
89
Page 93 of 418
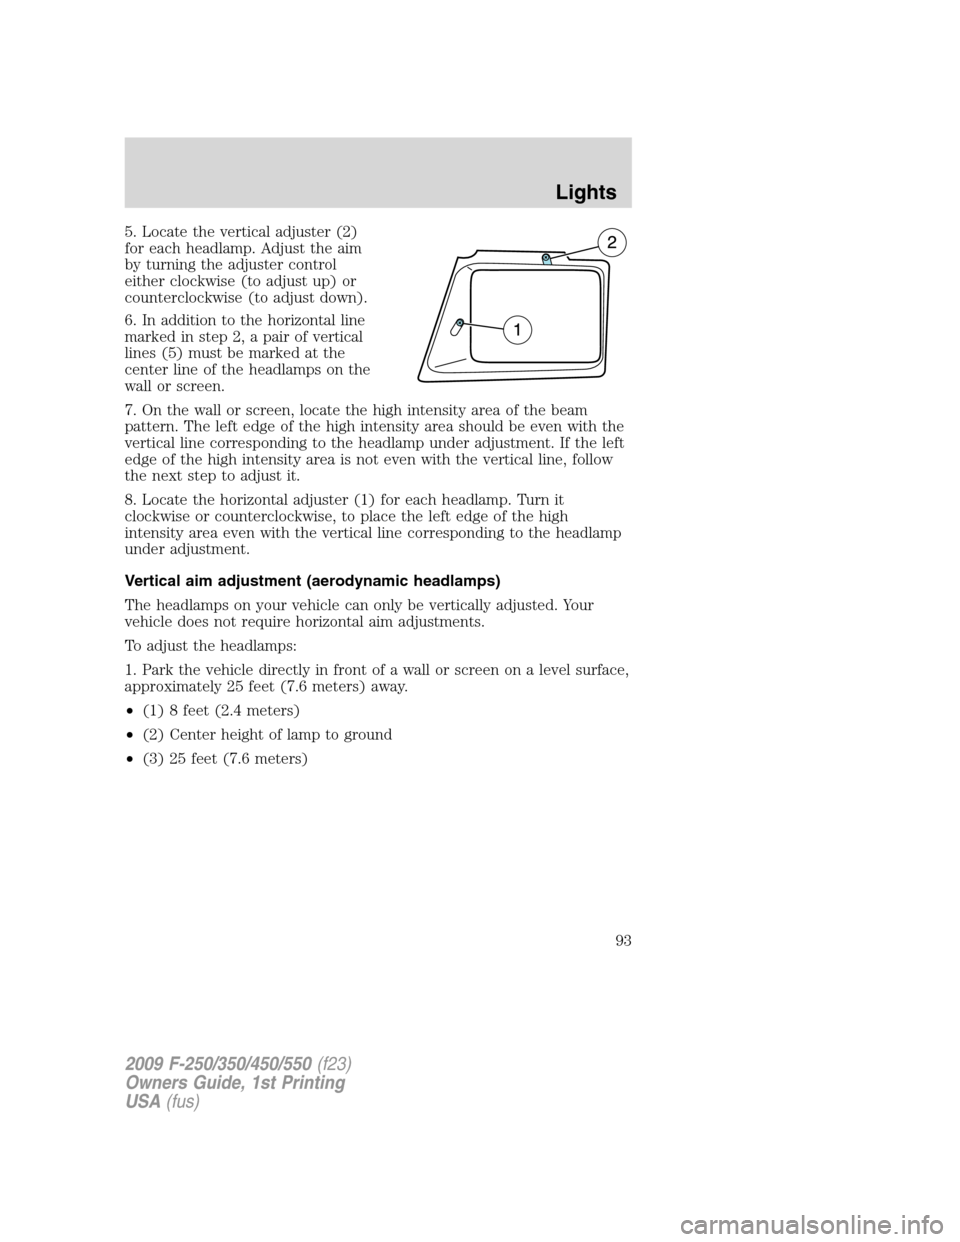
5. Locate the vertical adjuster (2)
for each headlamp. Adjust the aim
by turning the adjuster control
either clockwise (to adjust up) or
counterclockwise (to adjust down).
6. In addition to the horizontal line
marked in step 2, a pair of vertical
lines (5) must be marked at the
center line of the headlamps on the
wall or screen.
7. On the wall or screen, locate the high intensity area of the beam
pattern. The left edge of the high intensity area should be even with the
vertical line corresponding to the headlamp under adjustment. If the left
edge of the high intensity area is not even with the vertical line, follow
the next step to adjust it.
8. Locate the horizontal adjuster (1) for each headlamp. Turn it
clockwise or counterclockwise, to place the left edge of the high
intensity area even with the vertical line corresponding to the headlamp
under adjustment.
Vertical aim adjustment (aerodynamic headlamps)
The headlamps on your vehicle can only be vertically adjusted. Your
vehicle does not require horizontal aim adjustments.
To adjust the headlamps:
1. Park the vehicle directly in front of a wall or screen on a level surface,
approximately 25 feet (7.6 meters) away.
•(1) 8 feet (2.4 meters)
•(2) Center height of lamp to ground
•(3) 25 feet (7.6 meters)
2009 F-250/350/450/550(f23)
Owners Guide, 1st Printing
USA(fus)
Lights
93
Page 94 of 418
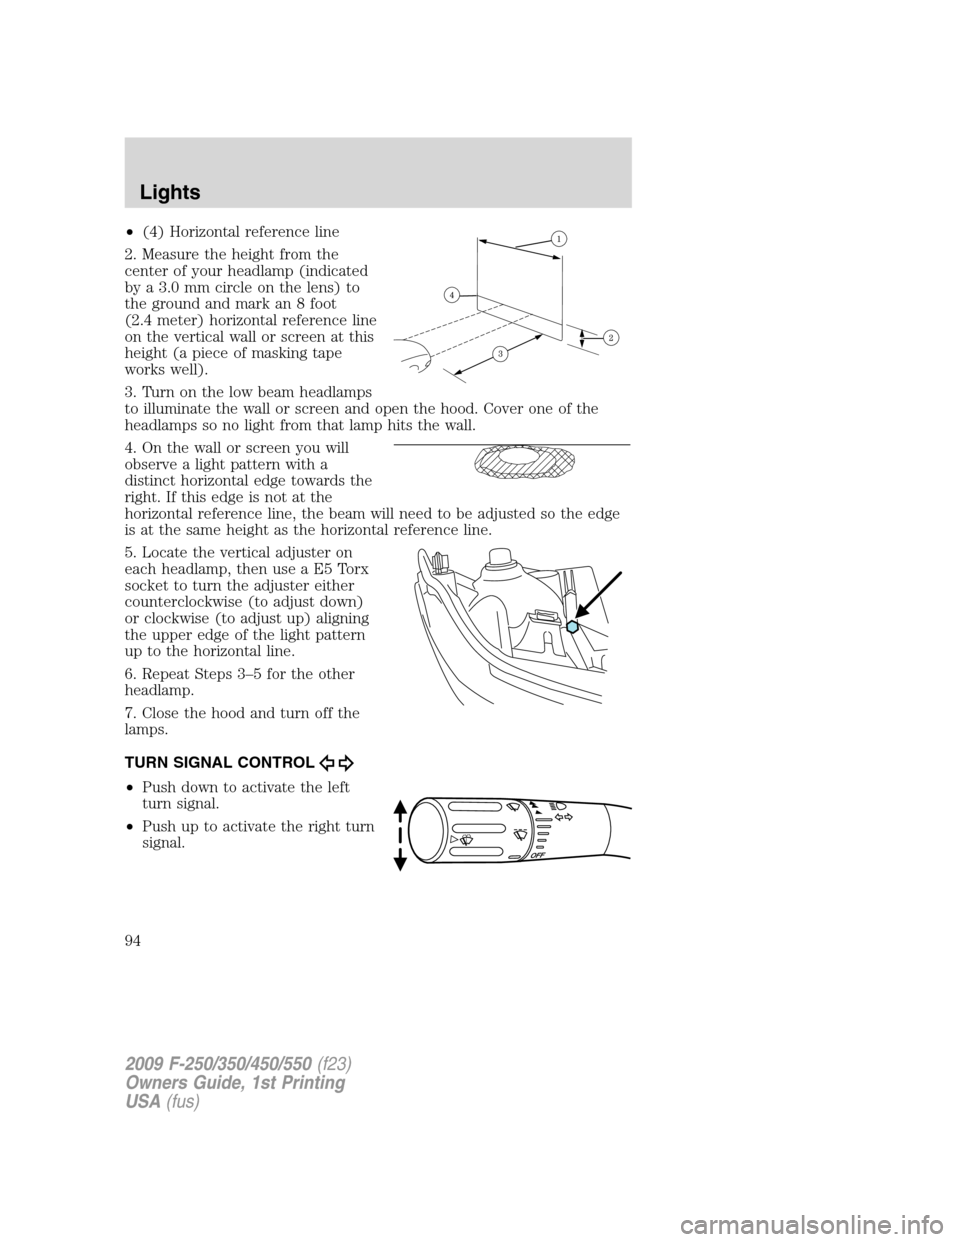
•(4) Horizontal reference line
2. Measure the height from the
center of your headlamp (indicated
by a 3.0 mm circle on the lens) to
the ground and mark an 8 foot
(2.4 meter) horizontal reference line
on the vertical wall or screen at this
height (a piece of masking tape
works well).
3. Turn on the low beam headlamps
to illuminate the wall or screen and open the hood. Cover one of the
headlamps so no light from that lamp hits the wall.
4. On the wall or screen you will
observe a light pattern with a
distinct horizontal edge towards the
right. If this edge is not at the
horizontal reference line, the beam will need to be adjusted so the edge
is at the same height as the horizontal reference line.
5. Locate the vertical adjuster on
each headlamp, then use a E5 Torx
socket to turn the adjuster either
counterclockwise (to adjust down)
or clockwise (to adjust up) aligning
the upper edge of the light pattern
up to the horizontal line.
6. Repeat Steps 3–5 for the other
headlamp.
7. Close the hood and turn off the
lamps.
TURN SIGNAL CONTROL
•Push down to activate the left
turn signal.
•Push up to activate the right turn
signal.
2009 F-250/350/450/550(f23)
Owners Guide, 1st Printing
USA(fus)
Lights
94
Page 97 of 418
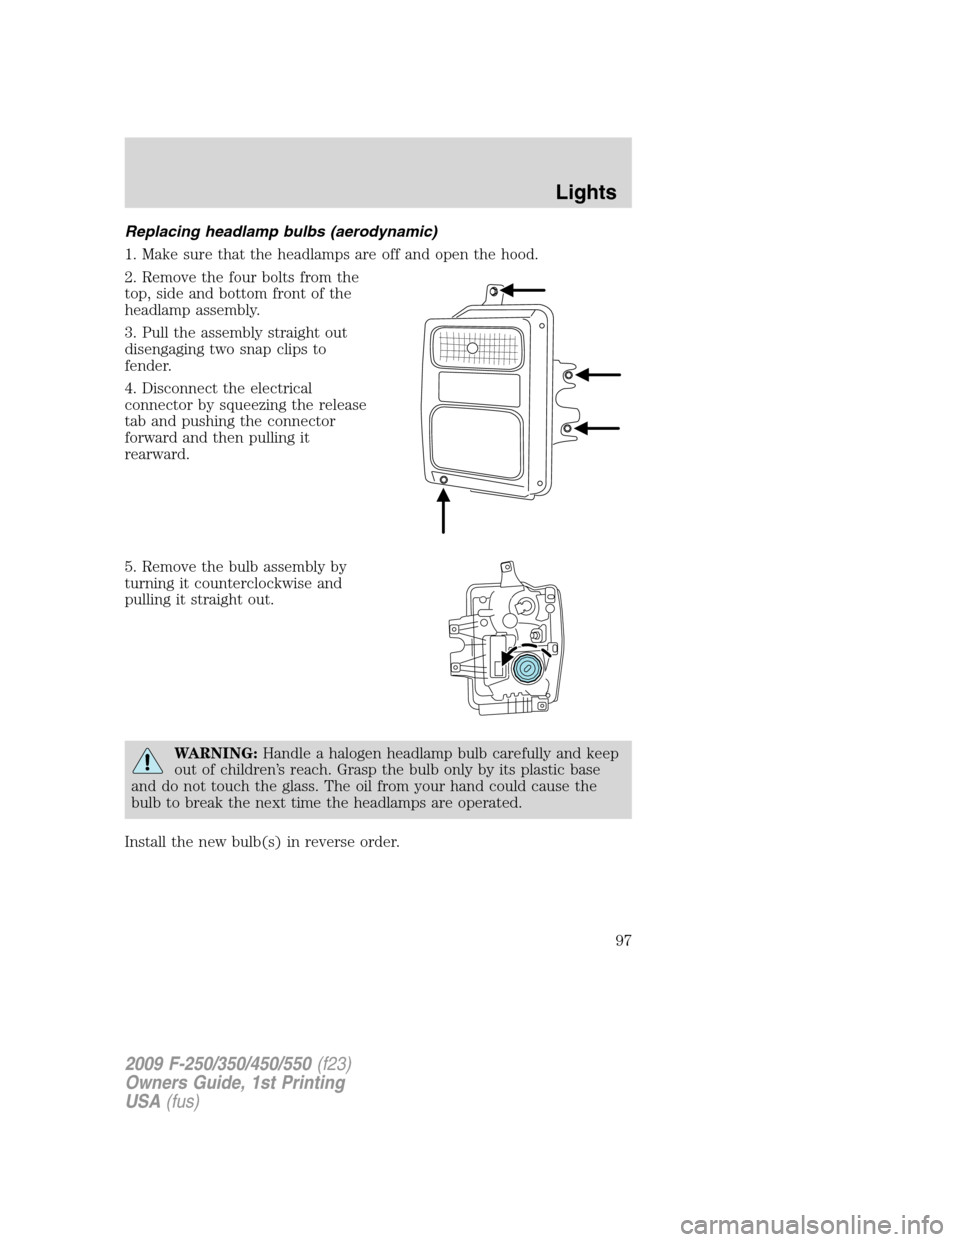
Replacing headlamp bulbs (aerodynamic)
1. Make sure that the headlamps are off and open the hood.
2. Remove the four bolts from the
top, side and bottom front of the
headlamp assembly.
3. Pull the assembly straight out
disengaging two snap clips to
fender.
4. Disconnect the electrical
connector by squeezing the release
tab and pushing the connector
forward and then pulling it
rearward.
5. Remove the bulb assembly by
turning it counterclockwise and
pulling it straight out.
WARNING:Handle a halogen headlamp bulb carefully and keep
out of children’s reach. Grasp the bulb only by its plastic base
and do not touch the glass. The oil from your hand could cause the
bulb to break the next time the headlamps are operated.
Install the new bulb(s) in reverse order.
2009 F-250/350/450/550(f23)
Owners Guide, 1st Printing
USA(fus)
Lights
97