Page 2 of 418
Locks and Security 153
Keys 153
Locks 153
Anti-theft system 165
Seating and Safety Restraints 169
Seating 169
Safety restraints 178
Airbags 190
Child restraints 200
Tires, Wheels and Loading 222
Tire information 224
Tire inflation 227
Tire Pressure Monitoring System (TPMS) 242
Vehicle loading 253
Trailer towing 259
Trailer brake controller-integrated 264
Recreational towing 271
Driving 272
Starting 272
Brakes 277
Traction Control™ 279
Transmission operation 282
Reverse sensing system 289
Reverse camera 292
Roadside Emergencies 313
Getting roadside assistance 313
Hazard flasher control 314
Fuel pump shut-off switch 315
Fuses and relays 316
Changing tires 325
Wheel lug nut torque 341
Jump starting 342
Wrecker towing 347
Table of Contents
2
2009 F-250/350/450/550(f23)
Owners Guide, 1st Printing
USA(fus)
Page 9 of 418
Special instructions
For your added safety, your vehicle is fitted with sophisticated electronic
controls.
WARNING:Please read the sectionAirbag Supplemental
Restraint System (SRS)in theSeating and Safety Restraints
chapter. Failure to follow the specific warnings and instructions could
result in personal injury.
WARNING:Front seat mounted rear-facing child or infant seats
shouldNEVERbe placed in front of an active passenger airbag.
Cell phone use
The use of Mobile Communications Equipment has become increasingly
important in the conduct of business and personal affairs. However,
drivers must not compromise their own or others’ safety when using
such equipment. Mobile Communications can enhance personal safety
and security when appropriately used, particularly in emergency
situations. Safety must be paramount when using mobile communications
equipment to avoid negating these benefits.
Mobile Communication Equipment includes, but is not limited to cellular
phones, pagers, portable email devices, in-vehicle communications
systems, telematics devices and portable two-way radios.
WARNING:Driving while distracted can result in loss of vehicle
control, accident and injury. Ford strongly recommends that
drivers use extreme caution when using any device that may take their
focus off the road. The driver’s primary responsibility is the safe
operation of their vehicle. Only use cell phones and other devices not
essential to the driving task when it is safe to do so.
2009 F-250/350/450/550(f23)
Owners Guide, 1st Printing
USA(fus)
Introduction
9
Page 12 of 418
These are some of the symbols you may see on your vehicle.
Vehicle Symbol Glossary
Safety Alert
See Owner’s Guide
Fasten Safety BeltAirbag - Front
Airbag - SideChild Seat Lower
Anchor
Child Seat Tether
AnchorBrake System
Anti-Lock Brake SystemParking Brake System
Brake Fluid -
Non-Petroleum BasedParking Aid System
Stability Control SystemSpeed Control
Master Lighting SwitchHazard Warning Flasher
Fog Lamps-FrontFuse Compartment
Fuel Pump ResetWindshield Wash/Wipe
Windshield
Defrost/DemistRear Window
Defrost/Demist
2009 F-250/350/450/550(f23)
Owners Guide, 1st Printing
USA(fus)
Introduction
12
Page 65 of 418
Wired headphones
WARNING:Do not leave children unattended in the vehicle and
do not let children operate the system while unsupervised. If
wired headphones or auxiliary systems are used, children may become
entangled in the cords and seriously injure themselves.
WARNING:The driver should never use the headphones while
driving the vehicle. Using headphones may prevent the driver
from hearing audible warnings such as horns or emergency sirens,
which could result in a crash causing serious injury. Give your full
attention to driving and to the road.
You may purchase wired headphones for your FES (Family
Entertainment System). Plug them into the 3.5 mm headphone jack(s)
located on the left and right sides of the system. (Channel A is located
on the left side and Channel B is located on the right side.) These
headphones will be active when in Dual Play mode.
To listen to the audio on wired headphones (not included), connect the
wired headphones into the headphone jacks on the sides of the DVD
system. The wired headphone jack for Channel A is located on the left
side of the FES and is labeled
A. Headphones plugged into this
headphone jack will hear audio from the audio source selected to be the
Channel A source. The wired headphone jack for Channel B is located on
the right side of the FES and is labeled
B. Headphones plugged into
this headphone jack will hear audio from the audio source selected to be
the Channel B source.
Adjust the headphone volume using
the volume control on the DVD
system.
Operation
Single play/Dual play
Your DVD and audio system work together with the infrared headphones
and wired headphones (not included) to allow the rear seat passengers
to listen to the radio (and other media sources) over the headphones.
This enables the front and rear seat passengers to listen to a variety of
sources a variety of ways.
2009 F-250/350/450/550(f23)
Owners Guide, 1st Printing
USA(fus)
Entertainment Systems
65
Page 178 of 418
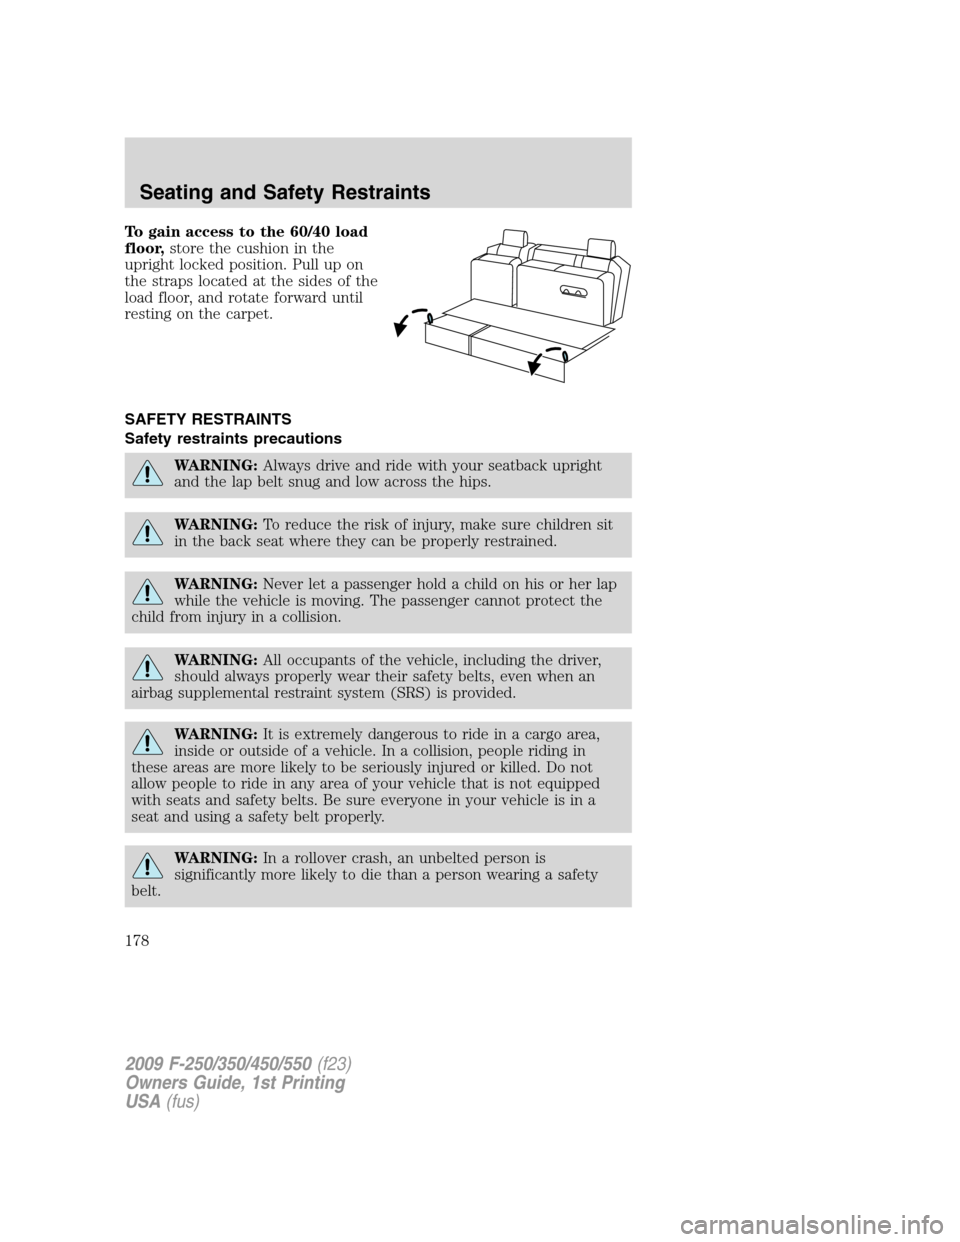
To gain access to the 60/40 load
floor,store the cushion in the
upright locked position. Pull up on
the straps located at the sides of the
load floor, and rotate forward until
resting on the carpet.
SAFETY RESTRAINTS
Safety restraints precautions
WARNING:Always drive and ride with your seatback upright
and the lap belt snug and low across the hips.
WARNING:To reduce the risk of injury, make sure children sit
in the back seat where they can be properly restrained.
WARNING:Never let a passenger hold a child on his or her lap
while the vehicle is moving. The passenger cannot protect the
child from injury in a collision.
WARNING:All occupants of the vehicle, including the driver,
should always properly wear their safety belts, even when an
airbag supplemental restraint system (SRS) is provided.
WARNING:It is extremely dangerous to ride in a cargo area,
inside or outside of a vehicle. In a collision, people riding in
these areas are more likely to be seriously injured or killed. Do not
allow people to ride in any area of your vehicle that is not equipped
with seats and safety belts. Be sure everyone in your vehicle is in a
seat and using a safety belt properly.
WARNING:In a rollover crash, an unbelted person is
significantly more likely to die than a person wearing a safety
belt.
2009 F-250/350/450/550(f23)
Owners Guide, 1st Printing
USA(fus)
Seating and Safety Restraints
178
Page 179 of 418
WARNING:Each seating position in your vehicle has a specific
safety belt assembly which is made up of one buckle and one
tongue that are designed to be used as a pair. 1) Use the shoulder belt
on the outside shoulder only. Never wear the shoulder belt under the
arm. 2) Never swing the safety belt around your neck over the inside
shoulder. 3) Never use a single belt for more than one person.
WARNING:When possible, all children 12 years old and under
should be properly restrained in a rear seating position.
WARNING:Safety belts and seats can become hot in a vehicle
that has been closed up in sunny weather; they could burn a
small child. Check seat covers and buckles before you place a child
anywhere near them.
WARNING:Front and rear seat occupants, including pregnant
women, should wear safety belts for optimum protection in an
accident.
Combination lap and shoulder belts
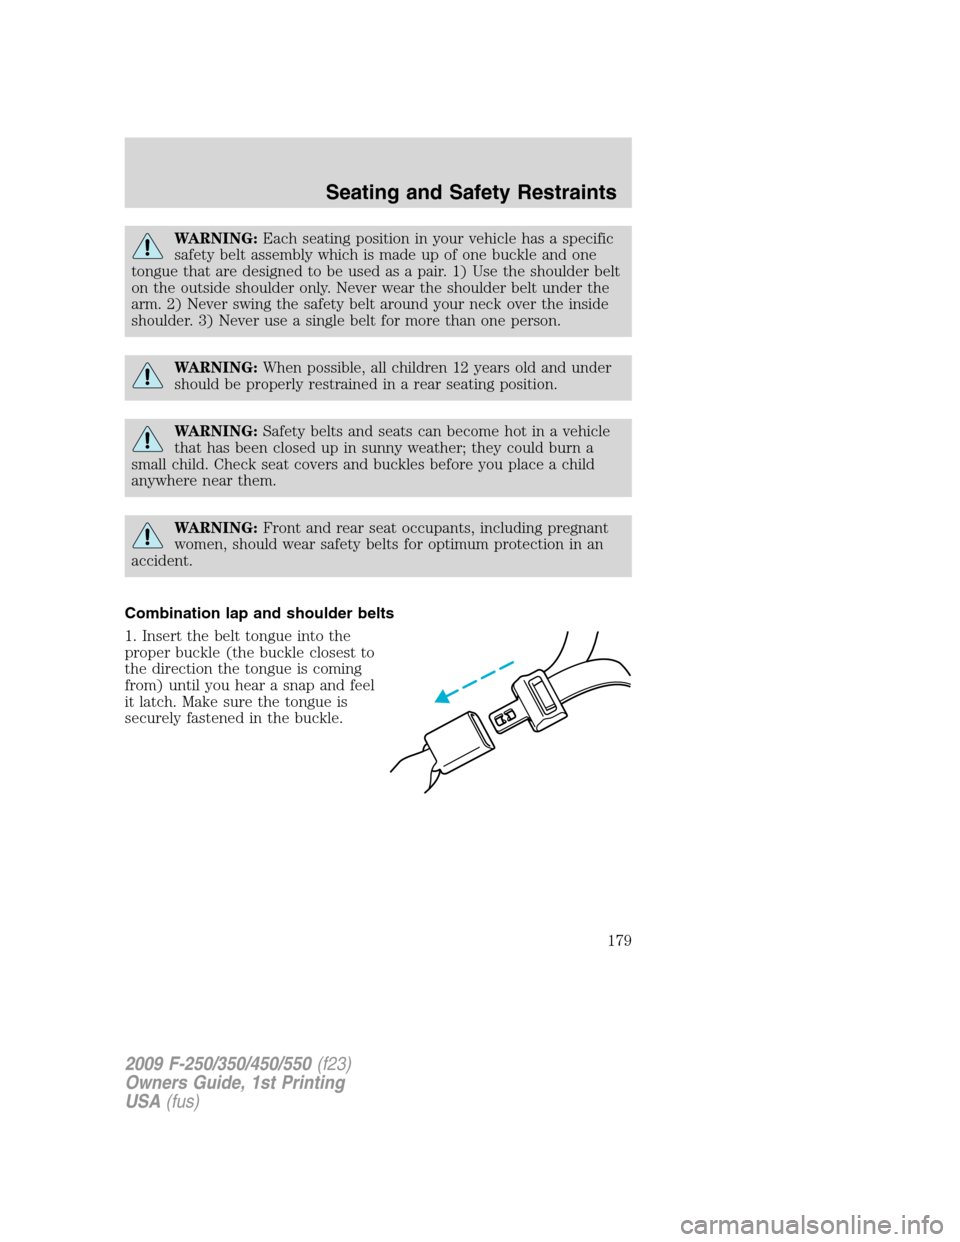
1. Insert the belt tongue into the
proper buckle (the buckle closest to
the direction the tongue is coming
from) until you hear a snap and feel
it latch. Make sure the tongue is
securely fastened in the buckle.
2009 F-250/350/450/550(f23)
Owners Guide, 1st Printing
USA(fus)
Seating and Safety Restraints
179
Page 180 of 418
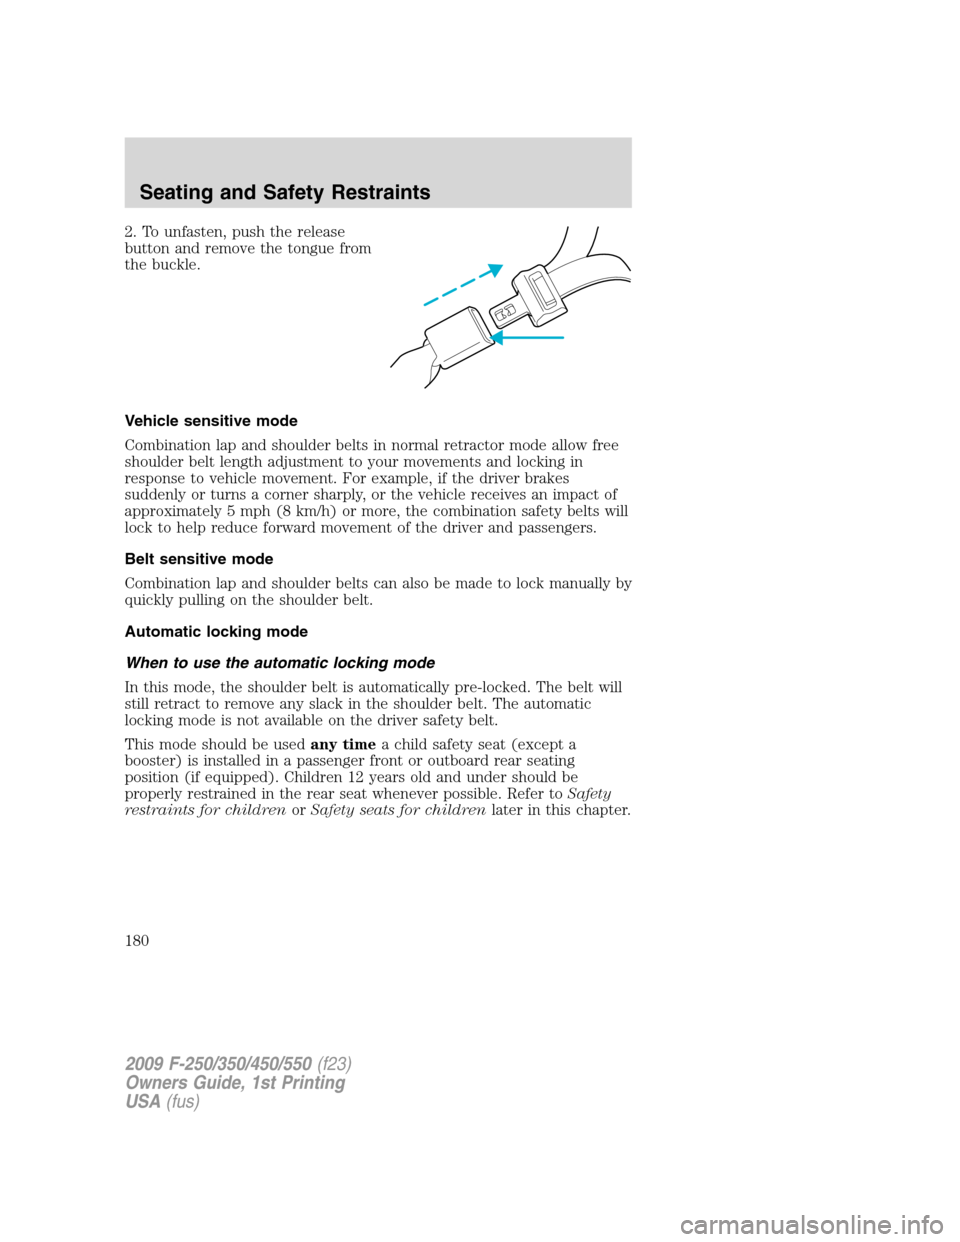
2. To unfasten, push the release
button and remove the tongue from
the buckle.
Vehicle sensitive mode
Combination lap and shoulder belts in normal retractor mode allow free
shoulder belt length adjustment to your movements and locking in
response to vehicle movement. For example, if the driver brakes
suddenly or turns a corner sharply, or the vehicle receives an impact of
approximately 5 mph (8 km/h) or more, the combination safety belts will
lock to help reduce forward movement of the driver and passengers.
Belt sensitive mode
Combination lap and shoulder belts can also be made to lock manually by
quickly pulling on the shoulder belt.
Automatic locking mode
When to use the automatic locking mode
In this mode, the shoulder belt is automatically pre-locked. The belt will
still retract to remove any slack in the shoulder belt. The automatic
locking mode is not available on the driver safety belt.
This mode should be usedany timea child safety seat (except a
booster) is installed in a passenger front or outboard rear seating
position (if equipped). Children 12 years old and under should be
properly restrained in the rear seat whenever possible. Refer toSafety
restraints for childrenorSafety seats for childrenlater in this chapter.
2009 F-250/350/450/550(f23)
Owners Guide, 1st Printing
USA(fus)
Seating and Safety Restraints
180
Page 181 of 418
How to use the automatic locking mode
•Buckle the combination lap and
shoulder belt.
•Grasp the shoulder portion and
pull downward until the entire
belt is pulled out.
•Allow the belt to retract. As the belt retracts, you will hear a clicking
sound. This indicates the safety belt is now in the automatic locking
mode.
How to disengage the automatic locking mode
Disconnect the combination lap/shoulder belt and allow it to retract
completely to disengage the automatic locking mode and activate the
vehicle sensitive (emergency) locking mode.
WARNING:After any vehicle collision, the front passenger and
rear outboard safety belt systems must be checked by an
authorized dealer to verify that the “automatic locking retractor”
feature for child seats is still functioning properly. In addition, all safety
belts should be checked for proper function.
2009 F-250/350/450/550(f23)
Owners Guide, 1st Printing
USA(fus)
Seating and Safety Restraints
181