2009 FORD SUPER DUTY fuel
[x] Cancel search: fuelPage 252 of 418
10. Perform Steps 8 and 9 on the right front tire, right rear tire and
finally the left rear tire. Training is complete after the horn sounds for
the last tire trained (left rear tire) and the message center displays:
TRAINING COMPLETE.
Turn the ignition to off. If two short horn beeps are heard, the reset
procedure was unsuccessful and must be repeated.
If after repeating the procedure and two short beeps are heard when the
ignition is turned to off, seek assistance from your authorized dealer.
SNOW TIRES AND CHAINS
WARNING:Snow tires must be the same size, load index, speed
rating as those originally provided by Ford. Use of any tire or
wheel not recommended by Ford can affect the safety and
performance of your vehicle, which could result in an increased risk of
loss of vehicle control, vehicle rollover, personal injury and death.
Additionally, the use of non-recommended tires and wheels could
cause steering, suspension, axle or transfer case/power transfer unit
failure.
Note:Do not use snow chains on front tires of vehicles with 20” wheels
and tires.
The tires on your vehicle have all weather treads to provide traction in
rain and snow. However, in some climates, you may need to use snow
tires and chains. If you need to use chains, it is recommended that steel
wheels (of the same size and specifications) be used, as chains may chip
aluminum wheels.
Follow these guidelines when using snow tires and chains:
•Use only SAE Class S chains.
•Install chains securely, verifying that the chains do not touch any
wiring, brake lines or fuel lines.
•Drive cautiously. If you hear the chains rub or bang against your
vehicle, stop and re-tighten the chains. If this does not work, remove
the chains to prevent damage to your vehicle.
•If possible, avoid fully loading your vehicle.
•Remove the tire chains when they are no longer needed. Do not use
tire chains on dry roads.
•The suspension insulation and bumpers will help prevent vehicle
damage. Do not remove these components from your vehicle when
using snow tires and chains.
2009 F-250/350/450/550(f23)
Owners Guide, 1st Printing
USA(fus)
Tires, Wheels and Loading
252
Page 253 of 418
VEHICLE LOADING – WITH AND WITHOUT A TRAILER
This section will guide you in the proper loading of your vehicle and/or
trailer, to keep your loaded vehicle weight within its design rating
capability, with or without a trailer. Properly loading your vehicle will
provide maximum return of vehicle design performance. Before loading
your vehicle, familiarize yourself with the following terms for determining
your vehicle’s weight ratings, with or without a trailer, from the vehicle’s
Tire Label or Safety Compliance Certification Label:
Base Curb Weight– is the weight of the vehicle including a full tank of
fuel and all standard equipment. It does not include passengers, cargo, or
optional equipment.
Vehicle Curb Weight– is the weight of your new vehicle when you
picked it up from your authorized dealer plus any aftermarket
equipment.
2009 F-250/350/450/550(f23)
Owners Guide, 1st Printing
USA(fus)
Tires, Wheels and Loading
253
Page 262 of 418
Preparing to tow
Use the proper equipment for towing a trailer and make sure it is
properly attached to your vehicle. Contact your authorized dealer or a
reliable trailer dealer as soon as possible if you require assistance.
Hitches
WARNING:ON PICK-UP TRUCKS, the trailer hitch provided on
this vehicle enhances collision protection for the fuel system. DO
NOT REMOVE!
Do not mount a ball hitch (sometimes referred to as a trailer ball hitch
or trailer ball) to the bumper or use hitches that clamp onto the vehicle’s
bumper or attach to the axle. You must distribute the load in your trailer
so that 10%–15% for conventional towing or 15%-25% fifth-wheel towing
of the total weight of the trailer is on the tongue.
Hitch rating
The standard hitch has two ratings depending on mode of operation:
•Weight carrying- requires a draw bar and hitch ball. The draw bar
supports all the vertical tongue load of the trailer.
•Weight distributing- requires an aftermarket weight distributing
system which includes draw bar, hitch ball, spring bars and snap-up
brackets. The vertical tongue load of the trailer is distributed between
the truck and the trailer by this system.
2009 F-250/350/450/550(f23)
Owners Guide, 1st Printing
USA(fus)
Tires, Wheels and Loading
262
Page 272 of 418
STARTING
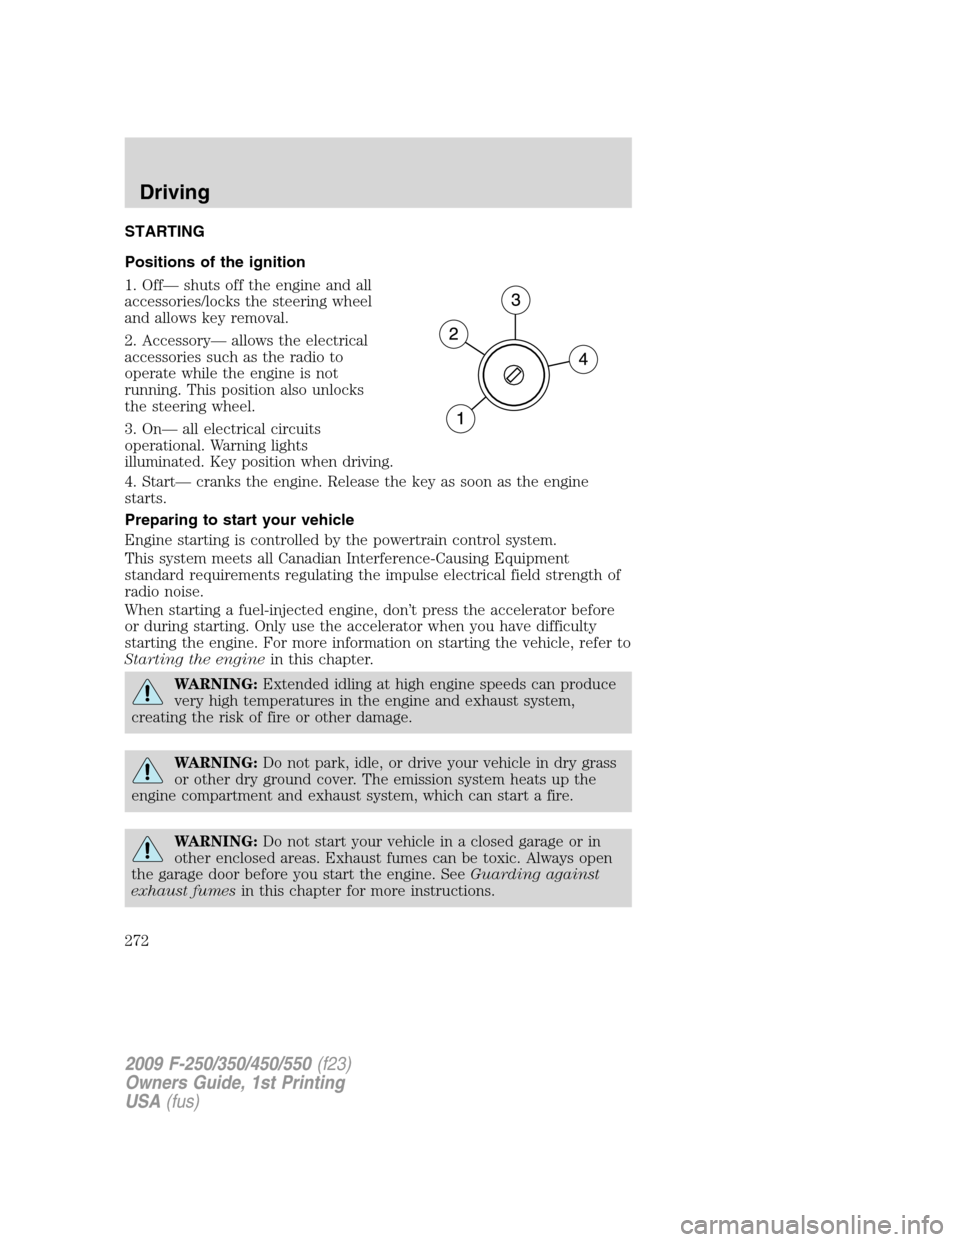
Positions of the ignition
1. Off— shuts off the engine and all
accessories/locks the steering wheel
and allows key removal.
2. Accessory— allows the electrical
accessories such as the radio to
operate while the engine is not
running. This position also unlocks
the steering wheel.
3. On— all electrical circuits
operational. Warning lights
illuminated. Key position when driving.
4. Start— cranks the engine. Release the key as soon as the engine
starts.
Preparing to start your vehicle
Engine starting is controlled by the powertrain control system.
This system meets all Canadian Interference-Causing Equipment
standard requirements regulating the impulse electrical field strength of
radio noise.
When starting a fuel-injected engine, don’t press the accelerator before
or during starting. Only use the accelerator when you have difficulty
starting the engine. For more information on starting the vehicle, refer to
Starting the enginein this chapter.
WARNING:Extended idling at high engine speeds can produce
very high temperatures in the engine and exhaust system,
creating the risk of fire or other damage.
WARNING:Do not park, idle, or drive your vehicle in dry grass
or other dry ground cover. The emission system heats up the
engine compartment and exhaust system, which can start a fire.
WARNING:Do not start your vehicle in a closed garage or in
other enclosed areas. Exhaust fumes can be toxic. Always open
the garage door before you start the engine. SeeGuarding against
exhaust fumesin this chapter for more instructions.
2009 F-250/350/450/550(f23)
Owners Guide, 1st Printing
USA(fus)
Driving
272
Page 275 of 418
2. Turn the key to 4 (start), then release the key as soon as the engine
begins cranking. Your vehicle has a computer assisted cranking system
that assists in starting the engine. After releasing the key from the 4
(start) position, the engine may continue cranking for up to 10 seconds
or until the vehicle starts.
Note:Cranking may be stopped at any time by turning the key to the off
position.
3. After idling for a few seconds, apply the brake, shift into gear and
drive.
Note:If the engine does not start on the first try, turn the key to the off
position, wait 10 seconds and try Step 2 again. If the engine still fails to
start, press the accelerator to the floor and try Step 2 again, keeping the
accelerator on the floor until the engine begins to accelerate above
cranking speeds; this will allow the engine to crank with the fuel shut off
in case the engine is flooded with fuel.
Guarding against exhaust fumes
Carbon monoxide is present in exhaust fumes. Take precautions to avoid
its dangerous effects.
WARNING:If you smell exhaust fumes inside your vehicle, have
your dealer inspect your vehicle immediately. Do not drive if you
smell exhaust fumes.
Important ventilating information
If the engine is idling while the vehicle is stopped for a long period of
time, open the windows at least one inch (2.5 cm) or adjust the heating
or air conditioning to bring in fresh air.
ENGINE BLOCK HEATER
An engine block heater warms the engine coolant which aids in starting
and allows the heater/defroster system to respond quickly. If your vehicle
is equipped with this system, your equipment includes a heater element
which is installed in your engine block and a wire harness which allows
the user to connect the system to a grounded 120 volt a/c electrical
source. The block heater system is most effective when outdoor
temperatures reach below 0°F (-18°C).
WARNING:Failure to follow engine block heater instructions
could result in property damage or physical harm.
2009 F-250/350/450/550(f23)
Owners Guide, 1st Printing
USA(fus)
Driving
275
Page 285 of 418
D (Overdrive) with Tow/Haul OFF
D (Overdrive) with Tow/Haul OFF is the normal driving position for the
best fuel economy. The overdrive function allows automatic upshifts and
downshifts through gears one through five.
D (Overdrive) with Tow/Haul ON
The Tow/Haul feature improves transmission operation when towing a
trailer or a heavy load. All transmission gear ranges are available when
using Tow/Haul.
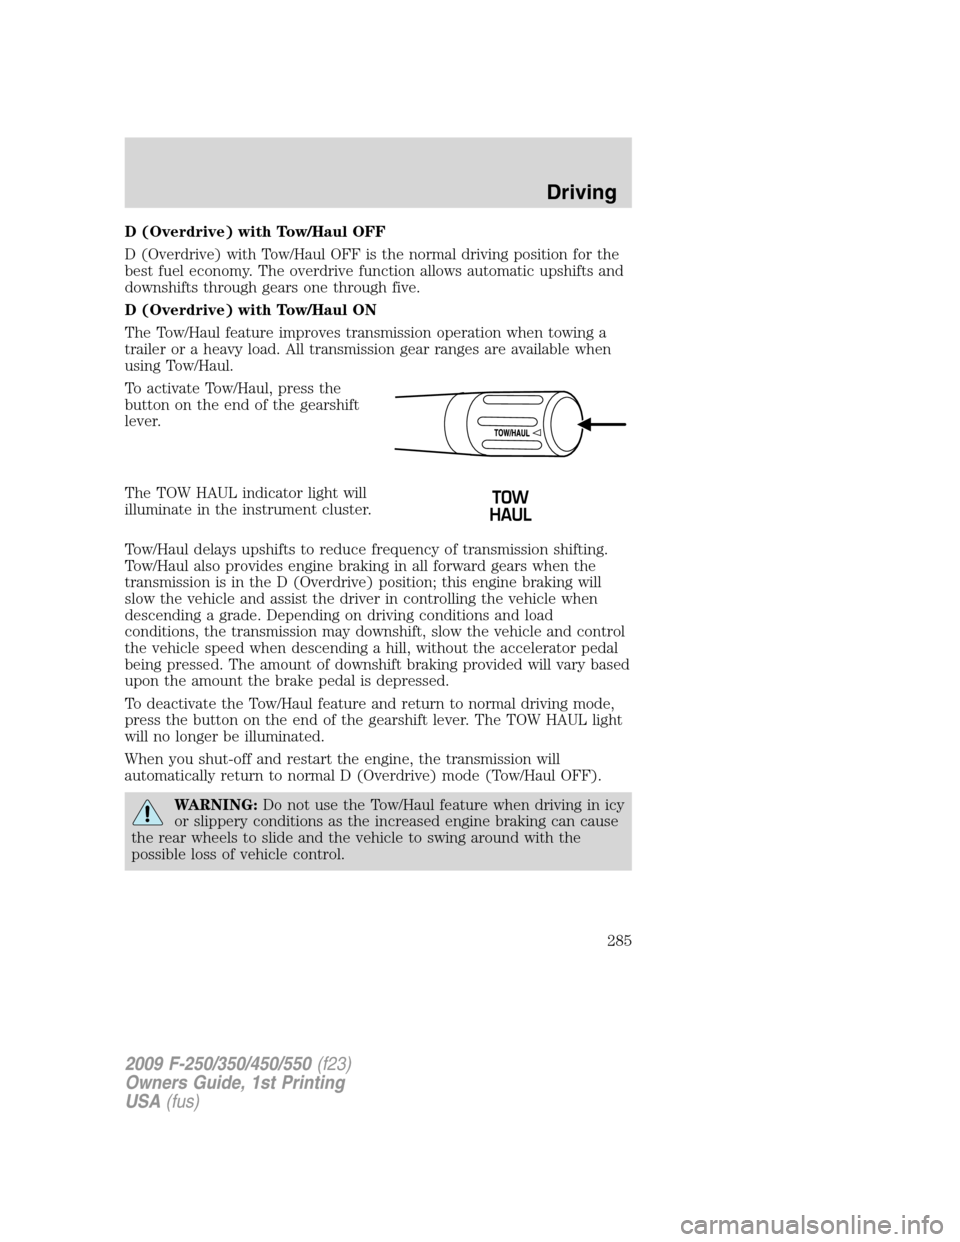
To activate Tow/Haul, press the
button on the end of the gearshift
lever.
The TOW HAUL indicator light will
illuminate in the instrument cluster.
Tow/Haul delays upshifts to reduce frequency of transmission shifting.
Tow/Haul also provides engine braking in all forward gears when the
transmission is in the D (Overdrive) position; this engine braking will
slow the vehicle and assist the driver in controlling the vehicle when
descending a grade. Depending on driving conditions and load
conditions, the transmission may downshift, slow the vehicle and control
the vehicle speed when descending a hill, without the accelerator pedal
being pressed. The amount of downshift braking provided will vary based
upon the amount the brake pedal is depressed.
To deactivate the Tow/Haul feature and return to normal driving mode,
press the button on the end of the gearshift lever. The TOW HAUL light
will no longer be illuminated.
When you shut-off and restart the engine, the transmission will
automatically return to normal D (Overdrive) mode (Tow/Haul OFF).
WARNING:Do not use the Tow/Haul feature when driving in icy
or slippery conditions as the increased engine braking can cause
the rear wheels to slide and the vehicle to swing around with the
possible loss of vehicle control.
2009 F-250/350/450/550(f23)
Owners Guide, 1st Printing
USA(fus)
Driving
285
Page 288 of 418
Recommended shift speeds
Do not overspeed the engine when going downhill or steep grades. If
equipped, use the tachometer and do not allow engine speed to exceed
the redline area. Operating the engine beyond the recommended speeds
can cause severe engine damage.
Shift according to the following shift speed charts:
Upshifts when accelerating (recommended for best fuel
economy)
6-speed transmission
Shift from:
Transfer case position
1(if equipped)
2H or 4H 4L
LO-1 5 mph (8 km/h) 2 mph (3 km/h)
1-2 14 mph (23 km/h) 6 mph (10 km/h)
2-3 22 mph (35 km/h) 9 mph (14 km/h)
3-4 30 mph (48 km/h) 12 mph (19 km/h)
4-
D
(Overdrive)40 mph (64 km/h) 15 mph (24 km/h)
Maximum downshift speeds1
6-speed transmission
Shift from: Transfer case position (if equipped)2
2H or 4H 4L
D(Overdrive) -
445 mph (72 km/h) 16 mph (26 km/h)
4-3 35 mph (56 km/h) 12 mph (19 km/h)
3-2 20 mph (32 km/h) 8 mph (13 km/h)
2-1 5 mph (8 km/h) 2 mph (3 km/h)
1-LO Only shift to LO when at a stop.
1Use 2H or 4H for 4WD equipped vehicles.2Downshift at lower speeds when driving on slippery surfaces.
2009 F-250/350/450/550(f23)
Owners Guide, 1st Printing
USA(fus)
Driving
288
Page 294 of 418
If the back end of the vehicle is hit or damaged, then check with your
authorized dealer to have your rear video system checked for proper
coverage and operation.
Night time and dark area use
At night time or in dark areas, the camera system relies on the reverse
lamp lighting to produce an image. Therefore it is necessary that both
reverse lamps are operating in order to get a clear image in the dark. If
either of the lamps are not operating, stop using the camera system, at
least in the dark, until the lamp(s) are replaced and functioning.
Servicing
•If the image comes on while the vehicle is not in R (Reverse), have
the system inspected by your authorized dealer.
•If the image is not clear, then check if there is anything covering the
lens such as dirt, mud, ice, snow, etc. If the image is still not clear
after cleaning, have your system inspected by your authorized dealer.
FOUR-WHEEL DRIVE (4WD) OPERATION (IF EQUIPPED)
WARNING:For important information regarding safe operation
of this type of vehicle, seePreparing to drive your vehiclein
this chapter.
When four–wheel drive (4WD) is engaged, power is supplied to all four
wheels through a transfer case. 4WD can be selected when additional
driving power is desired.
4WD operation is not recommended on dry pavement. Doing so could
result in difficult disengagement of the transfer case, increased tire wear
and decreased fuel economy.
2009 F-250/350/450/550(f23)
Owners Guide, 1st Printing
USA(fus)
Driving
294