Page 29 of 312
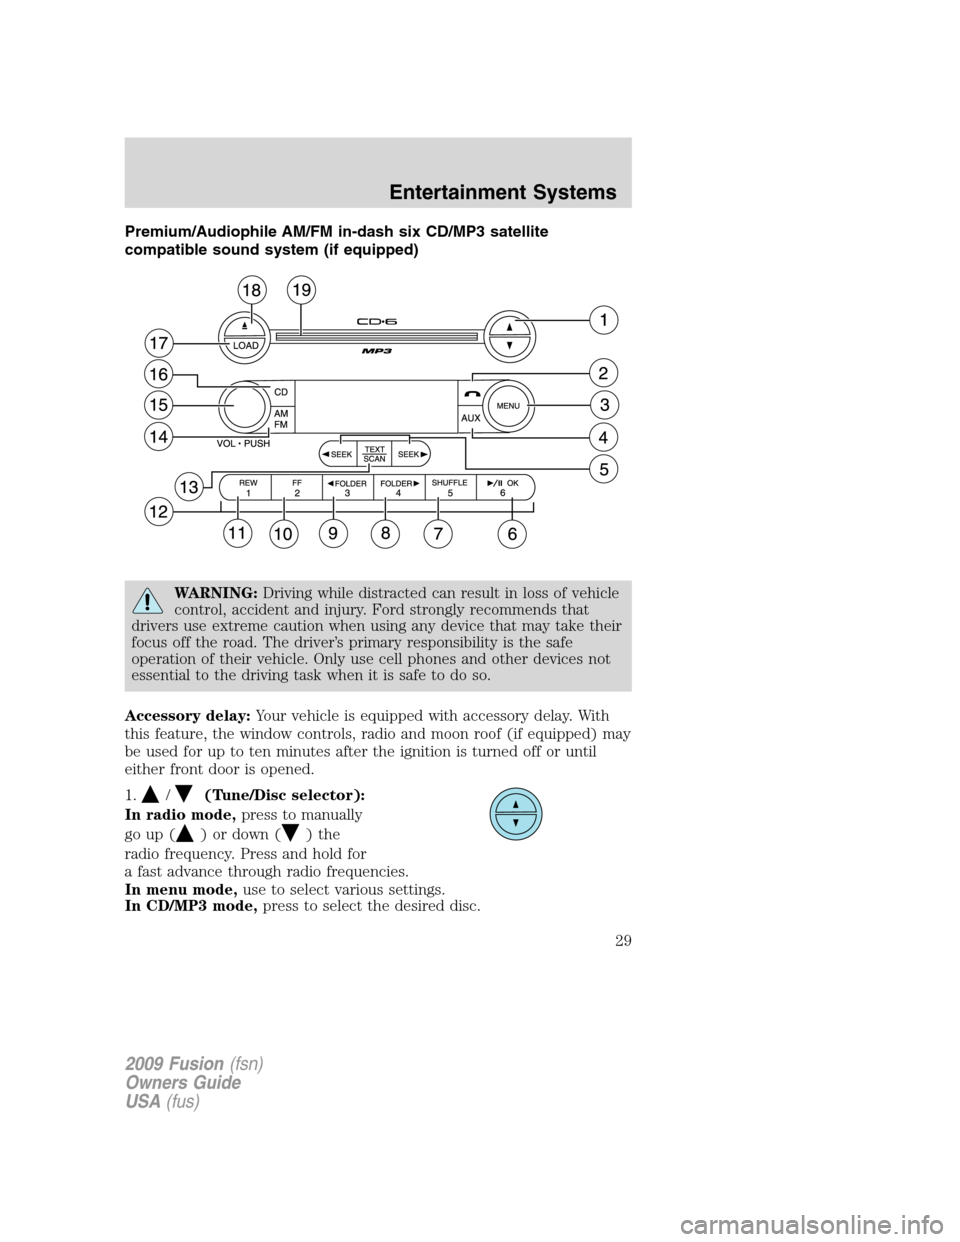
Premium/Audiophile AM/FM in-dash six CD/MP3 satellite
compatible sound system (if equipped)
WARNING:Driving while distracted can result in loss of vehicle
control, accident and injury. Ford strongly recommends that
drivers use extreme caution when using any device that may take their
focus off the road. The driver’s primary responsibility is the safe
operation of their vehicle. Only use cell phones and other devices not
essential to the driving task when it is safe to do so.
Accessory delay:Your vehicle is equipped with accessory delay. With
this feature, the window controls, radio and moon roof (if equipped) may
be used for up to ten minutes after the ignition is turned off or until
either front door is opened.
1.
/(Tune/Disc selector):
In radio mode,press to manually
go up (
) or down () the
radio frequency. Press and hold for
a fast advance through radio frequencies.
In menu mode,use to select various settings.
In CD/MP3 mode,press to select the desired disc.
2009 Fusion(fsn)
Owners Guide
USA(fus)
Entertainment Systems
29
Page 36 of 312
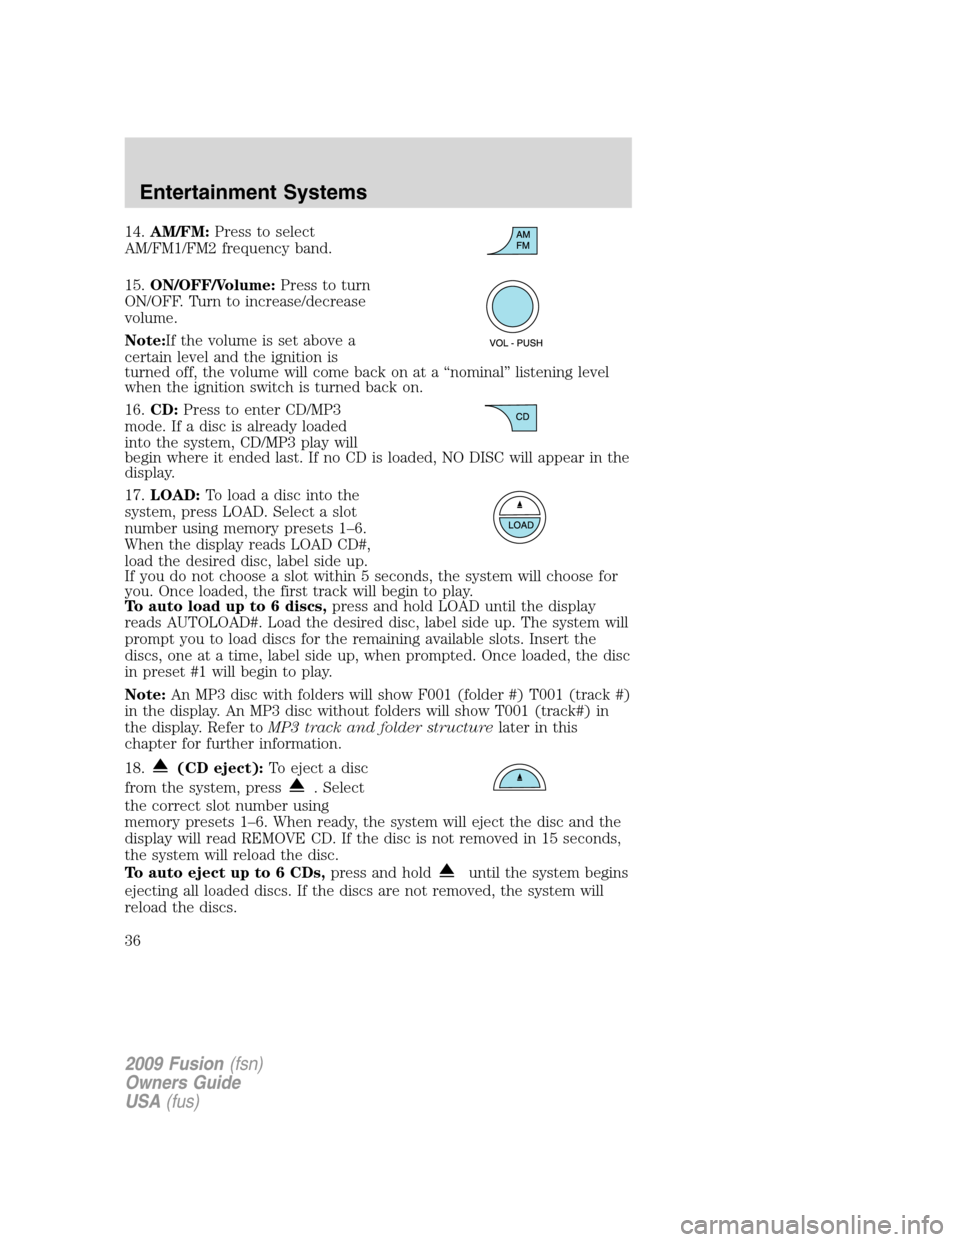
14.AM/FM:Press to select
AM/FM1/FM2 frequency band.
15.ON/OFF/Volume:Press to turn
ON/OFF. Turn to increase/decrease
volume.
Note:If the volume is set above a
certain level and the ignition is
turned off, the volume will come back on at a “nominal” listening level
when the ignition switch is turned back on.
16.CD:Press to enter CD/MP3
mode. If a disc is already loaded
into the system, CD/MP3 play will
begin where it ended last. If no CD is loaded, NO DISC will appear in the
display.
17.LOAD:To load a disc into the
system, press LOAD. Select a slot
number using memory presets 1–6.
When the display reads LOAD CD#,
load the desired disc, label side up.
If you do not choose a slot within 5 seconds, the system will choose for
you. Once loaded, the first track will begin to play.
To auto load up to 6 discs,press and hold LOAD until the display
reads AUTOLOAD#. Load the desired disc, label side up. The system will
prompt you to load discs for the remaining available slots. Insert the
discs, one at a time, label side up, when prompted. Once loaded, the disc
in preset #1 will begin to play.
Note:An MP3 disc with folders will show F001 (folder #) T001 (track #)
in the display. An MP3 disc without folders will show T001 (track#) in
the display. Refer toMP3 track and folder structurelater in this
chapter for further information.
18.
(CD eject):To eject a disc
from the system, press
. Select
the correct slot number using
memory presets 1–6. When ready, the system will eject the disc and the
display will read REMOVE CD. If the disc is not removed in 15 seconds,
the system will reload the disc.
To auto eject up to 6 CDs,press and hold
until the system begins
ejecting all loaded discs. If the discs are not removed, the system will
reload the discs.
2009 Fusion(fsn)
Owners Guide
USA(fus)
Entertainment Systems
36
Page 43 of 312
Satellite Radio Electronic Serial Number (ESN):This 12–digit
Satellite Serial Number is needed to activate, modify or track your
satellite radio account. You will need this number when communicating
with SIRIUS. While in Satellite Radio mode, you can view this number on
the radio display by pressing AUX and Preset 1 control simultaneously.
Radio Display Condition Action Required
ACQUIRING Radio requires more
than two seconds to
produce audio for
the selected
channel.No action required. This
message should disappear
shortly.
SAT FAULT Internal module or
system failure
present.If this message does not
clear within a short period
of time, or with an ignition
key cycle, your receiver
may have a fault. See your
authorized dealer for
service.
INVALID CHNL Channel no longer
available.This previously available
channel is no longer
available. Tune to another
channel. If the channel
was one of your presets,
you may choose another
channel for that preset
button.
UNSUBSCRIBED Subscription not
available for this
channel.Contact SIRIUS at
1–888–539–7474 to
subscribe to the channel
or tune to another
channel.
NO TEXT Artist information
not available.Artist information not
available at this time on
this channel. The system is
working properly.
2009 Fusion(fsn)
Owners Guide
USA(fus)
Entertainment Systems
43
Page 52 of 312
In(panel) or(panel/floor) modes:
•Adjust the temperature control to full cold.
•Select A/C and
(recirculated air). Use recirculated air with A/C to
provide colder airflow.
•Set highest fan speed initially, then adjust to maintain comfort.
•To aid in side window defogging/demisting in cold weather:
1. Select
.
2. Select A/C.
3. Adjust the temperature control to maintain comfort.
4. Set the fan speed to the highest setting.
5. Direct the outer instrument panel vents towards the side windows.
To increase airflow to the outer instrument panel vents, close the vents
located in the middle of the instrument panel.
REAR WINDOW DEFROSTER
R
The rear defroster control is located on the climate control panel and
works to clear the rear window of fog and thin ice.
The ignition must be on to operate the rear window defroster.
The rear defroster turns off automatically after 10 minutes or when the
ignition is turned off. To manually turn off the defroster before
10 minutes have passed, push the control again.
Do not use razor blades or other sharp objects to clean the inside
of the rear window or to remove decals from the inside of the
rear window. This may cause damage to the heated grid lines and
will not be covered by your warranty.
2009 Fusion(fsn)
Owners Guide
USA(fus)
Climate Controls
52
Page 53 of 312

HEADLAMP CONTROL
Turns the lamps off.
Turns on the parking lamps,
instrument panel lamps, license
plate lamps and tail lamps.
Turns the low beam headlamps
on.
Autolamp control (if equipped)
The autolamp system provides light
sensitive automatic on-off control of
the exterior lights normally
controlled by the headlamp control.
•To turn autolamps on, rotate the
control counterclockwise to
.
•To turn autolamps off, rotate the
control clockwise to off.
The autolamp system also keeps the
lights on for a predetermined
amount of time after the ignition switch is turned to off. You can change
the amount of time the lamps stay on by using the programming
procedure that follows:
Note:If the vehicle is equipped with autolamps, it will have the
headlamps on with windshield wipers feature.If the windshield
wipers are turned on (for a fixed period of time), the exterior lamps will
turn on with the headlamp control in the Autolamp position.
Autolamps - Programmable exit delay
Programmable exit delay allows the length of the autolamp exit delay to
be changed.
To program the auto lamp exit time delay:
1. Start with the ignition in the off position and the headlamp control in
the autolamp position.
2. Turn the headlamp switch to off.
2009 Fusion(fsn)
Owners Guide
USA(fus)
Lights
53
Page 54 of 312

3. Turn the ignition switch to on and then back to off.
4. Turn the headlamp switch to the autolamp position. The headlamps
will turn on.
5. Wait the desired amount of time for the exit delay you want (up to
three minutes), then turn the headlamp switch to off. The headlamps
will turn off.
Fog lamp control (if equipped)
With the ignition on, the fog lamps
can be turned on when the
headlamp control is pulled toward
you and is in any of the following
positions:
•Parking lamps
•Low beams
•Autolamps (when active)
The fog lamp indicator light will
illuminate when the fog lamps have been turned on. The fog lamps will
not operate when the high beams are active.
Daytime running lamps (DRL) (if equipped)
Turns the headlamps on with a reduced output.
To activate:
•the ignition must be in the on position,
•the headlamp control is in the off, autolamps or parking lamp position
and
•the transmission must be out of the P (Park) position.
WARNING:Always remember to turn on your headlamps at
dusk or during inclement weather. The Daytime Running Lamp
(DRL) system does not activate the tail lamps and generally may not
provide adequate lighting during these conditions. Failure to activate
your headlamps under these conditions may result in a collision.
2009 Fusion(fsn)
Owners Guide
USA(fus)
Lights
54
Page 58 of 312

Your vehicle may also have reading
lamps within the rear dome lamp(s).
Press the switches on either side of
the dome lamp to turn on the
lamps.
Ambient/Mood lighting (if equipped)
Illuminates four footwells, two
console cupholders and the console
bin with a choice of seven colors.
The ambient lighting control switch
is located on the center console
near the gearshift lever. To activate,
press and release the control switch
to cycle through the seven color
choices plus the off state.
The lights come on whenever the ignition is in either the on or accessory
position.Note:The ambient lights will stay on until after the ignition is
placed in the off position and either of the front doors are opened or the
delay accessory timer expires.
BULB REPLACEMENT
Headlamp condensation
Exterior lamps are vented to accommodate normal changes in pressure.
Condensation can be a natural by-product of this design. When moist air
enters the lamp assembly through the vents, condensation can occur
when the temperature is cold. When normal condensation occurs, a thin
film of mist can form on the interior of the lens. The thin mist eventually
clears and exits through the vents during normal operation. Clearing
time may take as long as 48 hours under dry weather conditions.
Examples of acceptable condensation are:
•Presence of thin mist (no streaks, drip marks or droplets)
•Fine mist covers less than 50% of the lens
Examples of unacceptable moisture (usually caused by a lamp water
leak) are:
•Water puddle inside the lamp
•Large water droplets, drip marks or streaks present on the interior of
the lens
2009 Fusion(fsn)
Owners Guide
USA(fus)
Lights
58
Page 66 of 312
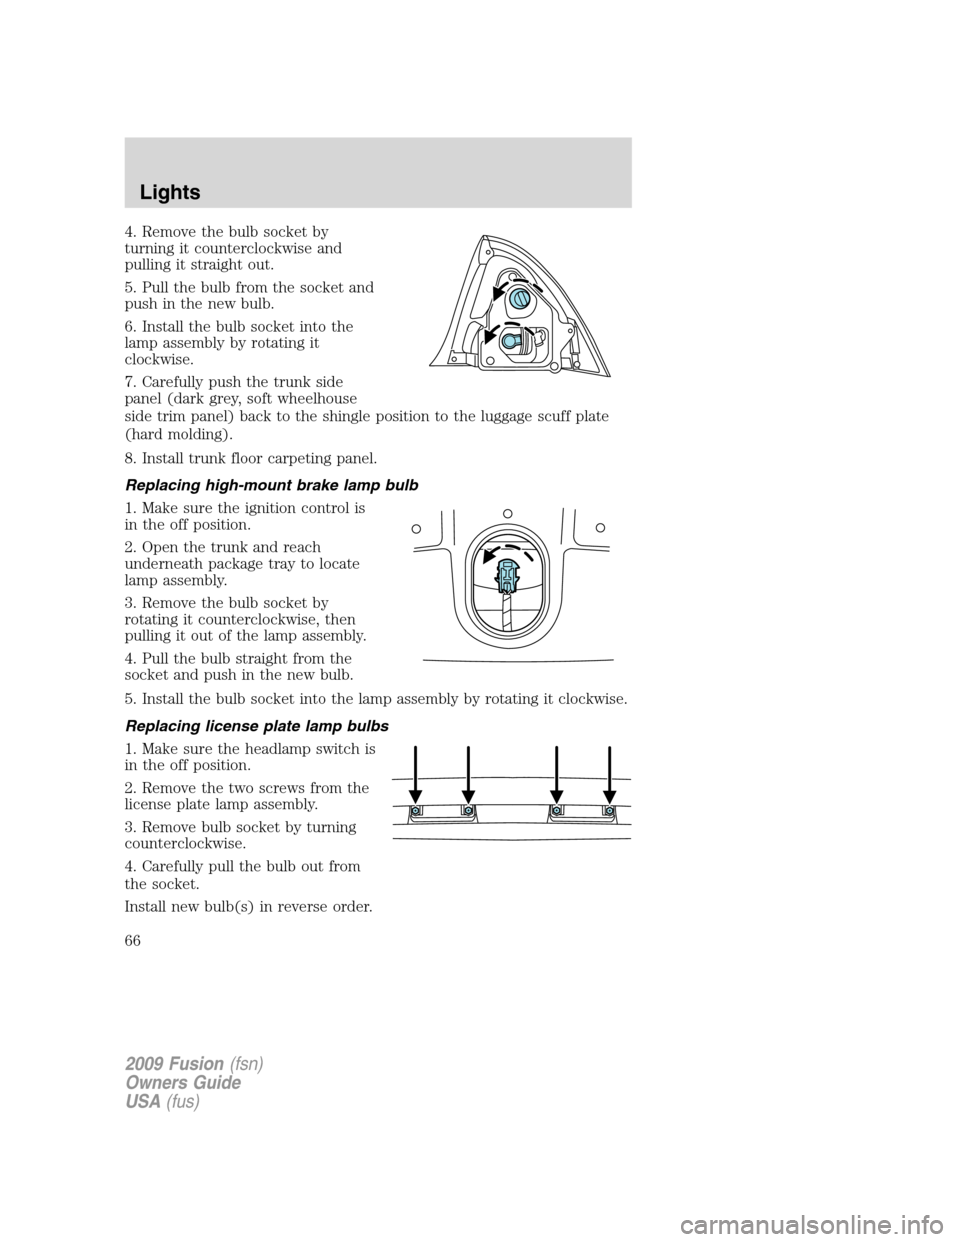
4. Remove the bulb socket by
turning it counterclockwise and
pulling it straight out.
5. Pull the bulb from the socket and
push in the new bulb.
6. Install the bulb socket into the
lamp assembly by rotating it
clockwise.
7. Carefully push the trunk side
panel (dark grey, soft wheelhouse
side trim panel) back to the shingle position to the luggage scuff plate
(hard molding).
8. Install trunk floor carpeting panel.
Replacing high-mount brake lamp bulb
1. Make sure the ignition control is
in the off position.
2. Open the trunk and reach
underneath package tray to locate
lamp assembly.
3. Remove the bulb socket by
rotating it counterclockwise, then
pulling it out of the lamp assembly.
4. Pull the bulb straight from the
socket and push in the new bulb.
5. Install the bulb socket into the lamp assembly by rotating it clockwise.
Replacing license plate lamp bulbs
1. Make sure the headlamp switch is
in the off position.
2. Remove the two screws from the
license plate lamp assembly.
3. Remove bulb socket by turning
counterclockwise.
4. Carefully pull the bulb out from
the socket.
Install new bulb(s) in reverse order.
2009 Fusion(fsn)
Owners Guide
USA(fus)
Lights
66