Page 161 of 358
A position can only be recalled when the transmission gearshift is in Park
(automatic transmission). A memory seat position may be programmed
at any time.
The memory seat positions are also recalled when you press your remote
entry transmitter
(unlock) control and the transmitter is
programmed to a memory seat position or when you enter a valid
customer code 1 or 2 on the keypad.
To program the memory seat to remote entry transmitter, refer to
Remote entry systemin theLocks and Security chapter.
Note: The seat will not travel to its final position if the key is not
in the ignition and the easy entry feature is enabled.
REAR SEATS
Head restraints
Lift the head restraint so that it is located directly or as close as possible
behind your head.
The head restraints can be moved
up by pulling up on the head
restraint.
Push the release button to lower
head restraint.
2009 Taurus X(219)
Owners Guide, 2nd Printing
USA(fus)
Seating and Safety Restraints
161
ProCarManuals.com
Page 164 of 358
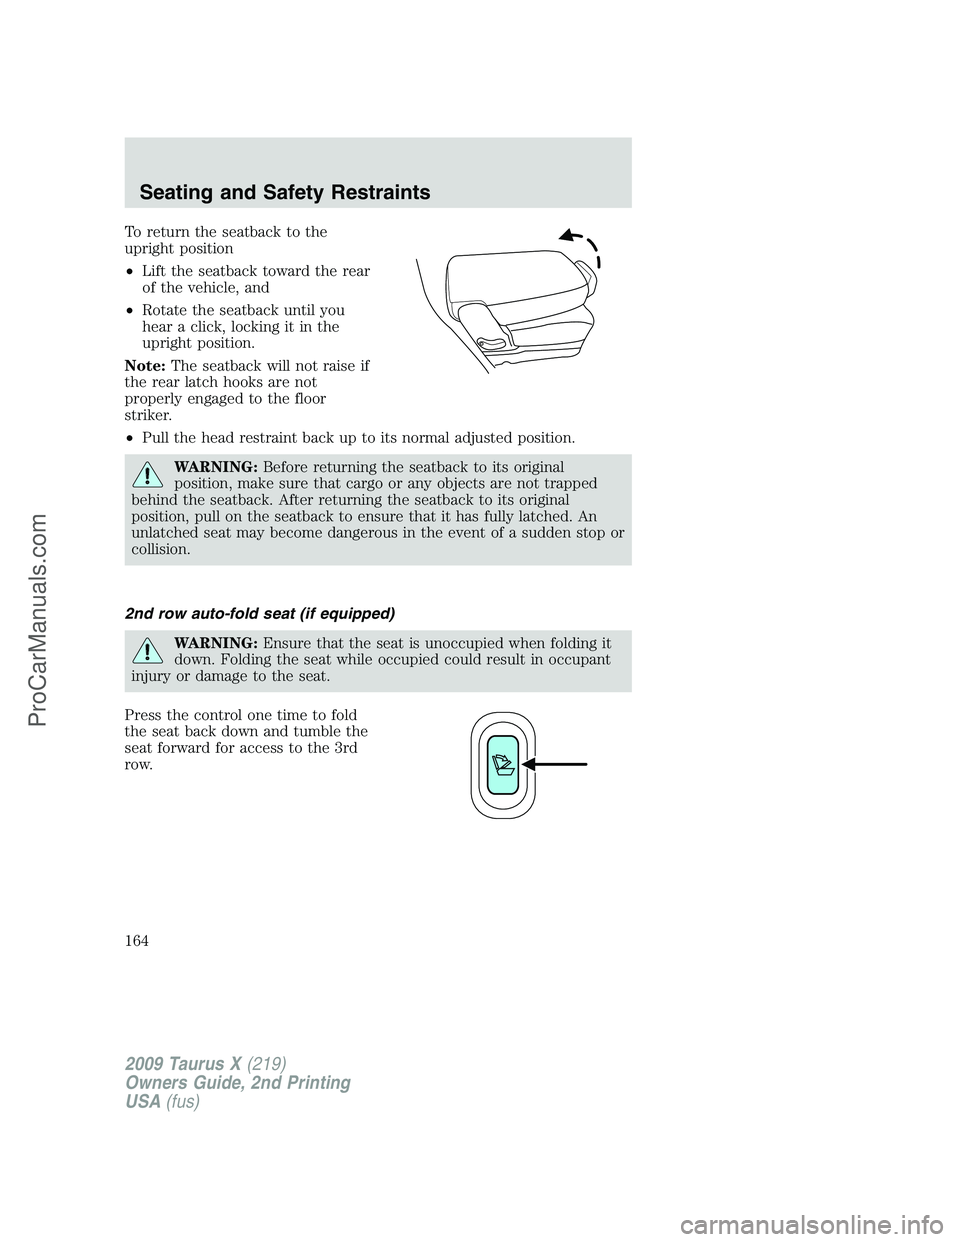
To return the seatback to the
upright position
•Lift the seatback toward the rear
of the vehicle, and
•Rotate the seatback until you
hear a click, locking it in the
upright position.
Note:The seatback will not raise if
the rear latch hooks are not
properly engaged to the floor
striker.
•Pull the head restraint back up to its normal adjusted position.
WARNING:Before returning the seatback to its original
position, make sure that cargo or any objects are not trapped
behind the seatback. After returning the seatback to its original
position, pull on the seatback to ensure that it has fully latched. An
unlatched seat may become dangerous in the event of a sudden stop or
collision.
2nd row auto-fold seat (if equipped)
WARNING:Ensure that the seat is unoccupied when folding it
down. Folding the seat while occupied could result in occupant
injury or damage to the seat.
Press the control one time to fold
the seat back down and tumble the
seat forward for access to the 3rd
row.
2009 Taurus X(219)
Owners Guide, 2nd Printing
USA(fus)
Seating and Safety Restraints
164
ProCarManuals.com
Page 165 of 358
Exiting the third row seat
Stow the head restraint by pushing the head restraint release button
while sliding the head restraint fully down.
Pull on the strap located on the
back of the second row seat. This
will fold the seatback forward. Pull
the strap a second time to tumble
the seat forward, allowing easy exit
from the 3rd row seat.
To return the seatback to the floor
from tumbled position, rotate the
seat down until you hear it latching
to the floor.
To return the seatback to the
upright position
•Lift the seatback toward the rear
of the vehicle, and
•Rotate the seatback until you
hear a click, locking it in the
upright position.
Note:The seatback will not raise if
the rear latch hooks are not
properly engaged to the floor
striker.
•Pull the head restraint back up to its normal adjusted position.
2009 Taurus X(219)
Owners Guide, 2nd Printing
USA(fus)
Seating and Safety Restraints
165
ProCarManuals.com
Page 175 of 358
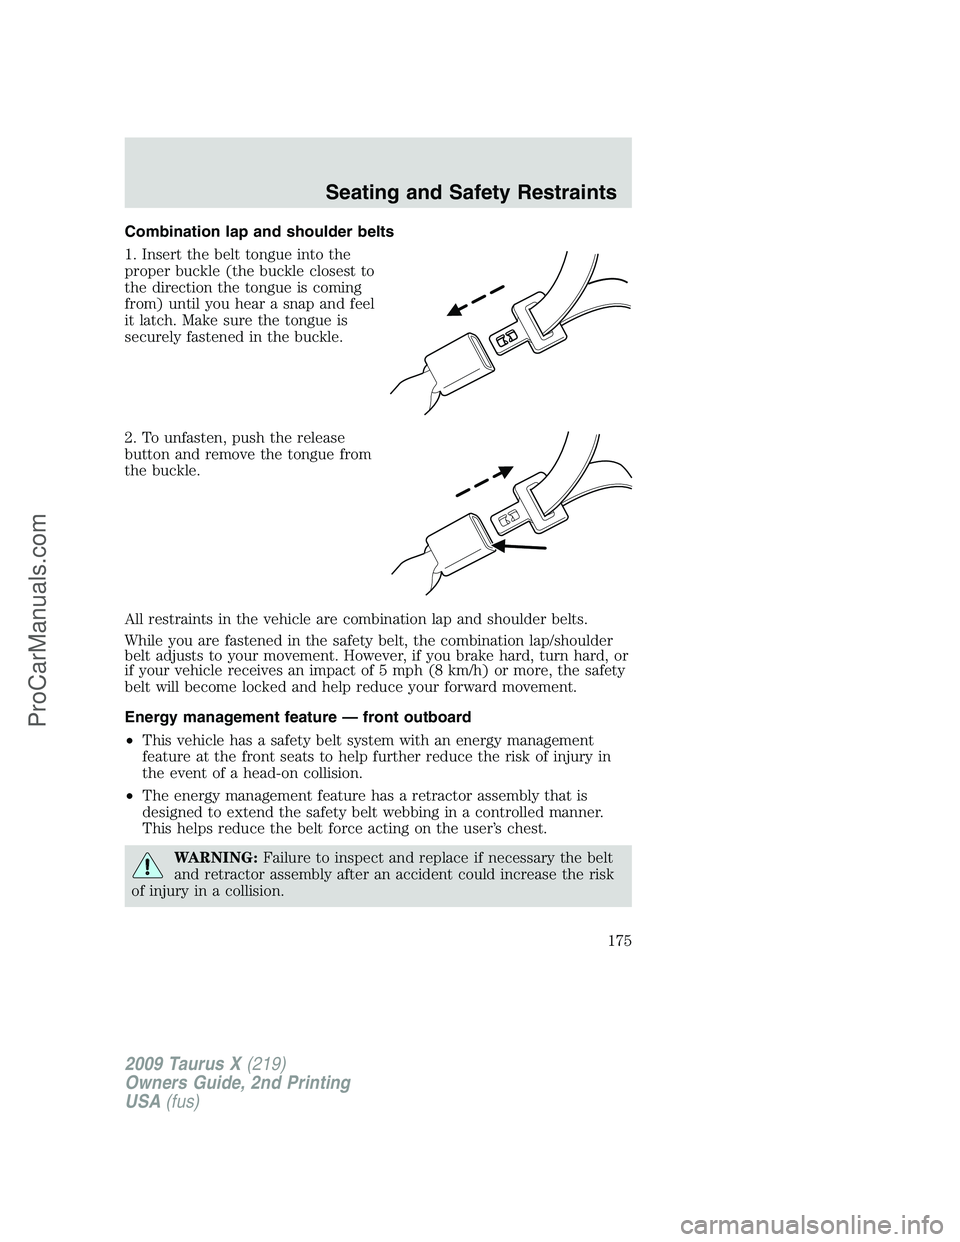
Combination lap and shoulder belts
1. Insert the belt tongue into the
proper buckle (the buckle closest to
the direction the tongue is coming
from) until you hear a snap and feel
it latch. Make sure the tongue is
securely fastened in the buckle.
2. To unfasten, push the release
button and remove the tongue from
the buckle.
All restraints in the vehicle are combination lap and shoulder belts.
While you are fastened in the safety belt, the combination lap/shoulder
belt adjusts to your movement. However, if you brake hard, turn hard, or
if your vehicle receives an impact of 5 mph (8 km/h) or more, the safety
belt will become locked and help reduce your forward movement.
Energy management feature — front outboard
•This vehicle has a safety belt system with an energy management
feature at the front seats to help further reduce the risk of injury in
the event of a head-on collision.
•The energy management feature has a retractor assembly that is
designed to extend the safety belt webbing in a controlled manner.
This helps reduce the belt force acting on the user’s chest.
WARNING:Failure to inspect and replace if necessary the belt
and retractor assembly after an accident could increase the risk
of injury in a collision.
2009 Taurus X(219)
Owners Guide, 2nd Printing
USA(fus)
Seating and Safety Restraints
175
ProCarManuals.com
Page 176 of 358
All safety restraints in the vehicle are combination lap and shoulder
belts. All of the passenger combination lap and shoulder belts have two
types of locking modes described below:
Vehicle sensitive mode
This is the normal retractor mode, which allows free shoulder belt length
adjustment to your movements and locking in response to vehicle
movement. For example, if the driver brakes suddenly or turns a corner
sharply, or the vehicle receives an impact of approximately 5 mph
(8 km/h) or more, the combination safety belts will lock to help reduce
forward movement of the driver and passengers.
Automatic locking mode
When to use the automatic locking mode
In this mode, the shoulder belt is automatically pre-locked. The belt will
still retract to remove any slack in the shoulder belt. The automatic
locking mode is not available on the driver safety belt.
This mode should be usedany timea child safety seat (except a
booster) is installed in a passenger front or outboard rear seating
position (if equipped). Children 12 years old and under should be
properly restrained in the rear seat whenever possible. Refer toSafety
restraints for childrenorSafety seats for childrenlater in this chapter.
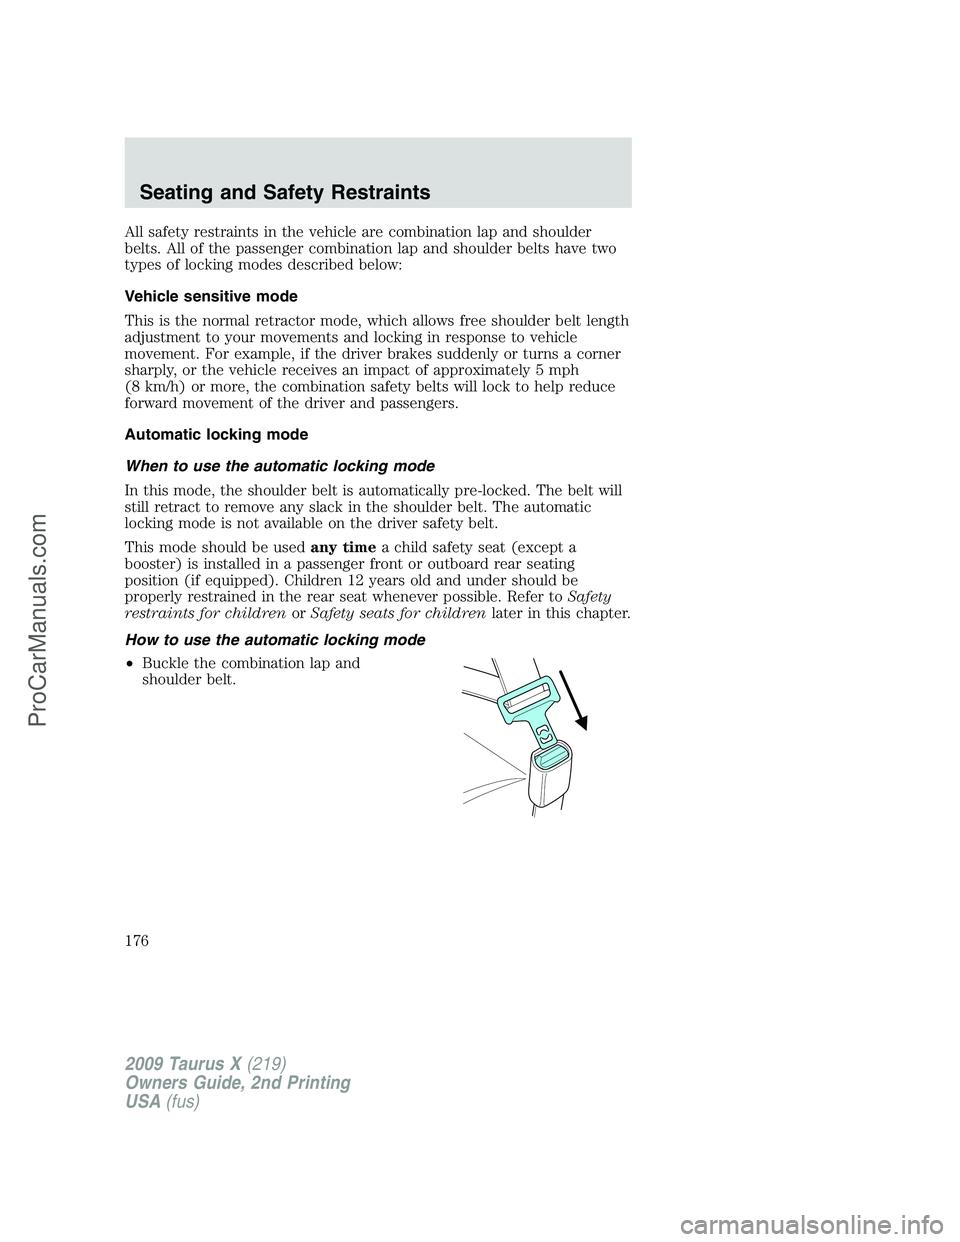
How to use the automatic locking mode
•Buckle the combination lap and
shoulder belt.
2009 Taurus X(219)
Owners Guide, 2nd Printing
USA(fus)
Seating and Safety Restraints
176
ProCarManuals.com
Page 177 of 358
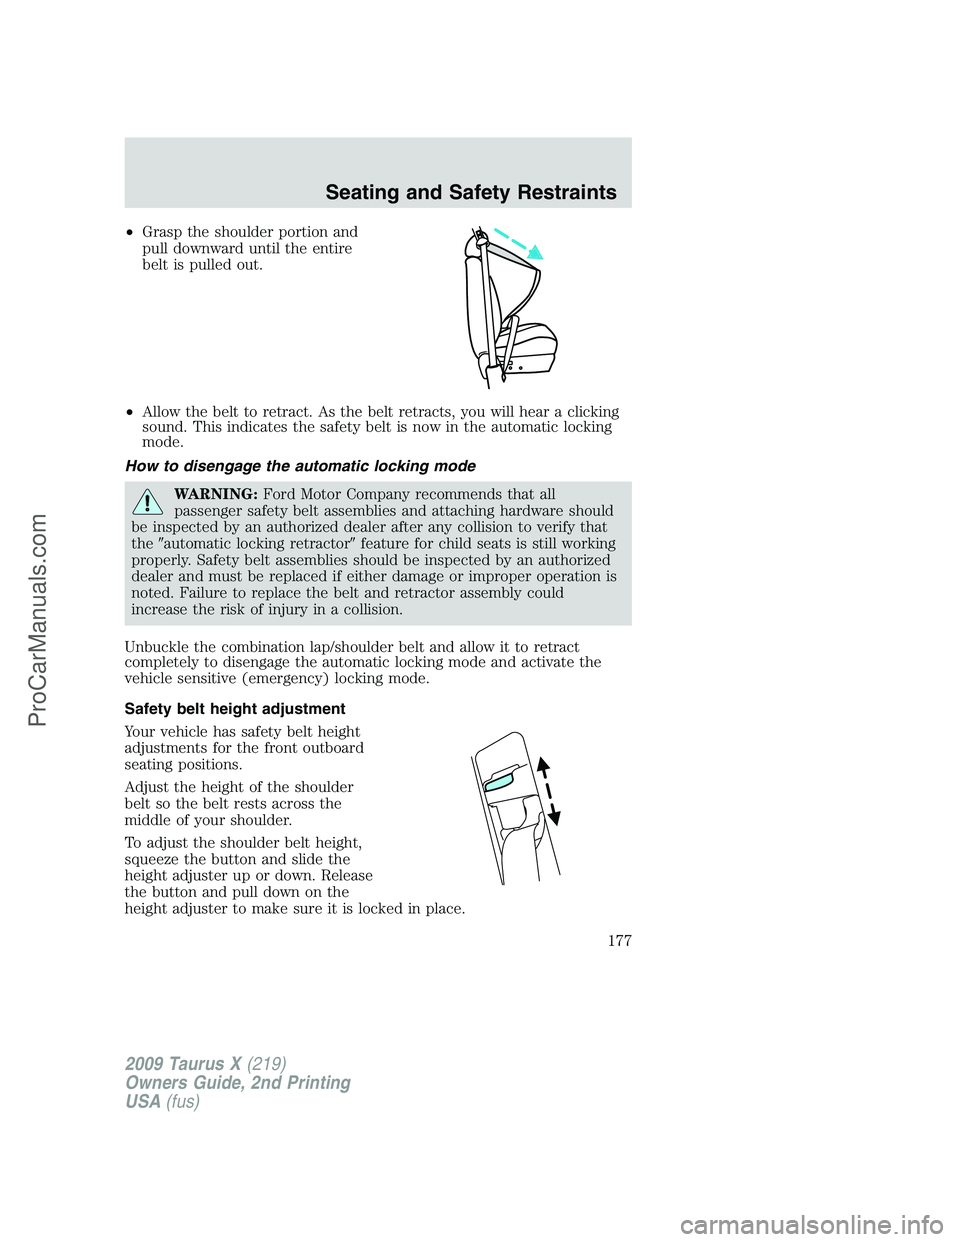
•Grasp the shoulder portion and
pull downward until the entire
belt is pulled out.
•Allow the belt to retract. As the belt retracts, you will hear a clicking
sound. This indicates the safety belt is now in the automatic locking
mode.
How to disengage the automatic locking mode
WARNING:Ford Motor Company recommends that all
passenger safety belt assemblies and attaching hardware should
be inspected by an authorized dealer after any collision to verify that
the�automatic locking retractor�feature for child seats is still working
properly. Safety belt assemblies should be inspected by an authorized
dealer and must be replaced if either damage or improper operation is
noted. Failure to replace the belt and retractor assembly could
increase the risk of injury in a collision.
Unbuckle the combination lap/shoulder belt and allow it to retract
completely to disengage the automatic locking mode and activate the
vehicle sensitive (emergency) locking mode.
Safety belt height adjustment
Your vehicle has safety belt height
adjustments for the front outboard
seating positions.
Adjust the height of the shoulder
belt so the belt rests across the
middle of your shoulder.
To adjust the shoulder belt height,
squeeze the button and slide the
height adjuster up or down. Release
the button and pull down on the
height adjuster to make sure it is locked in place.
2009 Taurus X(219)
Owners Guide, 2nd Printing
USA(fus)
Seating and Safety Restraints
177
ProCarManuals.com
Page 204 of 358

Children 12 and under should be properly restrained in a rear seating
position whenever possible. If all children cannot be seated and
restrained properly in a rear seating position, properly restrain the
largest child in the front seat.
Installing child safety seats with combination lap and shoulder
belts
Check to make sure the child seat is properly secured before each use.
Children 12 and under should be properly restrained in a rear seating
position whenever possible. If all children cannot be seated and
restrained properly in a rear seating position, properly restrain the
largest child in the front seat.
When installing a child safety seat with combination lap/shoulder belts:
•Use the correct safety belt buckle for that seating position.
•Insert the belt tongue into the proper buckle until you hear a snap
and feel it latch. Make sure the tongue is securely fastened in the
buckle.
•Keep the buckle release button pointing up and away from the safety
seat, with the tongue between the child seat and the release button,
to help prevent accidental unbuckling.
•Place vehicle seat back in upright position.
•Put the safety belt in the automatic locking mode. Refer to step 5
below.
WARNING:Depending on where you secure a child restraint,
and depending on the child restraint design, you may block
access to certain safety belt buckle assemblies and/or LATCH lower
anchors, rendering those features potentially unusable. To avoid risk of
injury, occupants should only use seating positions where they are able
to be properly restrained.
Perform the following steps when installing the child seat with
combination lap/shoulder belts:
Note:Although the child seat illustrated is a forward facing child seat,
the steps are the same for installing a rear facing child seat.
2009 Taurus X(219)
Owners Guide, 2nd Printing
USA(fus)
Seating and Safety Restraints
204
ProCarManuals.com
Page 206 of 358
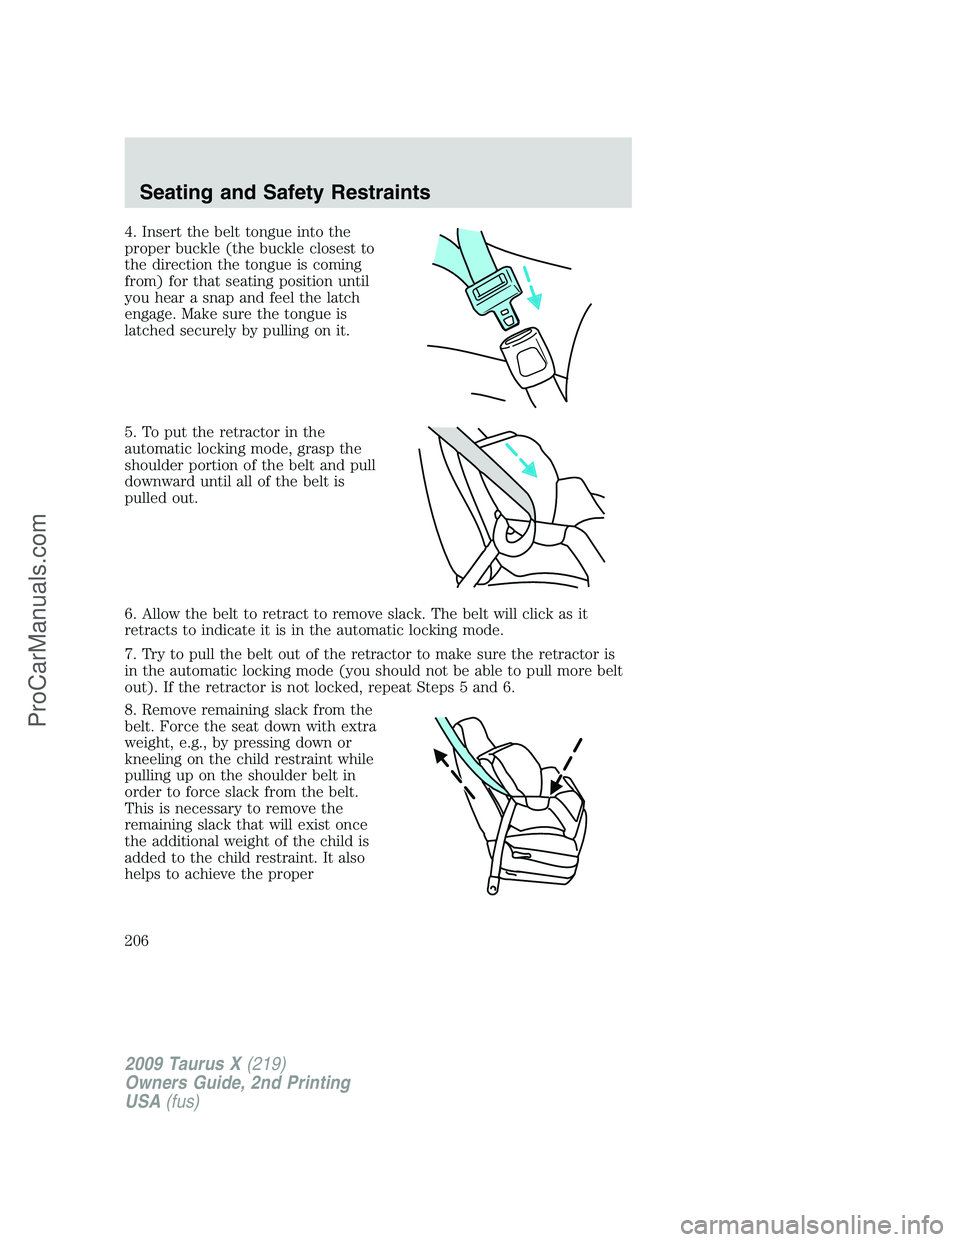
4. Insert the belt tongue into the
proper buckle (the buckle closest to
the direction the tongue is coming
from) for that seating position until
you hear a snap and feel the latch
engage. Make sure the tongue is
latched securely by pulling on it.
5. To put the retractor in the
automatic locking mode, grasp the
shoulder portion of the belt and pull
downward until all of the belt is
pulled out.
6. Allow the belt to retract to remove slack. The belt will click as it
retracts to indicate it is in the automatic locking mode.
7. Try to pull the belt out of the retractor to make sure the retractor is
in the automatic locking mode (you should not be able to pull more belt
out). If the retractor is not locked, repeat Steps 5 and 6.
8. Remove remaining slack from the
belt. Force the seat down with extra
weight, e.g., by pressing down or
kneeling on the child restraint while
pulling up on the shoulder belt in
order to force slack from the belt.
This is necessary to remove the
remaining slack that will exist once
the additional weight of the child is
added to the child restraint. It also
helps to achieve the proper
2009 Taurus X(219)
Owners Guide, 2nd Printing
USA(fus)
Seating and Safety Restraints
206
ProCarManuals.com