2009 FORD FREESTYLE remove seats
[x] Cancel search: remove seatsPage 75 of 358

4.Rear defroster:Press to activate/deactivate rear window defroster.
Refer toRear window defrosterin this section for more information.
5.A/C:Press to activate/deactivate air conditioning. Use with
recirculated air to improve cooling performance and efficiency. Engages
automatically in MAX A/C,
(defrost) and(floor/defrost).
6.Fan speed adjustment:Turn to select the desired fan speed.
Operating tips
•To reduce fog build up on the windshield during humid weather, place
the air flow selector in the
position.
•To reduce humidity build up inside the vehicle: do not drive with the
system off or with recirculated air engaged.
•Do not put objects under the front seats that will interfere with the
airflow to the back seats.
•Remove any snow, ice or leaves from the air intake area at the base of
the windshield.
•For maximum cooling performance (MAX A/C):
During extreme high ambient temperatures when idling stationary for
extended periods of time in gear, it is recommended to run the A/C in
MAX A/C mode, turn off the rear A/C unit, reduce blower fan speed from
the highest setting and put the vehicle’s transmission into the PARK gear
position to continue to receive cool air from your A/C system.
In the MAX A/C mode:
•Adjust the temperature to the coldest setting.
•Set the fan to the highest speed initially, then adjust to maintain
passenger comfort.
In the
andmodes:
•Adjust the temperature to the coldest setting.
•Select A/C and recirculated air
to provide colder airflow.
•Set the fan to the highest speed initially, then adjust to maintain
passenger comfort.
In extremely cold temperatures, to maximize overall heater performance,
it is suggested to not operate the auxiliary system (if equipped) until the
engine temperature gauge crosses into the normal operating range.
2009 Taurus X(219)
Owners Guide, 2nd Printing
USA(fus)
Climate Controls
75
ProCarManuals.com
Page 85 of 358
pressed, the display will show only the rear cabin settings. After rear
setting changes are completed on the front control, the display will
automatically show all climate settings.
Operating tips
•To reduce fog build up on the windshield during humid weather, place
the air flow selector in the
position.
•To reduce humidity build up inside the vehicle: do not drive with the
system off or with recirculated air engaged.
•Do not put objects under the front seats that will interfere with the
airflow to the back seats.
•Remove any snow, ice or leaves from the air intake area at the base of
the windshield.
•For maximum cooling performance (MAX A/C):
During extreme high ambient temperatures when idling stationary for
extended periods of time in gear, it is recommended to run the A/C in
the MAX A/C position, turn off the rear A/C unit, reduce blower fan
speed from the highest setting and put the vehicle’s transmission into the
PARK gear position to continue to receive cool air from your A/C system.
In AUTO mode, press AUTO control and set to desired temperature.
In manual override mode, select
or, A/C and recirculated
air
and set the temperature to 60°F (16°C). Set the fan to the
highest speed initially, then adjust to maintain passenger comfort.
•To improve the A/C cool down, drive with the windows slightly open
for 2–3 minutes after starting the vehicle or until the vehicle has
“aired out.”
In extremely cold temperatures, to maximize overall heater performance
it is suggested to not operate the auxiliary system (if equipped) until the
engine temperature gauge crosses into the normal operating range.
To aid in side window defogging/demisting in cold weather:
1. Select
.
2. Select A/C.
3. Adjust the temperature control to maintain comfort.
4. Set the fan to the highest speed.
5. Direct the outer instrument panel vents toward the side windows.
2009 Taurus X(219)
Owners Guide, 2nd Printing
USA(fus)
Climate Controls
85
ProCarManuals.com
Page 162 of 358
Adjusting second row bucket and bench seat back
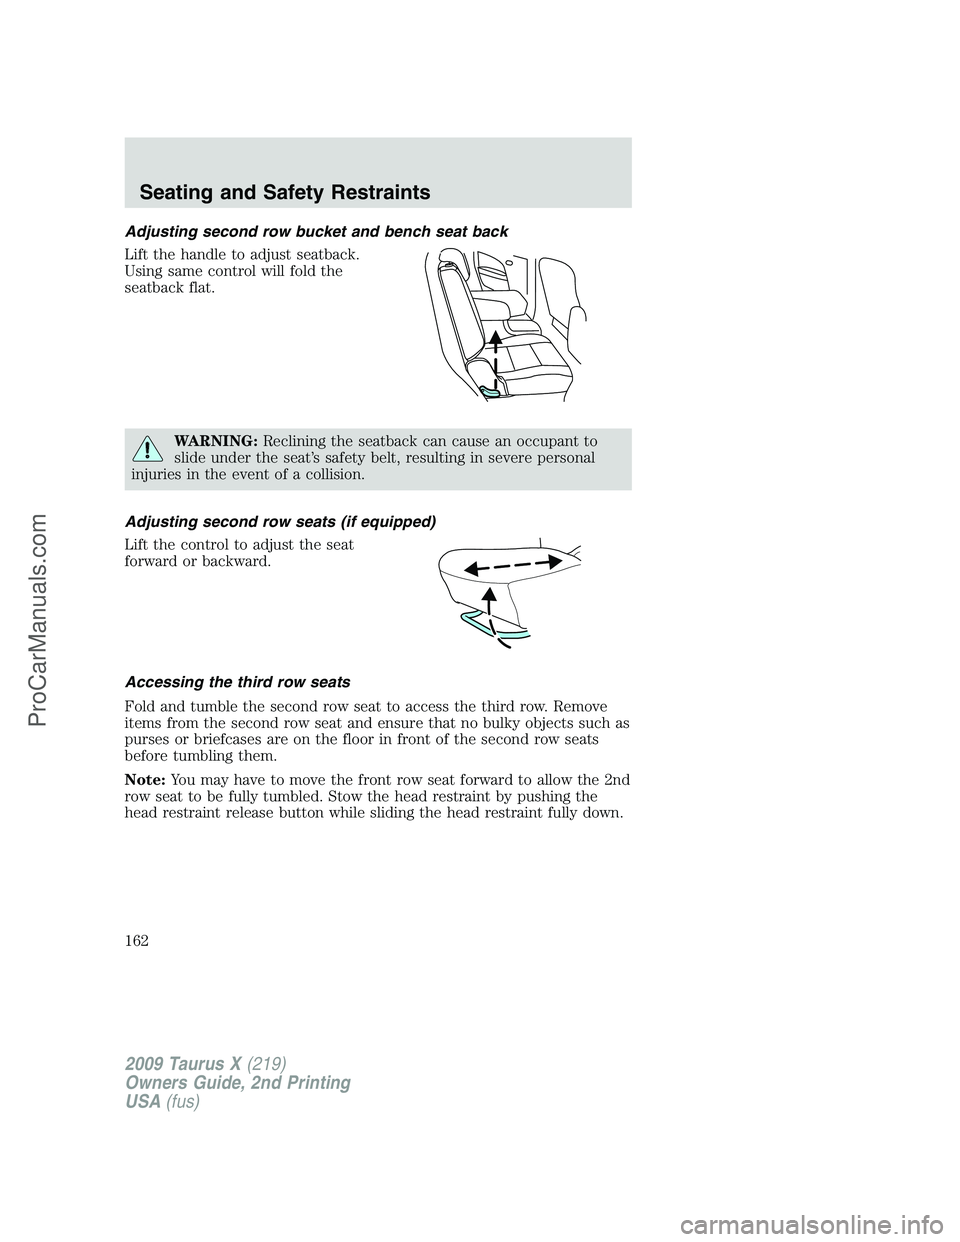
Lift the handle to adjust seatback.
Using same control will fold the
seatback flat.
WARNING:Reclining the seatback can cause an occupant to
slide under the seat’s safety belt, resulting in severe personal
injuries in the event of a collision.
Adjusting second row seats (if equipped)
Lift the control to adjust the seat
forward or backward.
Accessing the third row seats
Fold and tumble the second row seat to access the third row. Remove
items from the second row seat and ensure that no bulky objects such as
purses or briefcases are on the floor in front of the second row seats
before tumbling them.
Note:You may have to move the front row seat forward to allow the 2nd
row seat to be fully tumbled. Stow the head restraint by pushing the
head restraint release button while sliding the head restraint fully down.
2009 Taurus X(219)
Owners Guide, 2nd Printing
USA(fus)
Seating and Safety Restraints
162
ProCarManuals.com
Page 167 of 358
Note:Do not do the following:
•Place heavy objects on the seat
•Operate the seat heater if water or any other liquid is spilled on the
seat. Allow the seat to dry thoroughly.
The heated seat control is located on the back of the front console.
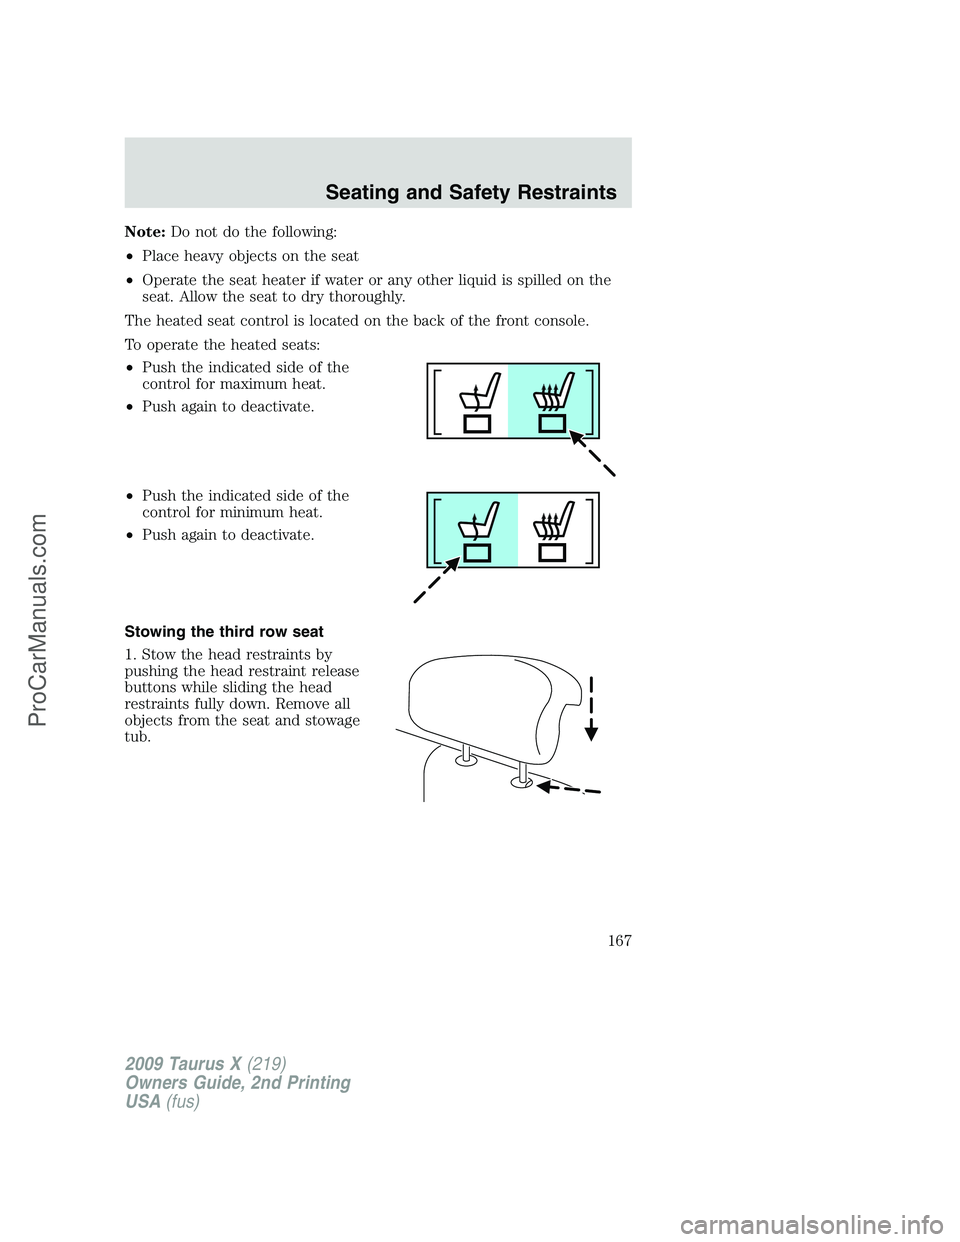
To operate the heated seats:
•Push the indicated side of the
control for maximum heat.
•Push again to deactivate.
•Push the indicated side of the
control for minimum heat.
•Push again to deactivate.
Stowing the third row seat
1. Stow the head restraints by
pushing the head restraint release
buttons while sliding the head
restraints fully down. Remove all
objects from the seat and stowage
tub.
2009 Taurus X(219)
Owners Guide, 2nd Printing
USA(fus)
Seating and Safety Restraints
167
ProCarManuals.com
Page 175 of 358
Combination lap and shoulder belts
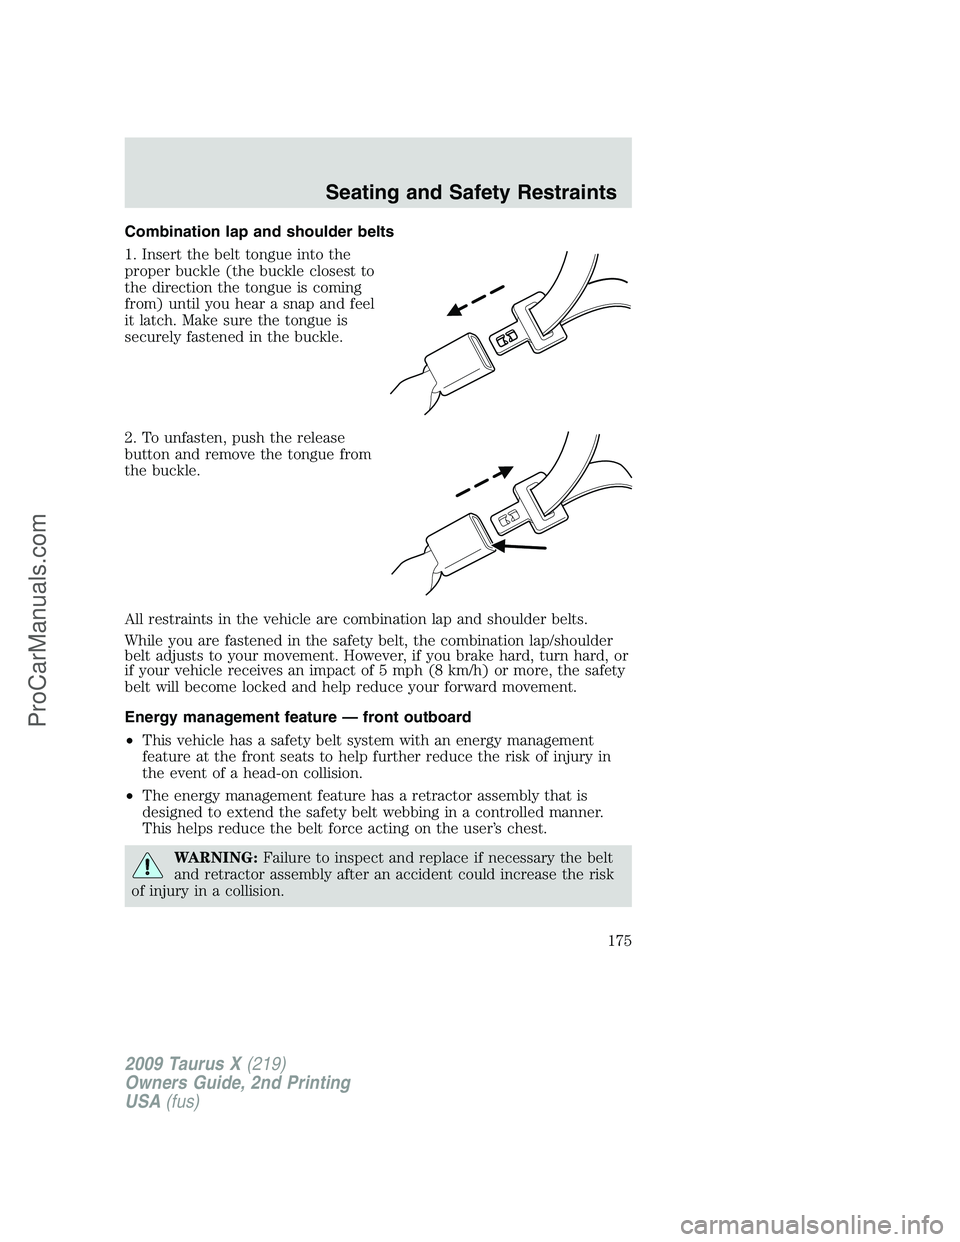
1. Insert the belt tongue into the
proper buckle (the buckle closest to
the direction the tongue is coming
from) until you hear a snap and feel
it latch. Make sure the tongue is
securely fastened in the buckle.
2. To unfasten, push the release
button and remove the tongue from
the buckle.
All restraints in the vehicle are combination lap and shoulder belts.
While you are fastened in the safety belt, the combination lap/shoulder
belt adjusts to your movement. However, if you brake hard, turn hard, or
if your vehicle receives an impact of 5 mph (8 km/h) or more, the safety
belt will become locked and help reduce your forward movement.
Energy management feature — front outboard
•This vehicle has a safety belt system with an energy management
feature at the front seats to help further reduce the risk of injury in
the event of a head-on collision.
•The energy management feature has a retractor assembly that is
designed to extend the safety belt webbing in a controlled manner.
This helps reduce the belt force acting on the user’s chest.
WARNING:Failure to inspect and replace if necessary the belt
and retractor assembly after an accident could increase the risk
of injury in a collision.
2009 Taurus X(219)
Owners Guide, 2nd Printing
USA(fus)
Seating and Safety Restraints
175
ProCarManuals.com
Page 176 of 358
All safety restraints in the vehicle are combination lap and shoulder
belts. All of the passenger combination lap and shoulder belts have two
types of locking modes described below:
Vehicle sensitive mode
This is the normal retractor mode, which allows free shoulder belt length
adjustment to your movements and locking in response to vehicle
movement. For example, if the driver brakes suddenly or turns a corner
sharply, or the vehicle receives an impact of approximately 5 mph
(8 km/h) or more, the combination safety belts will lock to help reduce
forward movement of the driver and passengers.
Automatic locking mode
When to use the automatic locking mode
In this mode, the shoulder belt is automatically pre-locked. The belt will
still retract to remove any slack in the shoulder belt. The automatic
locking mode is not available on the driver safety belt.
This mode should be usedany timea child safety seat (except a
booster) is installed in a passenger front or outboard rear seating
position (if equipped). Children 12 years old and under should be
properly restrained in the rear seat whenever possible. Refer toSafety
restraints for childrenorSafety seats for childrenlater in this chapter.
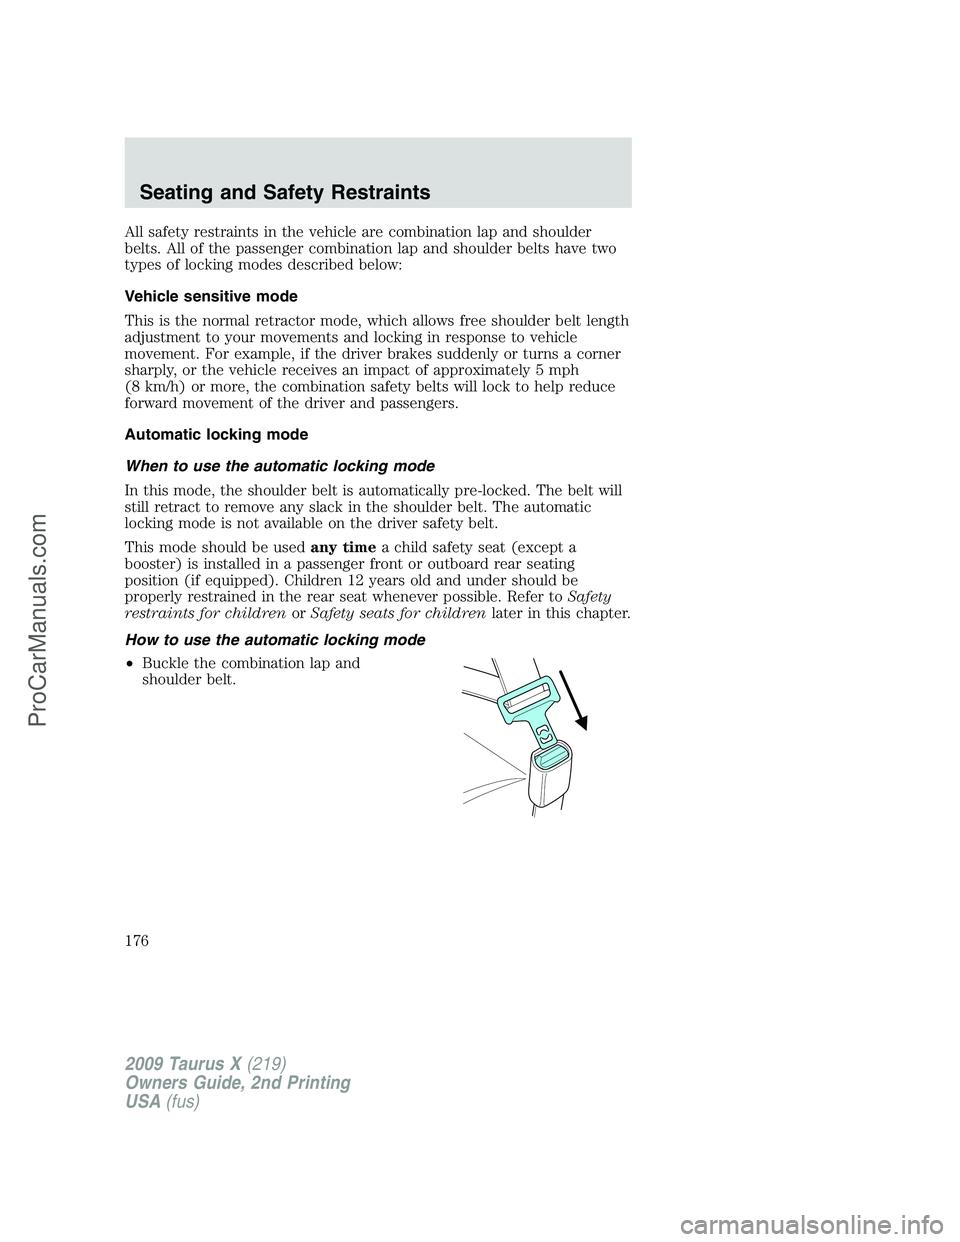
How to use the automatic locking mode
•Buckle the combination lap and
shoulder belt.
2009 Taurus X(219)
Owners Guide, 2nd Printing
USA(fus)
Seating and Safety Restraints
176
ProCarManuals.com
Page 207 of 358
snugness of the child seat to the vehicle. Sometimes, a slight lean
towards the buckle will additionally help to remove remaining slack from
the belt.
9. Attach the tether strap (if the child seat is equipped). Refer to
Attaching child safety seats with tether strapslater in this chapter.
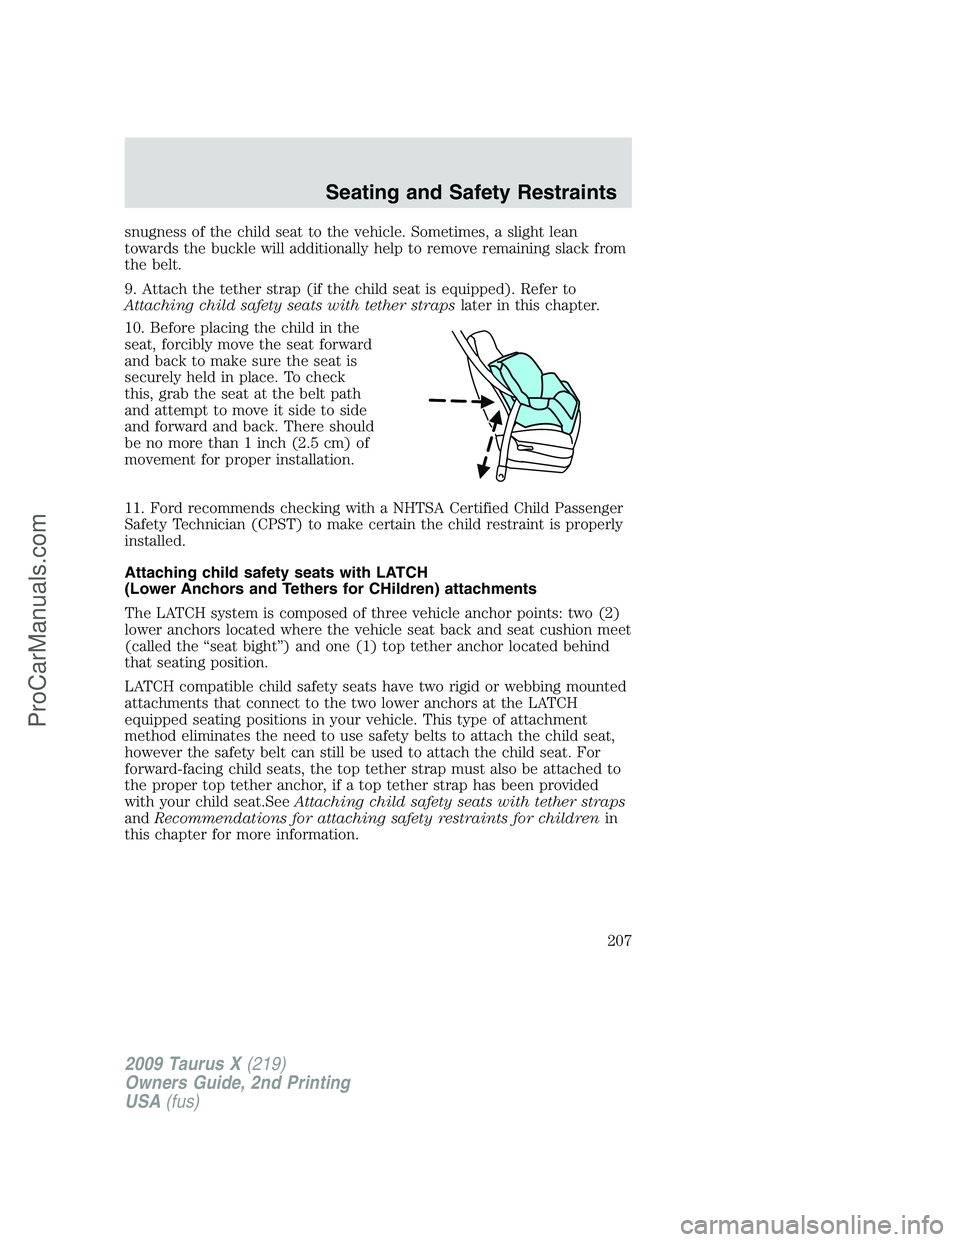
10. Before placing the child in the
seat, forcibly move the seat forward
and back to make sure the seat is
securely held in place. To check
this, grab the seat at the belt path
and attempt to move it side to side
and forward and back. There should
be no more than 1 inch (2.5 cm) of
movement for proper installation.
11. Ford recommends checking with a NHTSA Certified Child Passenger
Safety Technician (CPST) to make certain the child restraint is properly
installed.
Attaching child safety seats with LATCH
(Lower Anchors and Tethers for CHildren) attachments
The LATCH system is composed of three vehicle anchor points: two (2)
lower anchors located where the vehicle seat back and seat cushion meet
(called the “seat bight”) and one (1) top tether anchor located behind
that seating position.
LATCH compatible child safety seats have two rigid or webbing mounted
attachments that connect to the two lower anchors at the LATCH
equipped seating positions in your vehicle. This type of attachment
method eliminates the need to use safety belts to attach the child seat,
however the safety belt can still be used to attach the child seat. For
forward-facing child seats, the top tether strap must also be attached to
the proper top tether anchor, if a top tether strap has been provided
with your child seat.SeeAttaching child safety seats with tether straps
andRecommendations for attaching safety restraints for childrenin
this chapter for more information.
2009 Taurus X(219)
Owners Guide, 2nd Printing
USA(fus)
Seating and Safety Restraints
207
ProCarManuals.com
Page 216 of 358
Types of booster seats
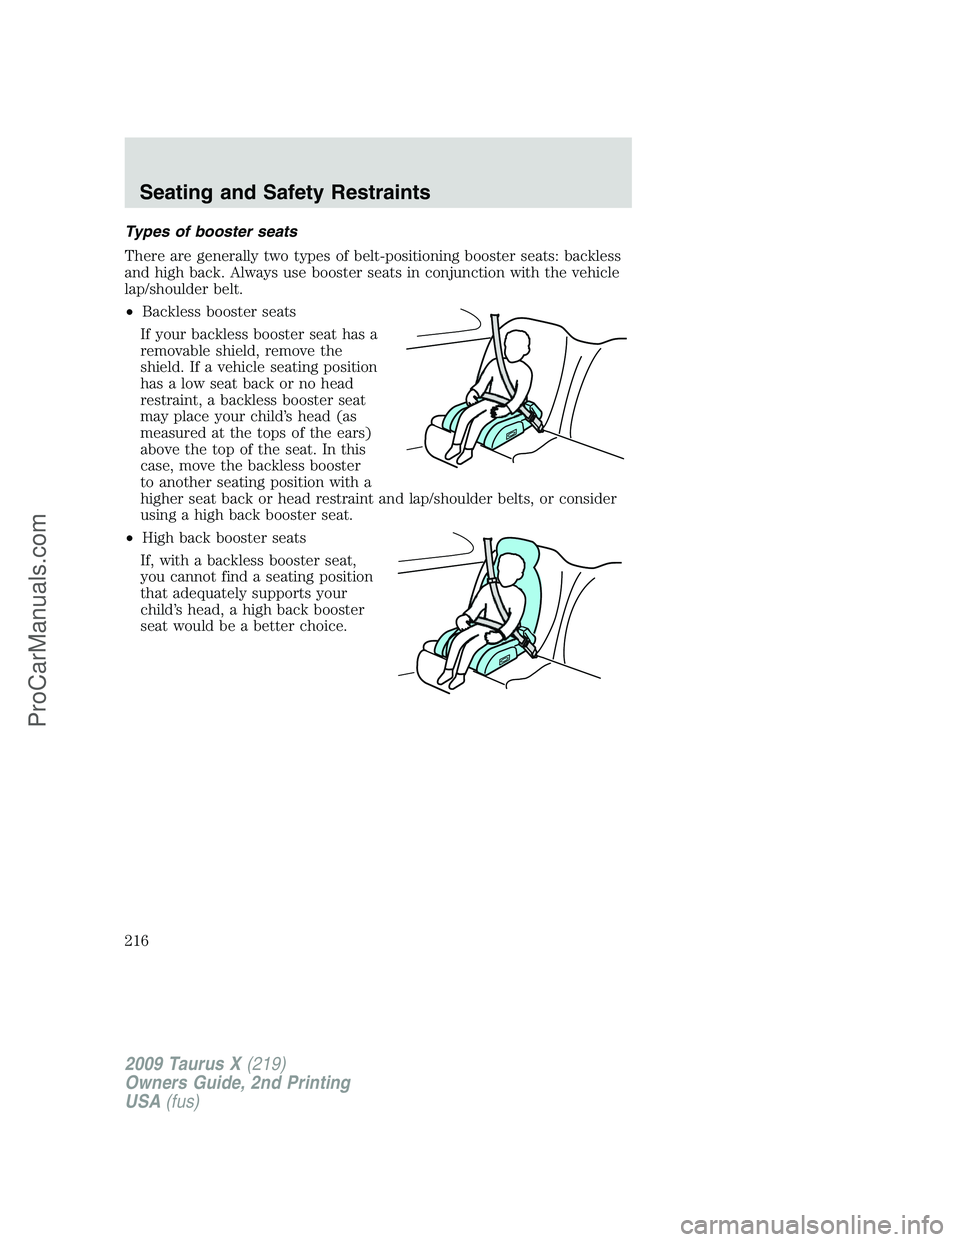
There are generally two types of belt-positioning booster seats: backless
and high back. Always use booster seats in conjunction with the vehicle
lap/shoulder belt.
•Backless booster seats
If your backless booster seat has a
removable shield, remove the
shield. If a vehicle seating position
has a low seat back or no head
restraint, a backless booster seat
may place your child’s head (as
measured at the tops of the ears)
above the top of the seat. In this
case, move the backless booster
to another seating position with a
higher seat back or head restraint and lap/shoulder belts, or consider
using a high back booster seat.
•High back booster seats
If, with a backless booster seat,
you cannot find a seating position
that adequately supports your
child’s head, a high back booster
seat would be a better choice.
2009 Taurus X(219)
Owners Guide, 2nd Printing
USA(fus)
Seating and Safety Restraints
216
ProCarManuals.com