Page 2 of 276
Driving 92
Starting 92
Brakes 100
Air suspension 121
Transmission operation 123
Vehicle loading 136
Roadside Emergencies 143
Hazard flasher switch 144
Fuses and relays 144
Jump starting 153
Wrecker towing 157
Customer Assistance 161
Getting assistance outside the U.S. and Canada 163
Ordering additional owner’s literature 164
Reporting safety defects (U.S. only) 164
Reporting safety defects (Canada only) 165
Cleaning 166
Cleaning your vehicle 166
Repairing paint chips 166
Underbody preservation 169
Table of Contents
2
2009 F-650/750(f67)
Supplement
USA(fus)
Page 13 of 276

Engine starting (parking brake applied)
Safety/Emergency
equipment:Prior to entering the cab, verify that the
vehicle is equipped with spare electrical fuses
(if used), three red reflective triangles, a
properly charged and rated fire extinguisher
and wheel chocks. Walk around the vehicle
and check that all steps and grab handles,
inside and out as well as behind, are tight and
clean. Use extreme caution and a three-point
stance at all times. Check door latches for
positive closing, latching and locking.
Starting the engine:Verify the parking brake is set. Depress the
clutch (if equipped with a manual
transmission) and verify the transmission is in
neutral. Vehicles equipped with an automatic
transmission should be in N (Neutral) or P
(Park) if equipped with a Park position.
Turn the key to ON. When the WAIT TO
START indicator light in the instrument
cluster turns off, turn the key to START.
Oil pressure builds:Make sure engine oil pressure is building to
normal operating range.
Air chime sounds (if
equipped with air
compressor):The low air pressure warning chime should
sound immediately after the engine starts but
before the compressor has built up pressure.
The low air pressure warning chime should
stop when the air pressure reaches 70 psi
(483 kPa) (or more). Let the air pressure
build to governed cut-out pressure, which
should occur between 115–130 psi
(793–896 kPa).
2009 F-650/750(f67)
Supplement
USA(fus)
Vehicle Inspection Guide
13
Page 55 of 276

WARNING:Never adjust the steering wheel when the vehicle is
moving.
AUXILIARY POWER POINT
Power outlets are designed for accessory plugs only. Do not insert
any other object in the power outlet as this will damage the
outlet and blow the fuse. Do not hang any type of accessory or
accessory bracket from the plug. Improper use of the power
outlet can cause damage not covered by your warranty.
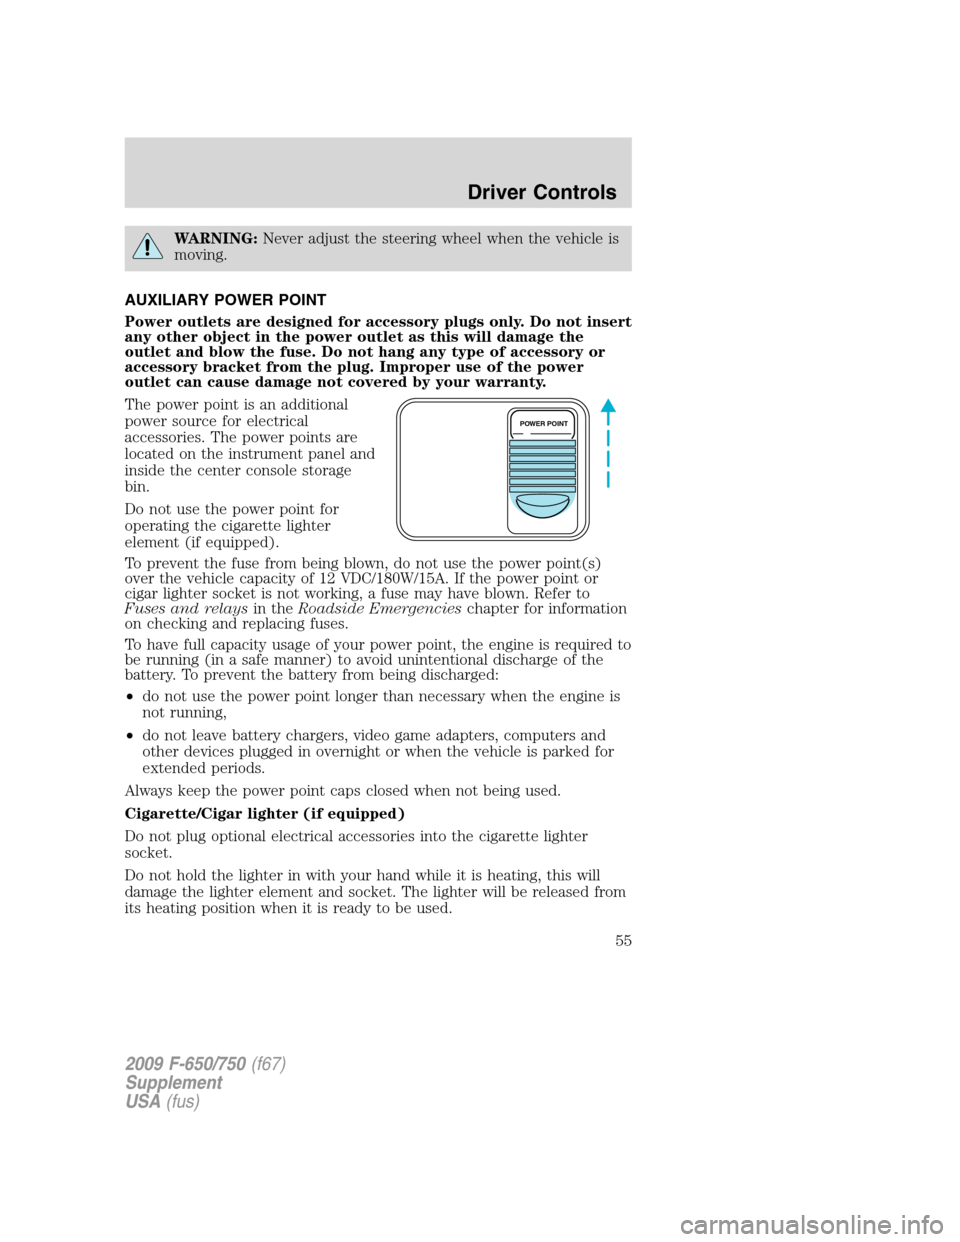
The power point is an additional
power source for electrical
accessories. The power points are
located on the instrument panel and
inside the center console storage
bin.
Do not use the power point for
operating the cigarette lighter
element (if equipped).
To prevent the fuse from being blown, do not use the power point(s)
over the vehicle capacity of 12 VDC/180W/15A. If the power point or
cigar lighter socket is not working, a fuse may have blown. Refer to
Fuses and relaysin theRoadside Emergencieschapter for information
on checking and replacing fuses.
To have full capacity usage of your power point, the engine is required to
be running (in a safe manner) to avoid unintentional discharge of the
battery. To prevent the battery from being discharged:
•do not use the power point longer than necessary when the engine is
not running,
•do not leave battery chargers, video game adapters, computers and
other devices plugged in overnight or when the vehicle is parked for
extended periods.
Always keep the power point caps closed when not being used.
Cigarette/Cigar lighter (if equipped)
Do not plug optional electrical accessories into the cigarette lighter
socket.
Do not hold the lighter in with your hand while it is heating, this will
damage the lighter element and socket. The lighter will be released from
its heating position when it is ready to be used.
POWER POINT
2009 F-650/750(f67)
Supplement
USA(fus)
Driver Controls
55
Page 144 of 276
HAZARD FLASHER
The hazard flasher control is located
on the steering column, just behind
the steering wheel. The hazard
flashers will operate when the
ignition is off.
Push in the flasher control and all
front and rear direction signals will
flash. Press the flasher control again
to turn them off. Use it when your
vehicle is disabled and is creating a
safety hazard for other motorists.
Note:With extended use, the flasher may run down your battery.
FUSING
If electrical components in the vehicle are not working, a fuse may have
blown. Blown fuses are identified by a broken wire within the fuse.
Check the appropriate fuses before replacing any electrical components.
Note:Always replace a fuse with one that has the specified amperage
rating. Using a fuse with a higher amperage rating can cause severe wire
damage and could start a fire.
2009 F-650/750(f67)
Supplement
USA(fus)
Roadside Emergencies
144
Page 146 of 276
Fuse/Relay
LocationFuse Amp
RatingFuse Description
15 10A Interior lamp relay, GEM, Vanity mirrors
16 15A High beams, Indicator
17 — Not used
18 5A Headlamp switch interior lighting
19 15A Engine control
20 5A Starting system
21 10A DRL resistor
22 15A Air horn, Air suspension dump, Two-speed
axle, Driver-controlled locking differential
23 10A Flasher
24 15A ABS, Air dryer, Vacuum pump, Fuel heater
relay
25 10A Function selector switch
26 10A RH low beam headlamp
27 — Not used
28 10A LH low beam headlamp
29 10A Cluster warning lamps, Gauges, GEM,
Hydraulic ABS
30 15A Allison electronic transmission
31 — Not used
Relay 1 — Interior lamps
Relay 2 — Not used
Relay 3 — Horn
Relay 4 — One-touch down window
Relay 5 — Not used
Power distribution box
WARNING:Always disconnect the battery before servicing high
current fuses.
2009 F-650/750(f67)
Supplement
USA(fus)
Roadside Emergencies
146
Page 148 of 276

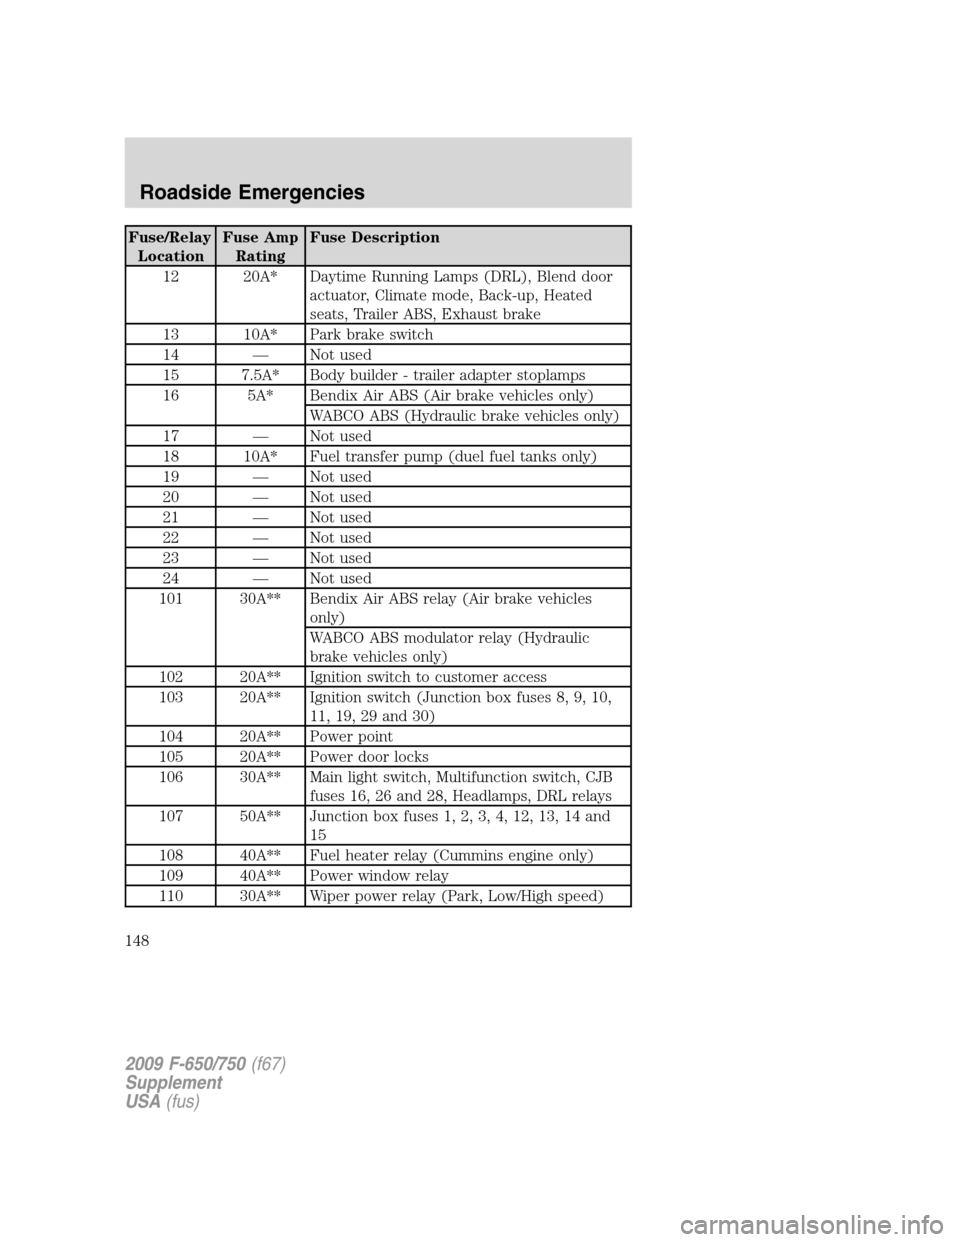
Fuse/Relay
LocationFuse Amp
RatingFuse Description
12 20A* Daytime Running Lamps (DRL), Blend door
actuator, Climate mode, Back-up, Heated
seats, Trailer ABS, Exhaust brake
13 10A* Park brake switch
14 — Not used
15 7.5A* Body builder - trailer adapter stoplamps
16 5A* Bendix Air ABS (Air brake vehicles only)
WABCO ABS (Hydraulic brake vehicles only)
17 — Not used
18 10A* Fuel transfer pump (duel fuel tanks only)
19 — Not used
20 — Not used
21 — Not used
22 — Not used
23 — Not used
24 — Not used
101 30A** Bendix Air ABS relay (Air brake vehicles
only)
WABCO ABS modulator relay (Hydraulic
brake vehicles only)
102 20A** Ignition switch to customer access
103 20A** Ignition switch (Junction box fuses 8, 9, 10,
11, 19, 29 and 30)
104 20A** Power point
105 20A** Power door locks
106 30A** Main light switch, Multifunction switch, CJB
fuses 16, 26 and 28, Headlamps, DRL relays
107 50A** Junction box fuses 1, 2, 3, 4, 12, 13, 14 and
15
108 40A** Fuel heater relay (Cummins engine only)
109 40A** Power window relay
110 30A** Wiper power relay (Park, Low/High speed)
2009 F-650/750(f67)
Supplement
USA(fus)
Roadside Emergencies
148
Page 149 of 276

Fuse/Relay
LocationFuse Amp
RatingFuse Description
111 30A** Park lamps relay, Park lamps
112 40A** Blower motor relay, Blower motor
113 30A** Heated seats, Air ride seat
114 25A** Hydraulic ABS ECU power
115 20A** Ignition switch, Central Junction Box fuses 8,
9, 10 and 11, Starter motor relay
116 30A** Left/Right turn relays, Back-up lamp relay
117 20A** Stoplamps relay
118 60A** Hydraulic brake vehicles (Trailer tow package
only)
119/120 60A** Hydraulic brake vehicle (Trailer tow package
only)
Air brake vehicles (Trailer tow package only)
121/122 60A** Hydraulic brake, ABS system
Air brake trailer tow fuse block
201 — Washer pump relay
202 — Wiper speed relay
203 — Wiper on/off relay
204 — Wiper power relay
205 — RH stop/turn relay
206 — LH stop/turn relay
207 — Hydraulic ABS event relay
208 — Back-up lamps relay
209 — Stoplamp relay
301 — Fuel heater/Fuel transfer pump relay
302 — Park lamps relay
303 — Blower motor relay
304 — Not used
* Mini fuse **Maxi fuse
2009 F-650/750(f67)
Supplement
USA(fus)
Roadside Emergencies
149
Page 153 of 276

Inline fuses
Your vehicle has two inline fuses located in/on the battery cables by the
battery. A 10A fuse for the transmission control module and a 40A fuse
for the engine control module. Refer toAutomatic transmission
operationin theDrivingchapter andBatteryin theMaintenance and
Specificationschapter for more information.
Your vehicle may have three inline fuses located in/on the battery cables
by the battery. A 10A fuse for the transmission control module, a 40A
fuse for the engine control module, and a 40A fuse for the Full Power
Brake Pump. There is also a 30A fuse for the Full Power Brake Pump by
the cowl.
JUMP STARTING
WARNING:The gases around the battery can explode if
exposed to flames, sparks, or lit cigarettes. An explosion could
result in injury or vehicle damage.
WARNING:Batteries contain sulfuric acid which can burn skin,
eyes and clothing, if contacted.
Do not attempt to push-start your automatic transmission
vehicle. Automatic transmissions do not have push-start
capability. Attempting to push-start a vehicle with an automatic
transmission may cause transmission damage.
Before connecting a fast-charger, booster battery or installing a new
battery, make sure the ground polarities of the fast-charger, booster
battery or alternator (when installing a battery) are matched to the
ground polarity of the vehicle battery. Improper usage of the
fast-charger, hook-up of booster battery or installation of a new battery
can cause damage to the electrical system or to the alternator. Do not
attempt to polarize the alternator.
Preparing your vehicle
1.Use only a 12–volt supply to start your vehicle.Do not attach the
jumper cables to the glow plug relay as this could severely damage the
glow plugs, injector driver module and PCM.
2. Do not disconnect the battery of the disabled vehicle as this could
damage the vehicle’s electrical system.
2009 F-650/750(f67)
Supplement
USA(fus)
Roadside Emergencies
153