2009 FORD F750 air condition
[x] Cancel search: air conditionPage 94 of 276

•Do not increase engine speed
until the oil pressure gauge
indicates normal pressure (as
indicated by the arrows); this
should be indicated on the gauge
within 15 seconds after starting.
•Idle the engine for three to five
minutes before operating with a
full load.
•Try to limit engine idle to
10 minutes. Excessive idling reduces fuel economy.
•When starting a cold engine, increase the engine speed (RPM) slowly
to make sure adequate lubrication is available to the bearings.
Cold weather operation
WARNING:Do not use volatile starting aids such as ether,
propane or gasoline in the engine air intake system. Glow plugs
may ignite vapors which can cause engine damage or personal injury.
In order to operate the engine in temperatures of 32°F (0°C) or lower,
read the following instructions:
•Make sure that the batteries are of sufficient size and are fully
charged. Check other electrical components to make sure they’re in
optimum condition.
•Use a permanent-type engine coolant solution to protect the engine
against damage from freezing.
•If your vehicle is equipped with a water-fuel separator, drain it daily.
Fill the fuel tank at the end of daily operation to prevent condensation
in the fuel system.
•Make sure you use proper cold weather engine oil and that it is at its
proper level.
•At temperatures of –4°F (–20°C) or below, it is recommended that you
use a crankcase-mounted coolant heater to improve cold engine
starting.
•If operating in arctic temperatures of –20°F (–29°C) or lower, consult
your truck dealer for information about special cold weather
equipment and precautions.
2009 F-650/750(f67)
Supplement
USA(fus)
Driving
94
Page 95 of 276

Note:Idling in cold weather will not heat the engine to its normal
operating temperature. Long periods of idling in cold weather can cause
a build-up of heavy deposits of carbon and rust on valve stems causing
them to stick which, in turn, can cause valvetrain damage.
Winter fronts
The use of winter fronts, or other air-restrictive devices mounted in front
of the radiator on vehicles with chassis-mounted charge air coolers, are
not recommended unless extremely cold weather conditions exist. Air
flow restriction can cause high exhaust temperatures, power loss,
excessive fan usage and a reduction in fuel economy. If you must use a
winter front, the device should have a permanent opening of at least 120
sq in. (774 sq. cm) directly in line with the fan hub.
Hot weather operation
•Keep the engine cooling system filled with a clean, permanent coolant
solution to protect against damage from overheating.
•Fill the fuel tank at the end of daily operation to prevent condensation
in the fuel system.
•Keep external surfaces of the engine, radiator, charge air cooler, A/C
condenser and accessories clean to avoid dirt build-up.
Above normal coolant temperatures could be experienced while driving
in a transmission gear ratio which lugs the engine. To correct this
problem, engine speed should be increased by downshifting in to the
next lower gear to increase engine RPM.
Starting a turbocharged engine with the vehicle on a steep grade
When starting a diesel engine when the loaded vehicle is on a grade, the
engine RPM will start to fall slightly when the clutch is engaged; do not
disengage the clutch and try to increase engine RPM as this may damage
driveline components. The engine will recover as the vehicle begins
moving.
Engine shutdown
Allow the engine to idle for three to five minutes before shutting it
down. The larger the engine, the greater the need for this idling period.
However, do not let the engine idle for more than 10 minutes.
Restarting after running out of fuel
The fuel system may need to be purged of air, refer toRunning out of
fuelin theMaintenance and Specificationschapter.
2009 F-650/750(f67)
Supplement
USA(fus)
Driving
95
Page 99 of 276
Occasional brake noise is normal and often does not indicate a
performance concern with the vehicle’s brake system. In normal
operation, automotive brake systems may emit occasional or intermittent
squeal or groan noises when the brakes are applied. Such noises are
usually heard during the first few brake applications in the morning;
however, they may be heard at any time while braking and can be
aggravated by environmental conditions such as cold, heat, moisture,
road dust, salt or mud. If a “metal-to-metal,” “continuous grinding” or
“continuous squeal” sound is present while braking, the brake linings
may be worn-out and should be inspected by a qualified service
technician.
Know the required stopping distances for all driving conditions that may
be encountered. For longer brake lining life, take full advantage of engine
braking power when coming to a stop.
WARNING:Do not drive with your foot resting on the brake
pedal. This will result in abnormally high brake temperatures,
excessive lining wear and increased stopping distances.
Before descending a long or steep hill, shift to a lower gear and avoid
continuous application of the brakes. Normally, choose the same gear to
descend the hill that you would use to ascend the hill.
WARNING:Continuous application of the brakes will cause the
brakes to overheat, resulting in a temporary loss of braking.
If brakes do not grip well
•If you have been driving through deep water, gently apply the brakes
several times while the vehicle is moving slowly.
•Let the brakes cool if you have been using them excessively, as in
mountain driving or after several fast, high speed stops.
•Check brake adjustment.
•Check brake linings for excessive wear.
•Check system air pressure. (Air brakes only)
2009 F-650/750(f67)
Supplement
USA(fus)
Driving
99
Page 106 of 276
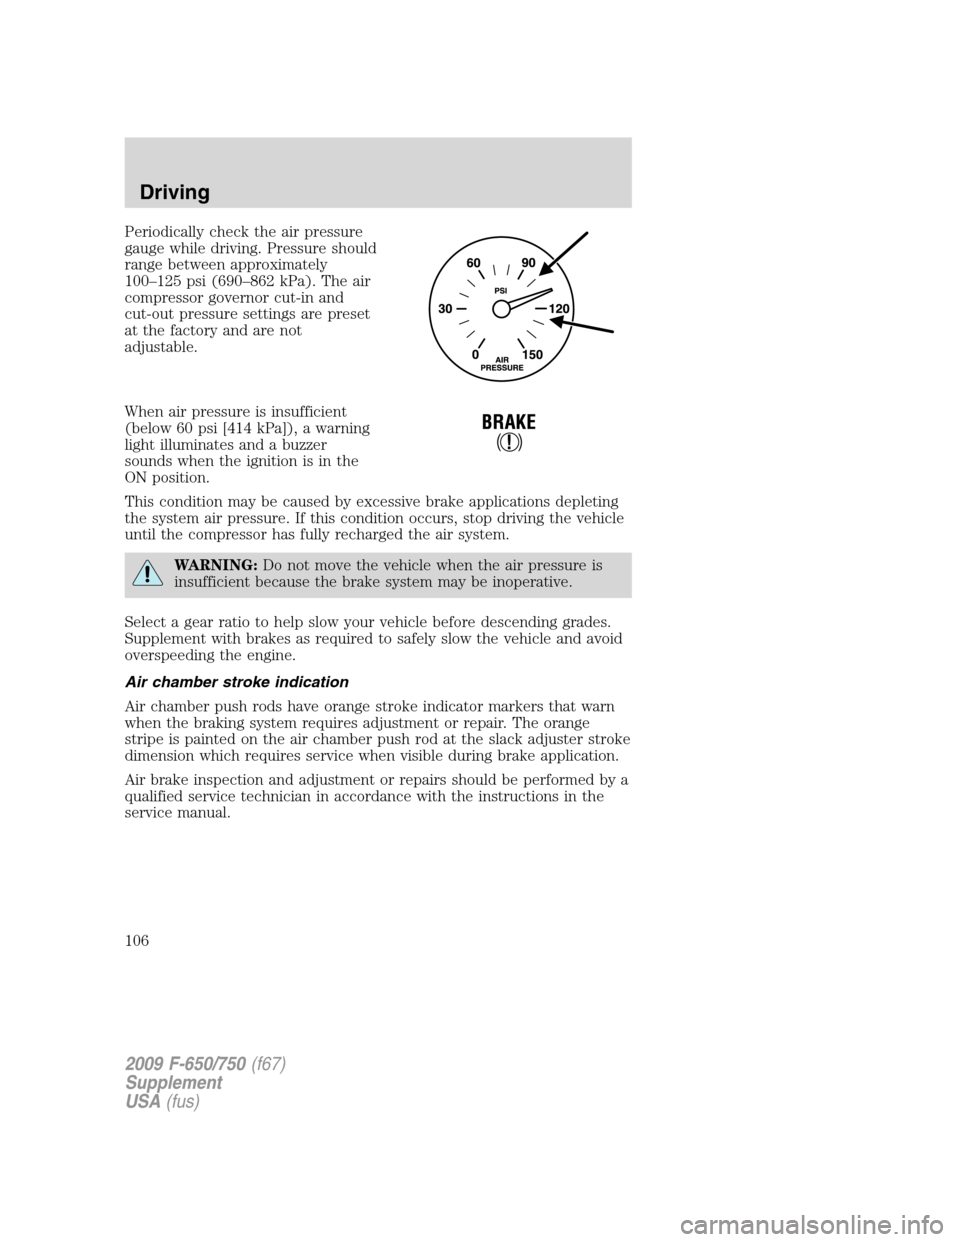
Periodically check the air pressure
gauge while driving. Pressure should
range between approximately
100–125 psi (690–862 kPa). The air
compressor governor cut-in and
cut-out pressure settings are preset
at the factory and are not
adjustable.
When air pressure is insufficient
(below 60 psi [414 kPa]), a warning
light illuminates and a buzzer
sounds when the ignition is in the
ON position.
This condition may be caused by excessive brake applications depleting
the system air pressure. If this condition occurs, stop driving the vehicle
until the compressor has fully recharged the air system.
WARNING:Do not move the vehicle when the air pressure is
insufficient because the brake system may be inoperative.
Select a gear ratio to help slow your vehicle before descending grades.
Supplement with brakes as required to safely slow the vehicle and avoid
overspeeding the engine.
Air chamber stroke indication
Air chamber push rods have orange stroke indicator markers that warn
when the braking system requires adjustment or repair. The orange
stripe is painted on the air chamber push rod at the slack adjuster stroke
dimension which requires service when visible during brake application.
Air brake inspection and adjustment or repairs should be performed by a
qualified service technician in accordance with the instructions in the
service manual.
2009 F-650/750(f67)
Supplement
USA(fus)
Driving
106
Page 109 of 276
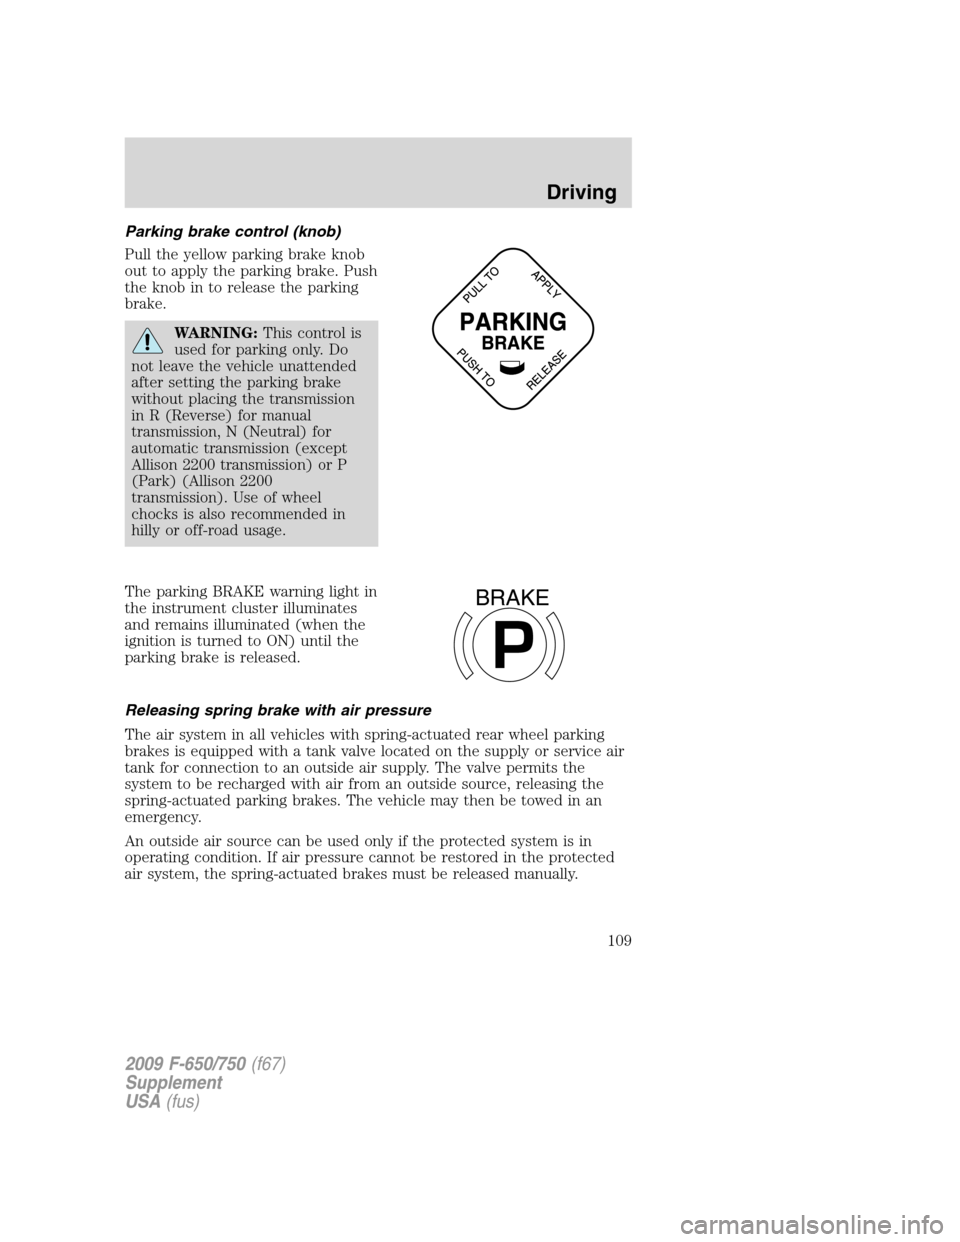
Parking brake control (knob)
Pull the yellow parking brake knob
out to apply the parking brake. Push
the knob in to release the parking
brake.
WARNING:This control is
used for parking only. Do
not leave the vehicle unattended
after setting the parking brake
without placing the transmission
in R (Reverse) for manual
transmission, N (Neutral) for
automatic transmission (except
Allison 2200 transmission) or P
(Park) (Allison 2200
transmission). Use of wheel
chocks is also recommended in
hilly or off-road usage.
The parking BRAKE warning light in
the instrument cluster illuminates
and remains illuminated (when the
ignition is turned to ON) until the
parking brake is released.
Releasing spring brake with air pressure
The air system in all vehicles with spring-actuated rear wheel parking
brakes is equipped with a tank valve located on the supply or service air
tank for connection to an outside air supply. The valve permits the
system to be recharged with air from an outside source, releasing the
spring-actuated parking brakes. The vehicle may then be towed in an
emergency.
An outside air source can be used only if the protected system is in
operating condition. If air pressure cannot be restored in the protected
air system, the spring-actuated brakes must be released manually.
P
BRAKE
2009 F-650/750(f67)
Supplement
USA(fus)
Driving
109
Page 111 of 276
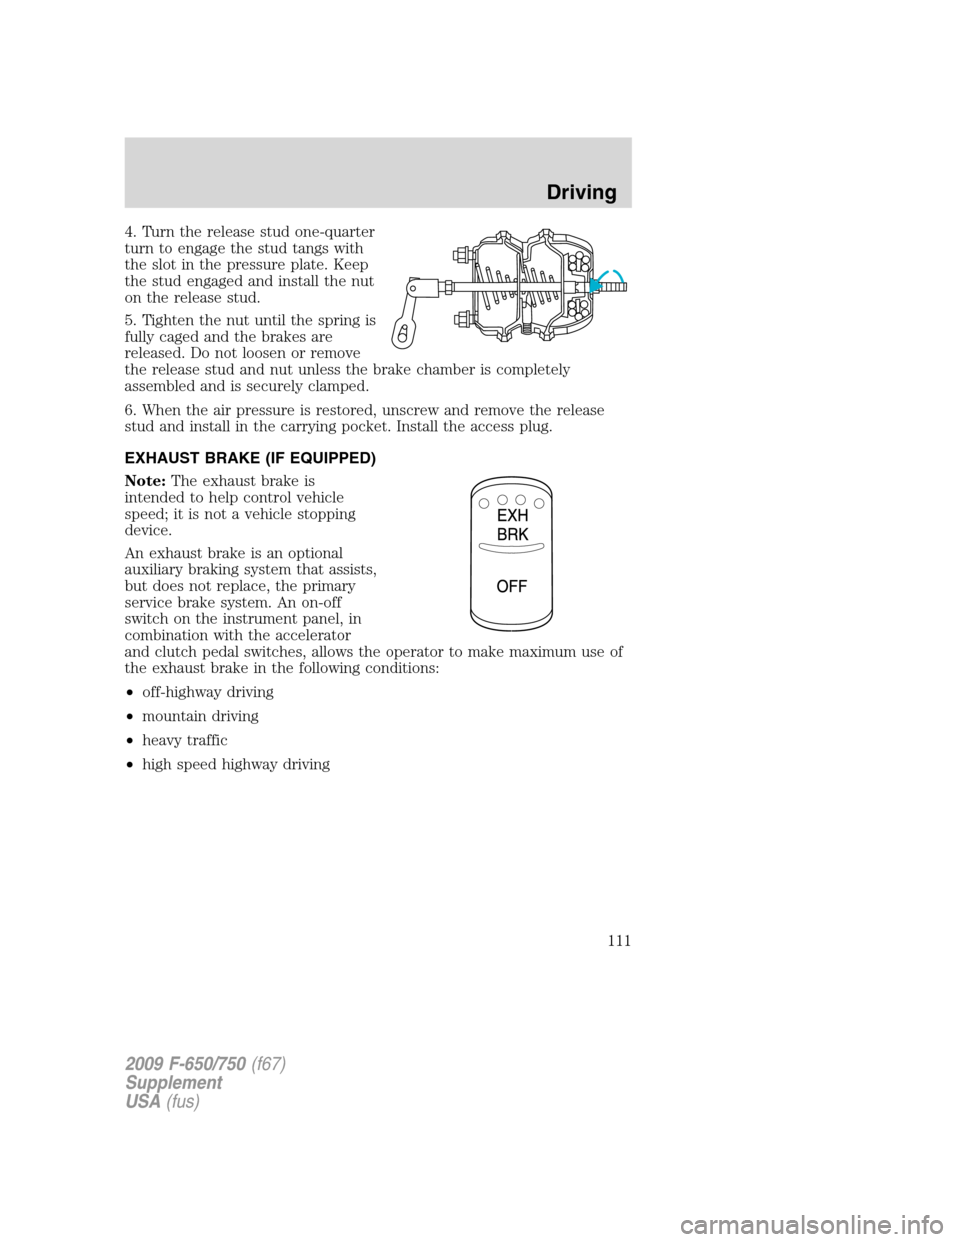
4. Turn the release stud one-quarter
turn to engage the stud tangs with
the slot in the pressure plate. Keep
the stud engaged and install the nut
on the release stud.
5. Tighten the nut until the spring is
fully caged and the brakes are
released. Do not loosen or remove
the release stud and nut unless the brake chamber is completely
assembled and is securely clamped.
6. When the air pressure is restored, unscrew and remove the release
stud and install in the carrying pocket. Install the access plug.
EXHAUST BRAKE (IF EQUIPPED)
Note:The exhaust brake is
intended to help control vehicle
speed; it is not a vehicle stopping
device.
An exhaust brake is an optional
auxiliary braking system that assists,
but does not replace, the primary
service brake system. An on-off
switch on the instrument panel, in
combination with the accelerator
and clutch pedal switches, allows the operator to make maximum use of
the exhaust brake in the following conditions:
•off-highway driving
•mountain driving
•heavy traffic
•high speed highway driving
2009 F-650/750(f67)
Supplement
USA(fus)
Driving
111
Page 114 of 276
Note:Installing an exhaust or auxiliary brake does not necessarily
protect the engine from exceeding maximum governed speed. The
primary brakes should be used to make sure the engine never exceeds
maximum governed speed under any conditions.
TRAILER BRAKE HAND CONTROL (IF EQUIPPED)
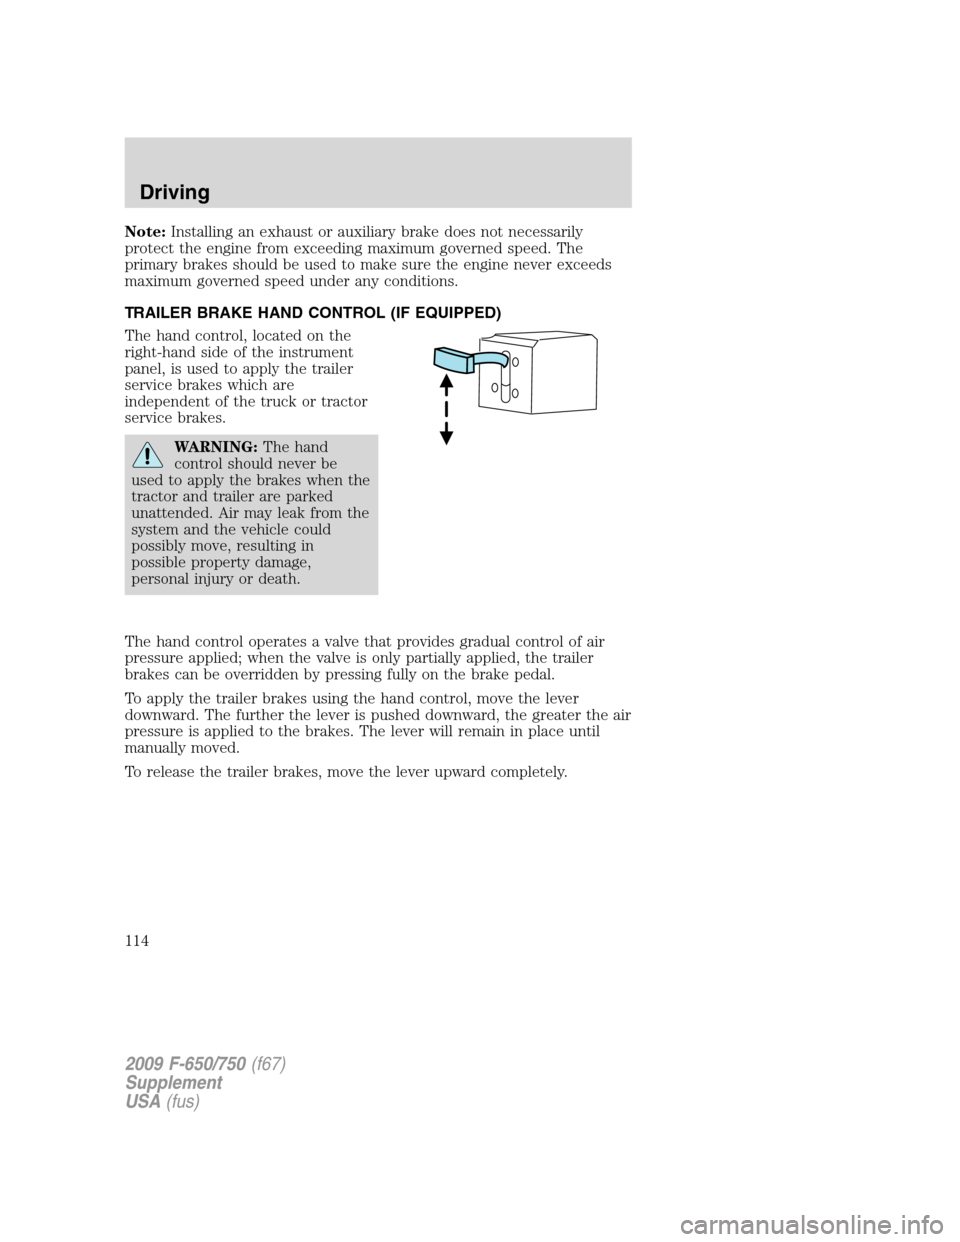
The hand control, located on the
right-hand side of the instrument
panel, is used to apply the trailer
service brakes which are
independent of the truck or tractor
service brakes.
WARNING:The hand
control should never be
used to apply the brakes when the
tractor and trailer are parked
unattended. Air may leak from the
system and the vehicle could
possibly move, resulting in
possible property damage,
personal injury or death.
The hand control operates a valve that provides gradual control of air
pressure applied; when the valve is only partially applied, the trailer
brakes can be overridden by pressing fully on the brake pedal.
To apply the trailer brakes using the hand control, move the lever
downward. The further the lever is pushed downward, the greater the air
pressure is applied to the brakes. The lever will remain in place until
manually moved.
To release the trailer brakes, move the lever upward completely.
2009 F-650/750(f67)
Supplement
USA(fus)
Driving
114
Page 121 of 276
WARNING:Aggressive driving in any road conditions can cause
you to lose control of your vehicle increasing the risk of severe
personal injury or property damage. The occurrence of a Traction
Control™ event is an indication that at least some of the tires have
exceeded their ability to grip the road; this may lead to an increased
risk of loss of vehicle control, vehicle rollover, personal injury and
death. If you experience a severe road event, SLOW DOWN.
AIR SUSPENSION (IF EQUIPPED)
Note:The vehicle must not be operated without air in the suspension
springs. Operating the vehicle without air in the air suspension springs
will damage the suspension, degrade ride performance and may cause
property damage.
The suspension system automatically adjusts to different loads to
maintain a constant frame height. The system allows for ease of vehicle
loading and provides improved vehicle ride and increased driver comfort.
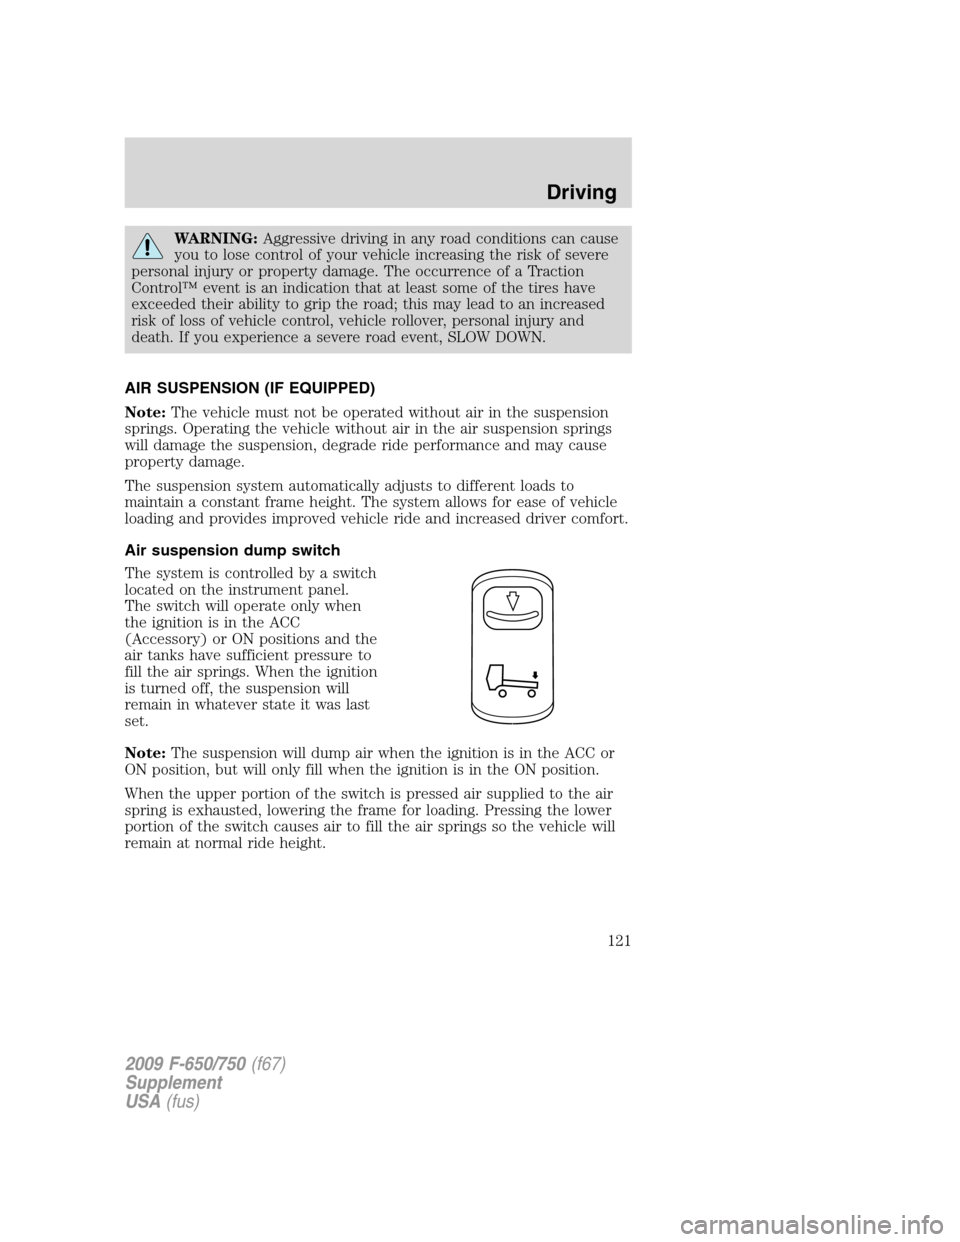
Air suspension dump switch
The system is controlled by a switch
located on the instrument panel.
The switch will operate only when
the ignition is in the ACC
(Accessory) or ON positions and the
air tanks have sufficient pressure to
fill the air springs. When the ignition
is turned off, the suspension will
remain in whatever state it was last
set.
Note:The suspension will dump air when the ignition is in the ACC or
ON position, but will only fill when the ignition is in the ON position.
When the upper portion of the switch is pressed air supplied to the air
spring is exhausted, lowering the frame for loading. Pressing the lower
portion of the switch causes air to fill the air springs so the vehicle will
remain at normal ride height.
2009 F-650/750(f67)
Supplement
USA(fus)
Driving
121