Page 115 of 419
Mirror mounted side turn signal indicator (if equipped)
When the vehicle turn signals are
activated, the outer portion of the
mirror housing will blink amber.
The turn signal feature can be seen
by other drivers who may approach
from the rear of the vehicle.
Clearance lamps (if equipped)
Illuminates when the headlamps or
parking lamps are switched on.
This provides additional visibility of
your vehicle to other drivers on the
road.
POWER ADJUSTABLE FOOT PEDALS (IF EQUIPPED)
The accelerator and brake pedal
should only be adjusted when the
vehicle is stopped and the gearshift
lever is in the P (Park) position.
Press and hold the rocker control to
adjust accelerator and brake pedal
toward you or away from you.
WARNING:Never adjust the accelerator and brake pedal with
feet on the pedals while the vehicle is moving.
2009 F-250/350/450/550(f23)
Owners Guide, 3rd Printing
USA(fus)
Driver Controls
115
Page 116 of 419

The accelerator and brake pedal positions are saved when doing a
memory set function and can be recalled along with the vehicle
personality features when a memory position is selected through the
remote entry transmitter, keyless entry keypad or memory switch on the
driver’s door (if equipped with memory feature). Refer toMemory
seats/power mirrors/adjustable pedalsin theSeating and Safety
Restraintschapter.
SPEED CONTROL (IF EQUIPPED)
With speed control set, you can maintain a set speed without keeping
your foot on the accelerator pedal.
WARNING:Do not use the speed control in heavy traffic or on
roads that are winding, slippery or unpaved.
Setting speed control
The controls for using your speed
control are located on the steering
wheel for your convenience.
1. Press the ON control and release
it.
2. Accelerate to the desired speed.
3. Press the SET + control and
release it.
4. Take your foot off the accelerator
pedal.
5. The indicator light
on the
instrument cluster will turn on.
2009 F-250/350/450/550(f23)
Owners Guide, 3rd Printing
USA(fus)
Driver Controls
116
Page 117 of 419
Note:
•Vehicle speed may vary momentarily when driving up and down a
steep hill.
•If the vehicle speed increases above the set speed on a downhill, you
may want to apply the brakes to reduce the speed.
•If the vehicle speed decreases more than 10 mph (16 km/h) below
your set speed on an uphill, your speed control will disengage.
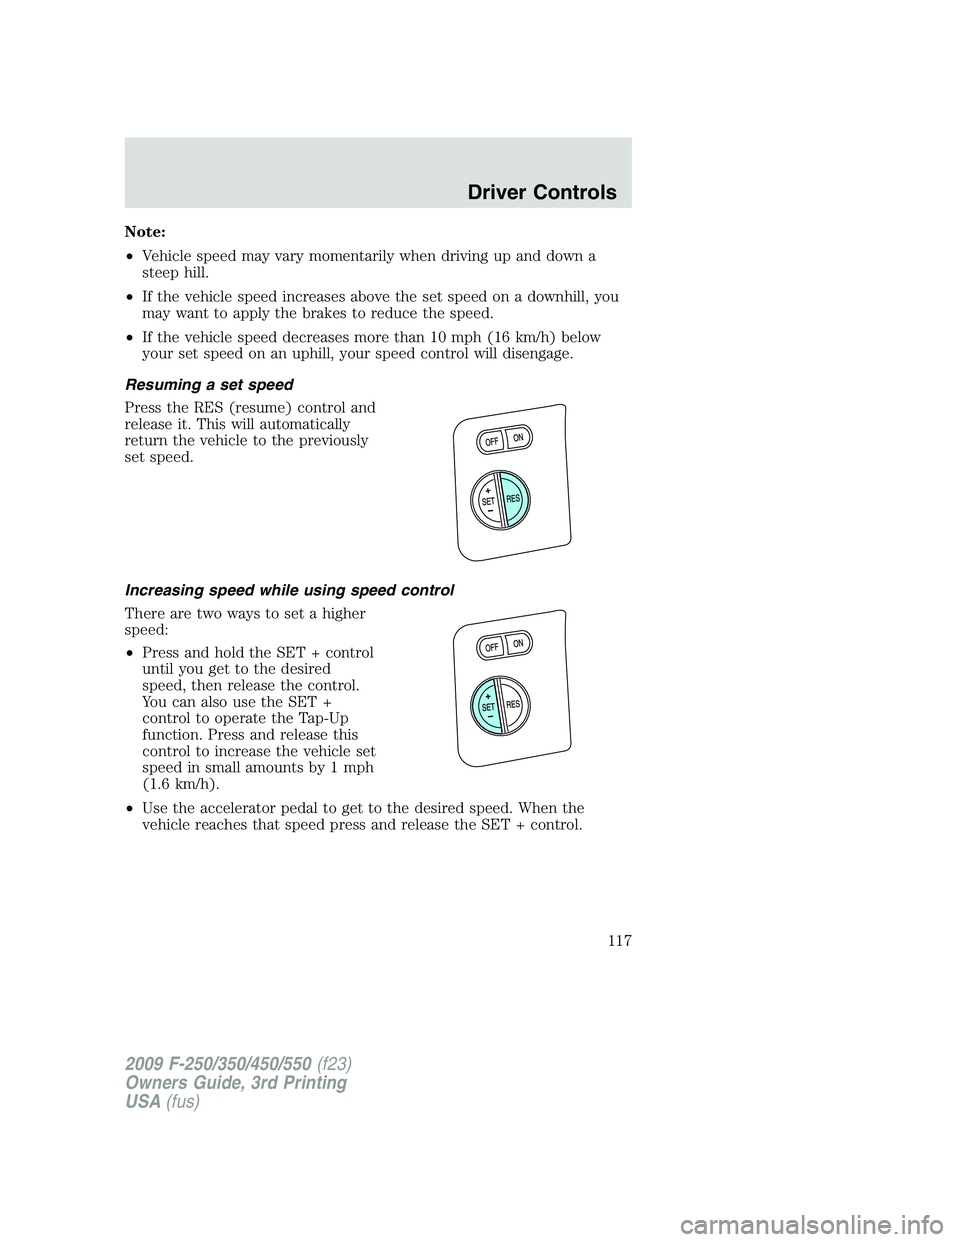
Resuming a set speed
Press the RES (resume) control and
release it. This will automatically
return the vehicle to the previously
set speed.
Increasing speed while using speed control
There are two ways to set a higher
speed:
•Press and hold the SET + control
until you get to the desired
speed, then release the control.
You can also use the SET +
control to operate the Tap-Up
function. Press and release this
control to increase the vehicle set
speed in small amounts by 1 mph
(1.6 km/h).
•Use the accelerator pedal to get to the desired speed. When the
vehicle reaches that speed press and release the SET + control.
2009 F-250/350/450/550(f23)
Owners Guide, 3rd Printing
USA(fus)
Driver Controls
117
Page 118 of 419
Reducing speed while using speed control
There are two ways to reduce a set
speed:
•Press and hold the SET - control
until you get to the desired
speed, then release the control.
You can also use the SET -
control to operate the Tap-Down
function. Press and release this
control to decrease the vehicle
set speed in small amounts by
1 mph (1.6 km/h).
•Depress the brake pedal until the desired vehicle speed is reached,
press the SET + control.
Turning off speed control
There are two ways to turn off the speed control:
•Depress the brake pedal. This will not erase your vehicle’s previously
set speed.
•Press the speed control OFF
control.
Note:When you turn off the speed
control or the ignition, your speed
control set speed memory is erased.
STEERING WHEEL CONTROLS (IF EQUIPPED)
These controls allow you to operate some radio and climate control
features.
2009 F-250/350/450/550(f23)
Owners Guide, 3rd Printing
USA(fus)
Driver Controls
118
Page 131 of 419
5. AIR FILTER (Diesel engine only)
6. DOOR AJAR
7. BRAKE SYSTEM
8. TBC GAIN = XX.X
NO TRAILER (if equipped and no trailer connected)
9. TBC GAIN = XX.X
OUTPUT = ////// (if equipped and trailer connected)
10. XX MILES TO E FUEL LEVEL XXX
Oil Life XXX% HOLD RESET = NEW
An oil change is required whenever indicated by the message center and
according to the recommended maintenance schedule. USE ONLY
RECOMMENDED ENGINE OILS.
To reset the oil monitoring system to 100% after each oil change
(approximately 7,500 miles [12,000 km] or six months) perform the
following:
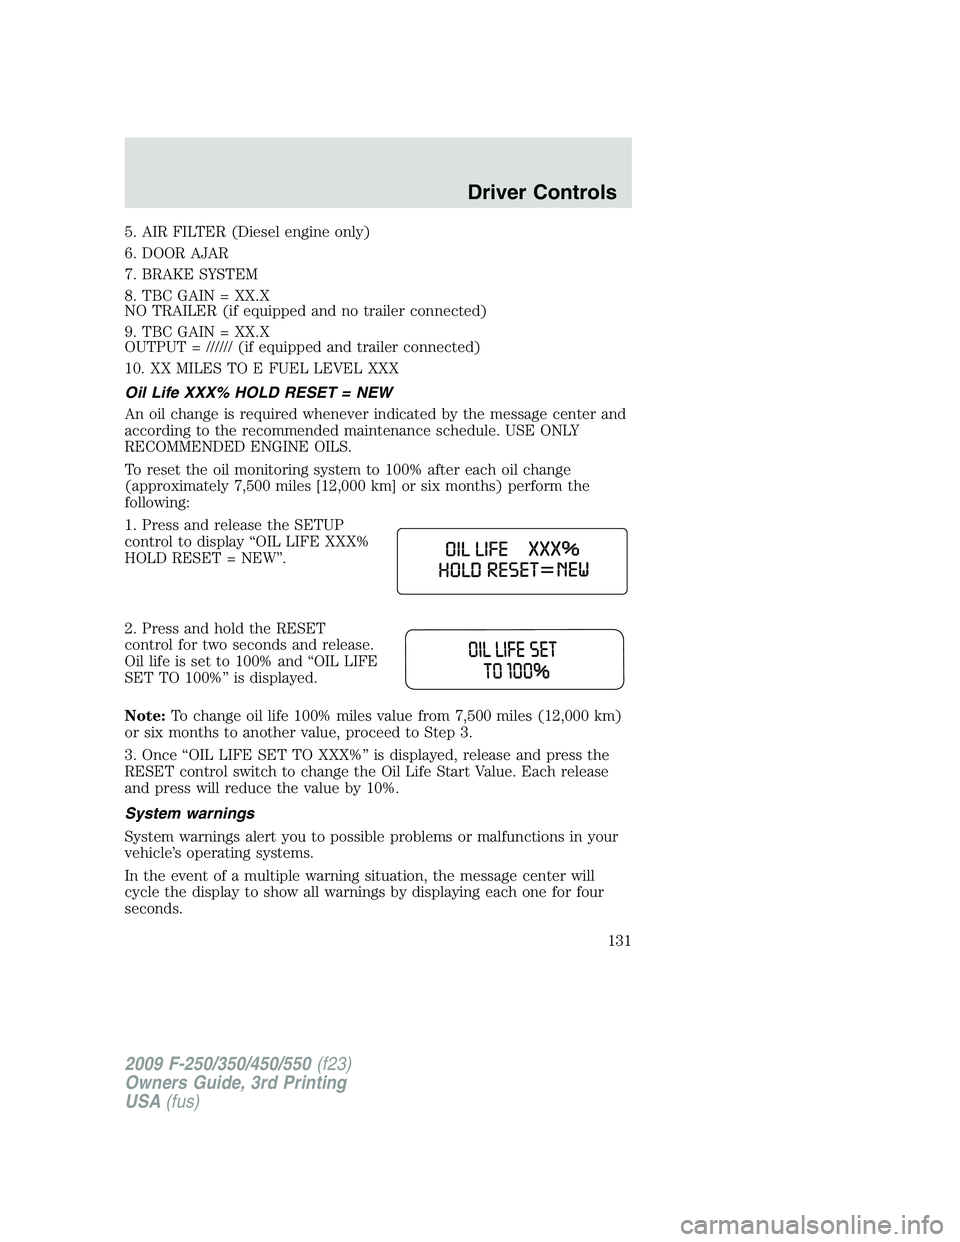
1. Press and release the SETUP
control to display “OIL LIFE XXX%
HOLD RESET = NEW”.
2. Press and hold the RESET
control for two seconds and release.
Oil life is set to 100% and “OIL LIFE
SET TO 100%” is displayed.
Note:To change oil life 100% miles value from 7,500 miles (12,000 km)
or six months to another value, proceed to Step 3.
3. Once “OIL LIFE SET TO XXX%” is displayed, release and press the
RESET control switch to change the Oil Life Start Value. Each release
and press will reduce the value by 10%.
System warnings
System warnings alert you to possible problems or malfunctions in your
vehicle’s operating systems.
In the event of a multiple warning situation, the message center will
cycle the display to show all warnings by displaying each one for four
seconds.
2009 F-250/350/450/550(f23)
Owners Guide, 3rd Printing
USA(fus)
Driver Controls
131
Page 132 of 419
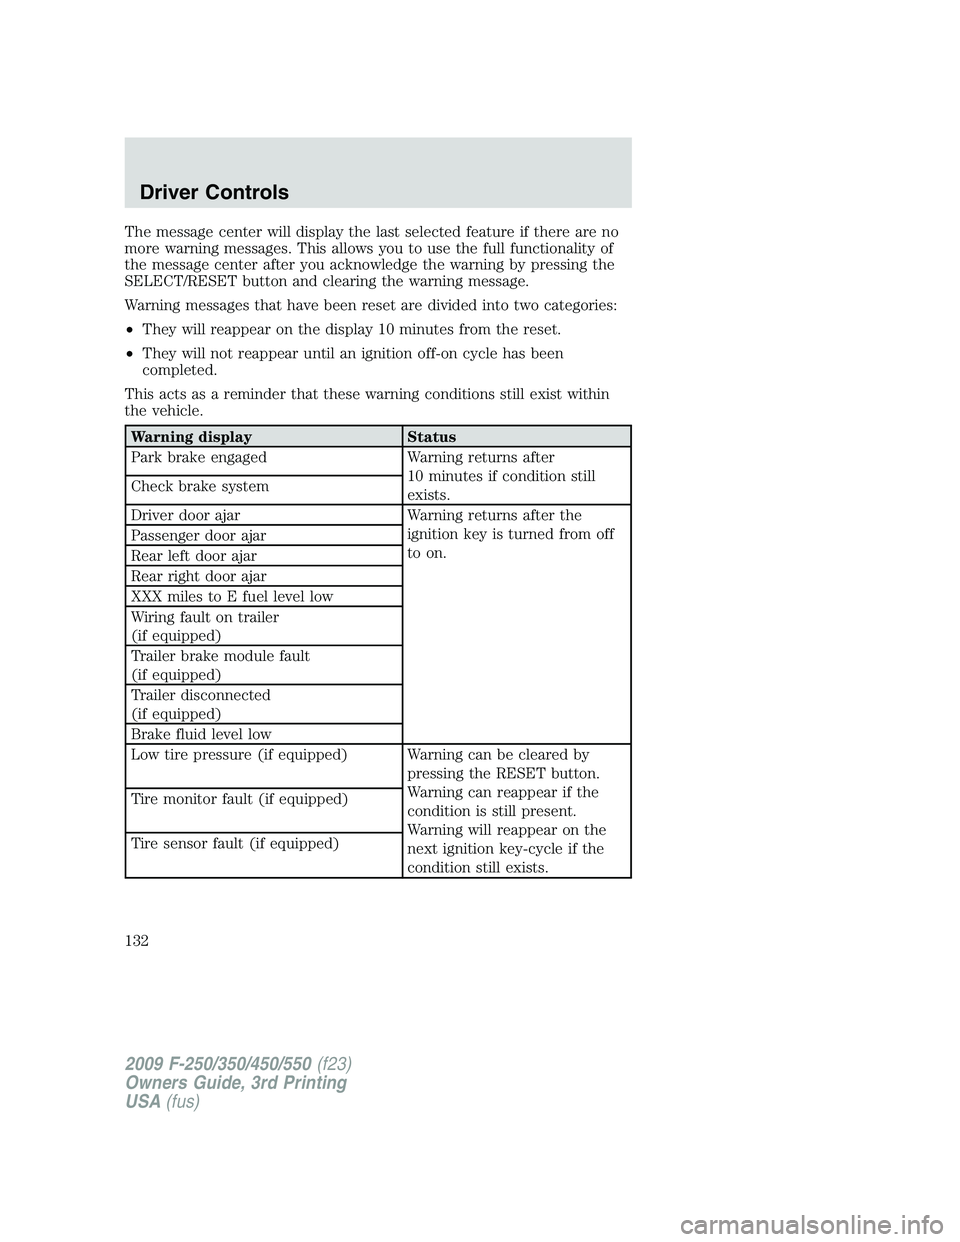
The message center will display the last selected feature if there are no
more warning messages. This allows you to use the full functionality of
the message center after you acknowledge the warning by pressing the
SELECT/RESET button and clearing the warning message.
Warning messages that have been reset are divided into two categories:
•They will reappear on the display 10 minutes from the reset.
•They will not reappear until an ignition off-on cycle has been
completed.
This acts as a reminder that these warning conditions still exist within
the vehicle.
Warning display Status
Park brake engaged Warning returns after
10 minutes if condition still
exists. Check brake system
Driver door ajar Warning returns after the
ignition key is turned from off
to on. Passenger door ajar
Rear left door ajar
Rear right door ajar
XXX miles to E fuel level low
Wiring fault on trailer
(if equipped)
Trailer brake module fault
(if equipped)
Trailer disconnected
(if equipped)
Brake fluid level low
Low tire pressure (if equipped) Warning can be cleared by
pressing the RESET button.
Warning can reappear if the
condition is still present.
Warning will reappear on the
next ignition key-cycle if the
condition still exists. Tire monitor fault (if equipped)
Tire sensor fault (if equipped)
2009 F-250/350/450/550(f23)
Owners Guide, 3rd Printing
USA(fus)
Driver Controls
132
Page 133 of 419
Warning display Status
Check air filter
(diesel engine only)
Drain water separator
(diesel engine only)
Stop safely now
(diesel engine only)
Engine warming please wait xx
(diesel engine only)
OK to drive
(diesel engine only)
Engine turns off in xx
(diesel engine only)
Engine turned off
(diesel engine only)
Drive to clean exhaust filter
(diesel engine only)
Cleaning exhaust filter
(diesel engine only)
Exhaust filter drive complete
(diesel engine only)
Oil life change soon
(gas engine only)
Oil change required
(gas engine only)
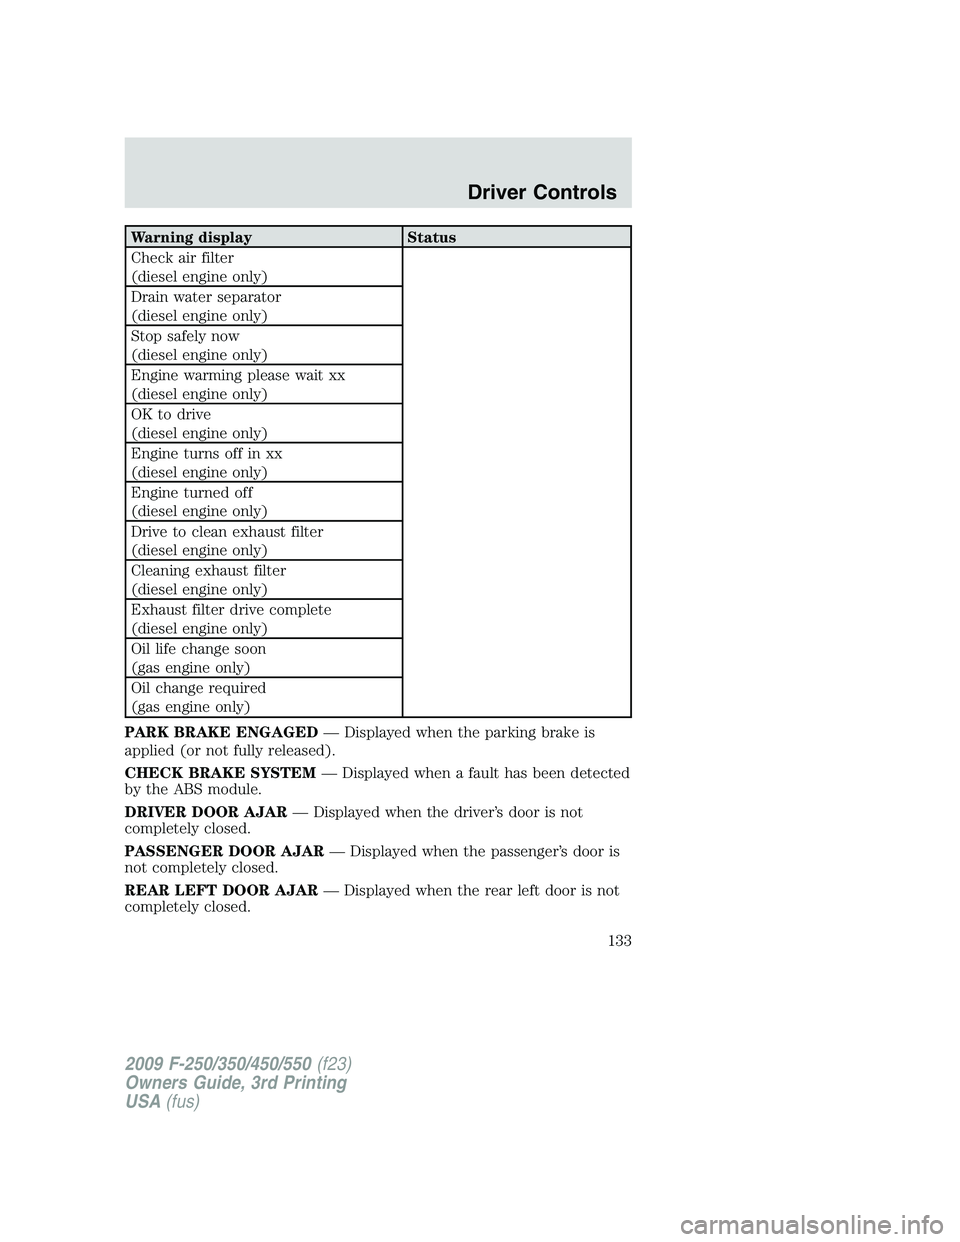
PARK BRAKE ENGAGED— Displayed when the parking brake is
applied (or not fully released).
CHECK BRAKE SYSTEM— Displayed when a fault has been detected
by the ABS module.
DRIVER DOOR AJAR— Displayed when the driver’s door is not
completely closed.
PASSENGER DOOR AJAR— Displayed when the passenger’s door is
not completely closed.
REAR LEFT DOOR AJAR— Displayed when the rear left door is not
completely closed.
2009 F-250/350/450/550(f23)
Owners Guide, 3rd Printing
USA(fus)
Driver Controls
133
Page 134 of 419
REAR RIGHT DOOR AJAR— Displayed when the rear right door is
not completely closed.
XXX MILES TO E FUEL LEVEL LOW— Displayed as an early
reminder of a low fuel condition.
WIRING FAULT ON TRAILER (if equipped)— Displayed if there
are certain faults in the vehicle wiring and trailer wiring/brake system.
Refer toTrailer towingin theTires, Wheels and Loadingchapter for
more information.
TRAILER BRAKE MODULE FAULT (if equipped)— Displayed and
accompanied by a single chime, in response to faults sensed by the TBC.
Refer toTrailer towingin theTires, Wheels and Loadingchapter for
more information.
TRAILER DISCONNECTED (if equipped)— Displayed when a
trailer connection becomes disconnected, either intentionally or
unintentionally, and has been sensed during a given ignition cycle. Refer
toTrailer towingin theTires, Wheels and Loadingchapter for more
information.
BRAKE FLUID LEVEL LOW— Indicates the brake fluid level is low
and the brake system should be inspected immediately. Refer toBrake
fluidin theMaintenance and Specificationschapter.
LOW TIRE PRESSURE (if equipped)— Displayed when one or more
tires on your vehicle have low tire pressure. Refer toInflating Your
Tiresin theTires, Wheels and Loadingchapter.
TIRE PRESSURE MONITOR FAULT (if equipped)— Displayed
when the Tire Pressure Monitoring System is malfunctioning. If the
warning stays on or continues to come on, contact your authorized
dealer as soon as possible.
TIRE PRESSURE SENSOR FAULT (if equipped)— Displayed when
a tire pressure sensor is malfunctioning, or your spare tire is in use. For
more information on how the system operates under these conditions,
refer toUnderstanding Your Tire Pressure Monitoring System
(TPMS)in theTires, Wheels and Loadingchapter. If the warning stays
on or continues to come on, contact your authorized dealer as soon as
possible.
CHECK AIR FILTER (Diesel engine only)— Refer toInstrument
Clusterin your6.0 and 6.4 Liter Power Stroke Direct Injection Turbo
Diesel Owner’s Guide Supplement.
2009 F-250/350/450/550(f23)
Owners Guide, 3rd Printing
USA(fus)
Driver Controls
134