Page 76 of 351

Without microphone
With microphone
The mirror will automatically return to the normal state whenever the
vehicle is placed in R (Reverse) to ensure a bright clear view when
backing up.
Do not block the sensors on the front and back of the interior
rear view mirror since this may impair proper mirror
performance.
Do not clean the housing or glass of any mirror with harsh
abrasives, fuel or other petroleum-based cleaning products.
EXTERIOR MIRRORS
Power side view mirrors
WARNING:Do not adjust the mirror while the vehicle is in
motion.
The ignition must be in the accessory or on position to adjust the power
side view mirrors.
To adjust your mirrors:
1. Rotate the control clockwise to
adjust the right mirror and rotate
the control counterclockwise to
adjust the left mirror.
2. Move the control in the direction
you wish to tilt the mirror.
3. Return to the center position to lock mirrors in place.
2009 07+ Explorer Sport Trac(esp)
Owners Guide, 2nd Printing
USA(fus)
Driver Controls
76
Page 112 of 351
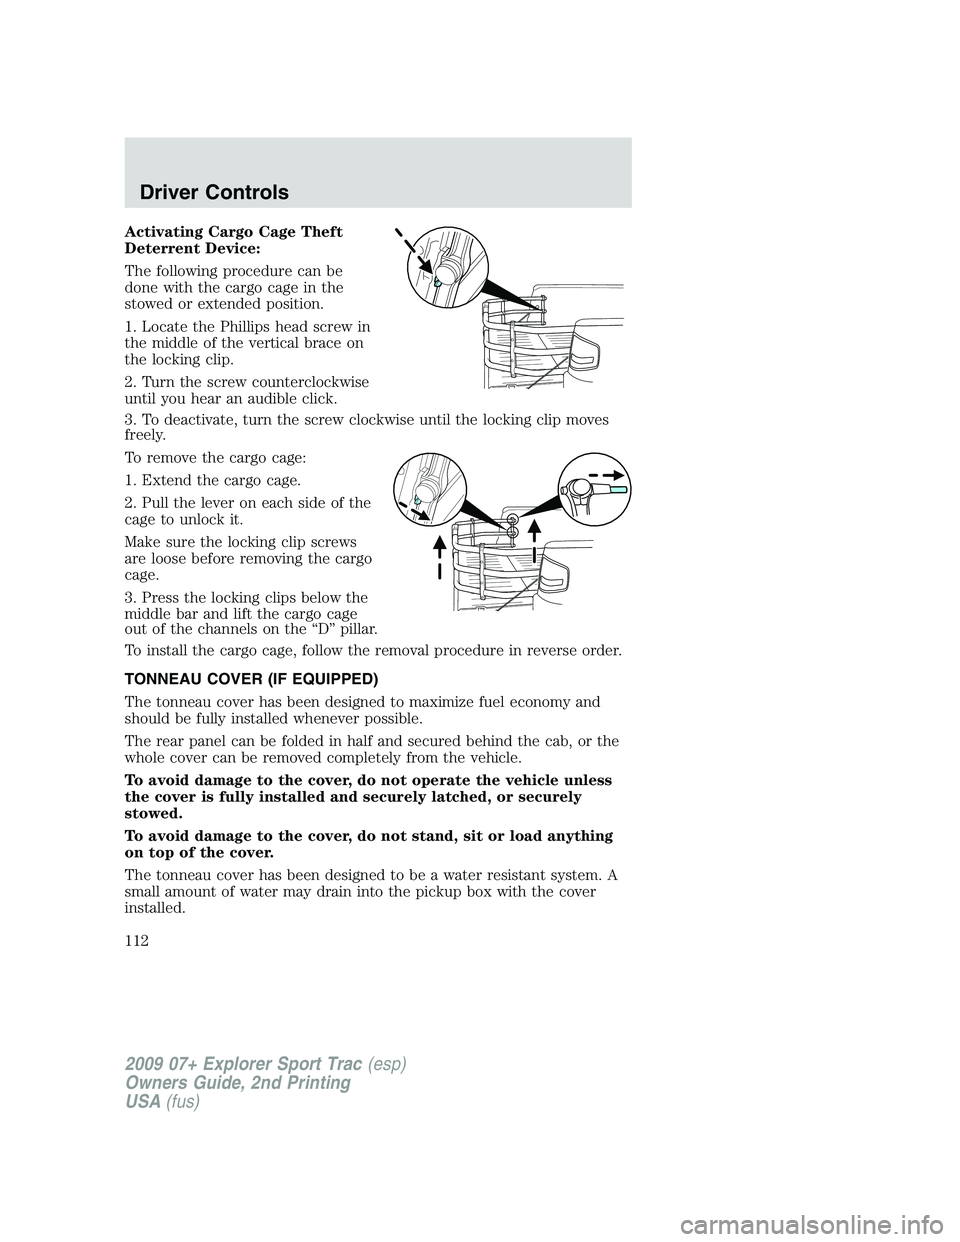
Activating Cargo Cage Theft
Deterrent Device:
The following procedure can be
done with the cargo cage in the
stowed or extended position.
1. Locate the Phillips head screw in
the middle of the vertical brace on
the locking clip.
2. Turn the screw counterclockwise
until you hear an audible click.
3. To deactivate, turn the screw clockwise until the locking clip moves
freely.
To remove the cargo cage:
1. Extend the cargo cage.
2. Pull the lever on each side of the
cage to unlock it.
Make sure the locking clip screws
are loose before removing the cargo
cage.
3. Press the locking clips below the
middle bar and lift the cargo cage
out of the channels on the “D” pillar.
To install the cargo cage, follow the removal procedure in reverse order.
TONNEAU COVER (IF EQUIPPED)
The tonneau cover has been designed to maximize fuel economy and
should be fully installed whenever possible.
The rear panel can be folded in half and secured behind the cab, or the
whole cover can be removed completely from the vehicle.
To avoid damage to the cover, do not operate the vehicle unless
the cover is fully installed and securely latched, or securely
stowed.
To avoid damage to the cover, do not stand, sit or load anything
on top of the cover.
The tonneau cover has been designed to be a water resistant system. A
small amount of water may drain into the pickup box with the cover
installed.
2009 07+ Explorer Sport Trac(esp)
Owners Guide, 2nd Printing
USA(fus)
Driver Controls
112
Page 115 of 351
WARNING:Do not leave children, unreliable adults, or animals
unattended in the vehicle. On hot days, the temperature in the
pickup box can rise very quickly. Exposure of people or animals to
these high temperatures for even a short time can cause death or
serious heat-related injuries, including brain damage. Small children are
particularly at risk.
CARGO AREA FEATURES
Cargo management system
WARNING:Vehicles equipped with a cap, keep passengers and
pets out of the pickup box area when vehicle is running to
prevent exhaust fumes from being drawn into the vehicle. Exhaust
fumes contain carbon monoxide which can injure your lungs and cause
drowsiness and even death.
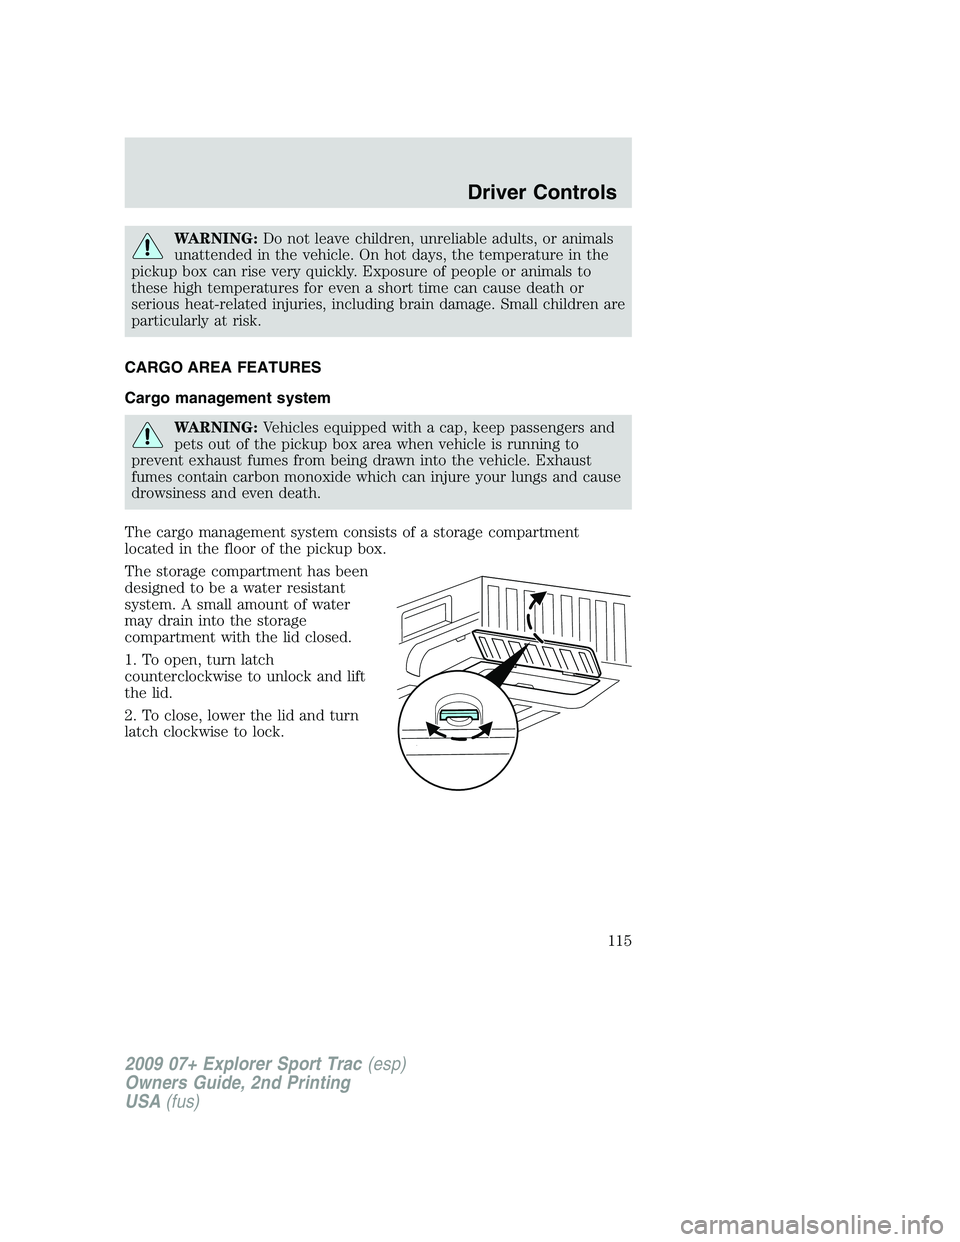
The cargo management system consists of a storage compartment
located in the floor of the pickup box.
The storage compartment has been
designed to be a water resistant
system. A small amount of water
may drain into the storage
compartment with the lid closed.
1. To open, turn latch
counterclockwise to unlock and lift
the lid.
2. To close, lower the lid and turn
latch clockwise to lock.
2009 07+ Explorer Sport Trac(esp)
Owners Guide, 2nd Printing
USA(fus)
Driver Controls
115
Page 116 of 351
Pickup box storage compartment
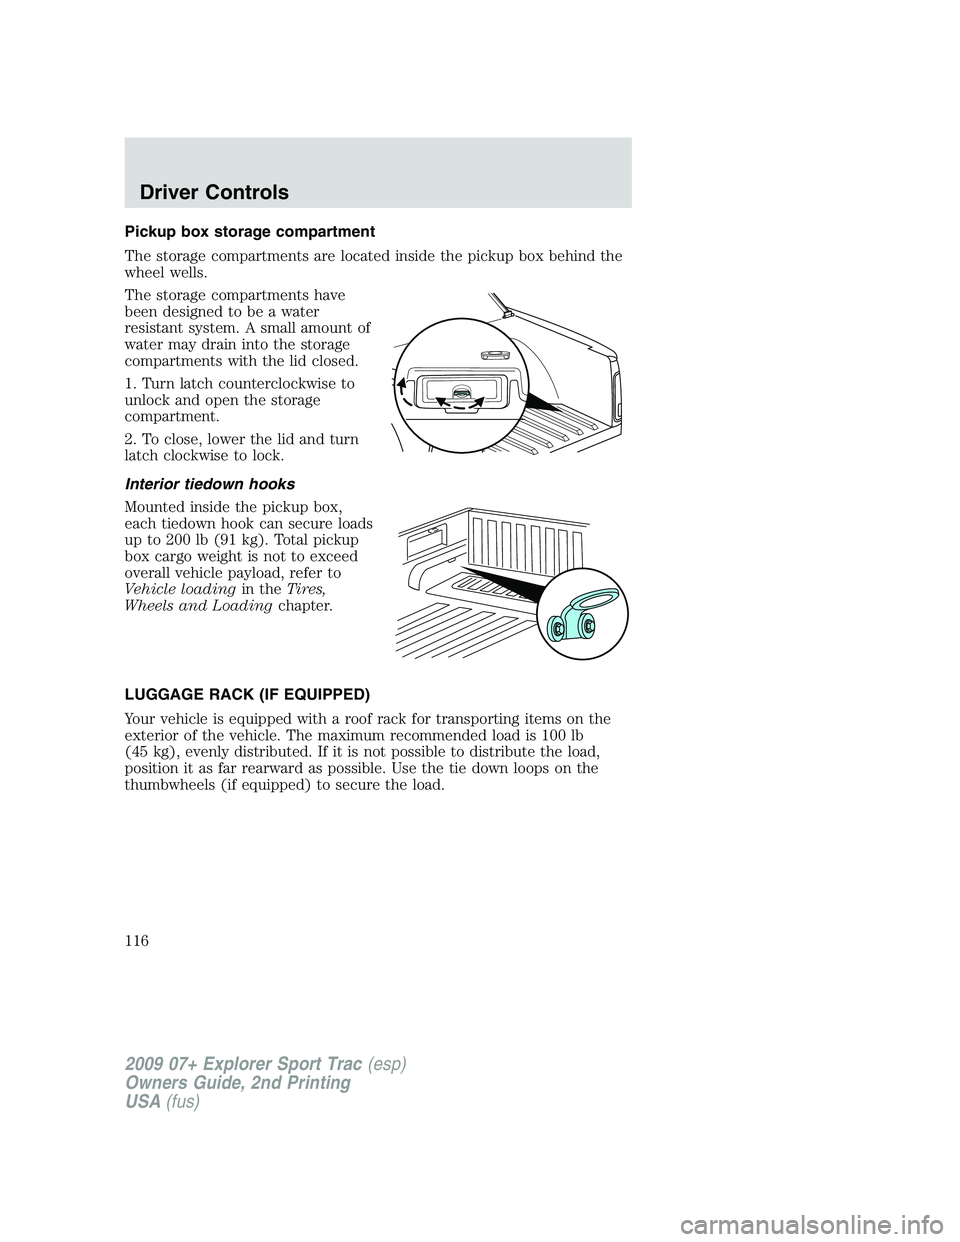
The storage compartments are located inside the pickup box behind the
wheel wells.
The storage compartments have
been designed to be a water
resistant system. A small amount of
water may drain into the storage
compartments with the lid closed.
1. Turn latch counterclockwise to
unlock and open the storage
compartment.
2. To close, lower the lid and turn
latch clockwise to lock.
Interior tiedown hooks
Mounted inside the pickup box,
each tiedown hook can secure loads
up to 200 lb (91 kg). Total pickup
box cargo weight is not to exceed
overall vehicle payload, refer to
Vehicle loadingin theTires,
Wheels and Loadingchapter.
LUGGAGE RACK (IF EQUIPPED)
Your vehicle is equipped with a roof rack for transporting items on the
exterior of the vehicle. The maximum recommended load is 100 lb
(45 kg), evenly distributed. If it is not possible to distribute the load,
position it as far rearward as possible. Use the tie down loops on the
thumbwheels (if equipped) to secure the load.
2009 07+ Explorer Sport Trac(esp)
Owners Guide, 2nd Printing
USA(fus)
Driver Controls
116
Page 117 of 351
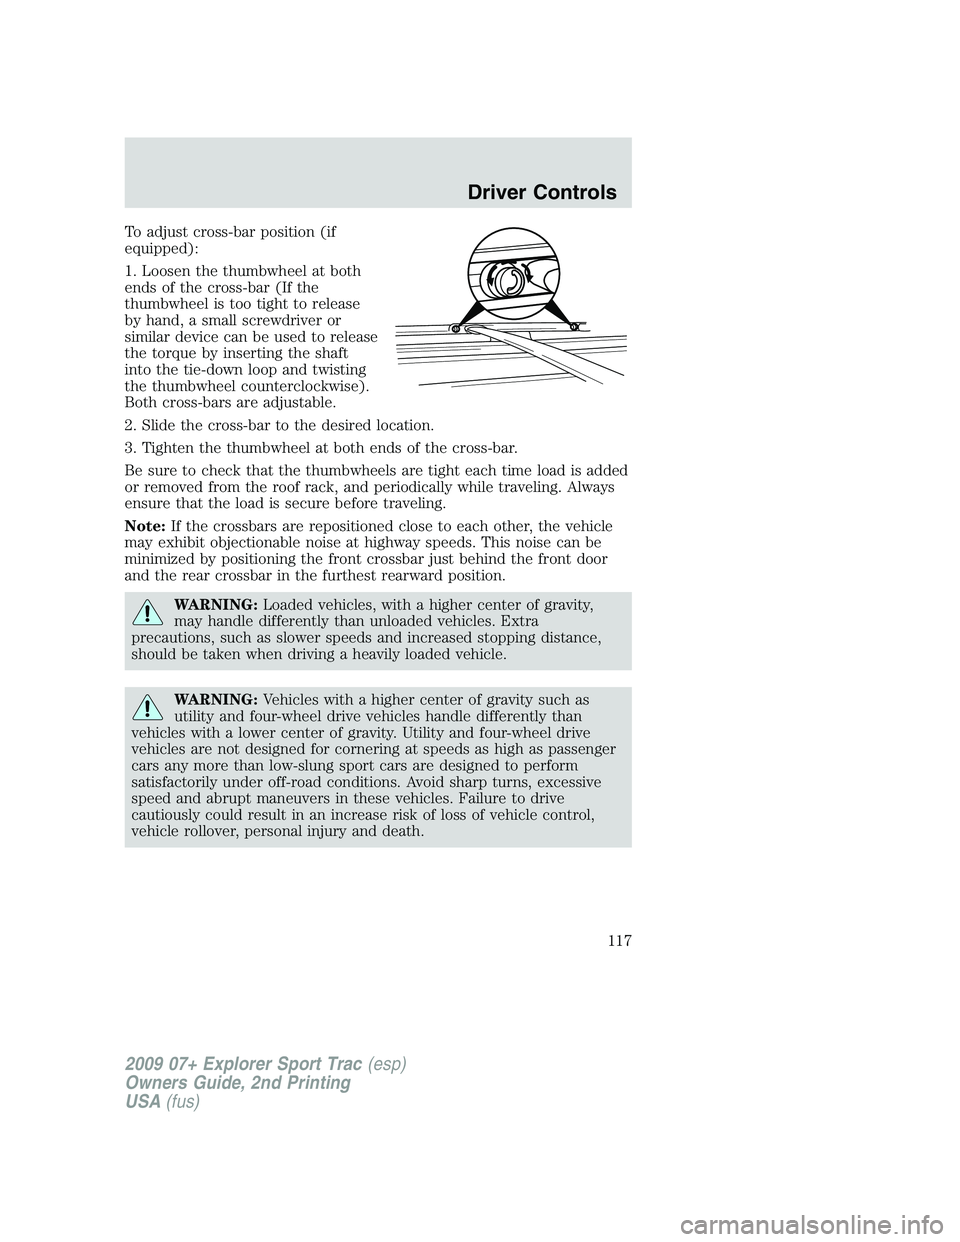
To adjust cross-bar position (if
equipped):
1. Loosen the thumbwheel at both
ends of the cross-bar (If the
thumbwheel is too tight to release
by hand, a small screwdriver or
similar device can be used to release
the torque by inserting the shaft
into the tie-down loop and twisting
the thumbwheel counterclockwise).
Both cross-bars are adjustable.
2. Slide the cross-bar to the desired location.
3. Tighten the thumbwheel at both ends of the cross-bar.
Be sure to check that the thumbwheels are tight each time load is added
or removed from the roof rack, and periodically while traveling. Always
ensure that the load is secure before traveling.
Note:If the crossbars are repositioned close to each other, the vehicle
may exhibit objectionable noise at highway speeds. This noise can be
minimized by positioning the front crossbar just behind the front door
and the rear crossbar in the furthest rearward position.
WARNING:Loaded vehicles, with a higher center of gravity,
may handle differently than unloaded vehicles. Extra
precautions, such as slower speeds and increased stopping distance,
should be taken when driving a heavily loaded vehicle.
WARNING:Vehicles with a higher center of gravity such as
utility and four-wheel drive vehicles handle differently than
vehicles with a lower center of gravity. Utility and four-wheel drive
vehicles are not designed for cornering at speeds as high as passenger
cars any more than low-slung sport cars are designed to perform
satisfactorily under off-road conditions. Avoid sharp turns, excessive
speed and abrupt maneuvers in these vehicles. Failure to drive
cautiously could result in an increase risk of loss of vehicle control,
vehicle rollover, personal injury and death.
2009 07+ Explorer Sport Trac(esp)
Owners Guide, 2nd Printing
USA(fus)
Driver Controls
117
Page 274 of 351
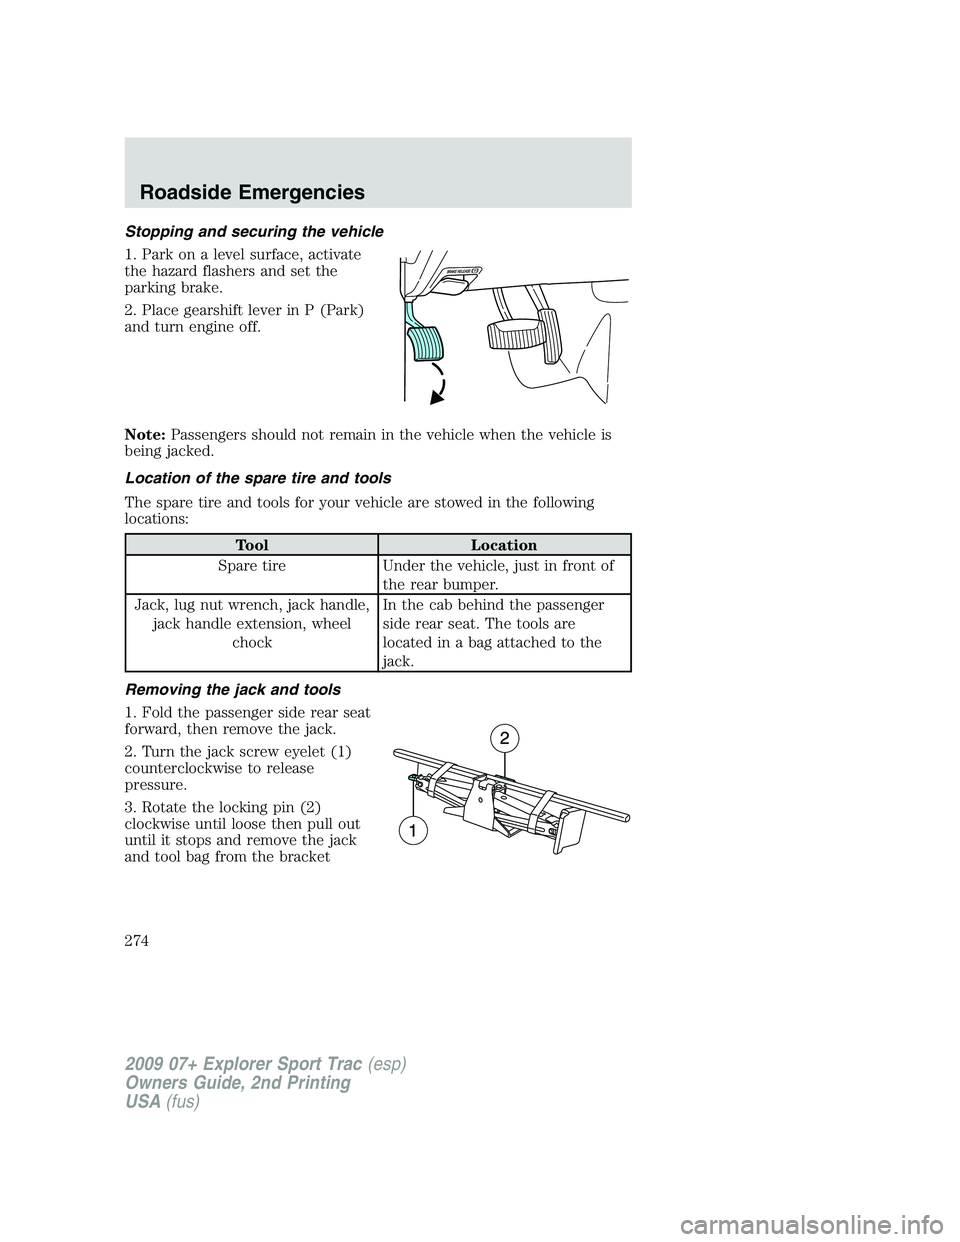
Stopping and securing the vehicle
1. Park on a level surface, activate
the hazard flashers and set the
parking brake.
2. Place gearshift lever in P (Park)
and turn engine off.
Note:Passengers should not remain in the vehicle when the vehicle is
being jacked.
Location of the spare tire and tools
The spare tire and tools for your vehicle are stowed in the following
locations:
Tool Location
Spare tire Under the vehicle, just in front of
the rear bumper.
Jack, lug nut wrench, jack handle,
jack handle extension, wheel
chockIn the cab behind the passenger
side rear seat. The tools are
located in a bag attached to the
jack.
Removing the jack and tools
1. Fold the passenger side rear seat
forward, then remove the jack.
2. Turn the jack screw eyelet (1)
counterclockwise to release
pressure.
3. Rotate the locking pin (2)
clockwise until loose then pull out
until it stops and remove the jack
and tool bag from the bracket
2009 07+ Explorer Sport Trac(esp)
Owners Guide, 2nd Printing
USA(fus)
Roadside Emergencies
274
Page 275 of 351
4. Remove the chock and jack tools
from the provided bag and rotate
the wrench socket out from the
handle.
Removing the spare tire
1. Assemble the jack handle to the
lug wrench by sliding the square
end of the jack handle through the
plastic grommet on the lug nut
wrench and into the square hole on
the other side.
2. Insert the square end of the jack
handle extension into the rear
access hole located just above the
rear bumper and below the tailgate.
Forward motion will stop and
resistance to turning will be felt
when properly engaged.
3. Connect the jack handle to the
jack handle extension. Turn the
handle counterclockwise until the
tire is lowered to the ground and
the cable is slightly slack.
2009 07+ Explorer Sport Trac(esp)
Owners Guide, 2nd Printing
USA(fus)
Roadside Emergencies
275
Page 278 of 351
5. Position the jack according to the
illustrated guides and turn the jack
handle clockwise until the tire is a
maximum of 1 inch (25 mm) off the
ground.
WARNING:To lessen the
risk of personal injury, do
not put any part of your body
under the vehicle while changing a
tire. Do not start the engine when
your vehicle is on the jack. The
jack is only meant for changing
the tire.
•Never use the front or rear differential as a jacking point.
6. Remove the lug nuts with the lug wrench.
7. Replace the flat tire with the spare tire, making sure the valve stem is
facing outward. Reinstall the lug nuts, cone side in, until the wheel is
snug against the hub. Do not fully tighten the lug nuts until the wheel
has been lowered.
8. Lower the wheel by turning the jack handle counterclockwise.
2009 07+ Explorer Sport Trac(esp)
Owners Guide, 2nd Printing
USA(fus)
Roadside Emergencies
278