Page 43 of 407

moving. Also, the portable music player should be stored in a secure
location, such as the center console or the glove box, when the vehicle is
in motion. The audio extension cable must be long enough to allow the
portable music player to be safely stored while the vehicle is in motion.
USB port (if equipped)
WARNING:Driving while distracted can result in loss of vehicle
control, accident and injury. Ford strongly recommends that
drivers use extreme caution when using any device that may take their
focus off the road. The driver’s primary responsibility is the safe
operation of their vehicle. Only use cell phones and other devices not
essential to the driving task when it is safe to do so.
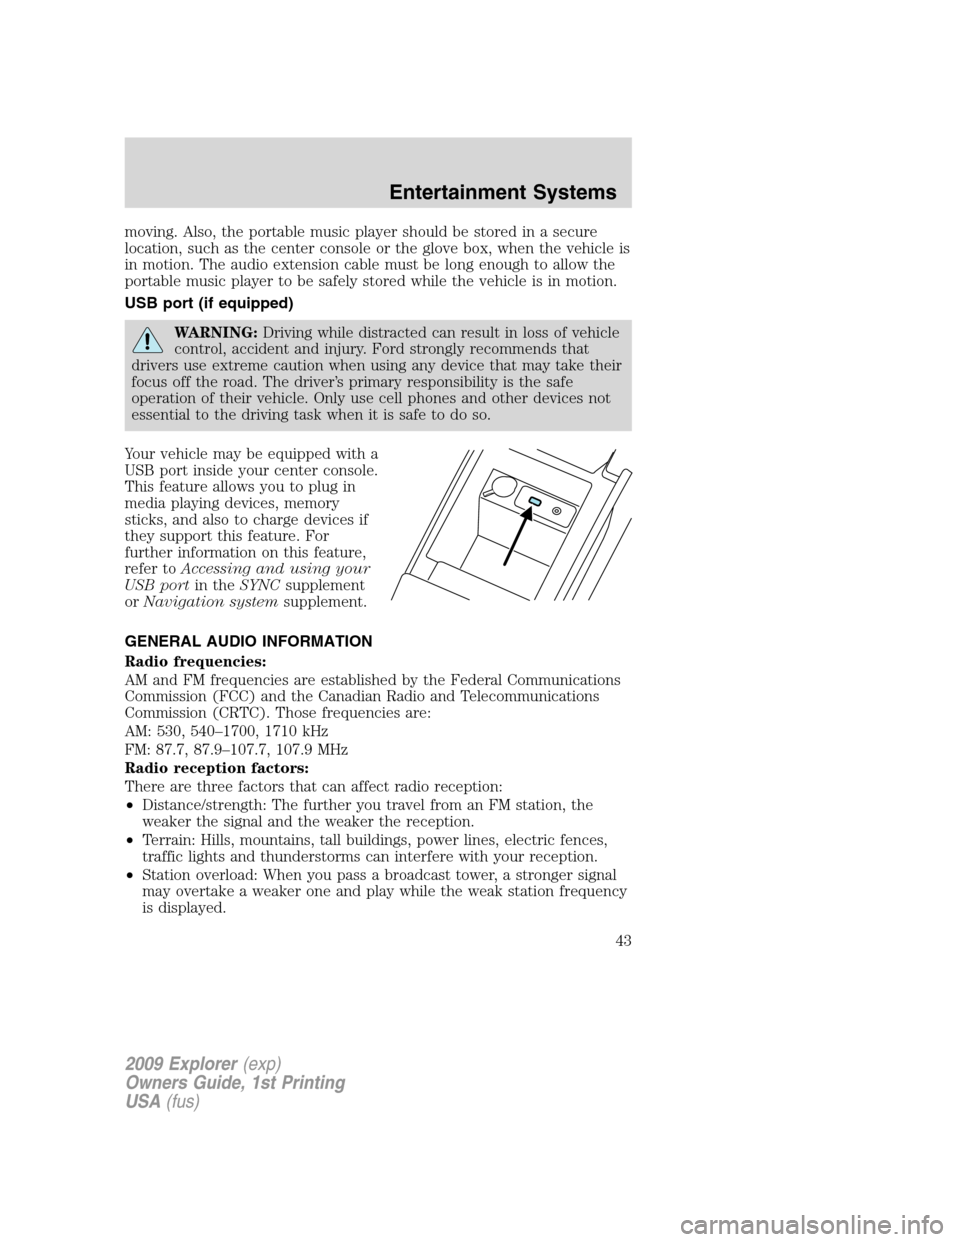
Your vehicle may be equipped with a
USB port inside your center console.
This feature allows you to plug in
media playing devices, memory
sticks, and also to charge devices if
they support this feature. For
further information on this feature,
refer toAccessing and using your
USB portin theSYNCsupplement
orNavigation systemsupplement.
GENERAL AUDIO INFORMATION
Radio frequencies:
AM and FM frequencies are established by the Federal Communications
Commission (FCC) and the Canadian Radio and Telecommunications
Commission (CRTC). Those frequencies are:
AM: 530, 540–1700, 1710 kHz
FM: 87.7, 87.9–107.7, 107.9 MHz
Radio reception factors:
There are three factors that can affect radio reception:
•Distance/strength: The further you travel from an FM station, the
weaker the signal and the weaker the reception.
•Terrain: Hills, mountains, tall buildings, power lines, electric fences,
traffic lights and thunderstorms can interfere with your reception.
•Station overload: When you pass a broadcast tower, a stronger signal
may overtake a weaker one and play while the weak station frequency
is displayed.
2009 Explorer(exp)
Owners Guide, 1st Printing
USA(fus)
Entertainment Systems
43
Page 54 of 407

1. Press the
headphone/speaker
/button
on the DVD player or press the 2
and 4 memory presets on the radio at the same time.
A green light will illuminate next to either the A or B Headphone Control
Button to indicate which channel is active (able to be controlled).
2. Press MEDIA to change the audio source of the active channel (A or
B). The audio source will be shown on the display. You may change the
active channel by pressing the A or B headphone control button.
Note:Channel A can access any possible media source (AM, FM1, FM2,
SAT (if equipped), CD, DVD, AUX). Channel B can only access DVD and
AUX sources.
Note:Refer toSingle play/Dual playfor more information.
Using the infrared (IR) wireless headphones:
1. Press the power control on the earpiece to turn the headphones ON.
2. Select Channel A or B for each set of wireless headphones by using
the A/B control on the ear piece.
3. Adjust the headphone volume using the rotary dial on the earpiece.
Using wired headphones (not included):
WARNING:Do not leave children unattended in the vehicle and
do not let children operate the system while unsupervised. If
wired headphones or auxiliary systems are used, children may become
entangled in the cords and seriously injure themselves.
1. Connect the wired headphones in to the headphone jacks on either
side of the DVD system. Each side is labeled
AorB. Headphones
plugged into jack A will listen to Channel A and headphones plugged into
jack B will listen to Channel B.
2. Adjust the volume levels using
the volume controls on the DVD
system.
2009 Explorer(exp)
Owners Guide, 1st Printing
USA(fus)
Entertainment Systems
54
Page 78 of 407

Safety information
WARNING:Driving while distracted can result in loss of vehicle
control, accident and injury. Ford strongly recommends that
drivers use extreme caution when using any device that may take their
focus off the road. The driver’s primary responsibility is the safe
operation of their vehicle. Only use cell phones and other devices not
essential to the driving task when it is safe to do so.
Read all of the safety and operating instructions before operating the
system and retain for future reference.
Do not attempt to service, repair or modify the Family Entertainment
System (FES). See your dealer.
Do not insert foreign objects into the DVD compartment.
WARNING:Do not leave children unattended in the vehicle and
do not let children operate the system while unsupervised. If
wired headphones or auxiliary systems are used, children may become
entangled in the cords and seriously injure themselves.
WARNING:The front glass on the liquid crystal display (LCD)
flip-down screen may break when hit with a hard surface. If the
glass breaks, do not touch the liquid crystalline material. In case of
contact with skin, wash immediately with soap and water.
WARNING:The driver should not attempt to operate any
function of the DVD system while the vehicle is in motion. Give
full attention to driving and to the road. Pull off the road in a safe
place before inserting or extracting DVDs from the system. A remote
control is included in the system to allow the rear seat occupants to
operate the FES functions without distracting the driver.
Do not expose the liquid crystal display (LCD) flip-down screen
to direct sunlight or intensive ultraviolet rays for extensive
periods of time. Ultraviolet rays deteriorate the liquid crystal.
Be sure to review User Manuals for video games and video game
equipment when used as auxiliary inputs for your Family Entertainment
System (FES).
2009 Explorer(exp)
Owners Guide, 1st Printing
USA(fus)
Entertainment Systems
78
Page 90 of 407

Fog lamp control
The fog lamps can be turned on
only when the headlamp control is
in the
,orposition and
the high beams are not turned on.
Pull headlamp control towards you
to turn fog lamps on. The fog lamp
indicator light below the
icon
will illuminate when fog lamp is
activated.
Push the headlamp control towards
the instrument panel to deactivate the fog lamps.
Daytime running lamps (DRL) (if equipped)
To activate DRL:
•the ignition must be in the on position and
•the headlamp control is in the
orposition
•the transmission is not in P (Park).
WARNING:Always remember to turn on your headlamps at
dusk or during inclement weather. The Daytime Running Light
(DRL) System does not activate your tail lamps and generally may not
provide adequate lighting during these conditions. Failure to activate
your headlamps under these conditions may result in a collision.
High beams
Push the lever toward the
instrument panel to activate. Pull
the lever towards you to deactivate.
2009 Explorer(exp)
Owners Guide, 1st Printing
USA(fus)
Lights
90
Page 96 of 407
Replacing headlamp bulbs
Do not touch the glass of a halogen bulb.
1. Turn off the headlamps and open
the hood.
2. Remove three screws from the
headlamp assembly and pull
headlamp forward.
3. Disconnect the electrical
connector.
4. Remove the old bulb by turning
counterclockwise and pull it out.
WARNING:Handle a halogen headlamp bulb carefully and keep
out of children’s reach. Grasp the bulb only by its plastic base
and do not touch the glass. The oil from your hand could cause the
bulb to break the next time the headlamps are operated.
Reverse steps to reinstall bulb(s).
2009 Explorer(exp)
Owners Guide, 1st Printing
USA(fus)
Lights
96
Page 104 of 407
WARNING:Use only soft cups in the cupholder. Hard objects
can injure you in a collision.
Rear center console features (if equipped)
The rear center console incorporates the following features:
•Utility compartment
•Cupholders
•Flip forward armrest to provide a
flat load floor
AUXILIARY POWER POINTS (12VDC)
Power outlets are designed for accessory plugs only. Do not insert
any other object in the power outlet as this will damage the
outlet and blow the fuse. Do not hang any type of accessory or
accessory bracket from the plug. Improper use of the power
outlet can cause damage not covered by your warranty.
The auxiliary power points are
located on the front of the center
console, inside the utility
compartment, and on the rear of the
console (accessible from the rear
seats).
Do not use the power point for
operating the cigarette lighter
element (if equipped).
2009 Explorer(exp)
Owners Guide, 1st Printing
USA(fus)
Driver Controls
104
Page 105 of 407

To prevent the fuse from being blown, do not use the power point(s)
over the vehicle capacity of 12 VDC/180W. If the power point or cigar
lighter socket is not working, a fuse may have blown. Refer toFuses and
relaysin theRoadside Emergencieschapter for information on
checking and replacing fuses.
To have full capacity usage of your power point, the engine is required to
be running to avoid unintentional discharge of the battery. To prevent
the battery from being discharged:
•do not use the power point longer than necessary when the engine is
not running,
•do not leave battery chargers, video game adapters, computers and
other devices plugged in overnight or when the vehicle is parked for
extended periods.
Always keep the power point caps closed when not being used.
Cigar/Cigarette lighter (if equipped)
Do not plug optional electrical accessories into the cigarette lighter
socket.
Do not hold the lighter in with your hand while it is heating, this will
damage the lighter element and socket. The lighter will be released from
its heating position when it is ready to be used.
Note:Improper use of the lighter can cause damage not covered by your
warranty, and can result in fire or serious injury.
POWER WINDOWS
WARNING:Do not leave children unattended in the vehicle and
do not let children play with the power windows. They may
seriously injure themselves.
WARNING:When closing the power windows, you should verify
they are free of obstructions and ensure that children and/or
pets are not in the proximity of the window openings.
2009 Explorer(exp)
Owners Guide, 1st Printing
USA(fus)
Driver Controls
105
Page 108 of 407

Automatic dimming interior rear view mirror (if equipped)
Your vehicle may be equipped with an interior rear view mirror which
has an auto-dimming function. The electronic day/night mirror will
change from the normal (high reflective) state to the non-glare
(darkened) state when bright lights (glare) reach the mirror. When the
mirror detects bright light from behind the vehicle, it will automatically
adjust (darken) to minimize glare.
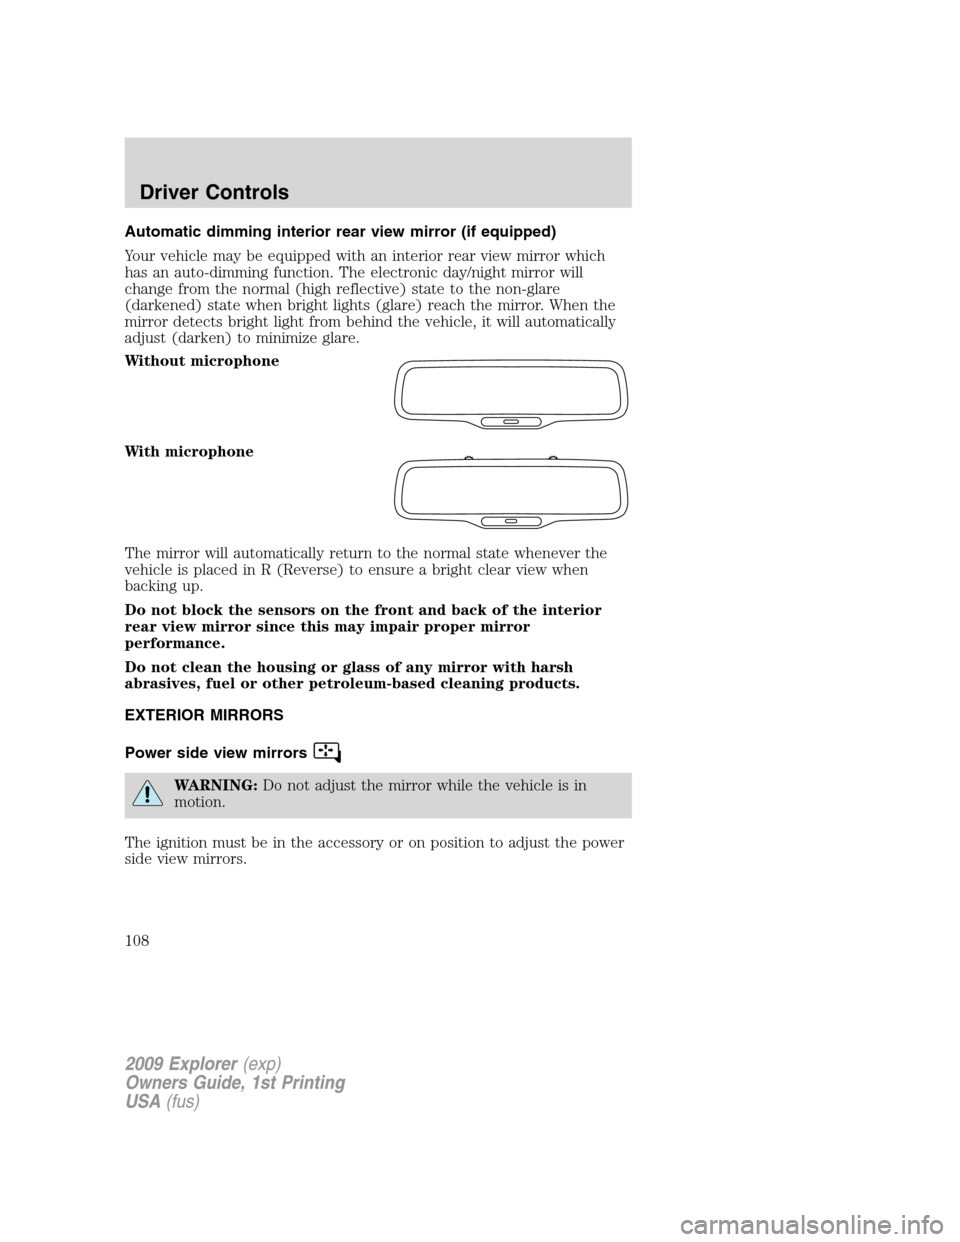
Without microphone
With microphone
The mirror will automatically return to the normal state whenever the
vehicle is placed in R (Reverse) to ensure a bright clear view when
backing up.
Do not block the sensors on the front and back of the interior
rear view mirror since this may impair proper mirror
performance.
Do not clean the housing or glass of any mirror with harsh
abrasives, fuel or other petroleum-based cleaning products.
EXTERIOR MIRRORS
Power side view mirrors
WARNING:Do not adjust the mirror while the vehicle is in
motion.
The ignition must be in the accessory or on position to adjust the power
side view mirrors.
2009 Explorer(exp)
Owners Guide, 1st Printing
USA(fus)
Driver Controls
108