Page 1 of 416
Introduction 4
Instrument Cluster 12
Warning lights and chimes 12
Gauges 17
Entertainment Systems 20
How to get going 20
AM/FM stereo with CD 24
AM/FM stereo with in-dash six CD 31
Auxiliary input jack (Line in) 39
USB port 41
Rear seat controls 42
Satellite radio information 48
Family entertainment system 51
Navigation system 83
SYNC 83
Climate Controls 84
Manual heating and air conditioning 84
Dual automatic temperature control 87
Rear window defroster 94
Lights 95
Headlamps 95
Turn signal control 99
Bulb replacement 101
Driver Controls 107
Windshield wiper/washer control 107
Steering wheel adjustment 108
Power windows 113
Mirrors 115
Speed control 121
Moon roof 126
Message center 131
Table of Contents
1
2009 Expedition(exd)
Owners Guide, 1st Printing
USA(fus)
Page 16 of 416

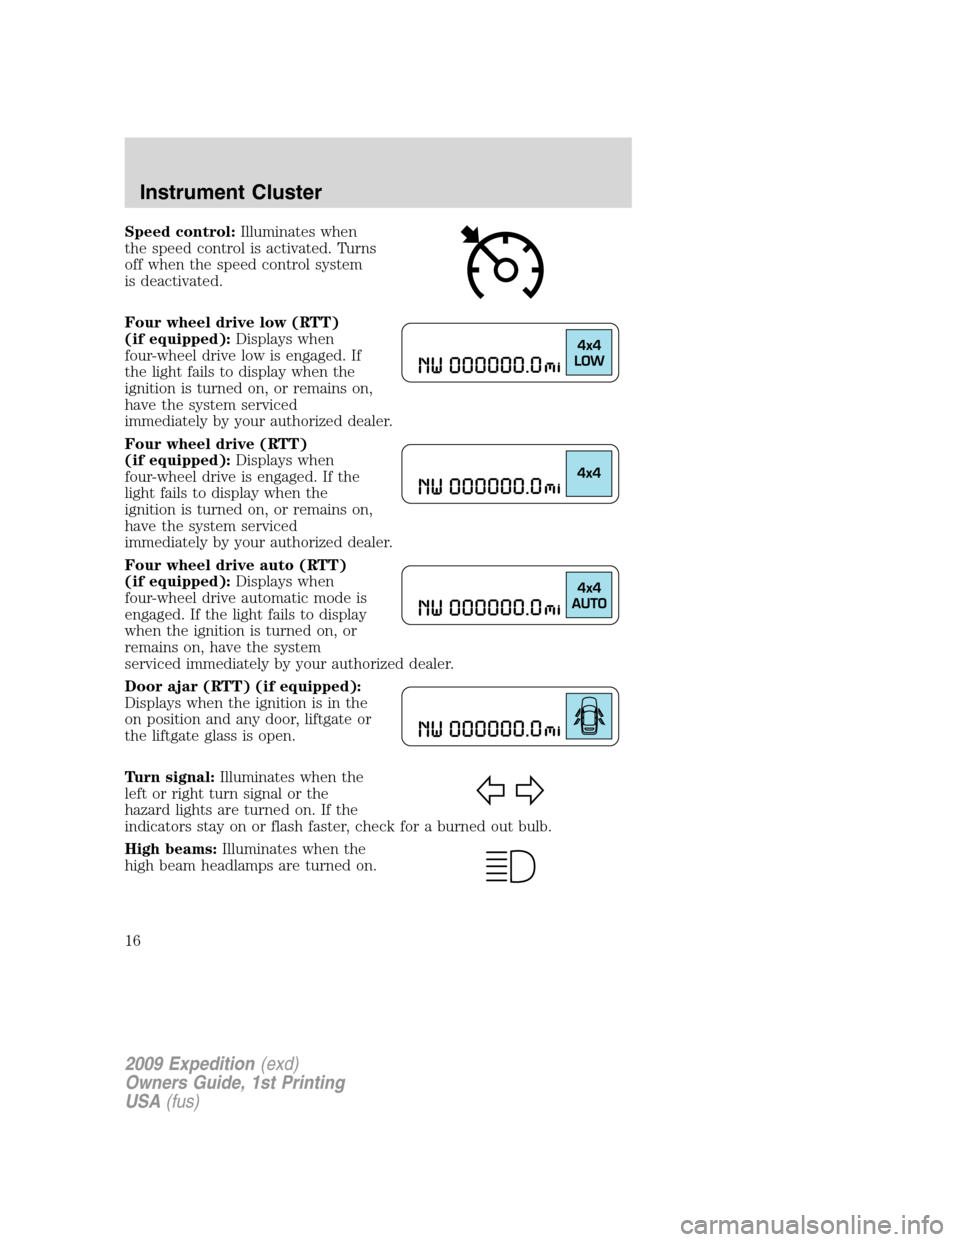
Speed control:Illuminates when
the speed control is activated. Turns
off when the speed control system
is deactivated.
Four wheel drive low (RTT)
(if equipped):Displays when
four-wheel drive low is engaged. If
the light fails to display when the
ignition is turned on, or remains on,
have the system serviced
immediately by your authorized dealer.
Four wheel drive (RTT)
(if equipped):Displays when
four-wheel drive is engaged. If the
light fails to display when the
ignition is turned on, or remains on,
have the system serviced
immediately by your authorized dealer.
Four wheel drive auto (RTT)
(if equipped):Displays when
four-wheel drive automatic mode is
engaged. If the light fails to display
when the ignition is turned on, or
remains on, have the system
serviced immediately by your authorized dealer.
Door ajar (RTT) (if equipped):
Displays when the ignition is in the
on position and any door, liftgate or
the liftgate glass is open.
Turn signal:Illuminates when the
left or right turn signal or the
hazard lights are turned on. If the
indicators stay on or flash faster, check for a burned out bulb.
High beams:Illuminates when the
high beam headlamps are turned on.
2009 Expedition(exd)
Owners Guide, 1st Printing
USA(fus)
Instrument Cluster
16
Page 102 of 416

Function Number of bulbs Trade number
Turn/tail/brake/sidemarker lamps 2 3157K or 4157K
Backup lamp 2 921
Approach/mirror turn signal
lamps (if equipped)2 906
Mirror approach lamps – non
turn signal (if equipped)2 *See your dealer
License lamp 2 168
Visor vanity lamp - Slide on rail
system (SOR)2 A6224PF
High-mount brake lamp 5 W5W
All replacement bulbs are clear in color except where noted.
To replace all instrument panel lights - see your authorized dealer
* To obtain replacement approach lamp assembly bulbs, see your
authorized dealer and reference Ford part no. 2L1Z–13B374–BB for the
passenger side mirror and 2L1Z–13B375–BB for the driver side mirror.
Replacing interior bulbs
Check the operation of all bulbs frequently.
Replacing exterior bulbs
Check the operation of all the bulbs frequently.
Replacing headlamp bulbs
1. Make sure that the headlamp control is in the off position.
2. Open the hood.
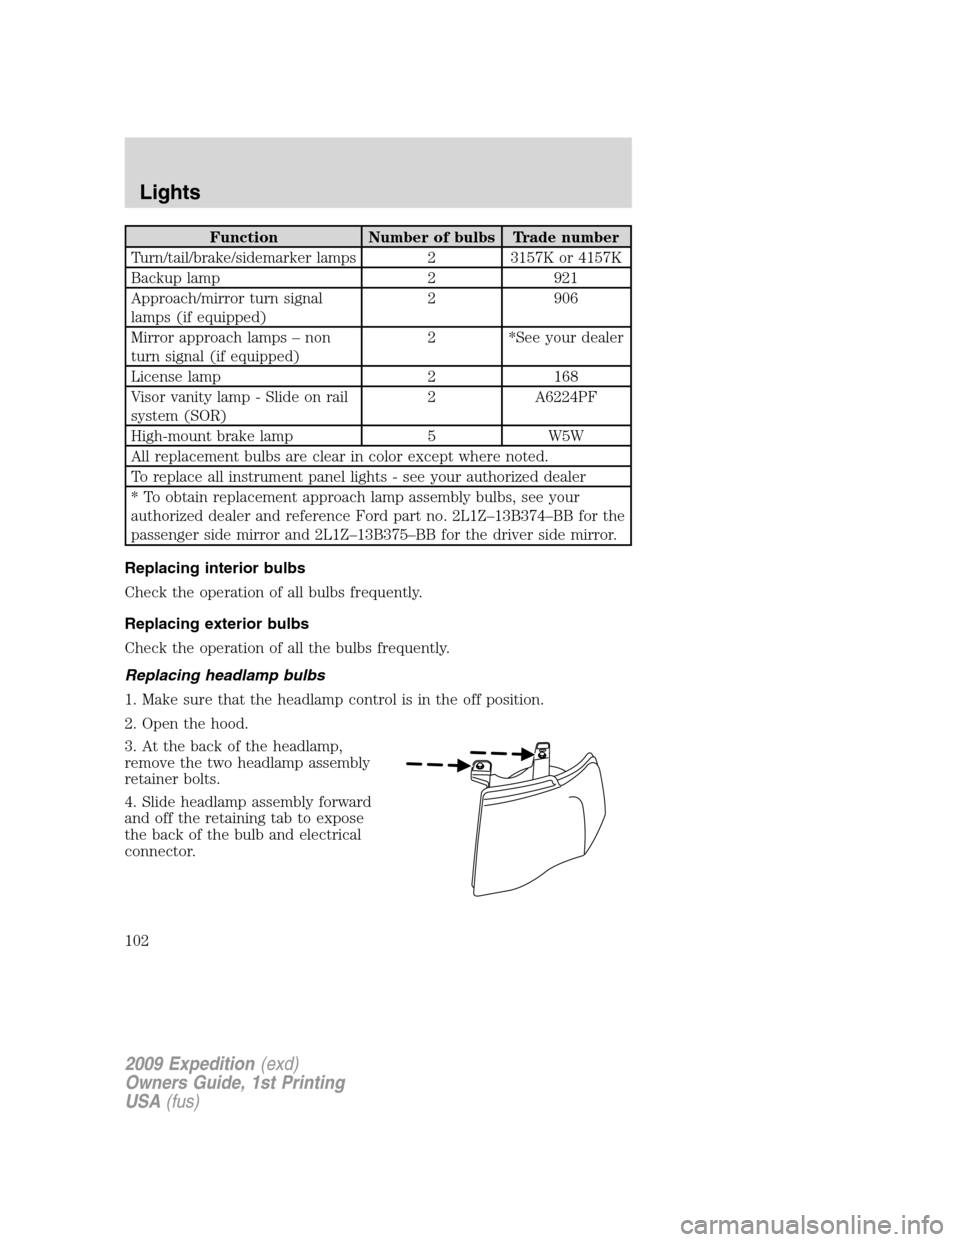
3. At the back of the headlamp,
remove the two headlamp assembly
retainer bolts.
4. Slide headlamp assembly forward
and off the retaining tab to expose
the back of the bulb and electrical
connector.
2009 Expedition(exd)
Owners Guide, 1st Printing
USA(fus)
Lights
102
Page 103 of 416

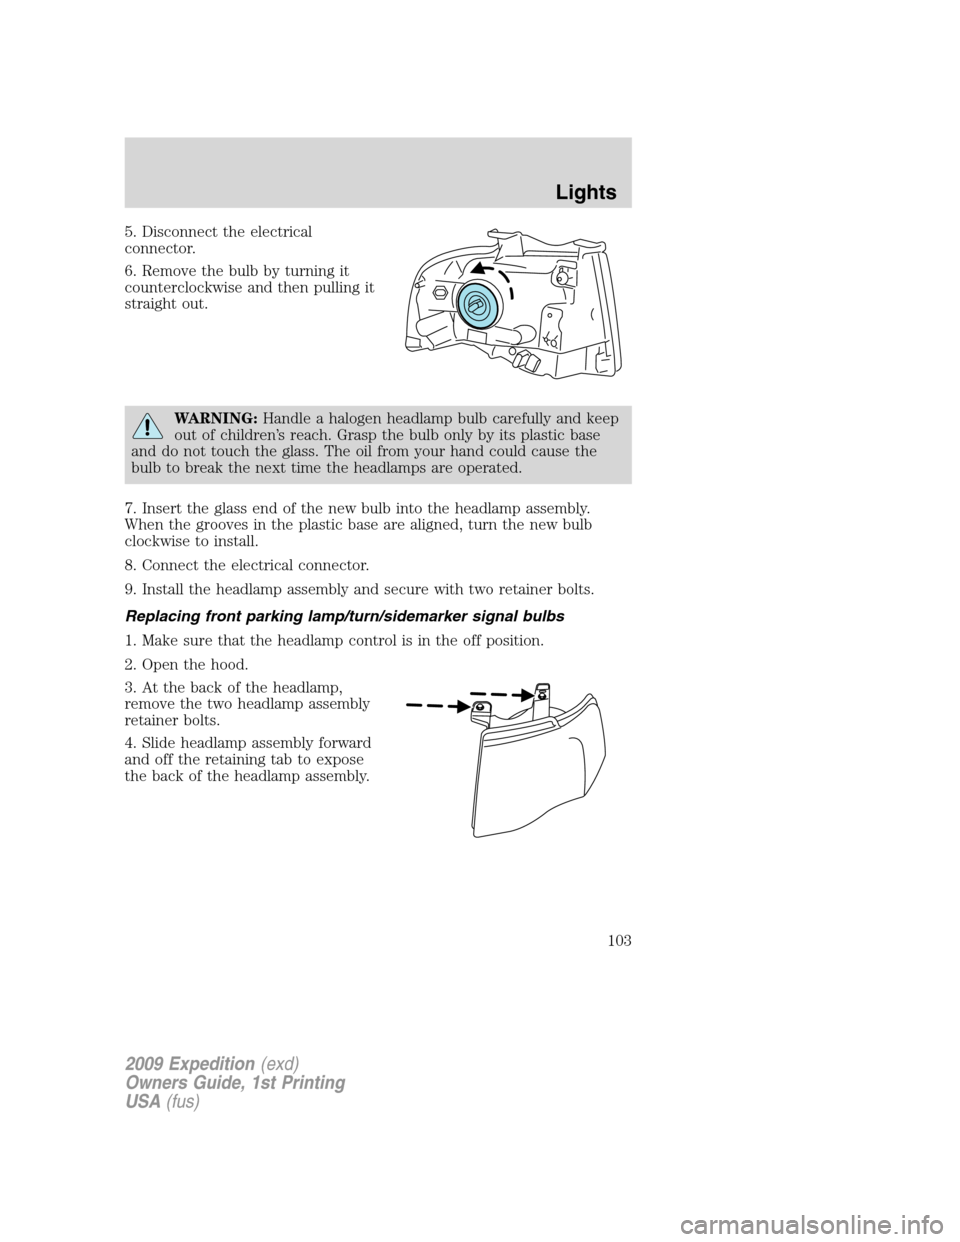
5. Disconnect the electrical
connector.
6. Remove the bulb by turning it
counterclockwise and then pulling it
straight out.
WARNING:Handle a halogen headlamp bulb carefully and keep
out of children’s reach. Grasp the bulb only by its plastic base
and do not touch the glass. The oil from your hand could cause the
bulb to break the next time the headlamps are operated.
7. Insert the glass end of the new bulb into the headlamp assembly.
When the grooves in the plastic base are aligned, turn the new bulb
clockwise to install.
8. Connect the electrical connector.
9. Install the headlamp assembly and secure with two retainer bolts.
Replacing front parking lamp/turn/sidemarker signal bulbs
1. Make sure that the headlamp control is in the off position.
2. Open the hood.
3. At the back of the headlamp,
remove the two headlamp assembly
retainer bolts.
4. Slide headlamp assembly forward
and off the retaining tab to expose
the back of the headlamp assembly.
2009 Expedition(exd)
Owners Guide, 1st Printing
USA(fus)
Lights
103
Page 106 of 416
Replacing license plate lamp bulb
The license plate bulbs are located in the license plate housing assembly
on the liftgate. To change the license plate bulbs:
1. Make sure the headlamp switch is
in the off position.
2. Remove the license lamp screw
from the assembly.
3. Pull the lamp down and twist the
bulb socket counterclockwise.
Remove the bulb socket from the
lamp.
4. Pull out the old bulb and push in
the new bulb.
5. Install the bulb socket in the lamp assembly by turning it clockwise.
6. Install the lamp assembly and secure it with the retaining screw.
Replacing approach lamp/mirror turn signal bulbs (if equipped)
For bulb replacement, see your authorized dealer.
2009 Expedition(exd)
Owners Guide, 1st Printing
USA(fus)
Lights
106