Page 2 of 416
Locks and Security 163
Keys 163
Locks 165
Anti-theft system 178
Seating and Safety Restraints 184
Seating 184
Safety restraints 205
Airbags 218
Child restraints 228
Tires, Wheels and Loading 246
Tire information 248
Tire inflation 251
Tire Pressure Monitoring System (TPMS) 263
Vehicle loading 269
Trailer towing 275
Recreational towing 283
Driving 284
Starting 284
Brakes 290
Traction Control™/AdvanceTrac�293
Air suspension 298
Transmission operation 300
Reverse sensing system 306
Reverse camera 309
Roadside Emergencies 321
Getting roadside assistance 321
Hazard flasher switch 322
Fuel pump shut-off switch 323
Fuses and relays 324
Changing tires 331
Wheel lug nut torque 340
Jump starting 341
Wrecker towing 348
Table of Contents
2
2009 Expedition(exd)
Owners Guide, 1st Printing
USA(fus)
Page 7 of 416

Service Data Recording
Service data recorders in your vehicle are capable of collecting and
storing diagnostic information about your vehicle. This potentially
includes information about the performance or status of various systems
and modules in the vehicle, such as engine, throttle, steering or brake
systems. In order to properly diagnose and service your vehicle, Ford
Motor Company, Ford of Canada, and service and repair facilities may
access vehicle diagnostic information through a direct connection to your
vehicle when diagnosing or servicing your vehicle.
Event Data Recording
Other modules in your vehicle — event data recorders — are capable of
collecting and storing data during a crash or near crash event. The
recorded information may assist in the investigation of such an event.
The modules may record information about both the vehicle and the
occupants, potentially including information such as:
•how various systems in your vehicle were operating;
•whether or not the driver and passenger seatbelts were buckled;
•how far (if at all) the driver was depressing the accelerator and/or the
brake pedal;
•how fast the vehicle was traveling; and
•where the driver was positioning the steering wheel.
To access this information, special equipment must be directly connected
to the recording modules. Ford Motor Company and Ford of Canada do
not access event data recorder information without obtaining consent,
unless pursuant to court order or where required by law enforcement,
other government authorities or other third parties acting with lawful
authority. Other parties may seek to access the information
independently of Ford Motor Company and Ford of Canada.
2009 Expedition(exd)
Owners Guide, 1st Printing
USA(fus)
Introduction
7
Page 10 of 416
These are some of the symbols you may see on your vehicle.
Vehicle Symbol Glossary
Safety Alert
See Owner’s Guide
Fasten Safety BeltAirbag - Front
Airbag - SideChild Seat Lower
Anchor
Child Seat Tether
AnchorBrake System
Anti-Lock Brake SystemParking Brake System
Brake Fluid -
Non-Petroleum BasedParking Aid System
Stability Control SystemSpeed Control
Master Lighting SwitchHazard Warning Flasher
Fog Lamps-FrontFuse Compartment
Fuel Pump ResetWindshield Wash/Wipe
Windshield
Defrost/DemistRear Window
Defrost/Demist
2009 Expedition(exd)
Owners Guide, 1st Printing
USA(fus)
Introduction
10
Page 13 of 416

WARNING:Under engine misfire conditions, excessive exhaust
temperatures could damage the catalytic converter, the fuel
system, interior floor coverings or other vehicle components, possibly
causing a fire.
Powertrain malfunction/reduced
power (RTT) (if equipped):
Displays when the engine has
defaulted to a “limp-home”
operation. Report the fault to a
dealer at the earliest opportunity.
Brake system warning light:To
confirm the brake system warning
light is functional, it will
momentarily illuminate when the
ignition is turned to the on position
when the engine is not running, or in a position between on and start, or
by applying the parking brake when the ignition is turned to the on
position. If the brake system warning light does not illuminate at this
time, seek service immediately from your authorized dealer. Illumination
after releasing the parking brake indicates low brake fluid level and the
brake system should be inspected immediately by your authorized dealer.
WARNING:Driving a vehicle with the brake system warning
light on is dangerous. A significant decrease in braking
performance may occur. It will take you longer to stop the vehicle.
Have the vehicle checked by your authorized dealer. Driving extended
distances with the parking brake engaged can cause brake failure and
the risk of personal injury.
Anti-lock brake system:If the
ABS light stays illuminated or
continues to flash, a malfunction has
been detected, have the system
serviced immediately by your
authorized dealer. Normal braking is still functional unless the brake
warning light also is illuminated.
P!
BRAKE
ABS
2009 Expedition(exd)
Owners Guide, 1st Printing
USA(fus)
Instrument Cluster
13
Page 17 of 416

Key-in-ignition warning chime (if equipped):Sounds when the key
is left in the ignition in the off or accessory position and the driver’s door
is opened.
Headlamps on warning chime:Sounds when the headlamps or parking
lamps are on, the ignition is off (the key is not in the ignition) and the
driver’s door is opened.
Parking brake on warning chime:Sounds when the parking brake is
set, the engine is running and the vehicle is driven more than 3 mph
(5 km/h).
Turn signal chime:Sounds when the turn signal lever has been
activated to signal a turn and not turned off after the vehicle is driven
more than 1.5 miles (2.4 km).
Message center activation chime:Sounds when some warning
messages appear in the message center display for the first time.
Reverse warning chime (if equipped):Sounds when the vehicle is in
R (Reverse). Refer to theDrivingchapter for more information.
GAUGES
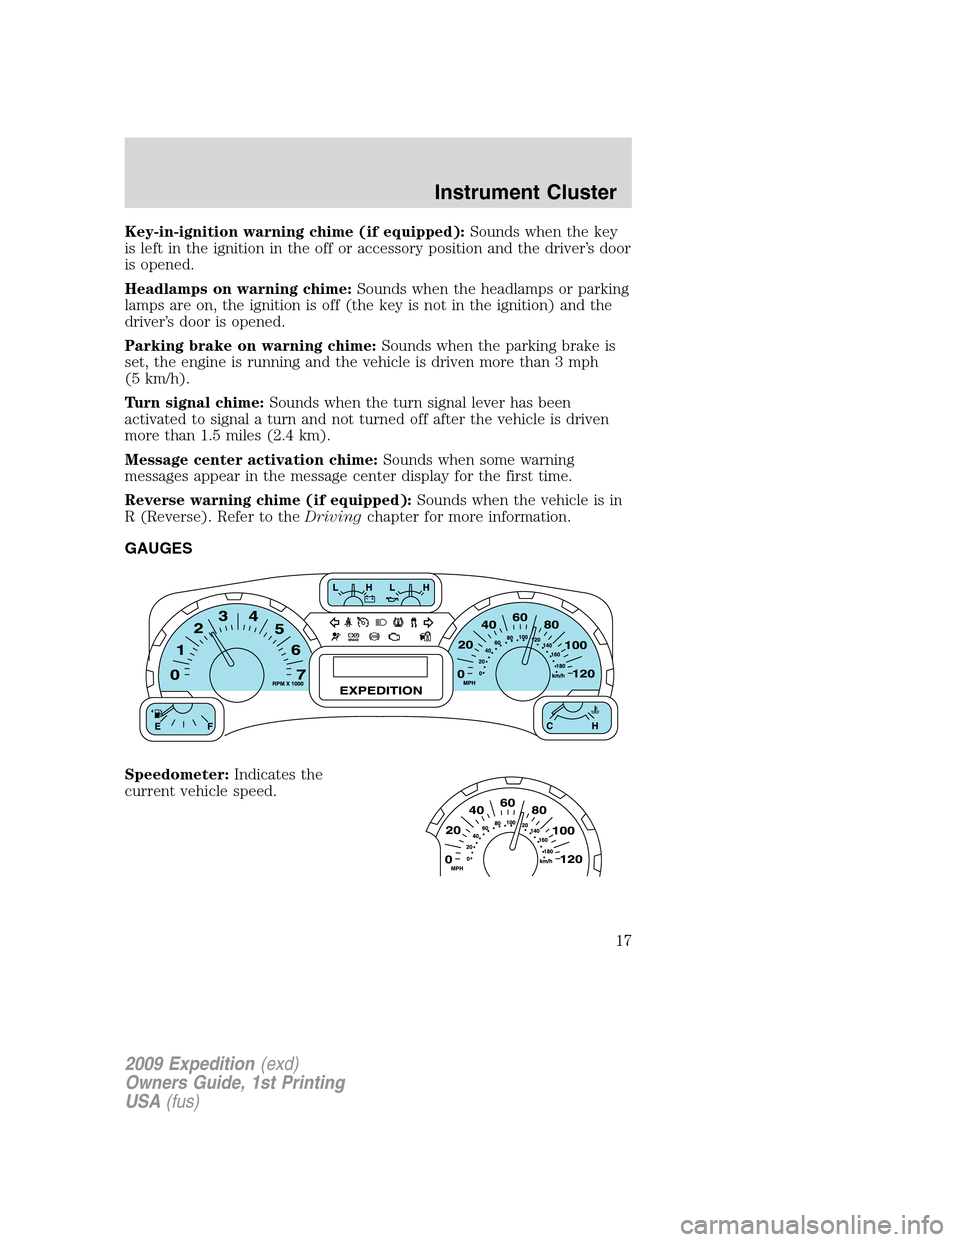
Speedometer:Indicates the
current vehicle speed.
2009 Expedition(exd)
Owners Guide, 1st Printing
USA(fus)
Instrument Cluster
17
Page 102 of 416

Function Number of bulbs Trade number
Turn/tail/brake/sidemarker lamps 2 3157K or 4157K
Backup lamp 2 921
Approach/mirror turn signal
lamps (if equipped)2 906
Mirror approach lamps – non
turn signal (if equipped)2 *See your dealer
License lamp 2 168
Visor vanity lamp - Slide on rail
system (SOR)2 A6224PF
High-mount brake lamp 5 W5W
All replacement bulbs are clear in color except where noted.
To replace all instrument panel lights - see your authorized dealer
* To obtain replacement approach lamp assembly bulbs, see your
authorized dealer and reference Ford part no. 2L1Z–13B374–BB for the
passenger side mirror and 2L1Z–13B375–BB for the driver side mirror.
Replacing interior bulbs
Check the operation of all bulbs frequently.
Replacing exterior bulbs
Check the operation of all the bulbs frequently.
Replacing headlamp bulbs
1. Make sure that the headlamp control is in the off position.
2. Open the hood.
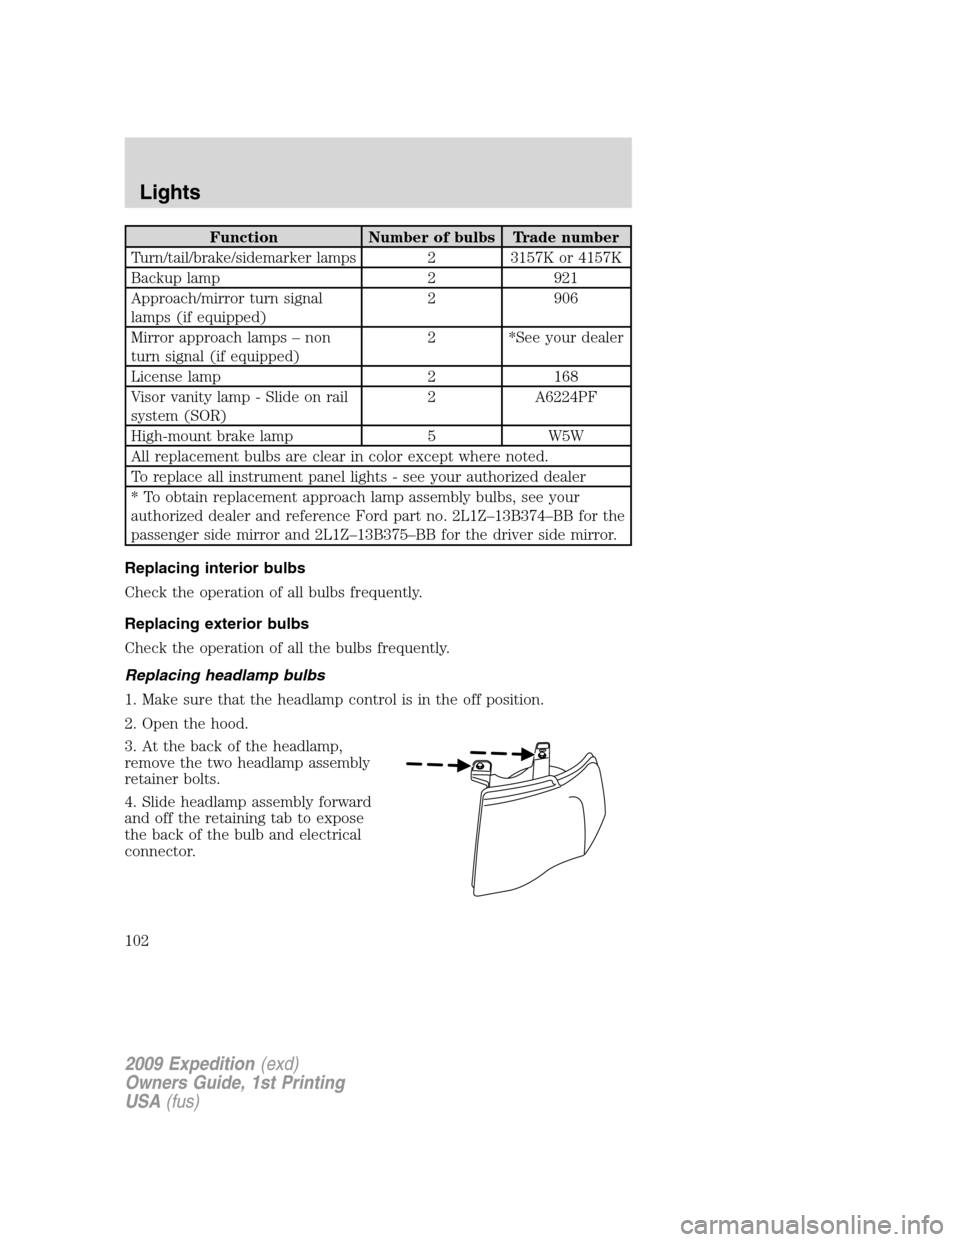
3. At the back of the headlamp,
remove the two headlamp assembly
retainer bolts.
4. Slide headlamp assembly forward
and off the retaining tab to expose
the back of the bulb and electrical
connector.
2009 Expedition(exd)
Owners Guide, 1st Printing
USA(fus)
Lights
102
Page 105 of 416
Replacing the high-mount brakelamp
To change the high-mount
brakelamp bulbs:
1. Remove the two screws holding
the lamp assembly in place.
2. Pull the lamp assembly straight
out.
3. Disconnect the wire harness.
4. Depress the four tabs that hold
the light assembly on, one at a time,
and pull the black bulb carrier away
from the lamp.
5. Pull the old bulb out and replace
with the new bulb.
6. Snap the black bulb carrier into
the lamp assembly.
7. Connect the wire harness.
8. Install the lamp assembly with
two screws.
Replacing fog lamp bulbs
1. From underneath the vehicle,
rotate the harness/bulb assembly
counterclockwise, to remove from
the fog lamp assembly.
2. Carefully disconnect the bulb
from the harness assembly via the
two snap clips.
Install the new bulb in reverse
order.
2009 Expedition(exd)
Owners Guide, 1st Printing
USA(fus)
Lights
105
Page 119 of 416
Signal indicator mirrors (if equipped)
When the turn signal is activated,
the lower portion of the mirror
housing will blink.
POWER ADJUSTABLE FOOT PEDALS (IF EQUIPPED)
The accelerator and brake pedal
should only be adjusted when the
vehicle is stopped and the gearshift
lever is in the P (Park) position.
Press and hold the rocker control to
adjust accelerator and brake pedal.
•Press the top of the control to
adjust the pedals toward you.
•Press the bottom of the control to adjust the pedals away from you.
WARNING:Never adjust the accelerator and brake pedal with
feet on the pedals while the vehicle is moving.
2009 Expedition(exd)
Owners Guide, 1st Printing
USA(fus)
Driver Controls
119