2009 FORD EXPEDITION air condition
[x] Cancel search: air conditionPage 97 of 416
WARNING:Always remember to turn on your headlamps at
dusk or during inclement weather. The Daytime Running Lamp
(DRL) system does not activate the tail lamps and generally may not
provide adequate lighting during these conditions. Failure to activate
your headlamps under these conditions may result in a collision.
PANEL DIMMER CONTROL
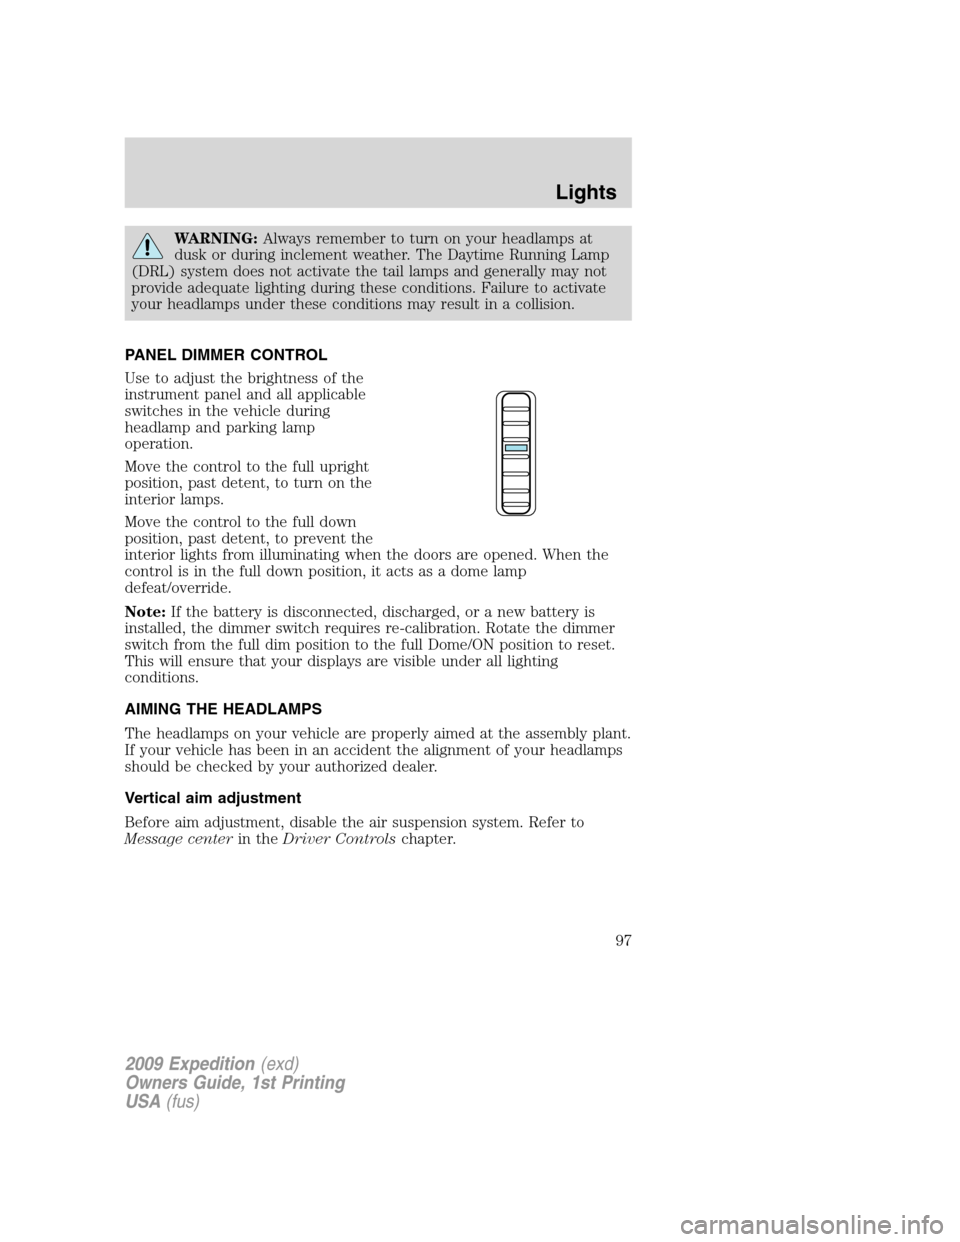
Use to adjust the brightness of the
instrument panel and all applicable
switches in the vehicle during
headlamp and parking lamp
operation.
Move the control to the full upright
position, past detent, to turn on the
interior lamps.
Move the control to the full down
position, past detent, to prevent the
interior lights from illuminating when the doors are opened. When the
control is in the full down position, it acts as a dome lamp
defeat/override.
Note:If the battery is disconnected, discharged, or a new battery is
installed, the dimmer switch requires re-calibration. Rotate the dimmer
switch from the full dim position to the full Dome/ON position to reset.
This will ensure that your displays are visible under all lighting
conditions.
AIMING THE HEADLAMPS
The headlamps on your vehicle are properly aimed at the assembly plant.
If your vehicle has been in an accident the alignment of your headlamps
should be checked by your authorized dealer.
Vertical aim adjustment
Before aim adjustment, disable the air suspension system. Refer to
Message centerin theDriver Controlschapter.
2009 Expedition(exd)
Owners Guide, 1st Printing
USA(fus)
Lights
97
Page 101 of 416
BULB REPLACEMENT
Headlamp condensation
Exterior lamps are vented to accommodate normal changes in pressure.
Condensation can be a natural by-product of this design. When moist air
enters the lamp assembly through the vents, condensation can occur
when the temperature is cold. When normal condensation occurs, a thin
film of mist can form on the interior of the lens. The thin mist eventually
clears and exits through the vents during normal operation. Clearing
time may take as long as 48 hours under dry weather conditions.
Examples of acceptable condensation are:
•Presence of thin mist (no streaks, drip marks or droplets)
•Fine mist covers less than 50% of the lens
Examples of unacceptable moisture (usually caused by a lamp water
leak) are:
•Water puddle inside the lamp
•Large water droplets, drip marks or streaks present on the interior of
the lens
Take your vehicle to dealer for service if any of the above conditions of
unacceptable moisture are present.
Using the right bulbs
Replacement bulbs are specified in the chart below. Headlamp bulbs
must be marked with an authorized “D.O.T.” for North America to ensure
lamp performance, light brightness and pattern and safe visibility. The
correct bulbs will not damage the lamp assembly or void the lamp
assembly warranty and will provide quality bulb burn time.
Function Number of bulbs Trade number
Headlamps (low and high-beam) 2 H13/9008
Front sidemarker 2 194
Front park/turn lamps 2 3157 A
Fog lamps 2 9145
Front row map lamps 2 W5W
Front row map/dome lamps 3 578
Rear cargo lamp 1 578
2nd row reading lamp 2 W5W
2009 Expedition(exd)
Owners Guide, 1st Printing
USA(fus)
Lights
101
Page 133 of 416
Outside air temperature (OAT)
The outside air temperature is
shown together with the compass
heading in the bottom row of the
message center display.
Compass display (if equipped)
The compass heading is displayed as one of N, NE, E, SE, S, SW, W and
NW in the message center display.
The compass reading may be affected when you drive near large
buildings, bridges, power lines and powerful broadcast antenna. Magnetic
or metallic objects placed in, on or near the vehicle may also affect
compass accuracy.
Usually, when something affects the compass readings, the compass will
correct itself after a few days of operating your vehicle in normal
conditions. If the compass still appears to be inaccurate, a manual
calibration may be necessary. Refer toCompass zone adjustment.
Most geographic areas (zones) have a magnetic north compass point that
varies slightly from the northerly direction on maps. This variation is up
to four degrees between adjacent zones and will become noticeable as
the vehicle crosses multiple zones. A correct zone setting will eliminate
this error. Refer toCompass calibration adjustment.
Compass zone adjustment (if equipped)
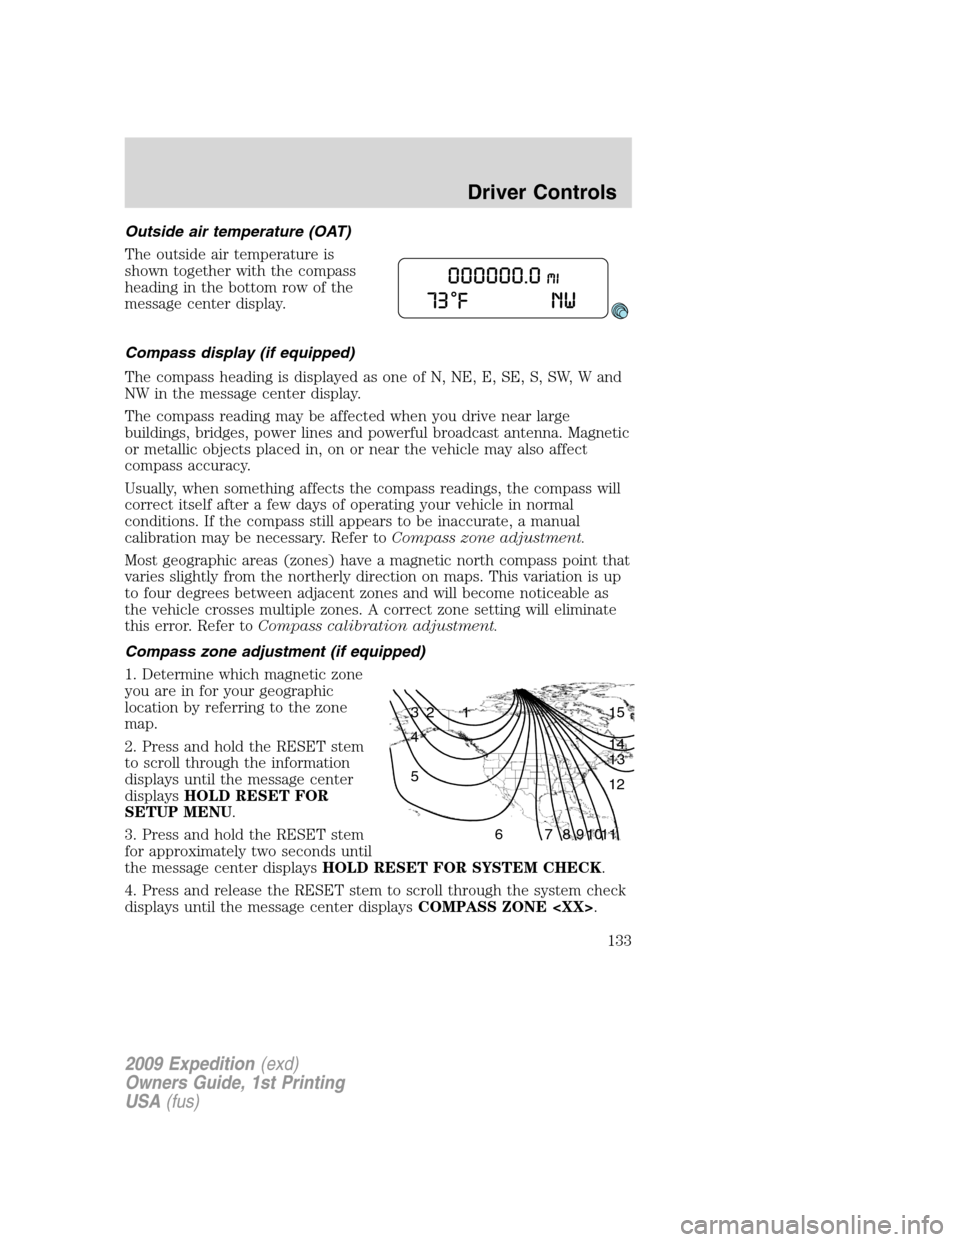
1. Determine which magnetic zone
you are in for your geographic
location by referring to the zone
map.
2. Press and hold the RESET stem
to scroll through the information
displays until the message center
displaysHOLD RESET FOR
SETUP MENU.
3. Press and hold the RESET stem
for approximately two seconds until
the message center displaysHOLD RESET FOR SYSTEM CHECK.
4. Press and release the RESET stem to scroll through the system check
displays until the message center displaysCOMPASS ZONE
1 2 3
4
5
6 7 8 9 101112 13 14 15
2009 Expedition(exd)
Owners Guide, 1st Printing
USA(fus)
Driver Controls
133
Page 141 of 416

XXX MILES TO E FUEL LEVEL LOW— Displayed as an early
reminder of a low fuel condition.
WASHER FLUID LEVEL LOW— Indicates the washer fluid reservoir
is less than one quarter full. Check the washer fluid level. Refer to
Windshield washer fluidin theMaintenance and Specifications
chapter.
OIL LIFE CHANGE SOON— Displayed when the engine oil life
remaining is 10% or less. When oil life left is between 10% and 0%, the
XX% OIL LIFE CHANGE SOON message will be displayed.
OIL CHANGE REQUIRED— Displayed when the oil life left reaches
0%, the OIL CHANGE REQUIRED message will be displayed.
OPTIONAL MESSAGE CENTER (IF EQUIPPED)
With the ignition in the on position,
the message center, located on your
instrument cluster, displays
important vehicle information
through a constant monitor of
vehicle systems.You may select
display features on the message center for a display of status preceded
by a brief indicator chime. The system will also notify you of potential
vehicle problems with a display of system warnings followed by a long
indicator chime.
Selectable features
Reset
Press this control to select and reset
functions shown in the INFO menu
and SETUP menu.
Info menu
This control displays the following
control displays:
•Odometer/Trip odometer
•Outside air temperature (if
equipped)
•Distance to Empty (DTE)
2009 Expedition(exd)
Owners Guide, 1st Printing
USA(fus)
Driver Controls
141
Page 142 of 416
•Average Fuel Economy (AFE)
•Instantaneous Fuel Economy
•Trip Elapsed Drive Time
•Blank Screen
Odometer/Trip odometer
Refer toGaugesin theInstrument Clusterchapter.
Outside air temperature (if equipped)
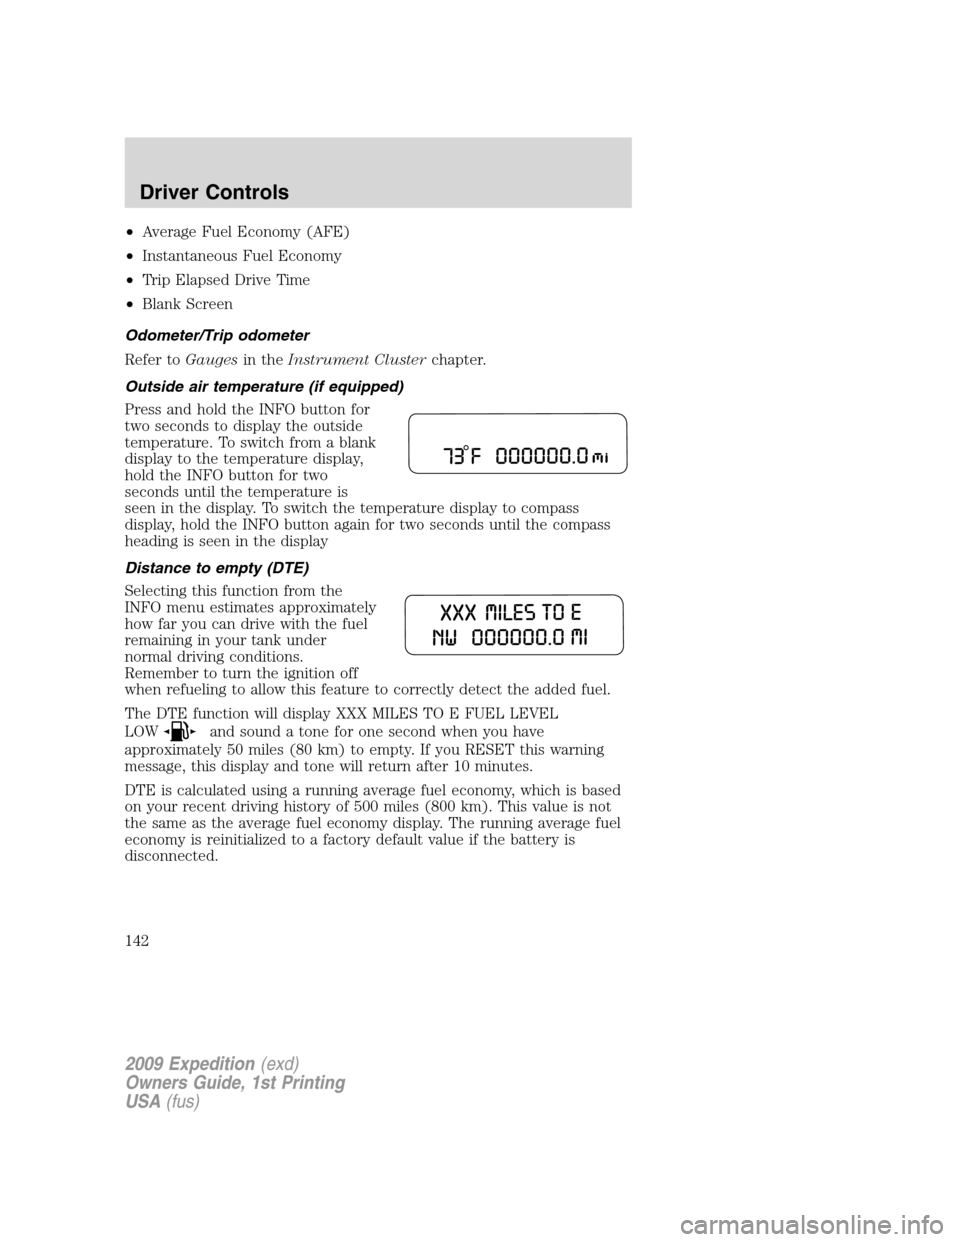
Press and hold the INFO button for
two seconds to display the outside
temperature. To switch from a blank
display to the temperature display,
hold the INFO button for two
seconds until the temperature is
seen in the display. To switch the temperature display to compass
display, hold the INFO button again for two seconds until the compass
heading is seen in the display
Distance to empty (DTE)
Selecting this function from the
INFO menu estimates approximately
how far you can drive with the fuel
remaining in your tank under
normal driving conditions.
Remember to turn the ignition off
when refueling to allow this feature to correctly detect the added fuel.
The DTE function will display XXX MILES TO E FUEL LEVEL
LOW
and sound a tone for one second when you have
approximately 50 miles (80 km) to empty. If you RESET this warning
message, this display and tone will return after 10 minutes.
DTE is calculated using a running average fuel economy, which is based
on your recent driving history of 500 miles (800 km). This value is not
the same as the average fuel economy display. The running average fuel
economy is reinitialized to a factory default value if the battery is
disconnected.
2009 Expedition(exd)
Owners Guide, 1st Printing
USA(fus)
Driver Controls
142
Page 149 of 416
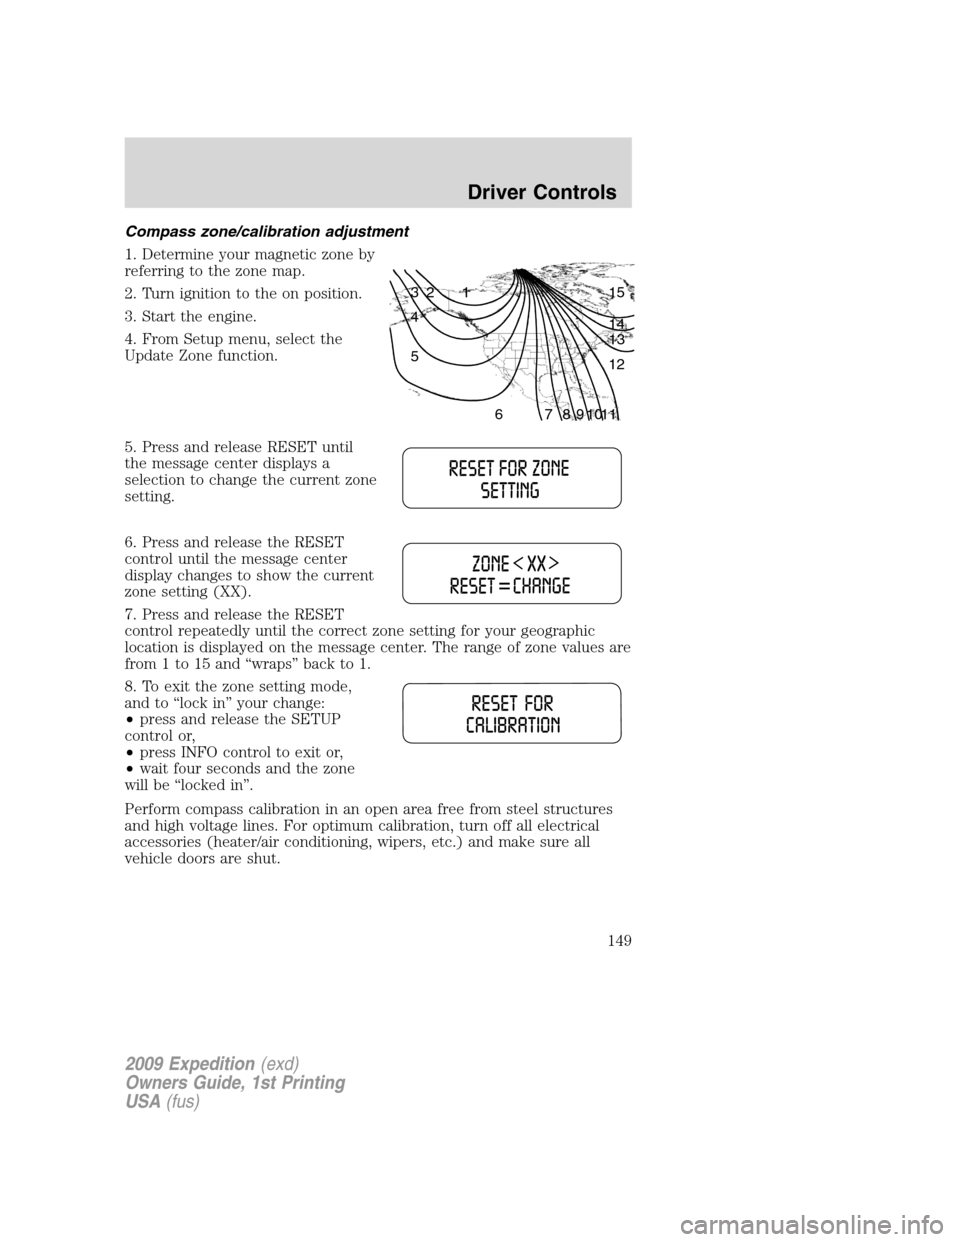
Compass zone/calibration adjustment
1. Determine your magnetic zone by
referring to the zone map.
2. Turn ignition to the on position.
3. Start the engine.
4. From Setup menu, select the
Update Zone function.
5. Press and release RESET until
the message center displays a
selection to change the current zone
setting.
6. Press and release the RESET
control until the message center
display changes to show the current
zone setting (XX).
7. Press and release the RESET
control repeatedly until the correct zone setting for your geographic
location is displayed on the message center. The range of zone values are
from 1 to 15 and “wraps” back to 1.
8. To exit the zone setting mode,
and to “lock in” your change:
•press and release the SETUP
control or,
•press INFO control to exit or,
•wait four seconds and the zone
will be “locked in”.
Perform compass calibration in an open area free from steel structures
and high voltage lines. For optimum calibration, turn off all electrical
accessories (heater/air conditioning, wipers, etc.) and make sure all
vehicle doors are shut.
1 2 3
4
5
6 7 8 9 101112 13 14 15
2009 Expedition(exd)
Owners Guide, 1st Printing
USA(fus)
Driver Controls
149
Page 151 of 416
System warnings
System warnings alert you to possible problems or malfunctions in your
vehicle’s operating systems.
In the event of a multiple warning situation, the message center will
cycle the display to show all warnings by displaying each one for four
seconds.
The message center will display the last selected feature if there are no
more warning messages. This allows you to use the full functionality of
the message center after you acknowledge the warning by pressing the
RESET control and clearing the warning message.
Warning messages that have been reset are divided into three categories:
•They cannot be cleared until the condition is corrected.
•They will reappear on the display 10 minutes from the reset.
•They will not reappear until an ignition off-on cycle has been
completed.
This acts as a reminder that these warning conditions still exist within
the vehicle.
Warning display Status
Driver door ajar Warning can be reset. Will return if
reset and warning is cleared and set
again within the same ignition cycle.
Will return on ignition cycle. Passenger door ajar
Rear left door ajar
Rear right door ajar
Liftgate/glass ajar
Check charging system
Check fuel fill inlet
Tire pressure sensor fault
Low tire pressure
Tire pressure monitor fault
4x4 shift in progress (if
equipped)
Air suspension off (if
equipped)
2009 Expedition(exd)
Owners Guide, 1st Printing
USA(fus)
Driver Controls
151
Page 152 of 416
Warning display Status
Brake fluid level low Warning can be reset. Will NOT return
if reset and warning is cleared and set
again within the same ignition cycle.
Will return on ignition cycle. Check park brake
Washer fluid level low
Oil change required
Oil life change soon
Check air suspension (if
equipped)
Check park aid (if equipped)
Check brake system Warning can be reset. Will return after
10 minutes. If within the 10 minutes,
the condition is cleared and set again,
it will not return until the initial
10 minutes is up. Will return on
ignition cycle. XXX miles to E fuel level low
Park brake engaged Warning can be reset. Will return after
10 minutes. If within the 10 minutes,
the condition is cleared and set again,
it will return immediately. Will return
on ignition cycle.
Press reset to clear This can be reset, it will remain on
the display for four seconds.
For 4x4 low stop vehicle (if
equipped)Temporary alert
For 4x4 low shift to N (if
equipped)
To exit 4x4 low stop vehicle (if
equipped)
To exit 4x4 low shift to N (if
equipped)
DRIVER DOOR AJAR— Displayed when the driver door is not
completely closed.
PASSENGER DOOR AJAR— Displayed when the passenger door is
not completely closed.
REAR LEFT DOOR AJAR— Displayed when the rear left door is not
completely closed.
2009 Expedition(exd)
Owners Guide, 1st Printing
USA(fus)
Driver Controls
152