Page 76 of 320

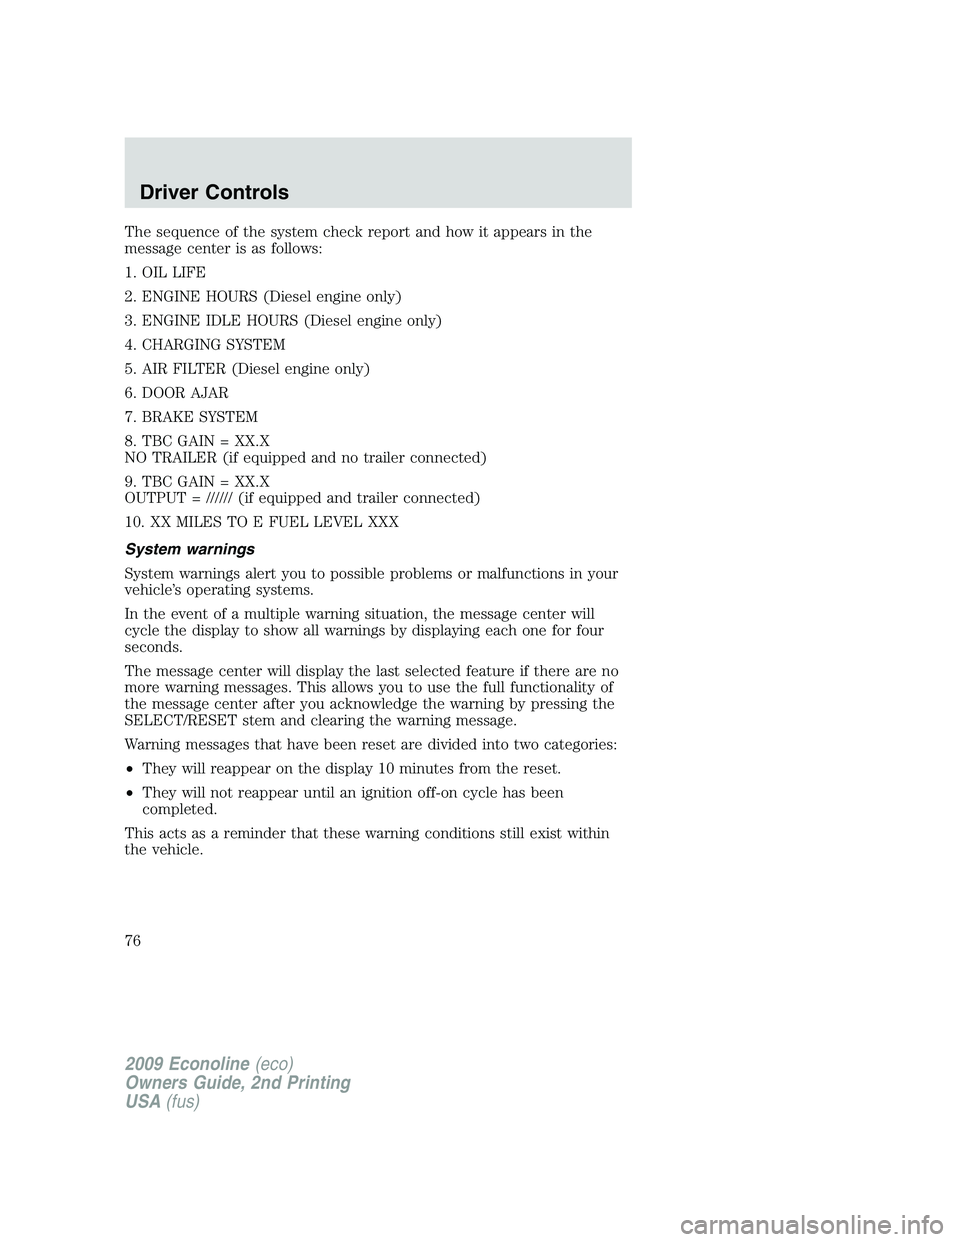
The sequence of the system check report and how it appears in the
message center is as follows:
1. OIL LIFE
2. ENGINE HOURS (Diesel engine only)
3. ENGINE IDLE HOURS (Diesel engine only)
4. CHARGING SYSTEM
5. AIR FILTER (Diesel engine only)
6. DOOR AJAR
7. BRAKE SYSTEM
8. TBC GAIN = XX.X
NO TRAILER (if equipped and no trailer connected)
9. TBC GAIN = XX.X
OUTPUT = ////// (if equipped and trailer connected)
10. XX MILES TO E FUEL LEVEL XXX
System warnings
System warnings alert you to possible problems or malfunctions in your
vehicle’s operating systems.
In the event of a multiple warning situation, the message center will
cycle the display to show all warnings by displaying each one for four
seconds.
The message center will display the last selected feature if there are no
more warning messages. This allows you to use the full functionality of
the message center after you acknowledge the warning by pressing the
SELECT/RESET stem and clearing the warning message.
Warning messages that have been reset are divided into two categories:
•They will reappear on the display 10 minutes from the reset.
•They will not reappear until an ignition off-on cycle has been
completed.
This acts as a reminder that these warning conditions still exist within
the vehicle.
2009 Econoline(eco)
Owners Guide, 2nd Printing
USA(fus)
Driver Controls
76
Page 77 of 320
Warning display Status
Park brake engaged Warning returns after 10 minutes if
condition still exists.
Check brake system
Service RSC now
XXX miles to E fuel level low Warning returns after the ignition key
is turned from off to on.
Wiring fault on trailer (if
equipped)
Trailer brake module fault (if
equipped)
Trailer connected (if equipped)
Trailer disconnected (if
equipped)
Brake fluid level low
Check rear park aid (if
equipped)
Low tire pressure (if equipped) Warning can be cleared by pressing
the SELECT/RESET button. Warning
can reappear if the condition is still
present. Warning will reappear on the
next ignition key-cycle if the condition
still exists. Tire monitor fault (if equipped)
Tire sensor fault (if equipped)
Check air filter (diesel engine
only)
Drain water separator (diesel
engine only)
Oil life change soon
Oil change required
2009 Econoline(eco)
Owners Guide, 2nd Printing
USA(fus)
Driver Controls
77
Page 79 of 320

TIRE PRESSURE MONITOR FAULT (if equipped)— Displayed
when the Tire Pressure Monitoring System is malfunctioning. If the
warning stays on or continues to come on, have the system inspected by
your authorized dealer.
TIRE PRESSURE SENSOR FAULT (if equipped)— Displayed when
a tire pressure sensor is malfunctioning, or your spare tire is in use. For
more information on how the system operates under these conditions,
refer toUnderstanding Your Tire Pressure Monitoring System
(TPMS)in theTires, Wheels and Loadingchapter. If the warning stays
on or continues to come on, contact your authorized dealer as soon as
possible
CHECK AIR FILTER (Diesel engine only)— Refer toInstrument
Clusterin your6.0 and 6.4 Liter Power Stroke Direct Injection Turbo
Diesel Owner’s Guide Supplement.
DRAIN WATER SEPARATOR (Diesel engine only)— Displayed
when the water separator has reached a predetermined capacity and
needs to be drained. Refer to your6.0 and 6.4 Liter Power Stroke
Direct Injection Turbo Diesel Owner’s Guide Supplementfor more
information.
OIL LIFE CHANGE SOON— Displayed when the engine oil life
remaining is 5% or less. When oil life left is between 5% and 0%, the
ENGINE OIL CHANGE SOON message will be displayed.
OIL CHANGE REQUIRED— Displayed when the oil life left reaches
0%, the OIL CHANGE REQUIRED message will be displayed. OIL LIFE
OK displays after you have changed the oil.
2009 Econoline(eco)
Owners Guide, 2nd Printing
USA(fus)
Driver Controls
79
Page 139 of 320

Move a child to a different seating location if the shoulder belt does not
stay positioned on the shoulder during use.
Follow all instructions provided by the manufacturer of the booster seat.
WARNING:Never place, or allow a child to place, the shoulder
belt under a child’s arm or behind the back because it reduces
the protection for the upper part of the body and may increase the risk
of injury or death in a collision.
Child restraint and safety belt maintenance
Inspect the vehicle safety belts and child safety seat systems periodically
to make sure they work properly and are not damaged. Inspect the
vehicle and child seat safety belts to make sure there are no nicks, tears
or cuts. Replace if necessary. All vehicle safety belt assemblies, including
retractors, buckles, front safety belt buckle assemblies, buckle support
assemblies (slide bar-if equipped), shoulder belt height adjusters (if
equipped), shoulder belt guide on seatback (if equipped), child safety
seat LATCH and tether anchors, and attaching hardware, should be
inspected after a collision. Refer to the child restraint manufacturer’s
instructions for additional inspection and maintenance information
specific to the child restraint. Ford Motor Company recommends that all
safety belt assemblies in use in vehicles involved in a collision be
replaced. However, if the collision was minor and an authorized dealer
finds that the belts do not show damage and continue to operate
properly, they do not need to be replaced. Safety belt assemblies not in
use during a collision should also be inspected and replaced if either
damage or improper operation is noted.
For proper care of soiled safety belts, refer toInteriorin theCleaning
chapter.
WARNING:Failure to inspect and if necessary replace the
safety belt assembly or child restraint system under the above
conditions could result in severe personal injuries in the event of a
collision.
2009 Econoline(eco)
Owners Guide, 2nd Printing
USA(fus)
Seating and Safety Restraints
139
Page 233 of 320
Fuse/Relay
LocationFuse Amp
RatingProtected Circuits
13 30A** Starter solenoid relay
14 40A** Run start relay
15 40A** Modified vehicle and stripped
chassis battery
16 50A** Auxiliary A/C blower
17 50A** Auxiliary battery feed, Trailer tow
battery charge, trailer tow park
feed
18 30A** Electric trailer brake, Trailer
brake controller
19 30A** Upfitter #1
20 30A** Upfitter #2
21 50A** IDM relay (diesel engine only)
22 — Not used
23 G8VA relay A/C clutch
24 G8VA relay Horn relay (Stripped chassis)
25 HC Micro relay Run/start
26 — Not used
27 — Not used
28 20A* Back up lamp
29 10A* A/C clutch
30 10A* BOO switch
31 10A* Cluster battery (stripped chassis
only), IDM coil (diesel engine
only)
32 50A** Blower motor
33 40A** ABS pump
34 20A** Stripped chassis horn
35 40A** PCM relay
36 20A** Ignition switch (Stripped chassis
only)
37 G8VA relay Trailer tow stop/LH turn signal
2009 Econoline(eco)
Owners Guide, 2nd Printing
USA(fus)
Roadside Emergencies
233
Page 234 of 320

Fuse/Relay
LocationFuse Amp
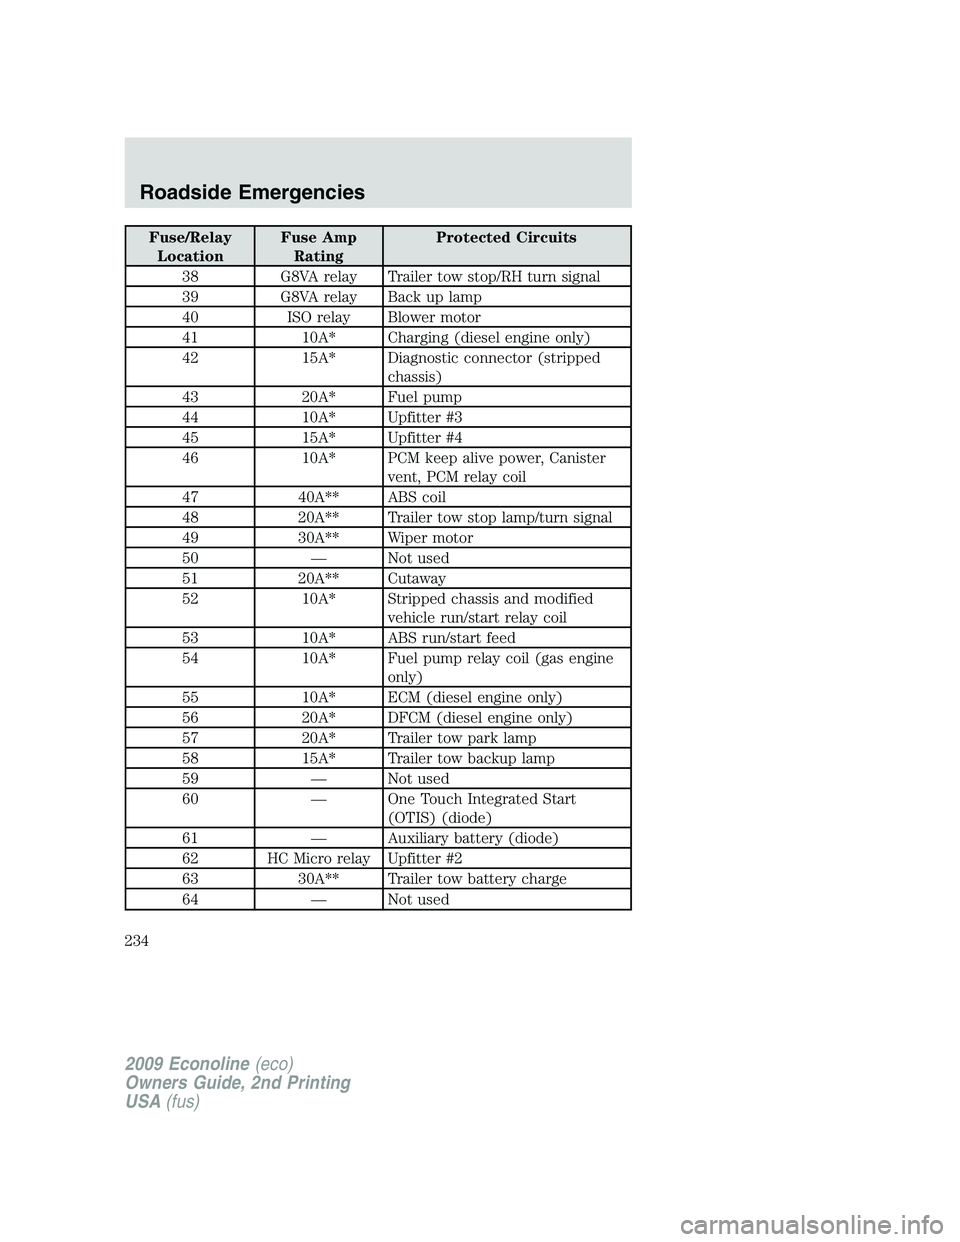
RatingProtected Circuits
38 G8VA relay Trailer tow stop/RH turn signal
39 G8VA relay Back up lamp
40 ISO relay Blower motor
41 10A* Charging (diesel engine only)
42 15A* Diagnostic connector (stripped
chassis)
43 20A* Fuel pump
44 10A* Upfitter #3
45 15A* Upfitter #4
46 10A* PCM keep alive power, Canister
vent, PCM relay coil
47 40A** ABS coil
48 20A** Trailer tow stop lamp/turn signal
49 30A** Wiper motor
50 — Not used
51 20A** Cutaway
52 10A* Stripped chassis and modified
vehicle run/start relay coil
53 10A* ABS run/start feed
54 10A* Fuel pump relay coil (gas engine
only)
55 10A* ECM (diesel engine only)
56 20A* DFCM (diesel engine only)
57 20A* Trailer tow park lamp
58 15A* Trailer tow backup lamp
59 — Not used
60 — One Touch Integrated Start
(OTIS) (diode)
61 — Auxiliary battery (diode)
62 HC Micro relay Upfitter #2
63 30A** Trailer tow battery charge
64 — Not used
2009 Econoline(eco)
Owners Guide, 2nd Printing
USA(fus)
Roadside Emergencies
234
Page 235 of 320

Fuse/Relay
LocationFuse Amp
RatingProtected Circuits
65 20A** Power point 2 (glove box)
66 20A** Power point 3 (left-hand B-pillar)
67 20A** Power point 1 (instrument panel)
68 50A** Modified vehicle
69 — Not used
70 30A** Stripped chassis
71 — Not used
72 20A** Cigar lighter
73 — Not used
74 30A** Power seat
75 20A* VPWR 1, PCM power
76 20A* VPWR 2, PCM mil
77 10A* VPWR 3, PCM non mil
78 15A* VPWR 4 (gas engine only),
Ignition coil (diesel engine only),
Fuel pump relay coil
79 10A* VPWR 5, Transmission
80 10A* Cluster run/start (stripped chassis
only)
81 15A* IDM logic (diesel engine only)
82 — Not used
83 — Fuel pump (diode)
84 — Not used
85 HC Micro relay Upfitter #1
* Mini fuses ** A1S fuses
CHANGING THE TIRES
If you get a flat tire while driving, do not apply the brake heavily.
Instead, gradually decrease your speed. Hold the steering wheel firmly
and slowly move to a safe place on the side of the road.
Note:The tire pressure monitoring system (TPMS) indicator light will
illuminate when the spare tire is in use. To restore the full functionality
of the monitoring system, all road wheels equipped with tire pressure
monitoring sensors must be mounted on the vehicle.
2009 Econoline(eco)
Owners Guide, 2nd Printing
USA(fus)
Roadside Emergencies
235
Page 244 of 320

4. Check that the tire lies flat against the frame and is properly
tightened. Try to push or pull, then turn the tire to be sure it will not
move. Loosen and retighten, if necessary. Failure to properly stow the
spare tire may result in failure of the winch cable and loss of the tire.
5. Repeat this tightness check procedure when servicing the spare tire
pressure (every six months, as per yourscheduled maintenance
information),or at any time that the spare tire is disturbed through
service of other components.
6. If removed, install the spare tire lock (if equipped) into the bumper
drive tube with the spare tire lock key (if equipped) and jack handle.
WHEEL LUG NUT TORQUE SPECIFICATIONS
On vehicles equipped with single rear wheels, retighten the lug nuts to
the specified torque at 100 miles (160 km) after any wheel disturbance
(tire rotation, changing a flat tire, wheel removal, etc.).
On vehicles equipped with dual rear wheels, retighten the wheel lug nuts
to the specified torque at 100 miles (160 km), and again at 500 miles
(800 km) of new vehicle operation and after any wheel disturbance (tire
rotation, changing a flat tire, wheel removal, etc.).
Bolt size and wheel
lug nut typeWheel lug nut torque*
lb.ft. N•m
9/16 x 18 conical lug
nut150 200
9/16 x 18 two-piece
lug nut140 190
* Torque specifications are for nut and bolt threads free of dirt and
rust. Use only Ford recommended replacement fasteners.
On all two-piece flat wheel nuts,
apply one drop of motor oil between
the flat washer and the nut. Do not
apply motor oil to the wheel nut
threads or the wheel stud threads.
2009 Econoline(eco)
Owners Guide, 2nd Printing
USA(fus)
Roadside Emergencies
244