2009 FORD CROWN VICTORIA open hood
[x] Cancel search: open hoodPage 44 of 271
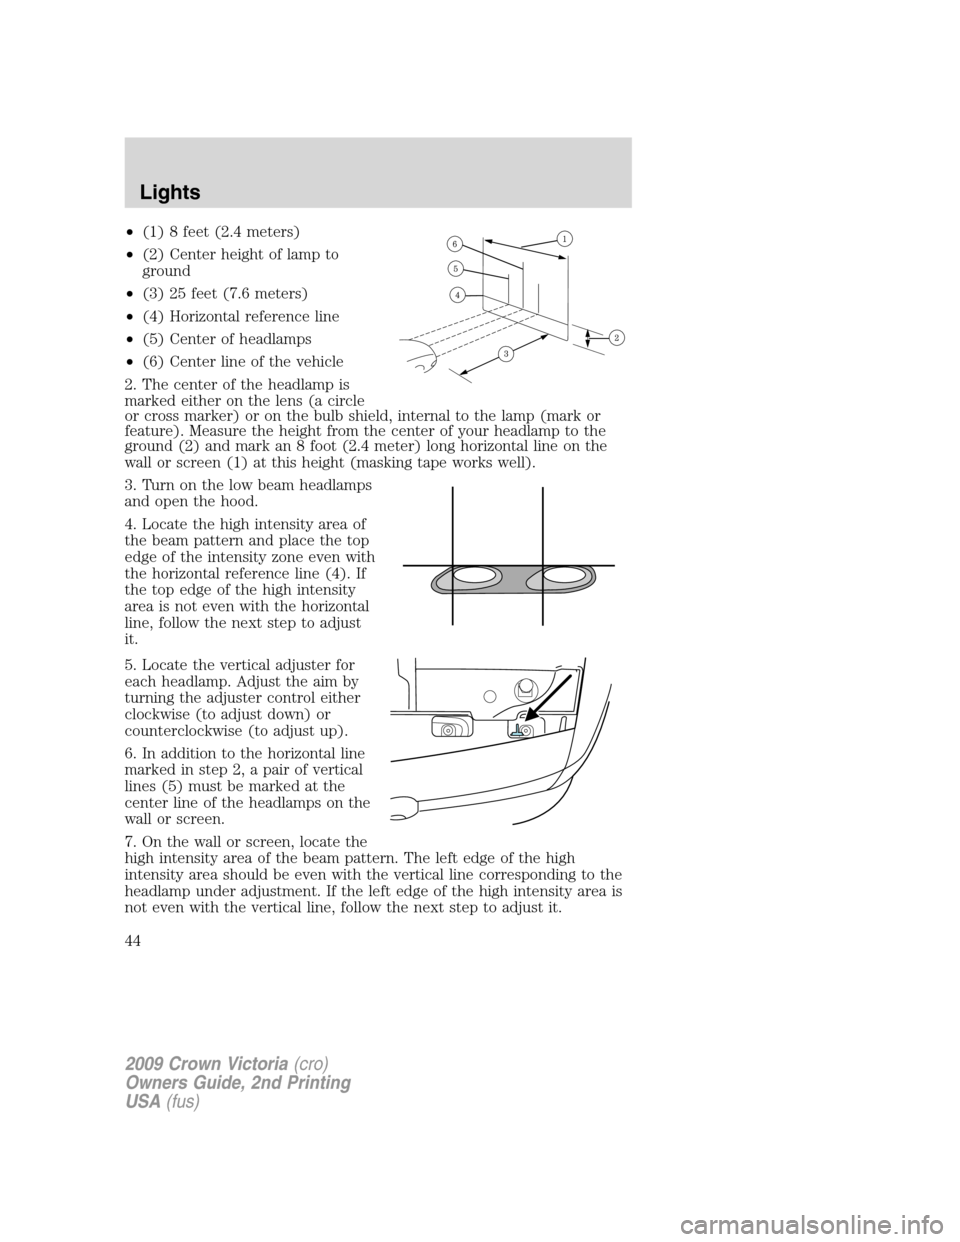
•(1) 8 feet (2.4 meters)
•(2) Center height of lamp to
ground
•(3) 25 feet (7.6 meters)
•(4) Horizontal reference line
•(5) Center of headlamps
•(6) Center line of the vehicle
2. The center of the headlamp is
marked either on the lens (a circle
or cross marker) or on the bulb shield, internal to the lamp (mark or
feature). Measure the height from the center of your headlamp to the
ground (2) and mark an 8 foot (2.4 meter) long horizontal line on the
wall or screen (1) at this height (masking tape works well).
3. Turn on the low beam headlamps
and open the hood.
4. Locate the high intensity area of
the beam pattern and place the top
edge of the intensity zone even with
the horizontal reference line (4). If
the top edge of the high intensity
area is not even with the horizontal
line, follow the next step to adjust
it.
5. Locate the vertical adjuster for
each headlamp. Adjust the aim by
turning the adjuster control either
clockwise (to adjust down) or
counterclockwise (to adjust up).
6. In addition to the horizontal line
marked in step 2, a pair of vertical
lines (5) must be marked at the
center line of the headlamps on the
wall or screen.
7. On the wall or screen, locate the
high intensity area of the beam pattern. The left edge of the high
intensity area should be even with the vertical line corresponding to the
headlamp under adjustment. If the left edge of the high intensity area is
not even with the vertical line, follow the next step to adjust it.
2009 Crown Victoria(cro)
Owners Guide, 2nd Printing
USA(fus)
Lights
44
Page 47 of 271
Function Trade Number
Headlamp 9007
Park lamp and turn lamp (front) 3457 AK (amber)
Side marker (front) 194 AK (amber)
Tail, stop, turn (rear) 3157K
Side marker (rear) 194
Backup lamp 3156K
License plate lamp 168
High-mount brakelamp 912
Luggage compartment lamp 212-2
Rear reading lamp 578
Map lamp 906
Dual floorwell lamp 906
Glove compartment 168
Visor vanity lamp - Slide on Rail system
(SOR)A6224PF
All replacement bulbs are clear in color except where noted.
To replace all instrument panel lights - see your authorized dealer.
Replacing interior bulbs
Check the operation of all bulbs frequently.
Replacing exterior bulbs
Check the operation of all bulbs frequently.
Replacing headlamp bulbs
To remove the headlamp bulb:
1. Make sure the headlamp switch is in the off position, then open the
hood.
2. Remove the radiator cover by turning the three knobs to the unlock
position.
2009 Crown Victoria(cro)
Owners Guide, 2nd Printing
USA(fus)
Lights
47
Page 49 of 271
1. With the flat side of the new bulb’s plastic base facing upward, insert
the glass end of the bulb into the lamp assembly. Turn the bulb left or
right to align the grooves in the plastic base with the tabs in the lamp
assembly. When the grooves are aligned, push the bulb into the lamp
assembly until the plastic base contacts the rear of the lamp assembly.
2. Install the bulb retaining ring over the plastic base until it contacts the
rear of the socket by rotating it clockwise until you feel a “stop.”
3. Connect the electrical connector into the rear of the plastic base until
it snaps, locking it into position.
4. Install the headlamp assembly with two retainers.
5. Install the radiator cover locking it in place with three knobs.
6. Turn the headlamps on and make sure they work properly. If the
headlamp was correctly aligned before you changed the bulb, you should
not need to align it again.
Replacing front parking/turn signal lamp bulbs
To remove the front parking/turn signal lamp bulbs:
1. Make sure headlamp switch is in the off position, then open the hood.
2. Remove the radiator cover by turning the three knobs to the unlock
position.
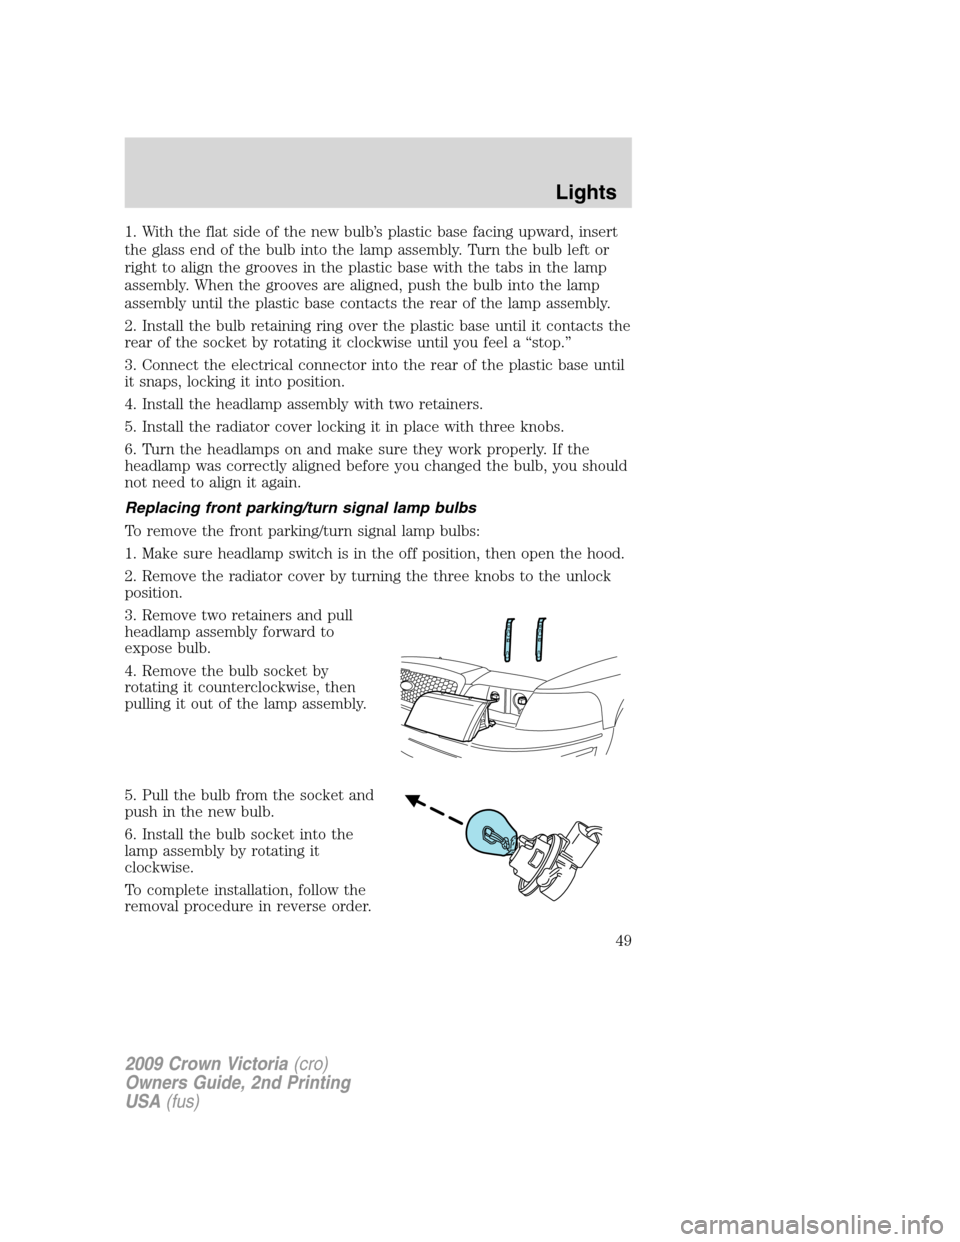
3. Remove two retainers and pull
headlamp assembly forward to
expose bulb.
4. Remove the bulb socket by
rotating it counterclockwise, then
pulling it out of the lamp assembly.
5. Pull the bulb from the socket and
push in the new bulb.
6. Install the bulb socket into the
lamp assembly by rotating it
clockwise.
To complete installation, follow the
removal procedure in reverse order.
2009 Crown Victoria(cro)
Owners Guide, 2nd Printing
USA(fus)
Lights
49
Page 50 of 271
Replacing front sidemarker bulb
To remove the front side marker bulb:
1. Make sure headlamp switch is in the off position, then open the hood.
2. Remove the radiator cover by turning the three knobs to the unlock
position.
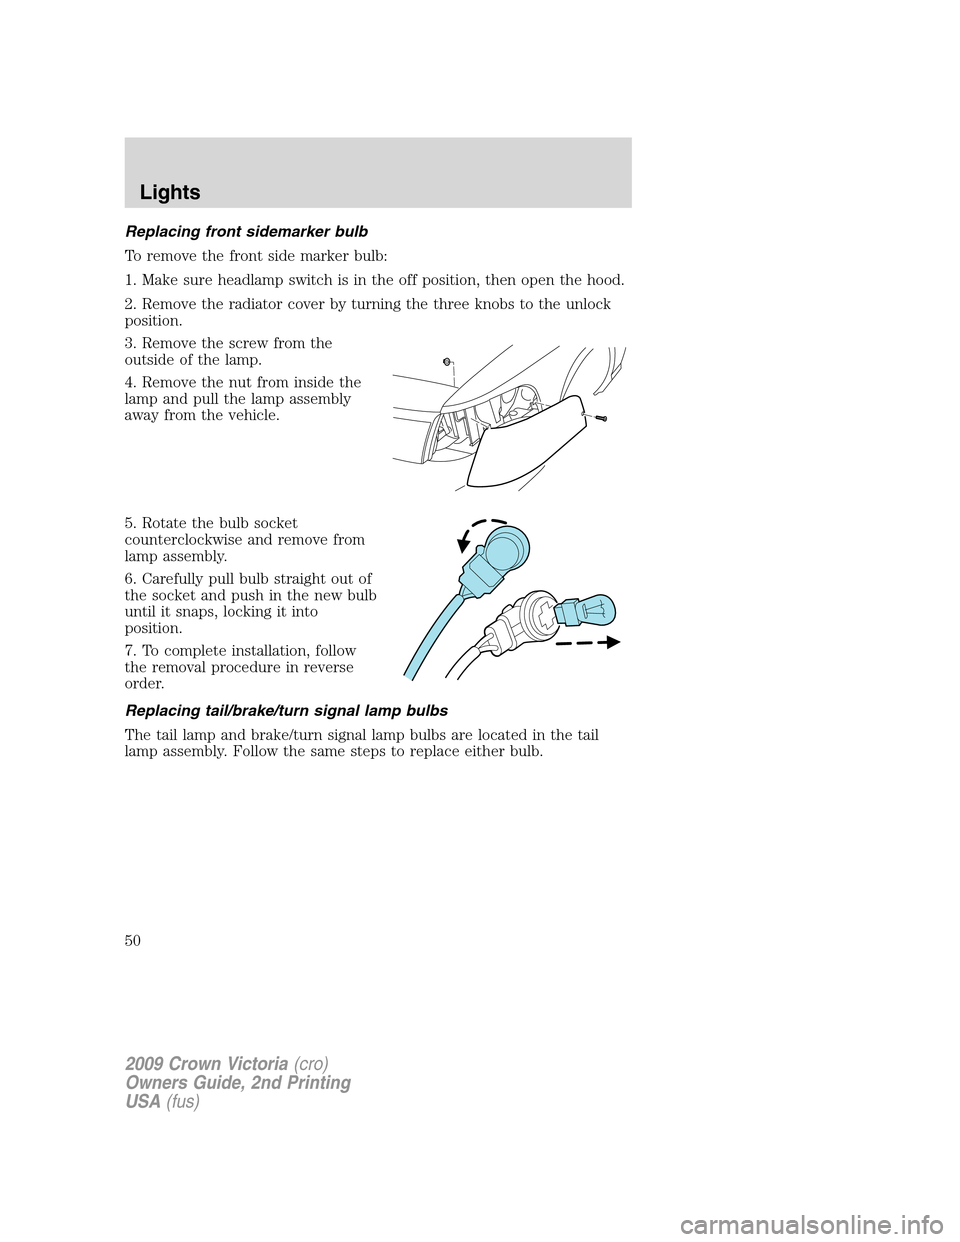
3. Remove the screw from the
outside of the lamp.
4. Remove the nut from inside the
lamp and pull the lamp assembly
away from the vehicle.
5. Rotate the bulb socket
counterclockwise and remove from
lamp assembly.
6. Carefully pull bulb straight out of
the socket and push in the new bulb
until it snaps, locking it into
position.
7. To complete installation, follow
the removal procedure in reverse
order.
Replacing tail/brake/turn signal lamp bulbs
The tail lamp and brake/turn signal lamp bulbs are located in the tail
lamp assembly. Follow the same steps to replace either bulb.
2009 Crown Victoria(cro)
Owners Guide, 2nd Printing
USA(fus)
Lights
50
Page 74 of 271
Auto-unlock
The auto-unlock feature will unlock all doors when:
•the ignition has been in the on position, all doors are closed, and the
vehicle has been in motion at a speed greater than 12 mph (20 km/h),
•the vehicle has then come to a stop and the ignition is turned to the
accessory or off position, and
•the driver door is opened {within ten minutes after the ignition was
transitioned to the accessory or off position}.
Note:The vehicle doors will not auto-unlock if the vehicle has been
electronically locked prior to the driver door being opened.
Deactivating/activating the autolock or auto-unlock feature
Automatic door locks can also be turned on/off through the following
procedure:
You must complete Steps 1-7 within 30 seconds or the procedure will
have to be repeated. If the procedure needs to be repeated, you must
wait at least 30 seconds.Note:Before following the procedure, make
sure that the ignition is in the off position and all vehicle doors, the
hood, and the decklid are closed.
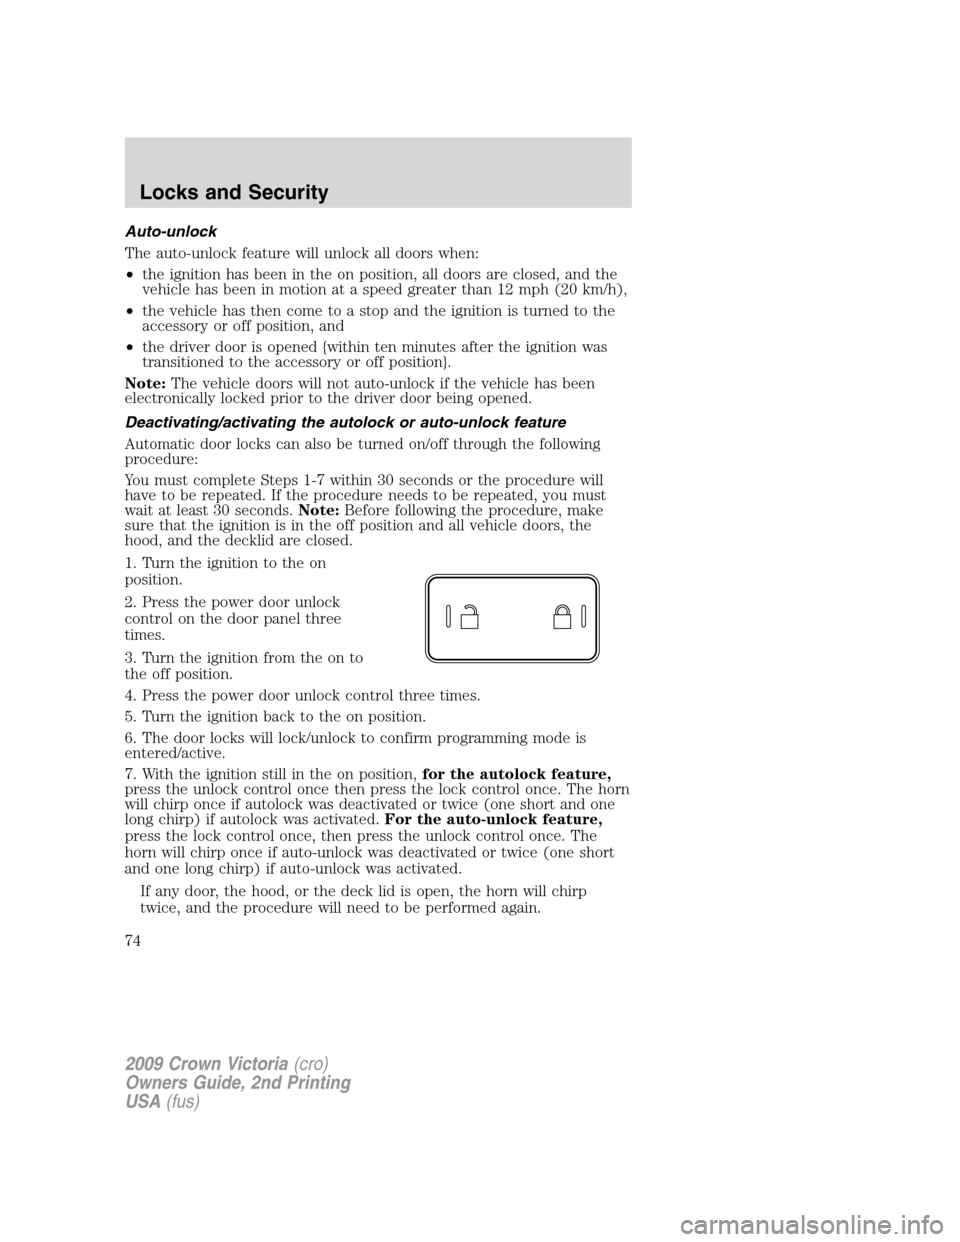
1. Turn the ignition to the on
position.
2. Press the power door unlock
control on the door panel three
times.
3. Turn the ignition from the on to
the off position.
4. Press the power door unlock control three times.
5. Turn the ignition back to the on position.
6. The door locks will lock/unlock to confirm programming mode is
entered/active.
7. With the ignition still in the on position,for the autolock feature,
press the unlock control once then press the lock control once. The horn
will chirp once if autolock was deactivated or twice (one short and one
long chirp) if autolock was activated.For the auto-unlock feature,
press the lock control once, then press the unlock control once. The
horn will chirp once if auto-unlock was deactivated or twice (one short
and one long chirp) if auto-unlock was activated.
If any door, the hood, or the deck lid is open, the horn will chirp
twice, and the procedure will need to be performed again.
2009 Crown Victoria(cro)
Owners Guide, 2nd Printing
USA(fus)
Locks and Security
74
Page 225 of 271
Working with the engine on
1. Set the parking brake and shift to P (Park).
2. Block the wheels.
WARNING:To reduce the risk of vehicle damage and/or
personal burn injuries, do not start your engine with the air
cleaner removed and do not remove it while the engine is running.
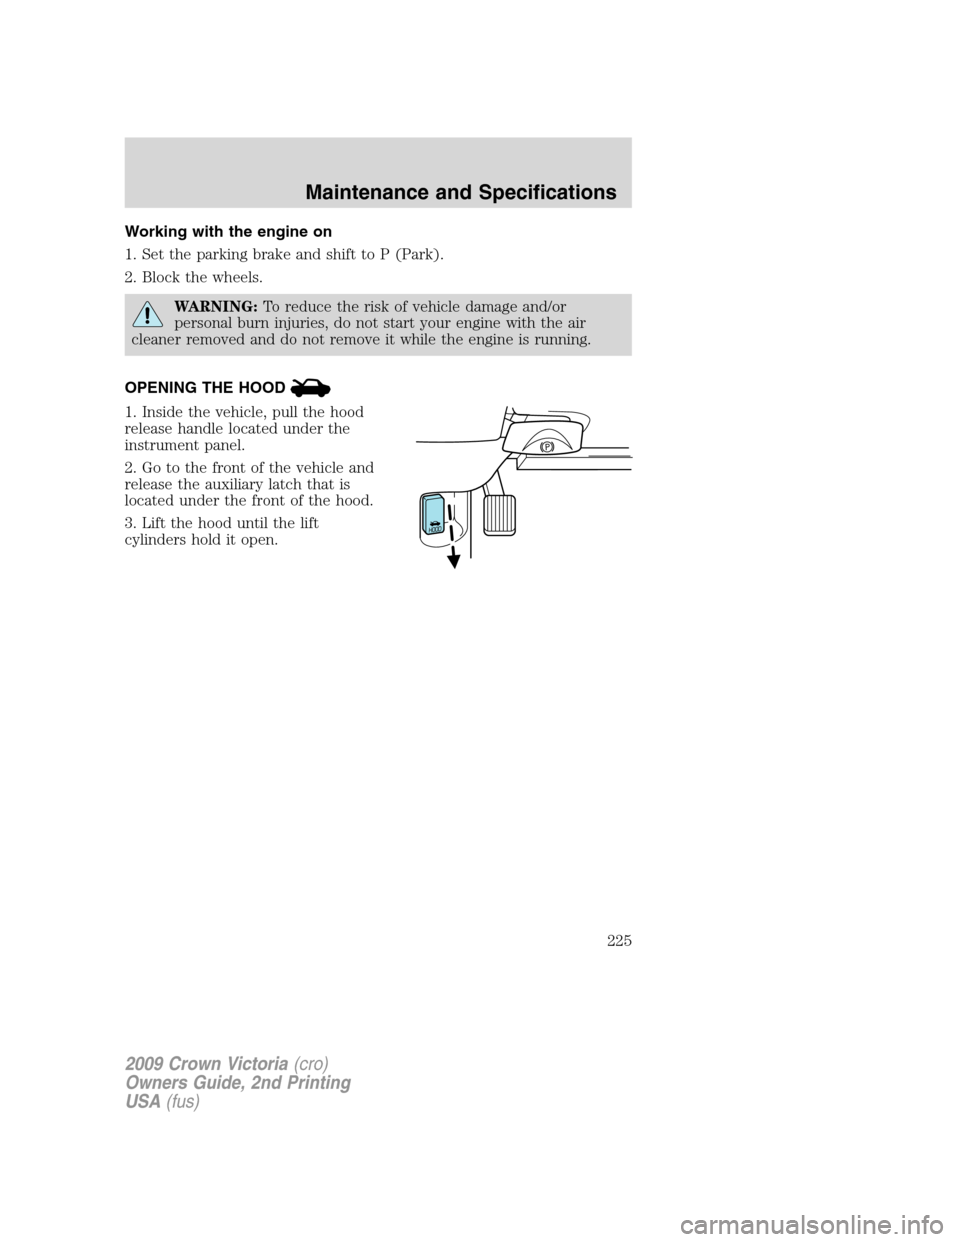
OPENING THE HOOD
1. Inside the vehicle, pull the hood
release handle located under the
instrument panel.
2. Go to the front of the vehicle and
release the auxiliary latch that is
located under the front of the hood.
3. Lift the hood until the lift
cylinders hold it open.
2009 Crown Victoria(cro)
Owners Guide, 2nd Printing
USA(fus)
Maintenance and Specifications
225
Page 228 of 271
Replace wiper blades at least once per year for optimum performance.
Poor wiper quality can be improved by cleaning the wiper blades and the
windshield. Refer toWindows and wiper bladesin theCleaning
chapter.
To prolong the life of the wiper blades, it is highly recommended to
scrape off the ice on the windshield before turning on the wipers. The
layer of ice has many sharp edges and can damage the micro edge of the
wiper rubber element.
ENGINE OIL
Checking the engine oil
Refer to thescheduled maintenance informationfor the appropriate
intervals for checking the engine oil.
1. Make sure the vehicle is on level ground.
2. Turn the engine off and wait up to 15 minutes for the oil to drain into
the oil pan.
3. Set the parking brake and ensure the gearshift is securely latched in P
(Park).
4. Open the hood. Protect yourself from engine heat.
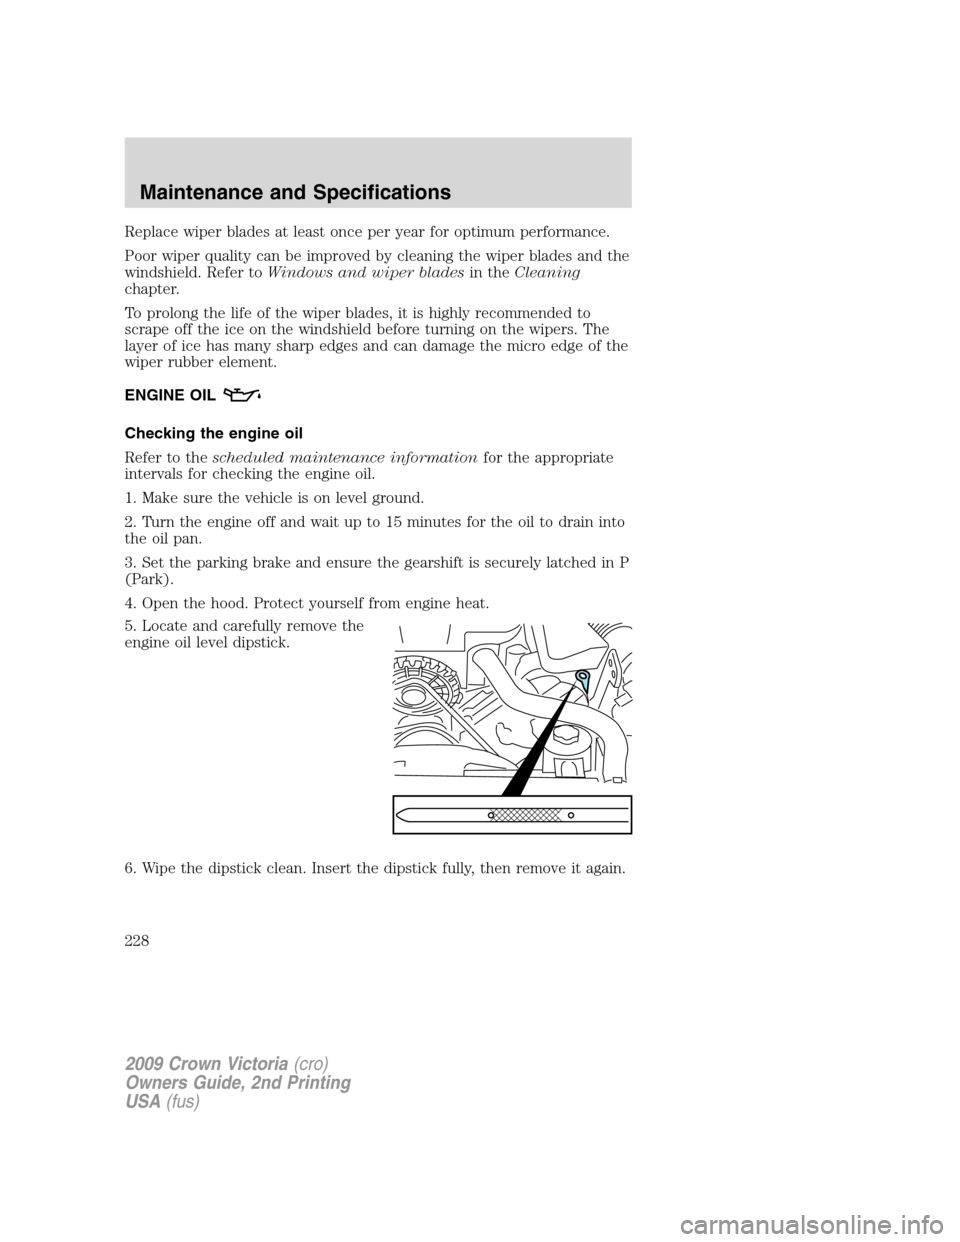
5. Locate and carefully remove the
engine oil level dipstick.
6. Wipe the dipstick clean. Insert the dipstick fully, then remove it again.
2009 Crown Victoria(cro)
Owners Guide, 2nd Printing
USA(fus)
Maintenance and Specifications
228