Page 199 of 429
3. To decrease the clock by one hour, use the Select
Encoder to highlight the “-” sign. Press ENTER. Press
ENTER again to decrease the clock by another hour.
4. To increase the clock by minutes, make sure “MIN +”
is highlighted and press ENTER. Press ENTER again to
increase the clock by another minute.
5. To decrease the clock by minutes, use the Select
Encoder to highlight the “-“ sign. Press ENTER. Press
ENTER again to decrease the clock by another minute.
6. Select “DONE” to exit from the clock setting mode.
Press ENTER to save your changes. If you press CAN-
CEL or NAV then your changes will not be saved.
SATELLITE RADIO — IF EQUIPPED
Satellite radio uses direct satellite to receiver broadcast-
ing technology to provide clear digital sound, coast to
coast. The subscription service provider is Sirius SatelliteRadio. This service offers over 130 channels of music,
sports, news, entertainment, and programming for chil-
dren, directly from its satellites and broadcasting studios.
NOTE:
Sirius service is not available in Hawaii and has
limited coverage in Alaska.
System Activation
Sirius Satellite Radio service is pre-activated, and you
may begin listening immediately to the one year of audio
service that is included with the factory-installed satellite
radio system in your vehicle. Sirius will supply a wel-
come kit that contains general information, including
how to setup your on-line listening account at no addi-
tional charge. For further information, call the toll-free
UNDERSTANDING YOUR INSTRUMENT PANEL 197
4
Page 201 of 429
With the ignition in the ACC position and the radio off,
press the CD Eject and SET buttons simultaneously until
the 12 digits of the ESN/SID appear on the screen.
Selecting Satellite Mode in REF, RAQ, And RAK
Radios
Selecting Satellite Mode — REF Radio
Press the MODE button repeatedly until the word�SAT�
appears in the display.
A CD may remain in the radio while in the Satellite radio
mode.
Selecting Satellite Mode — RAQ and RAK Radio
Press the MODE button repeatedly until the word �SAT�
appears in the display.
These radios will also display the current station name
and program type. For more information, such as song
title and artist, press the MSG or INFO button. A CD or tape may remain in the radio while in the
Satellite radio mode.
Selecting A Channel
Press and release the SEEK or TUNE knob to search for
the next channel. Press the top of the button to search up
and the bottom of the button to search down. Holding the
TUNE button causes the radio to bypass channels until
the button is released.
Press and release the SCAN button (if equipped) to
automatically change channels every seven seconds. The
radio will pause on each channel for seven seconds
before moving on to the next channel. The word
�SCAN�
will appear in the display between each channel change.
Press the SCAN button a second time to stop the search.
NOTE: Channels that may contain objectionable content
can be blocked. Contact Sirius Customer Care at 888-539-
7474 to discuss options for channel blocking or unblock-
ing. Please have your ESN/SID information available.
UNDERSTANDING YOUR INSTRUMENT PANEL 199
4
Page 202 of 429
Storing And Selecting Preset Channels
In addition to the 12 AM and 12 FM preset stations, you
may also commit 12 satellite stations to pushbutton
memory. These satellite channel preset stations will not
erase any AM or FM preset memory stations. Follow the
memory preset procedures that apply to your radio.
Using The PTY (Program Type) Button — If
Equipped
Follow the PTY button instructions that apply to your
radio.
PTY Button SCAN
When the desired program type is obtained, press the
SCAN button within five seconds. The radio will play
seven seconds of the selected channel before moving to
the next channel of the selected program type. Press the
SCAN button a second time to stop the search.
NOTE:Pressing the SEEK or SCAN button, while
performing a music type scan, will change the channel by one and stop the search. Pressing a preset memory button
during a music type scan will call up the memory
channel and stop the search.
PTY Button SEEK
When the desired program is obtained, press the SEEK
button within five seconds. The channel will change to
the next channel that matches the program type selected.
Satellite Antenna
To ensure optimum reception on vehicles available with
a luggage rack, do not place items on the roof around the
rooftop antenna location. Metal objects placed within the
line of sight of the antenna will cause decreased perfor-
mance. Larger luggage items should be placed as far
forward as possible. Do not place items directly on or
above the antenna.
200 UNDERSTANDING YOUR INSTRUMENT PANEL
Page 203 of 429
Reception Quality
Satellite reception may be interrupted due to one of the
following reasons:
•The vehicle is parked in an underground parking
structure or under a physical obstacle.
•Dense tree coverage may interrupt reception.
•Driving under wide bridges or along tall buildings can
cause intermittent reception.
•Placing objects over or too close to the antenna can
cause signal blockage.
VIDEO ENTERTAINMENT SYSTEM™ (SALES
CODE XRV) — IF EQUIPPED
The optional Video Entertainment System (VES)™ con-
sists of a DVD player and LCD (liquid crystal display)
screen, a battery-powered remote control, and two head-
sets. The system is located in the headliner behind thefront row seat. Refer to your VES™ User’s Manual for
detailed operating instructions.
REMOTE SOUND SYSTEM CONTROLS — IF
EQUIPPED
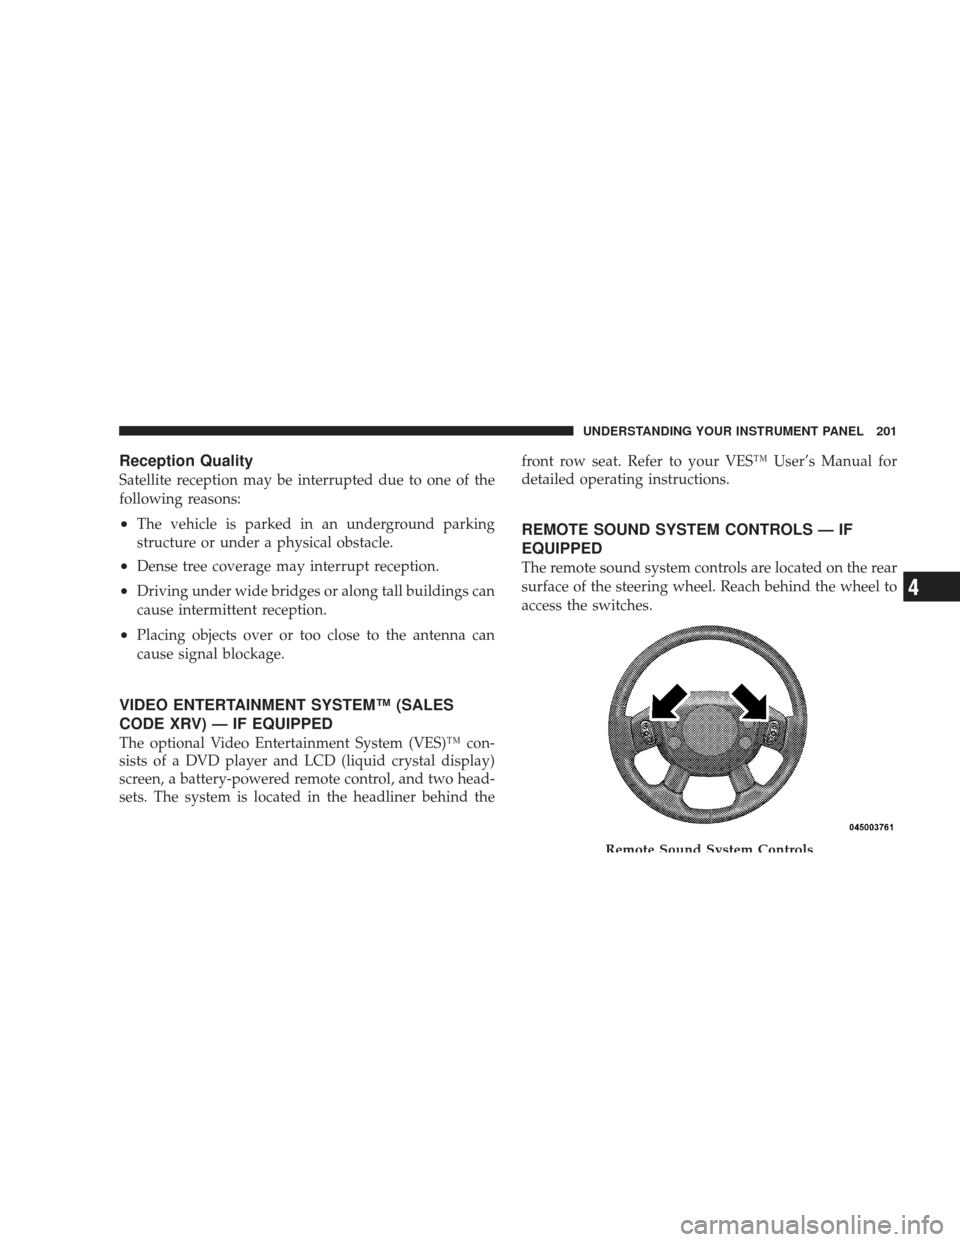
The remote sound system controls are located on the rear
surface of the steering wheel. Reach behind the wheel to
access the switches.
Remote Sound System Controls
UNDERSTANDING YOUR INSTRUMENT PANEL 201
4
Page 204 of 429
The right-hand control is a rocker type switch with a
button in the center. Pressing the top of the switch will
increase the volume and pressing the bottom of the
switch will decrease the volume. The center button of the
right-hand control will allow you to change the mode.
The left-hand control is a rocker type switch with a push
button in the center. The function of the left-hand control
is different, depending on which mode you are in.
The following describes the left-hand control operation in
each mode.
Radio Operation
Pressing the top of the left side switch will seek up for the
next listenable station and pressing the bottom of the
switch will seek down for the next listenable station.
The button located in the center of the left-hand control
will tune to the next pre-set station that you have
programmed in the radio pre-set push-buttons.
Tape Player
Pressing the top of the switch once will go to the next
selection on the cassette. Pressing the bottom of the
switch once will go to the beginning of the current
selection or to the beginning of the previous selection if it
is within the first five seconds of the current selection.
If you press the switch up or down twice it plays the
second selection; three times, it will play the third, etc.
The button in the center of the left-hand switch has no
function in this mode.
CD Player
Pressing the top of the switch once will go to the next
track on the CD. Pressing the bottom of the switch once
will go to the beginning of the current track or to the
beginning of the previous track if it is within one second
after the current track; begins to play.
202 UNDERSTANDING YOUR INSTRUMENT PANEL
Page 206 of 429
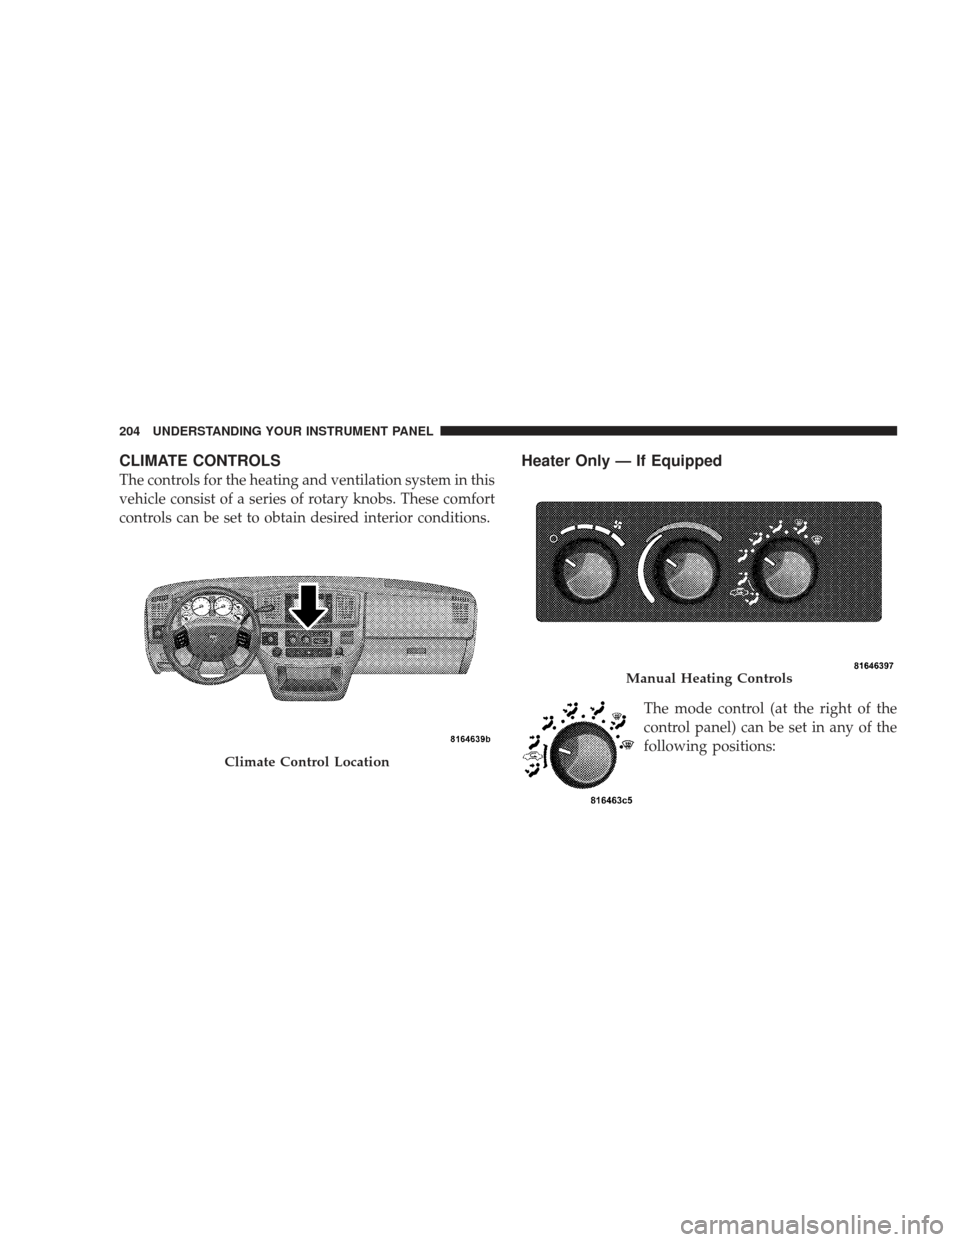
CLIMATE CONTROLS
The controls for the heating and ventilation system in this
vehicle consist of a series of rotary knobs. These comfort
controls can be set to obtain desired interior conditions.
Heater Only — If Equipped
The mode control (at the right of the
control panel) can be set in any of the
following positions:
Climate Control Location
Manual Heating Controls
204 UNDERSTANDING YOUR INSTRUMENT PANEL
Page 208 of 429
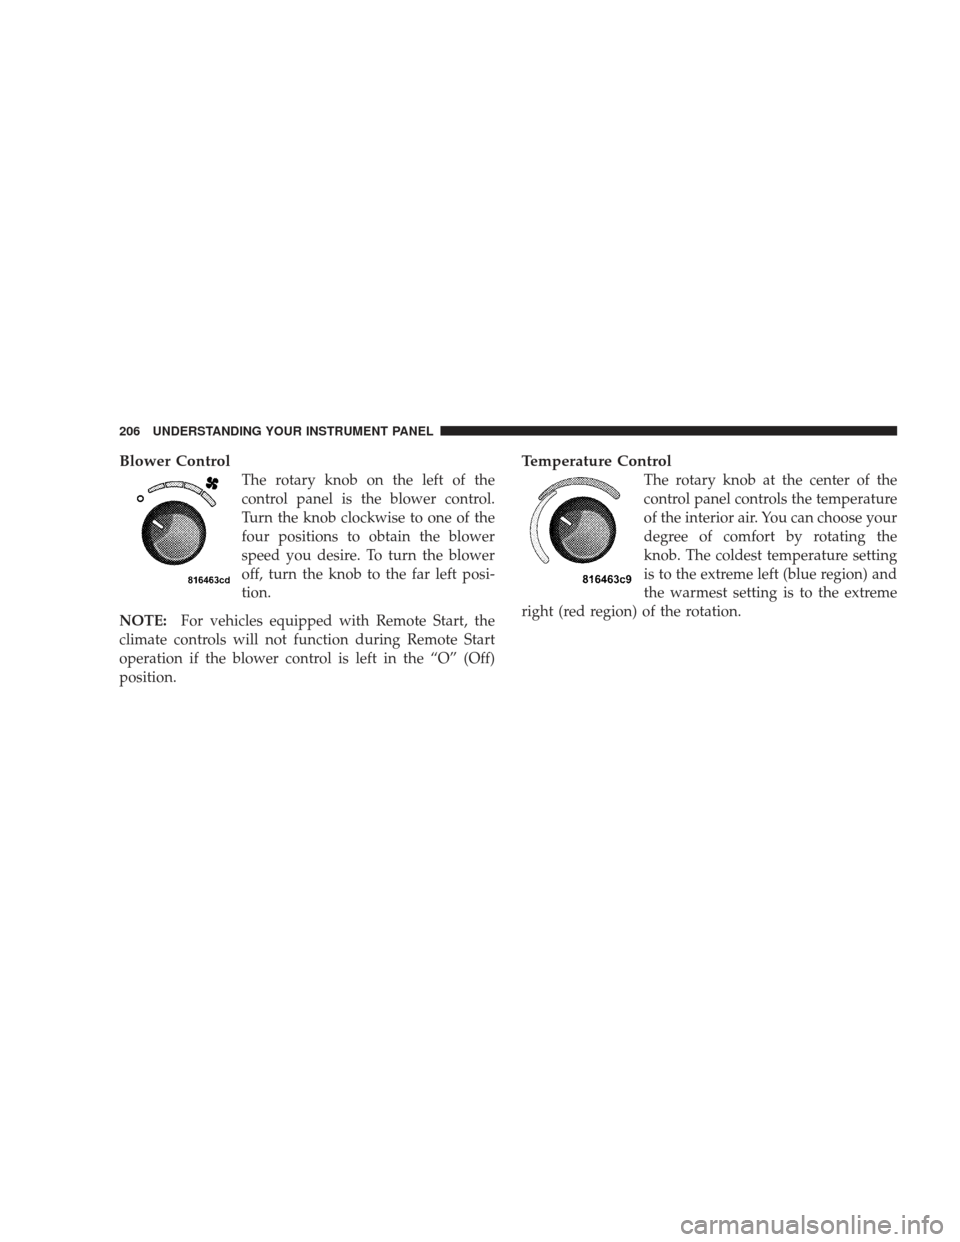
Blower Control
The rotary knob on the left of the
control panel is the blower control.
Turn the knob clockwise to one of the
four positions to obtain the blower
speed you desire. To turn the blower
off, turn the knob to the far left posi-
tion.
NOTE: For vehicles equipped with Remote Start, the
climate controls will not function during Remote Start
operation if the blower control is left in the “O” (Off)
position.
Temperature Control
The rotary knob at the center of the
control panel controls the temperature
of the interior air. You can choose your
degree of comfort by rotating the
knob. The coldest temperature setting
is to the extreme left (blue region) and
the warmest setting is to the extreme
right (red region) of the rotation.
206 UNDERSTANDING YOUR INSTRUMENT PANEL
Page 209 of 429
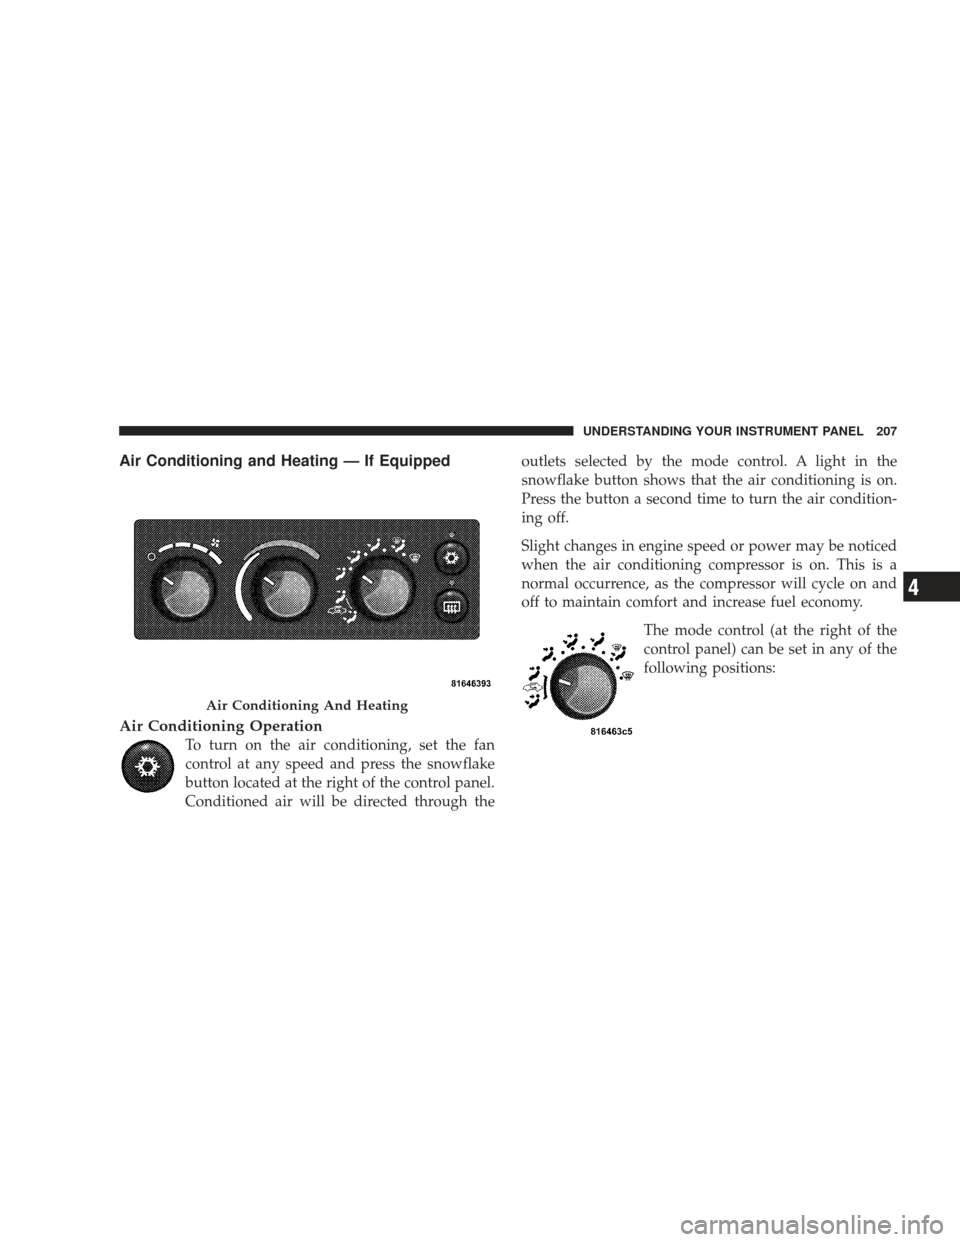
Air Conditioning and Heating — If Equipped
Air Conditioning Operation
To turn on the air conditioning, set the fan
control at any speed and press the snowflake
button located at the right of the control panel.
Conditioned air will be directed through theoutlets selected by the mode control. A light in the
snowflake button shows that the air conditioning is on.
Press the button a second time to turn the air condition-
ing off.
Slight changes in engine speed or power may be noticed
when the air conditioning compressor is on. This is a
normal occurrence, as the compressor will cycle on and
off to maintain comfort and increase fuel economy.
The mode control (at the right of the
control panel) can be set in any of the
following positions:
Air Conditioning And Heating
UNDERSTANDING YOUR INSTRUMENT PANEL 207
4