Page 202 of 532
29. Fuel Gauge
Shows level of fuel in tank when ignition switch is in the
ON position.
30. Low Fuel LightWhen the fuel level drops to 1/16 tank, the fuel
symbol will light and a single chime will sound.
NOTE: If your vehicle is equipped with an overhead
console module (CMTC), it is possible for DTE to display
“LO FUEL” before the low fuel warning light turns on in
the instrument cluster. This could occur because the low
fuel warning is set to a specified fuel tank volume and
DTE is an estimated distance calculation based on vehicle
fuel economy and remaining fuel tank volume.
Vehicle fuel tank volumes are as follows:•
26 gal (98 L) - 1500 short box models
•
34 gal (128 L) - 1500/2500/3500 short box models
•
35 gal (132 L) - 1500/2500/3500 long box models 31. CRUISE Indicator
This indicator lights when the electronic speed
control system is turned on.
32. Engine Temperature Warning Light This light warns of an overheated engine condi-
tion. As temperatures rise and the gauge ap-
proaches H, this indicator will illuminate and a
single chime will sound after reaching a set threshold.
Further overheating will cause the temperature gauge to
pass H, the indicator will continuously flash and a
continuous chime will occur until the engine is allowed
to cool.
If the light turns on while driving, safely pull over and
stop the vehicle. If the A/C system is on, turn it off. Also,
shift the transmission into NEUTRAL and idle the ve-
hicle. If the temperature reading does not return to
normal, turn the engine off immediately and call for
service. Refer to “If Your Engine Overheats” in Section 6
for more information.
200 UNDERSTANDING YOUR INSTRUMENT PANEL
Page 268 of 532
Driving in the 4WD LOCK and 4WD LOW positions on
dry hard surfaced roads may cause increased tire wear
and damage to the driveline components.
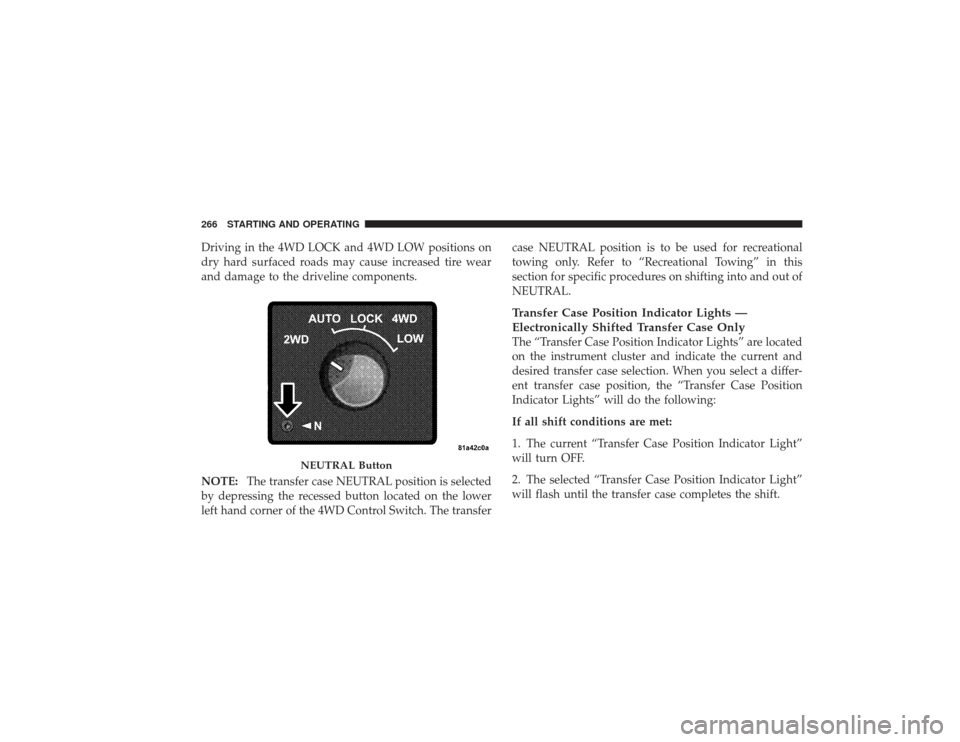
NOTE:The transfer case NEUTRAL position is selected
by depressing the recessed button located on the lower
left hand corner of the 4WD Control Switch. The transfer case NEUTRAL position is to be used for recreational
towing only. Refer to “Recreational Towing” in this
section for specific procedures on shifting into and out of
NEUTRAL.
Transfer Case Position Indicator Lights —
Electronically Shifted Transfer Case OnlyThe “Transfer Case Position Indicator Lights” are located
on the instrument cluster and indicate the current and
desired transfer case selection. When you select a differ-
ent transfer case position, the “Transfer Case Position
Indicator Lights” will do the following:
If all shift conditions are met:
1. The current “Transfer Case Position Indicator Light”
will turn OFF.
2. The selected “Transfer Case Position Indicator Light”
will flash until the transfer case completes the shift.
NEUTRAL Button
266 STARTING AND OPERATING
Page 273 of 532
Alternate Procedure
1. Bring the vehicle to complete stop.
2. With the key ON and the engine either off or running,
shift the transmission into NEUTRAL.
3. Rotate the transfer case control switch to the desired
position.
4. After the desired “Transfer Case Position Indicator
Light” is ON (not flashing), shift the transmission back
into gear.NOTE:
•
If steps 1 or 2 of either the Preferred or Alternate
Procedure are not satisfied, prior to attempting the
shift, or if they no longer are being met while the shift
attempt is in process, then the desired “Transfer Case
Position Indicator Light” will flash continuously while
the original “Transfer Case Position Indicator Light” is
ON, until all requirements have been met.
•
The ignition key must be ON for a shift to take place
and for the “Transfer Case Position Indicator Lights”
to be operable. If the key is not ON, then the shift will
not take place and no “Transfer Case Position Indica-
tor Lights” will be on or flashing.
•
If your are leaving your vehicle stored for longer than
21 days, refer to the section on “Vehicle Storage.”
STARTING AND OPERATING 271
5
Page 275 of 532
LOW positions are designed for loose, slippery road
surfaces only. Driving in the 4WD LOCK and 4WD LOW
positions on dry hard surfaced roads may cause in-
creased tire wear and damage to the driveline compo-
nents.NOTE:
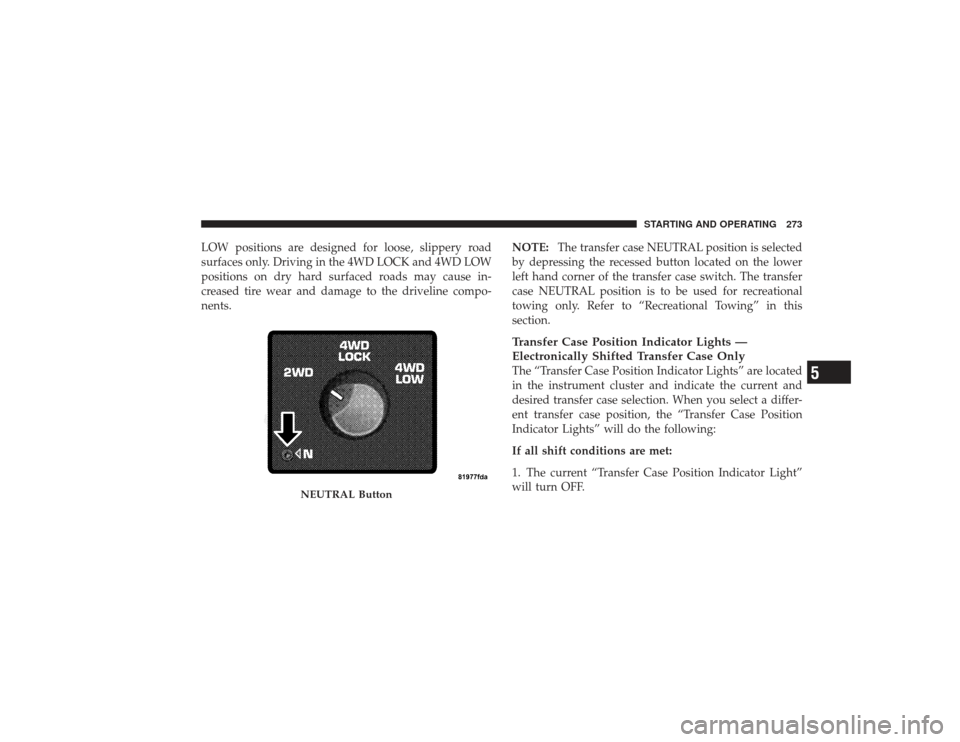
The transfer case NEUTRAL position is selected
by depressing the recessed button located on the lower
left hand corner of the transfer case switch. The transfer
case NEUTRAL position is to be used for recreational
towing only. Refer to “Recreational Towing” in this
section.
Transfer Case Position Indicator Lights —
Electronically Shifted Transfer Case OnlyThe “Transfer Case Position Indicator Lights” are located
in the instrument cluster and indicate the current and
desired transfer case selection. When you select a differ-
ent transfer case position, the “Transfer Case Position
Indicator Lights” will do the following:
If all shift conditions are met:
1. The current “Transfer Case Position Indicator Light”
will turn OFF.
NEUTRAL Button
STARTING AND OPERATING 273
5
Page 280 of 532
2. Shift the transmission into NEUTRAL.
3. While still rolling, rotate the transfer case switch to the
desired position.
4. After the desired “Transfer Case Position Indicator
Light” is ON (not flashing), shift the transmission back
into gear.
Alternate Procedure
1. Bring the vehicle to complete stop.
2. With the key ON and the engine either OFF or
running, shift the transmission into NEUTRAL.
3. Rotate the transfer case switch into the desired posi-
tion.
4. After the desired “Transfer Case Position Indicator
Light” is ON (not flashing), shift the transmission back
into gear.NOTE:
•
If steps 1 or 2 of either the Preferred or Alternate
Procedure are not satisfied prior to attempting the
shift, the desired “Transfer Case Position Indicator
Light” will flash continuously while the original
“Transfer Case Position Indicator Light” is ON, until
all requirements have been met.
•
The ignition key must be ON for a shift to take place
and for the “Transfer Case Position Indicator Lights”
to be operable. If the key is not ON then the shift will
not take place and no “Transfer Case Position Indica-
tor Lights” will be on or flashing.
•
If your are leaving your vehicle stored for longer than
21 days, refer to the section on “Vehicle Storage.”
278 STARTING AND OPERATING
Page 290 of 532
using light brake pressure with light throttle will keep the
vehicle from jerking or lurching. This technique is also
used when you need to stop and restart a vehicle on a
steep incline.The Basics Of Off-Road DrivingYou will encounter many types of terrain driving off-
road. You should be familiar with the terrain and area
before proceeding. There are many types of surface
conditions: hard packed dirt, gravel, rocks, grass, sand,
mud, snow and ice. Every surface has a different effect on
your vehicle’s steering, handling and traction. Control-
ling your vehicle is one of the keys to successful off-road
driving, so always keep a firm grip on the steering wheel
and maintain a good driving posture. Avoid sudden
accelerations, turns or braking. In most cases there are no
road signs, posted speed limits or signal lights. Therefore
you will need to use your own good judgment on what is
safe and what isn’t. When on a trail you should always be
looking ahead for surface obstacles and changes interrain. The key is to plan your future driving route while
remembering what you are currently driving over.
CAUTION!
Never park your vehicle over dry grass or other
combustible materials. The heat from your vehicle
exhaust system could cause a fire.
WARNING!
Always wear your seat belt and firmly tie down
cargo. Unsecured cargo can become projectiles in an
off-road situation.When To Use Low RangeWhen driving off-road, shift into 4L (Low Range) for
additional traction or to improve handling and control on
slippery or difficult terrain. Due to the lower gearing, low
range will allow the engine to operate in a higher power
288 STARTING AND OPERATING
Page 395 of 532
CAUTION!
If the trailer weighs more than 1,000 lbs (454 kg)
loaded, it should have its own brakes and they
should be of adequate capacity. Failure to do this
could lead to accelerated brake lining wear, higher
brake pedal effort, and longer stopping distances.
WARNING!
•
Do not connect trailer brakes to your vehicle’s
hydraulic brake lines. It can overload your brake
system and cause it to fail. You might not have
brakes when you need them and could have an
accident.(Continued)
WARNING! (Continued)
•
Towing any trailer will increase your stopping
distance. When towing you should allow for addi-
tional space between your vehicle and the vehicle
in front of you. Failure to do so could result in an
accident.
Towing Requirements — Trailer Lights & WiringWhenever you pull a trailer, regardless of the trailer size,
stop lights and turn signals on the trailer are required for
motoring safety.
The Trailer Tow Package may include a 4 and 7–pin
wiring harness. Use a factory approved trailer harness
and connector.
NOTE:Do not cut or splice wiring into the vehicles
wiring harness.
STARTING AND OPERATING 393
5
Page 403 of 532
11. Repeat steps 9 and 10 with the transmission in
DRIVE.
12. Shut the engine OFF and place ignition key in the
unlocked OFF position.
13. Shift the transmission into PARK.
14. Apply the parking brake.
15. Attach the vehicle to the tow vehicle with the tow bar.
16. Release the parking brake.
NOTE:•
Steps 1 through 5 are requirements that must be met
prior to depressing the NEUTRAL selection button,
and must continue to be met until the four seconds
elapses and the shift has been completed. If any of
these requirements (with the exception of 3 - Key ON)
are not met prior to depressing the NEUTRAL button
or are no longer met during the four second timer, thenthe NEUTRAL indicator light will flash continuously
until all requirements are met or until the NEUTRAL
button is released.
•
The ignition key must be ON for a shift to take place
and for the position indicator lights to be operable. If
the key in not ON, the shift will not take place and no
position indicator lights will be on or flashing.
•
Flashing NEUTRAL position indicator light indicates
that shift requirements have not been met.
CAUTION!
Damage to the transmission may occur if the trans-
mission is shifted into PARK with the transfer case in
NEUTRAL and the engine running. With the transfer
case in NEUTRAL, ensure that the engine is OFF
prior to shifting the transmission into PARK.
STARTING AND OPERATING 401
5