Page 193 of 532
CAUTION!
Driving with a hot engine cooling system could
damage your vehicle. If temperature gauge reads “H”
pull over and stop the vehicle. Idle the vehicle with
the air conditioner turned off until the pointer drops
back into the normal range. If the pointer remains on
the “H” and you hear continuous chimes, turn the
engine off immediately, and call an authorized deal-
ership for service.
WARNING!
A hot engine cooling system is dangerous. You or
others could be badly burned by steam or boiling
coolant. You may want to call an authorized dealer-
ship for service if your vehicle overheats. If you
decide to look under the hood yourself, see Section 7
of this manual. Follow the warnings under the Cool-
ing System Pressure Cap paragraph.
14. Vehicle Security Light — If Equipped This light will flash at a fast rate for approxi-
mately 15 seconds, when the vehicle security
alarm is arming, and then will flash slowly
until the vehicle is disarmed.
UNDERSTANDING YOUR INSTRUMENT PANEL 191
4
Page 282 of 532
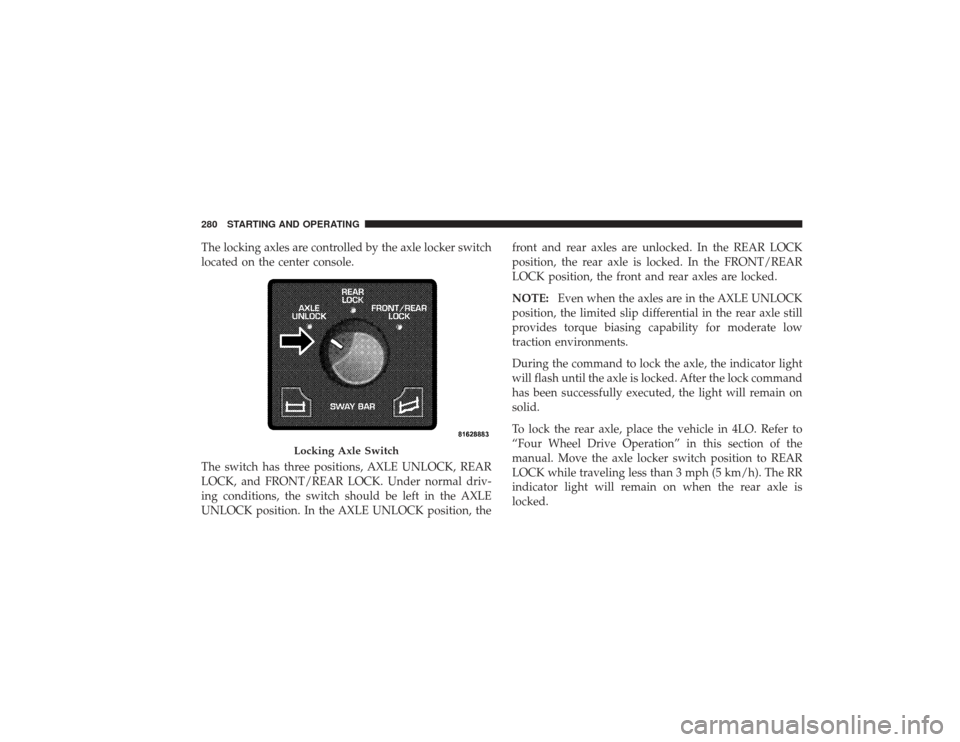
The locking axles are controlled by the axle locker switch
located on the center console.
The switch has three positions, AXLE UNLOCK, REAR
LOCK, and FRONT/REAR LOCK. Under normal driv-
ing conditions, the switch should be left in the AXLE
UNLOCK position. In the AXLE UNLOCK position, thefront and rear axles are unlocked. In the REAR LOCK
position, the rear axle is locked. In the FRONT/REAR
LOCK position, the front and rear axles are locked.
NOTE:
Even when the axles are in the AXLE UNLOCK
position, the limited slip differential in the rear axle still
provides torque biasing capability for moderate low
traction environments.
During the command to lock the axle, the indicator light
will flash until the axle is locked. After the lock command
has been successfully executed, the light will remain on
solid.
To lock the rear axle, place the vehicle in 4LO. Refer to
“Four Wheel Drive Operation” in this section of the
manual. Move the axle locker switch position to REAR
LOCK while traveling less than 3 mph (5 km/h). The RR
indicator light will remain on when the rear axle is
locked.
Locking Axle Switch
280 STARTING AND OPERATING
Page 290 of 532
using light brake pressure with light throttle will keep the
vehicle from jerking or lurching. This technique is also
used when you need to stop and restart a vehicle on a
steep incline.The Basics Of Off-Road DrivingYou will encounter many types of terrain driving off-
road. You should be familiar with the terrain and area
before proceeding. There are many types of surface
conditions: hard packed dirt, gravel, rocks, grass, sand,
mud, snow and ice. Every surface has a different effect on
your vehicle’s steering, handling and traction. Control-
ling your vehicle is one of the keys to successful off-road
driving, so always keep a firm grip on the steering wheel
and maintain a good driving posture. Avoid sudden
accelerations, turns or braking. In most cases there are no
road signs, posted speed limits or signal lights. Therefore
you will need to use your own good judgment on what is
safe and what isn’t. When on a trail you should always be
looking ahead for surface obstacles and changes interrain. The key is to plan your future driving route while
remembering what you are currently driving over.
CAUTION!
Never park your vehicle over dry grass or other
combustible materials. The heat from your vehicle
exhaust system could cause a fire.
WARNING!
Always wear your seat belt and firmly tie down
cargo. Unsecured cargo can become projectiles in an
off-road situation.When To Use Low RangeWhen driving off-road, shift into 4L (Low Range) for
additional traction or to improve handling and control on
slippery or difficult terrain. Due to the lower gearing, low
range will allow the engine to operate in a higher power
288 STARTING AND OPERATING
Page 320 of 532
and over-wrapped when slackened, leading to wire rope
damage. To prevent losing the end, hold the hook strap
while you work.
6. Secure to the anchor point. Once you have established
your anchor point, secure the tree-trunk protector or
choker-chain around the object.
CAUTION!
Always be certain the anchor you select will with-
stand the load.
Tree Trunk Protector
318 STARTING AND OPERATING
Page 321 of 532
NOTE: How to choose an anchor point:A secure
anchor is critical to winching operations. An anchor must
be strong enough to hold while winching. Natural an-
chors include trees, stumps and rocks. Hook the cable as
low as possible. If no natural anchors are available when
recovering another vehicle, your vehicle becomes the
anchor point. In this case, be sure to put the transmission
in NEUTRAL, apply the hand brake and block its wheels
to prevent your vehicle from moving. Ideally, you’ll want
an anchor point that will enable you to pull straight in the
direction the vehicle will move. This allows the wire rope
to wind tightly and evenly onto the spooling drum. An
anchor point as far away as possible will provide the
winch with its greatest pulling power.
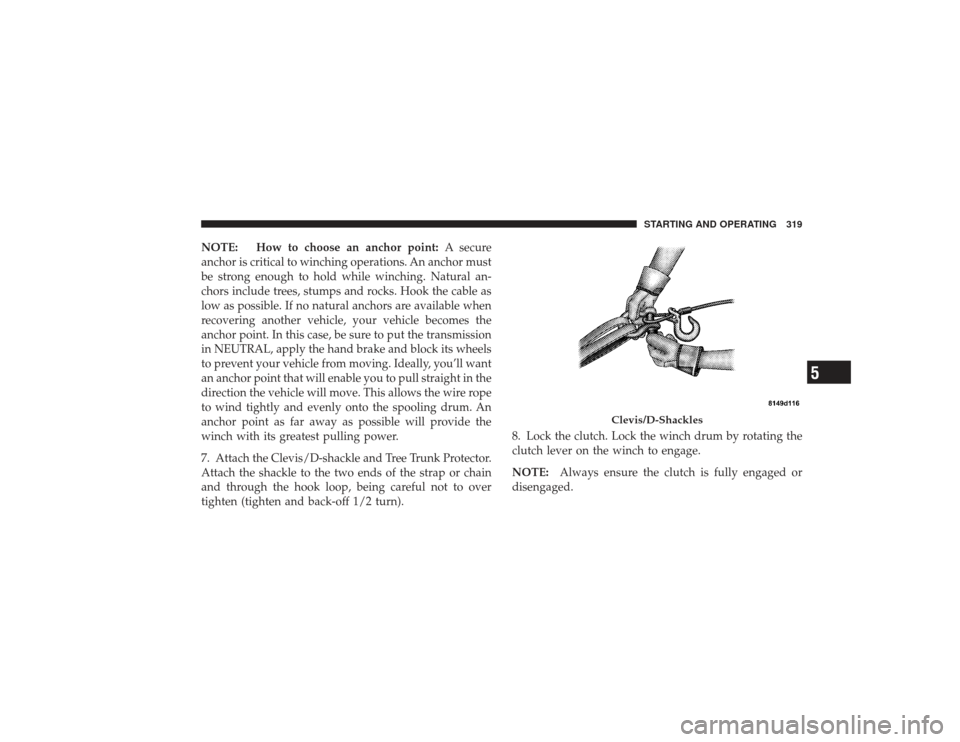
7. Attach the Clevis/D-shackle and Tree Trunk Protector.
Attach the shackle to the two ends of the strap or chain
and through the hook loop, being careful not to over
tighten (tighten and back-off 1/2 turn). 8. Lock the clutch. Lock the winch drum by rotating the
clutch lever on the winch to engage.
NOTE:
Always ensure the clutch is fully engaged or
disengaged.
Clevis/D-Shackles
STARTING AND OPERATING 319
5
Page 322 of 532
9. Connect the remote control to the winch control box,
located behind the front bumper. Be careful not to let the
remote control cord dangle in front of the winch. If you
choose to control the winch from inside your vehicle,
always pass the remote through a window to avoid
pinching the cord in the door. Always disconnect the
remote control when not in use.10. Put wire rope under tension. Using the remote con-
trol switch, slowly wind the wire rope until no slack
remains. Once the wire rope is under tension, stand well
clear of it and never step over it.
11. Check your anchor. Make sure all connections are
secured and free of debris before continuing with the
winching procedure.320 STARTING AND OPERATING
Page 325 of 532
NOTE:•
Avoid overheating the winch motor. For extended
winching, stop at reasonable intervals to allow the
winch motor to cool down.
•
What to look for under load:The wire rope must
always spool onto the drum as indicated by the drum
rotation decal on the winch. As you power-in, make
sure the wire rope winds evenly and tightly on the
drum. This prevents the outer wire wraps from draw-
ing into the inner wraps, binding and damaging the
wire rope. Avoid shock loads by using the control
switch intermittently to take up wire rope slack. Shock
loads can momentarily far exceed the winch and wire
rope ratings. During side pulls the wire rope tends to
stack up at one end of the drum. This stack can become large enough to cause serious damage to the winch.
So, line up pulls as straight ahead as possible and stop
winching if the wire rope comes close to the tie rods or
mounting plate. To fix an uneven stack, spool out that
section of the rope and reposition it to the opposite end
of the drum, which will free up space for continued
winching.
16. Secure vehicle. Once recovery of the vehicle’s is
complete, be sure to secure the vehicle’s brakes and put
the transmission in PARK. Release tension in the wire
rope.
17. Disconnect the wire rope, and disconnect from the
anchor.
STARTING AND OPERATING 323
5
Page 328 of 532
How to Change the Pulling Direction
All winching operations should have a straight line from
the winch to the object being pulled. This minimizes the
wire rope collecting on one side of the drum affecting
pulling efficiency and damaging wire rope. A snatch
block, secured to a point directly in front of the vehicle
will enable you to change your pulling direction while
still allowing the wire rope to be at 90° to wind properly
onto the spooling drum.Increasing Pulling PowerIn some cases, you may find yourself needing more
pulling power. The use of snatch blocks increases me-
chanical advantage and that increases your pulling
power.
Change Pulling Directions
326 STARTING AND OPERATING