Page 346 of 532
the stability feature at speeds above 40 mph (64 km/h).
The “ESP/TCS Indicator Light” will always be illumi-
nated when ESP is off. To turn ESP on again, momen-
tarily depress the ESP OFF switch. This will restore the
normal “ESP On” mode of operation.
“ESP Off” is the only operating mode for ESP in 4WD
LOW. Whenever the vehicle is started in 4WD LOW or
the transfer case (if equipped) is shifted from 4WD LOCK
or Neutral, to 4WD LOW, the ESP system will be in this
mode.
WARNING!
With the ESP switched off, the enhanced vehicle
stability offered by ESP is unavailable. In an emer-
gency evasive maneuver, the ESP system will not
engage to assist in maintaining stability. “ESP Off”
mode is intended for off-highway or off-road use,
only.
ESP/BAS Warning Light and ESP/TCS Indicator
LightThe malfunction indicator for the ESP is combined with
the BAS indicator. The “ESP/BAS Warning Light” and
the “ESP/TCS Indicator Light” in the instrument cluster
both come on when the ignition switch is turned to the
ON position. They should both go out with the engine
running. If the “ESP/BAS Warning Light” comes on
continuously with the engine running, a malfunction has
been detected in either the ESP or BAS system, or both. If
this light remains on after several ignition cycles, and the
vehicle has been driven several miles/kilometers at
speeds greater than 30 mph (48 km/h), see your autho-
rized dealer as soon as possible to have the problem
diagnosed and corrected.
NOTE:•
The “ESP Indicator Light” and the “ESP/BAS Warning
Light” come on momentarily each time the ignition
switch is turned ON.
344 STARTING AND OPERATING
Page 393 of 532
WARNING!
Improper towing can lead to an injury accident.
Follow these guidelines to make your trailer towing
as safe as possible:
Make certain that the load is secured in the trailer
and will not shift during travel. When trailering
cargo that is not fully secured, dynamic load shifts
can occur that may be difficult for the driver to
control. You could lose control of your vehicle and
have an accident.•
When hauling cargo or towing a trailer, do not over-
load your vehicle or trailer. Overloading can cause a
loss of control, poor performance or damage to brakes,
axle, engine, transmission, steering, suspension, chas-
sis structure or tires.
•
Safety chains must always be used between your
vehicle and trailer. Always connect the chains to theframe or hook retainers of the vehicle hitch. Cross the
chains under the trailer tongue and allow enough
slack for turning corners.
•
Vehicles with trailers should not be parked on a grade.
When parking, apply the parking brake on the tow
vehicle. Put the tow vehicle automatic transmission in
PARK. With four-wheel-drive vehicles, make sure the
transfer case is not in neutral. Always, block or
�chock�
the trailer wheels.
•
GCWR must not be exceeded.
•
Total weight must be distributed between the tow
vehicle and the trailer such that the following four
ratings are not exceeded:
1. GVWR
2. GTW
3. GAWR
STARTING AND OPERATING 391
5
Page 400 of 532
Recreational Towing Procedure — Manual Shift
Transfer Case — If EquippedUse the following procedure to prepare your vehicle for
recreational towing:
CAUTION!
It is necessary to follow these steps to be certain that
the transfer case is fully in NEUTRAL before recre-
ational towing to prevent damage to internal parts.
1. Bring the vehicle to a complete stop.
2. Shut OFF the engine.
3. Depress the brake pedal.
4. Shift the transmission into NEUTRAL.
5. Shift the transfer case lever into NEUTRAL. 6. Start the engine.
7. Shift the transmission into REVERSE.
8. Release the brake pedal for five seconds and ensure
that there is no vehicle movement.
9. Repeat steps 7 and 8 with the transmission in DRIVE.
10. Shut OFF the engine and place the ignition key in the
unlocked OFF position.
11. Shift the transmission into PARK.
12. Apply the parking brake.
13. Attach the vehicle to the tow vehicle with the tow bar.
14. Release the parking brake.398 STARTING AND OPERATING
Page 403 of 532
11. Repeat steps 9 and 10 with the transmission in
DRIVE.
12. Shut the engine OFF and place ignition key in the
unlocked OFF position.
13. Shift the transmission into PARK.
14. Apply the parking brake.
15. Attach the vehicle to the tow vehicle with the tow bar.
16. Release the parking brake.
NOTE:•
Steps 1 through 5 are requirements that must be met
prior to depressing the NEUTRAL selection button,
and must continue to be met until the four seconds
elapses and the shift has been completed. If any of
these requirements (with the exception of 3 - Key ON)
are not met prior to depressing the NEUTRAL button
or are no longer met during the four second timer, thenthe NEUTRAL indicator light will flash continuously
until all requirements are met or until the NEUTRAL
button is released.
•
The ignition key must be ON for a shift to take place
and for the position indicator lights to be operable. If
the key in not ON, the shift will not take place and no
position indicator lights will be on or flashing.
•
Flashing NEUTRAL position indicator light indicates
that shift requirements have not been met.
CAUTION!
Damage to the transmission may occur if the trans-
mission is shifted into PARK with the transfer case in
NEUTRAL and the engine running. With the transfer
case in NEUTRAL, ensure that the engine is OFF
prior to shifting the transmission into PARK.
STARTING AND OPERATING 401
5
Page 410 of 532
Removing The Spare TireRemove the spare tire before attempting to jack the truck.
Attach the wheel wrench to the jack extension tube. Insert
the tube through the access hole between the lower
tailgate and the top of the bumper and into the winch
mechanism tube. Rotate the wheel wrench handle coun-
terclockwise until the spare tire is on the ground with
enough cable slack to allow you to pull it out from under
the vehicle. When the spare is clear, tilt the retainer at the
end of the cable and pull it through the center of the
wheel.
NOTE:Always stow the spare tire with the valve stem
facing the ground.
It is recommended that you stow the flat or spare to
avoid tangling the loose cable.
Removing the Spare Tire
1 — Lower
2 — Raise
408 WHAT TO DO IN EMERGENCIES
Page 412 of 532
3. Place the shift lever into PARK. On four-wheel drive
vehicles, shift the transfer case to the 4L position.
4. Turn the ignition OFF.
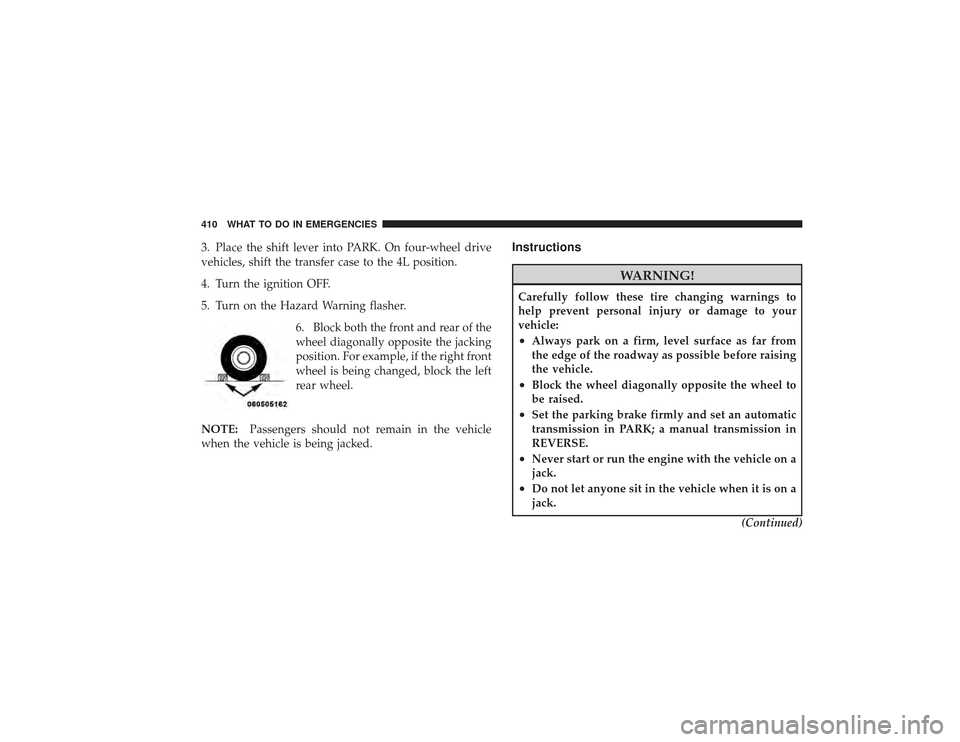
5. Turn on the Hazard Warning flasher.6. Block both the front and rear of the
wheel diagonally opposite the jacking
position. For example, if the right front
wheel is being changed, block the left
rear wheel.
NOTE: Passengers should not remain in the vehicle
when the vehicle is being jacked.
Instructions
WARNING!
Carefully follow these tire changing warnings to
help prevent personal injury or damage to your
vehicle:•
Always park on a firm, level surface as far from
the edge of the roadway as possible before raising
the vehicle.
•
Block the wheel diagonally opposite the wheel to
be raised.
•
Set the parking brake firmly and set an automatic
transmission in PARK; a manual transmission in
REVERSE.
•
Never start or run the engine with the vehicle on a
jack.
•
Do not let anyone sit in the vehicle when it is on a
jack.
(Continued)
410 WHAT TO DO IN EMERGENCIES
Page 413 of 532
WARNING! (Continued)
•
Do not get under the vehicle when it is on a jack.
•
Only use the jack in the positions indicated and
for lifting this vehicle during a tire change.
•
If working on or near a roadway, be extremely
careful of motor traffic.
•
To assure that spare tires, flat or inflated, are
securely stowed, spares must be stowed with the
valve stem facing the ground.
•
Turn on the Hazard Warning flasher.
1. Remove the spare wheel, jack, and tools from storage. 2. Using the wheel wrench, loosen, but do not remove,
the wheel nuts by turning them counterclockwise one
turn while the wheel is still on the ground.
3. Placement of the Jack:
•
For 2500/3500 4x2 series trucks, when changing a
front wheel, place the bottle jack under the frame
rail behind the wheel. Locate the jack as far forward
as possible on the straight part of the frame.
Jack Warning Label
4x2 Jacking Location
WHAT TO DO IN EMERGENCIES 411
6
Page 415 of 532
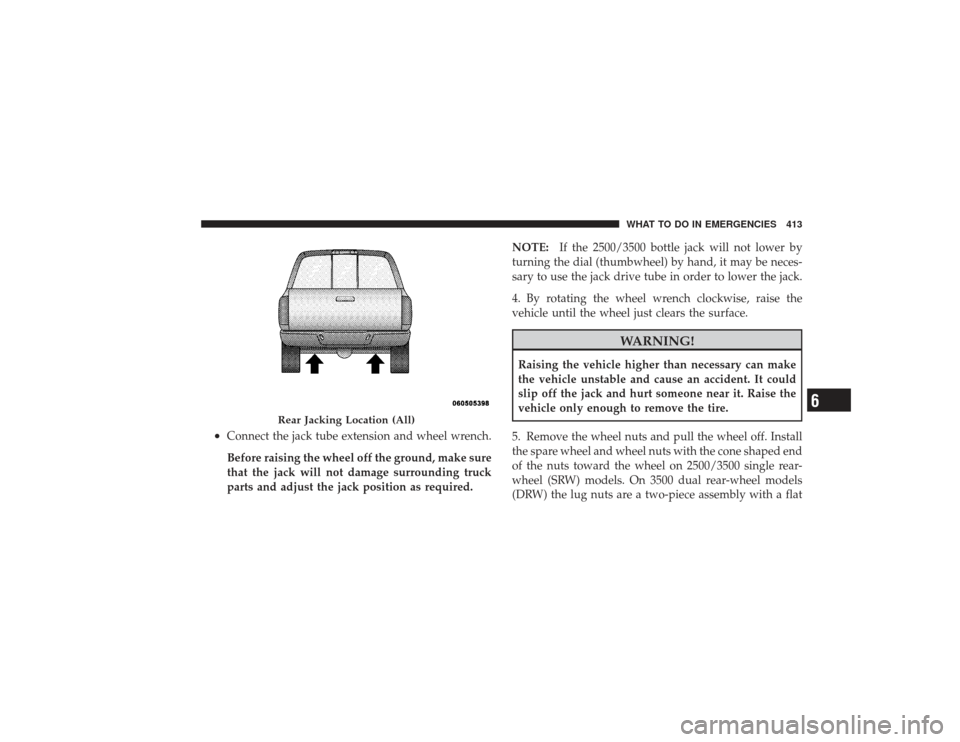
•
Connect the jack tube extension and wheel wrench.
Before raising the wheel off the ground, make sure
that the jack will not damage surrounding truck
parts and adjust the jack position as required.NOTE:
If the 2500/3500 bottle jack will not lower by
turning the dial (thumbwheel) by hand, it may be neces-
sary to use the jack drive tube in order to lower the jack.
4. By rotating the wheel wrench clockwise, raise the
vehicle until the wheel just clears the surface.
WARNING!
Raising the vehicle higher than necessary can make
the vehicle unstable and cause an accident. It could
slip off the jack and hurt someone near it. Raise the
vehicle only enough to remove the tire.
5. Remove the wheel nuts and pull the wheel off. Install
the spare wheel and wheel nuts with the cone shaped end
of the nuts toward the wheel on 2500/3500 single rear-
wheel (SRW) models. On 3500 dual rear-wheel models
(DRW) the lug nuts are a two-piece assembly with a flat
Rear Jacking Location (All)
WHAT TO DO IN EMERGENCIES 413
6