Page 121 of 532

NOTE:Keep in mind that you have to press the VR
button first and wait for the beep before speaking the
“Barge In” commands.Voice TrainingFor users experiencing difficulty with the system recog-
nizing their voice commands or numbers, uconnect �
phone Voice Training feature may be used.
1. Press the VR button, say “System Setup” and once you
are in that menu then say “Voice Training.” This will train
your own voice to the system and will improve recogni-
tion.
2. Repeat the words and phrases when prompted by
uconnect� phone. For best results, the Voice Training
session should be completed when the vehicle is parked,
engine running, all windows closed, and the blower fan
switched off. This procedure may be repeated with a new
user. The system will adapt to the last trained voice only.
SEATSSeats are a primary part of the Occupant Restraint System
of the vehicle. Proper use of the seats is needed for safe
operation of the vehicle.
WARNING!
•
It is extremely dangerous to ride in a cargo area,
inside or outside of a vehicle. In a collision, people
riding in these areas are more likely to be seri-
ously injured or killed.
•
Do not allow people to ride in any area of your
vehicle that is not equipped with seats and seat
belts.
•
Be sure everyone in your vehicle is in a seat and
using a seat belt properly.UNDERSTANDING THE FEATURES OF YOUR VEHICLE 119
3
Page 122 of 532
Manual Seat Adjuster — If EquippedThe front seats are adjustable, forward or rearward. The
adjustment handle is located at the front edge of each seat
cushion. Pull upward on the handle and slide the seat,
forward or rearward, to the desired position. Using body
pressure, move forward and rearward on the seat to be
sure the seat is locked into position.
WARNING!
Adjusting a seat while the vehicle is moving is
dangerous. The sudden movement of the seat could
cause you to lose control. The seat belt might not be
properly adjusted and you could be injured. Only
adjust a seat while the vehicle is parked.
Manual Seat Adjuster
120 UNDERSTANDING THE FEATURES OF YOUR VEHICLE
Page 123 of 532
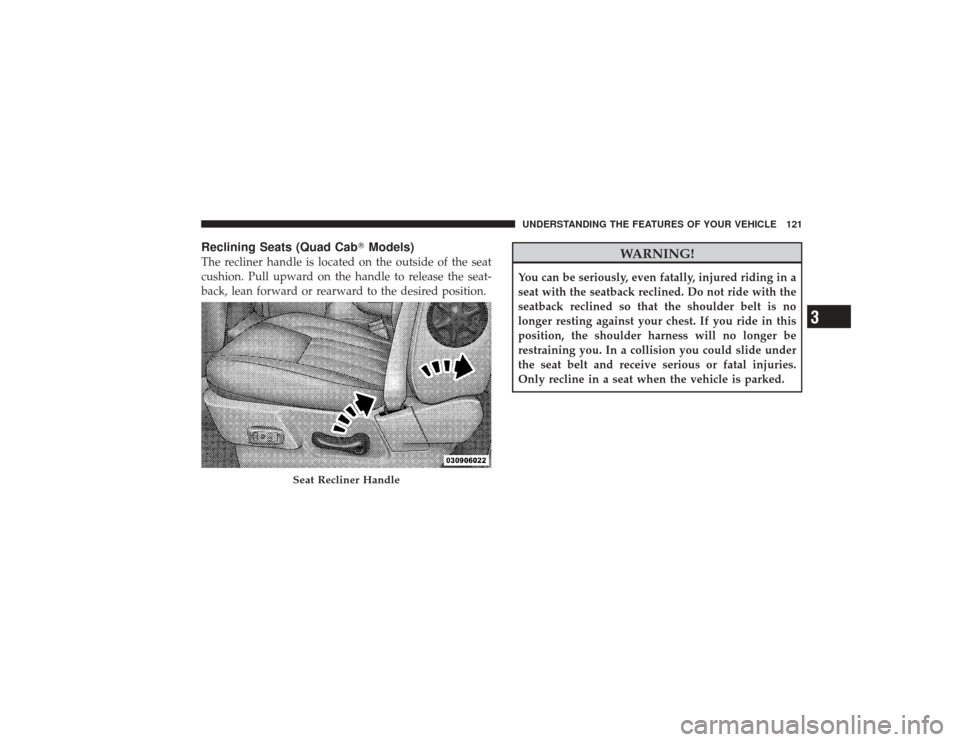
Reclining Seats (Quad Cab�Models)The recliner handle is located on the outside of the seat
cushion. Pull upward on the handle to release the seat-
back, lean forward or rearward to the desired position.
WARNING!
You can be seriously, even fatally, injured riding in a
seat with the seatback reclined. Do not ride with the
seatback reclined so that the shoulder belt is no
longer resting against your chest. If you ride in this
position, the shoulder harness will no longer be
restraining you. In a collision you could slide under
the seat belt and receive serious or fatal injuries.
Only recline in a seat when the vehicle is parked.
Seat Recliner Handle
UNDERSTANDING THE FEATURES OF YOUR VEHICLE 121
3
Page 124 of 532
Reclining Seats (2500/3500 Models)The recliner handle is located on the outside of the seat
cushion. Pull upward on the handle to release the seat-
back, lean forward or rearward to the desired position.
WARNING!
You can be seriously, even fatally, injured riding in a
seat with the seatback reclined. Do not ride with the
seatback reclined so that the shoulder belt is no
longer resting against your chest. If you ride in this
position, the shoulder harness will no longer be
restraining you. In a collision you could slide under
the seat belt and receive serious or fatal injuries.
Only recline in a seat when the vehicle is parked.
Seat Recliner Handle
122 UNDERSTANDING THE FEATURES OF YOUR VEHICLE
Page 129 of 532
 — If EquippedBoth the left and right rear seats can be folded flat (kneel
mode) and used for carrying cargo. Each of the rear
seatbacks provide two D-rings and rear st")
Folding Rear Seat (Kneel Mode) — If EquippedBoth the left and right rear seats can be folded flat (kneel
mode) and used for carrying cargo. Each of the rear
seatbacks provide two D-rings and rear storage bin lids
with two slotted cutouts. Use a cargo tie-downs to secure
cargo.
WARNING!
•
It is extremely dangerous to ride in a cargo area,
inside or outside of a vehicle. In a collision, people
riding in these areas are more likely to be seri-
ously injured or killed.
•
Do not allow people to ride in any area of your
vehicle that is not equipped with seats and seat
belts.
•
Be sure everyone in your vehicle is in a seat and
using a seat belt properly.
•
Cargo must be securely tied down before driving
your vehicle. Improperly secured cargo can fly
around in a sudden stop and strike someone in the
vehicle, causing serious injury or possible death.
Secure cargo with a cargo tie-down using the
D-rings provided on the back of the seats and the
slotted cutouts in the rear storage bin lid.
Securing Cargo
UNDERSTANDING THE FEATURES OF YOUR VEHICLE 127
3
Page 131 of 532
WARNING!
Be certain that the seatback is securely locked into
position. If the seatback in not securely locked into
position the seat will not provide the proper stability
for child seats and/or passengers. An improperly
latched seat could cause serious injury.Heated Seats — If EquippedThis feature heats the front driver and passenger seats.
The controls for front heated seats are located in the
instrument panel under the climate controls.After turning the ignition ON, you can choose from High,
Low, or Off heat settings. Amber indicator lights in each
switch indicate the level of heat in use. Two indicator
lights will illuminate for High, one for Low, and none for
Off.
Heated Seat Switches
UNDERSTANDING THE FEATURES OF YOUR VEHICLE 129
3
Page 132 of 532
Press the switch once to select High-level heat-
ing. Press the switch a second time to select
Low-level heating. Press the switch a third time
to shut the heating elements Off.
WARNING!
•
Persons who are unable to feel pain to the skin
because of advanced age, chronic illness, diabetes,
spinal cord injury, medication, alcohol use, ex-
haustion or other physical condition must exercise
care when using the seat heater. It may cause burns
even at low temperatures, especially if used for
long periods of time.
•
Do not place anything on the seat that insulates
against heat, such as a blanket or cushion. This
may cause the seat heater to overheat.
TO OPEN AND CLOSE THE HOODTo open the hood, two latches must be released.
1. Pull the hood release lever located below the steering
wheel at the base of the instrument panel.
Hood Release Lever
130 UNDERSTANDING THE FEATURES OF YOUR VEHICLE
Page 133 of 532
2. Reach into the opening beneath the center of the grille
and push upward on the safety latch to release it before
raising the hood.
CAUTION!
To prevent possible damage, do not slam the hood to
close it. Use a firm downward push at the front center
of the hood to ensure that both latches engage.
WARNING!
If the hood is not fully latched, it could fly up when
the vehicle is moving and block your forward vision.
Be sure all hood latches are latched fully before
driving.
Safety Latch
UNDERSTANDING THE FEATURES OF YOUR VEHICLE 131
3

The recliner handle is located on the outside of the seat
cushion. Pull upward on the handle to release the seat-
back, lean forward or rearward to the desired positi")


