2009 DODGE RAM 2500 DIESEL stop start
[x] Cancel search: stop startPage 198 of 532
The light also will turn on when the parking brake is
applied with the ignition switch in the ON position.
NOTE:This light shows only that the parking brake is
applied. It does not show the degree of brake application.
20. Anti-Lock Brake (ABS) Light This light monitors the Anti-Lock Brake System
(ABS). The light will turn on when the ignition
switch is turned to the ON position and may
stay on for as long as four seconds.
If the ABS light remains on or turns on while driving, it
indicates that the Anti-Lock portion of the brake system
is not functioning and that service is required. However,
the conventional brake system will continue to operate
normally if the BRAKE warning light is not on.
If the ABS light is on, the brake system should be serviced
as soon as possible to restore the benefits of Anti-Lock
brakes. If the ABS light does not turn on when the
Ignition switch is turned to the ON position, have the
light inspected by an authorized dealer. 21. Electronic Throttle Control (ETC) Light
This light informs you of a problem with the
Electronic Throttle Control (ETC) system. If a
problem is detected, the light will come on
while the engine is running. Cycle the ignition
key when the vehicle has completely stopped and the
shift lever is placed in the PARK position. The light
should turn off. If the light remains lit with the engine
running, your vehicle will usually be drivable; however,
see an authorized dealer for service as soon as possible. If
the light is flashing when the engine is running, imme-
diate service is required and you may experience reduced
performance, an elevated/rough idle or engine stall and
your vehicle may require towing. The light will come on
when the ignition is first turned ON and remain on
briefly as a bulb check. If the light does not come on
during starting, have the system checked by an autho-
rized dealer.196 UNDERSTANDING YOUR INSTRUMENT PANEL
Page 200 of 532
vehicle placard or tire inflation pressure label, you should
determine the proper tire inflation pressure for those tires.)As an added safety feature, your vehicle has been
equipped with a Tire Pressure Monitoring System
(TPMS) that illuminates a low tire pressure telltale when
one or more of your tires is significantly under-inflated.
Accordingly, when the low tire pressure telltale illumi-
nates, you should stop and check your tires as soon as
possible, and inflate them to the proper pressure. Driving
on a significantly under-inflated tire causes the tire to
overheat and can lead to tire failure. Under-inflation also
reduces fuel efficiency and tire tread life, and may affect
the vehicle’s handling and stopping ability.
Please note that the TPMS is not a substitute for proper
tire maintenance, and it is the driver ’s responsibility to
maintain correct tire pressure, even if under-inflation has
not reached the level to trigger illumination of the TPMS
low tire pressure telltale.Your vehicle has also been equipped with a TPMS
malfunction indicator to indicate when the system is not
operating properly. The TPMS malfunction indicator is
combined with the low tire pressure telltale. When the
system detects a malfunction, the telltale will flash for
approximately one minute and then remain continuously
illuminated. This sequence will continue upon subse-
quent vehicle start-ups as long as the malfunction exists.
When the malfunction indicator is illuminated, the sys-
tem may not be able to detect or signal low tire pressure
as intended. TPMS malfunctions may occur for a variety
of reasons, including the installation of replacement or
alternate tires or wheels on the vehicle that prevent the
TPMS from functioning properly. Always check the
TPMS malfunction telltale after replacing one or more
tires or wheels on your vehicle, to ensure that the
replacement or alternate tires and wheels allow the TPMS
to continue to function properly.198 UNDERSTANDING YOUR INSTRUMENT PANEL
Page 203 of 532
33. Charging System LightThis light shows the status of the electrical charg-
ing system. The light should come on when the
ignition switch is first turned ON and remain on briefly
as a bulb check. If the light stays on or comes on while
driving, turn off some of the vehicle’s non-essential
electrical devices or increase engine speed (if at idle). If
the charging system light remains on, it means that the
vehicle is experiencing a problem with the charging
system. Obtain SERVICE IMMEDIATELY. See an autho-
rized dealer.
34. Oil Pressure Warning Light This light indicates low engine oil pressure. The
light should turn on momentarily when the engine
is started. If the light turns on while driving, stop the
vehicle and shut off the engine as soon as possible. A
chime will sound for four minutes when this light turns
on. Do not operate the vehicle until the cause is corrected.
This light does not indicate how much oil is in the engine.
The engine oil level must be checked under the hood.
ELECTRONIC DIGITAL CLOCKThe clock and radio each use the display panel built into
the radio. A digital readout shows the frequency and/or
time in hours and minutes (depending on your radio
model) whenever the ignition switch is in the ON or ACC
position.
When the ignition switch is in the OFF position, or when
the radio frequency is being displayed, time keeping is
accurately maintained.
On the RAQ radio the time button alternates the location
of the time and frequency on the display. On the REF only
one of the two, time or frequency, is displayed at a time.
UNDERSTANDING YOUR INSTRUMENT PANEL 201
4
Page 256 of 532
After StartingThe idle speed is automatically controlled and will de-
crease as the engine warms up.ENGINE BLOCK HEATER — IF EQUIPPEDThe engine block heater warms the engine, and permits
quicker starts in cold weather. Connect the cord to a
standard 110-115 Volt AC electrical outlet with a
grounded, three-wire extension cord.
The engine block heater cord is routed under the hood on
the driver side of the vehicle. It has a removable cap that
is located on the driver’s side of the Integrated Power
Module.
WARNING!
Remember to disconnect the cord before driving.
Damage to the 110-115 Volt electrical cord could cause
electrocution.
AUTOMATIC TRANSMISSION
CAUTION!
Damage to the transmission may occur if the follow-
ing precautions are not observed:•
Shift into PARK only after the vehicle has come to
a complete stop.
•
Shift into or out of REVERSE only after the
vehicle has come to a complete stop and the engine
is at idle speed.
•
Do not shift from REVERSE, PARK, or NEUTRAL
into any forward gear when the engine is above
idle speed.
•
Before shifting into any gear, make sure your foot
is firmly on the brake pedal.
254 STARTING AND OPERATING
Page 258 of 532
WARNING!
•
Never use the PARK position as a substitute for
the parking brake. Always apply parking brake
fully when parked to guard against vehicle move-
ment and possible injury or damage.
•
Your vehicle could move and injure you and others
if it is not completely in PARK. Check by trying to
move the shift lever back and forth without first
pulling it toward you after you have set it in
PARK. Make sure it is in PARK before leaving the
vehicle.(Continued)
WARNING! (Continued)
•
It is dangerous to move the shift lever out of PARK
or NEUTRAL if the engine speed is higher than
idle speed. If your foot is not firmly on the brake
pedal, the vehicle could accelerate quickly forward
or in reverse. You could lose control of the vehicle
and hit someone or something. Only shift into
gear when the engine is idling normally and when
your right foot is firmly on the brake pedal.
REVERSE
Use this range only after the vehicle has come to a
complete stop.
NEUTRAL
Shift into NEUTRAL when the vehicle is standing for
prolonged periods with the engine running. The engine
may be started in this range. Set the parking brake if you
must leave the vehicle.
256 STARTING AND OPERATING
Page 263 of 532
This transfer case is intended to be driven in the 2H
position for normal street and highway conditions such
as dry, hard surfaced roads.
When additional traction is required, the 4H and 4L
positions can be used to lock the front and rear drive-
shafts together and force the front and rear wheels to
rotate at the same speed. This is accomplished by simply
moving the shift lever to the desired positions. The 4H
and 4L positions are intended for loose, slippery road
surfaces only. Driving in the 4H and 4L positions on dry,
hard surfaced roads may cause increased tire wear and
damage to the driveline components.The “Transfer Case Position Indicator Light” in the instru-
ment cluster will alert the driver that the vehicle is in
four-wheel drive and that the front and rear driveshafts
are locked together. This light will illuminate when the
transfer case is shifted into either the 4H or 4L position.
There is no light for the 2H or NEUTRAL positions.
When operating your vehicle in 4L, the engine speed is
approximately three times that of the 2H or 4H positions
at a given road speed. Take care not to overspeed the
engine and do not exceed 25 mph (40 km/h).
Proper operation of four-wheel drive vehicles depends
on tires of equal size, type and circumference on each
wheel. Any difference will adversely affect shifting and
can cause damage to the transfer case.
NOTE:Do not attempt to make a shift while only the
front or rear wheels are spinning. The transfer case is not
equipped with a synchronizer and therefore the front and
rear driveshaft speeds must be equal for the shift to take
place. Shifting while only the front or rear wheels are
spinning can cause damage to the transfer case.
Because four-wheel drive provides improved traction,
there is a tendency to exceed safe turning and stopping
speeds. Do not go faster than road conditions permit.
STARTING AND OPERATING 261
5
Page 265 of 532
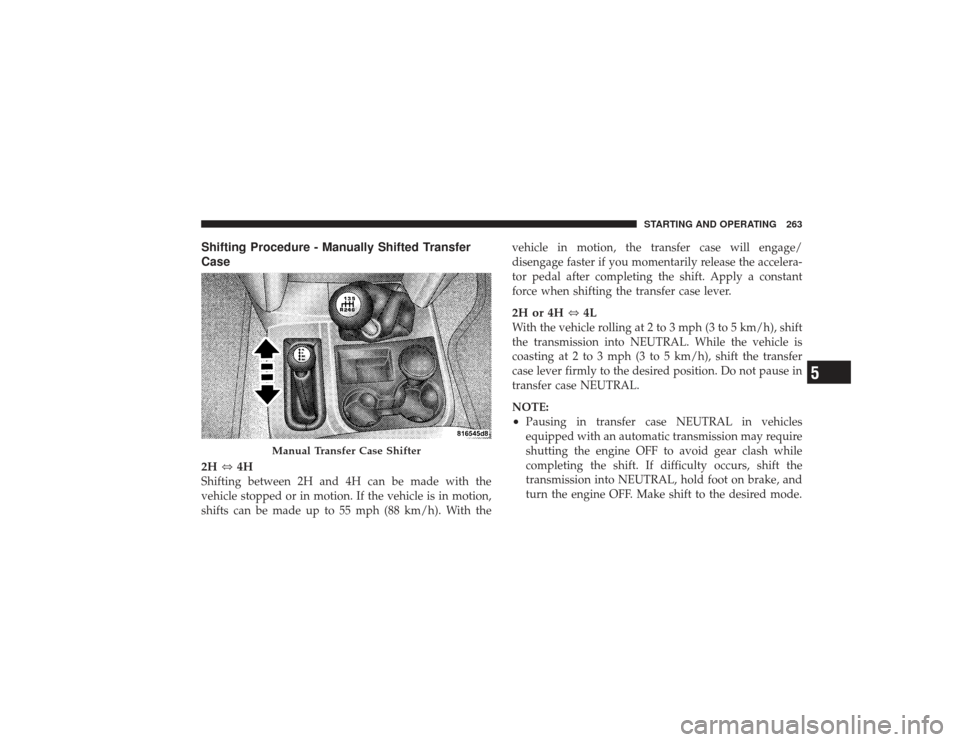
Shifting Procedure - Manually Shifted Transfer
Case
2H⇔4HShifting between 2H and 4H can be made with the
vehicle stopped or in motion. If the vehicle is in motion,
shifts can be made up to 55 mph (88 km/h). With the vehicle in motion, the transfer case will engage/
disengage faster if you momentarily release the accelera-
tor pedal after completing the shift. Apply a constant
force when shifting the transfer case lever.
2H or 4H
⇔4LWith the vehicle rolling at 2 to 3 mph (3 to 5 km/h), shift
the transmission into NEUTRAL. While the vehicle is
coasting at 2 to 3 mph (3 to 5 km/h), shift the transfer
case lever firmly to the desired position. Do not pause in
transfer case NEUTRAL.
NOTE:•
Pausing in transfer case NEUTRAL in vehicles
equipped with an automatic transmission may require
shutting the engine OFF to avoid gear clash while
completing the shift. If difficulty occurs, shift the
transmission into NEUTRAL, hold foot on brake, and
turn the engine OFF. Make shift to the desired mode.
Manual Transfer Case Shifter
STARTING AND OPERATING 263
5
Page 266 of 532
•
Shifting into or out of 4L is possible with the vehicle
completely stopped, however difficulty may occur due
to the mating clutch teeth not being properly aligned.
Several attempts may be required for clutch teeth
alignment and shift completion to occur. The preferred
method is with the vehicle rolling 2 to 3 mph (3 to
5 km/h). Avoid attempting to engage or disengage 4L
with the vehicle moving faster than 2 to 3 mph (3 to
5 km/h).
•
Do not attempt to shift into or from 4L while the
transmission is in gear.
Transfer Case Position Indicator LightThe “Transfer Case Position Indicator Light” in the
instrument cluster is used to alert the driver that the front
axle is fully engaged and all four wheels are driving.
Electronically Shifted Transfer Case Operating
Information/Precautions (Five Position Switch) —
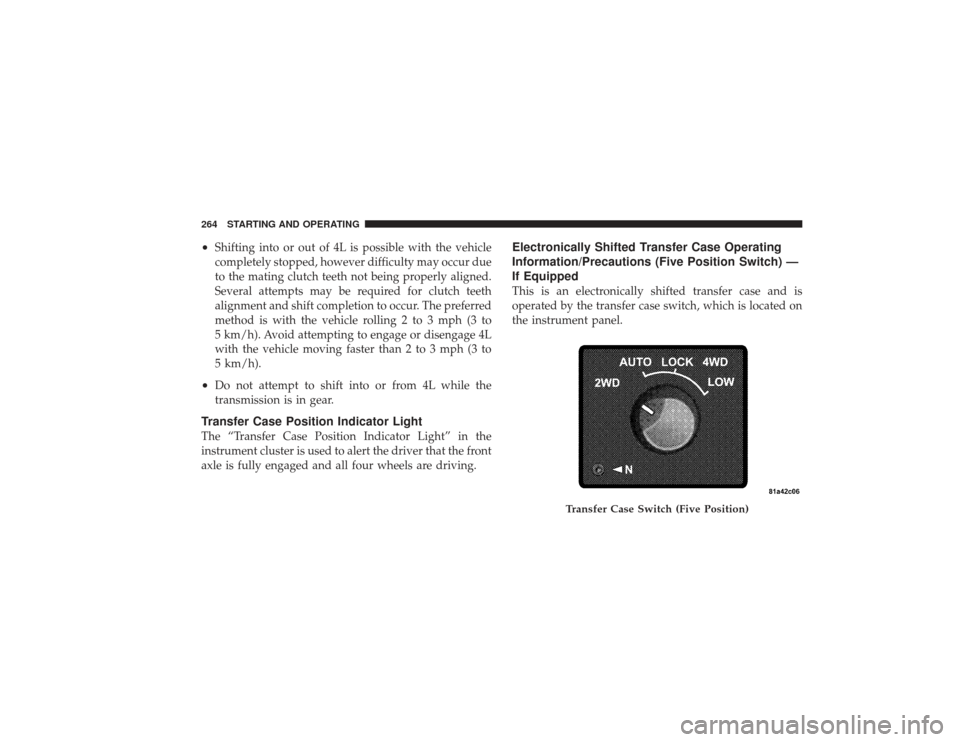
If EquippedThis is an electronically shifted transfer case and is
operated by the transfer case switch, which is located on
the instrument panel.
Transfer Case Switch (Five Position)
264 STARTING AND OPERATING