Page 75 of 449
Safety Checks You Should Make Outside The
Vehicle
Tires
Examine tires for tread wear or uneven wear patterns.
Check for stones, nails, glass or other objects lodged in
the tread.
Inspect for tread cuts or sidewall cracks. Check wheel
nuts for tightness and tires for proper pressure.
Lights
Check the operation of all exterior lights. Check turn
signal and high beam indicator lights on the instrument
panel.
Door Latches
Check for positive closing, latching and locking.
Fluid Leaks
Check area under vehicle after overnight parking for fuel,
water, oil, or other fluid leaks. Also, if fuel fumes are
detected the cause should be located and corrected.
THINGS TO KNOW BEFORE STARTING YOUR VEHICLE 73
2
Page 79 of 449
mTilt Steering Column................... 131
mElectronic Speed Control Ð If Equipped...... 132
NTo Activate......................... 133
NTo Set At A Desired Speed.............. 133
NTo Deactivate....................... 133
NTo Resume Speed.................... 133
NTo Vary The Speed Setting.............. 134
NTo Accelerate For Passing............... 134
mOverhead Console..................... 135
NCourtesy/Reading Lights............... 136
mCompass/Temperature Mini-Trip Computer . . . 136
NUS/M Button....................... 137
NReset Button........................ 137NStep Button......................... 138
NAverage Fuel Economy (AVG ECO)........ 138
NDistance To Empty (DTE)............... 138
NTrip Odometer (ODO)................. 139
NElapsed Time (ET).................... 139
NC/T Button......................... 139
NGlobal Reset........................ 140
NCompass/Temperature Display........... 140
NAutomatic Compass Calibration.......... 140
NManual Compass Calibration............ 141
NTo Put Into a Calibration Mode........... 141
NOutside Temperature.................. 142
UNDERSTANDING THE FEATURES OF YOUR VEHICLE 77
3
Page 139 of 449
US/M Button
Use the US/M button to change the display from U.S. to
metric measurement units.
RESET Button
Use the RESET button to reset the following displays:
²Average Fuel Economy
²Trip Odometer
²Elapsed time.
US/M Button
RESET Button
UNDERSTANDING THE FEATURES OF YOUR VEHICLE 137
3
Page 140 of 449
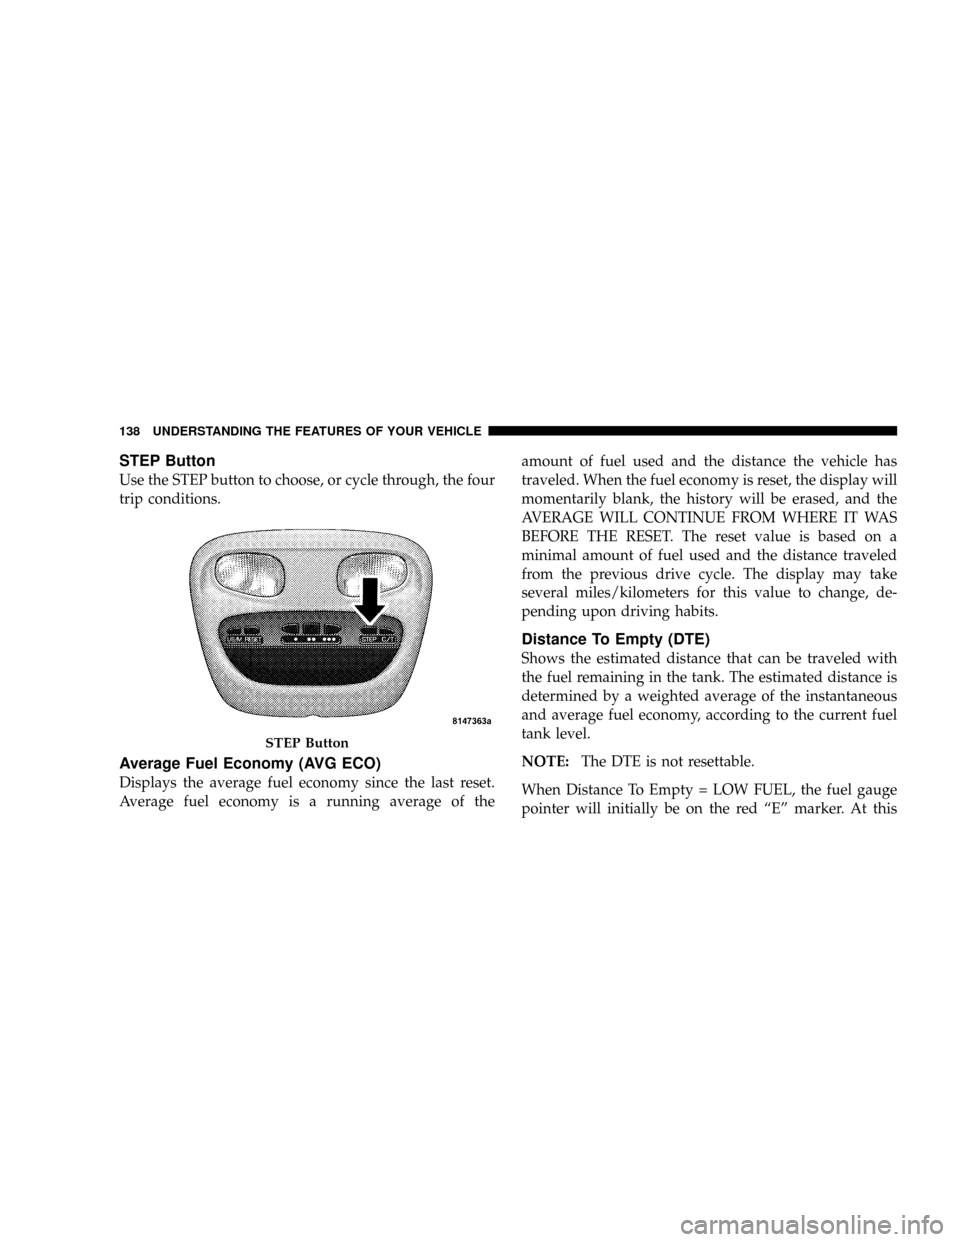
STEP Button
Use the STEP button to choose, or cycle through, the four
trip conditions.
Average Fuel Economy (AVG ECO)
Displays the average fuel economy since the last reset.
Average fuel economy is a running average of theamount of fuel used and the distance the vehicle has
traveled. When the fuel economy is reset, the display will
momentarily blank, the history will be erased, and the
AVERAGE WILL CONTINUE FROM WHERE IT WAS
BEFORE THE RESET. The reset value is based on a
minimal amount of fuel used and the distance traveled
from the previous drive cycle. The display may take
several miles/kilometers for this value to change, de-
pending upon driving habits.
Distance To Empty (DTE)
Shows the estimated distance that can be traveled with
the fuel remaining in the tank. The estimated distance is
determined by a weighted average of the instantaneous
and average fuel economy, according to the current fuel
tank level.
NOTE:The DTE is not resettable.
When Distance To Empty = LOW FUEL, the fuel gauge
pointer will initially be on the red ªEº marker. At this
STEP Button
138 UNDERSTANDING THE FEATURES OF YOUR VEHICLE
Page 141 of 449
point (fuel gauge pointer on the red ªEº marker), there is
reserve fuel capacity, which corresponds to approxi-
mately 8% of tank volume. This reserve capacity was put
in place to prevent the likelihood of customers running
out of fuel when operating at maximum load conditions
in areas where there aren't many gas stations.
NOTE:The Distance To Empty will remain equal to zero
until the vehicle runs out of fuel or is refueled.
Trip Odometer (ODO)
This display shows the distance traveled since the last
reset.
NOTE:The maximum value is approximately
6000 miles (9656 km).
Resetting of this screen will cause the trip odometer to
change to zero. Then the trip odometer must be reset in
order to update the trip odometer miles.
Elapsed Time (ET)
This display shows the accumulated ignition ON time
since the last reset. Resetting the Elapsed Time will cause
the display to change to zero.
C/T Button
Use the C/T (Compass/Temperature) button to select a
readout of the outside temperature and one of eight
compass headings that indicate the direction in which the
vehicle is facing.
UNDERSTANDING THE FEATURES OF YOUR VEHICLE 139
3
Page 170 of 449
INSTRUMENT CLUSTER DESCRIPTION
1. Fuel Gauge
The fuel gauge shows the level of fuel in the fuel tank
when ignition switch is in the ON position.
2. Temperature Gauge
The temperature gauge shows engine coolant tempera-
ture. Any reading within the normal range indicates that
the engine cooling system is operating satisfactorily. The
gauge pointer will likely indicate a higher temperature
when driving in hot weather, up mountain grades, or
when towing a trailer. It should not be allowed to exceed
the upper limits of the normal operating range.
CAUTION!
Do not leave your vehicle unattended with the en-
gine running as you would not be able to react to the
temperature gauge if the engine overheats.3. Turn Signal Indicators
When a turn signal is activated, a right-pointing or
left-pointing arrow lights up and flashes to indicate the
direction of the turn. These indicators also indicate
proper operation of the front and rear turn signal lights.
If either indicator flashes at a faster rate than normal,
check for a defective bulb. If either indicator fails to light
up when the lever is moved, check for a defective fuse or
turn signal LED. A single chime is activated when the
left/right turn signal is left on, with the vehicle speed
greater than 15 mph (24 km/h) for more than one mile.
4. Low Fuel Warning Light
The low fuel warning light will illuminate when the
fuel gauge reads 1/8 of a tank or less. There is a
pointer on the side of this symbol that indicates the
side that your fuel filler door is located.
168 UNDERSTANDING YOUR INSTRUMENT PANEL
Page 174 of 449
CHAngE OIL and the outside temperature on vehicles
that are not equipped with the Overhead Console with
Compass/Temperature Mini-Trip Computer.
If the vehicle diagnostic system determines that the fuel
filler cap is loose, improperly installed, or damaged,
ªGASCAPº will be displayed in the instrument cluster.
Tighten the fuel filler cap properly and press the odom-
eter RESET button to turn the ªGASCAPº message off. If
the problem continues, the message will appear the next
time the vehicle is started.
Change Oil Message
Your vehicle is equipped with an engine oil change
indicator system. The ªCHAngE OILº message will flash
in the instrument cluster odometer for approximately
12 seconds after a single chime has sounded, to indicate
the next scheduled oil change interval. The engine oil
change indicator system is duty cycle based, which
means the engine oil change interval may fluctuate
dependent upon your personal driving style.Unless reset, this message will continue to display each
time you turn the ignition switch to the ON/RUN
position. To turn off the message temporarily, press and
release the Trip Odometer button on the instrument
cluster. To reset the oil change indicator system (after
performing the scheduled maintenance) refer to the fol-
lowing procedure.
1. Turn the ignition switch to the ON position(do not
start the engine).
2. Fully depress the accelerator pedal slowly three
times within 10 seconds.
3. Turn the ignition switch to the OFF/LOCK position.
NOTE:If the indicator message illuminates when you
start the vehicle, the oil change indicator system did not
reset. If necessary, repeat this procedure.
172 UNDERSTANDING YOUR INSTRUMENT PANEL
Page 178 of 449
If this light comes on and remains on while driving, it
suggests a potential engine control problem and the need
for system service.
Although your vehicle will usually be drivable and not
need towing, see an authorized dealer for service as soon
as possible.
CAUTION!
Prolonged driving with the MIL on could cause
damage to the engine control system. It also could
affect fuel economy and drivability.
If the MIL is flashing, severe catalytic converter
damage and power loss will soon occur. Immediate
service is required.22. Tire Pressure Monitoring Telltale Light Ð If
Equipped
Each tire, including the spare (if provided),
should be checked monthly, when cold and
inflated to the inflation pressure recommended
by the vehicle manufacturer on the vehicle
placard or tire inflation pressure label. (If your vehicle
has tires of a different size than the size indicated on the
vehicle placard or tire inflation pressure label, you should
determine the proper tire inflation pressure for those
tires.)
As an added safety feature, your vehicle has been
equipped with a Tire Pressure Monitoring System
(TPMS) that illuminates a low tire pressure telltale when
one or more of your tires is significantly under-inflated.
Accordingly, when the low tire pressure telltale illumi-
nates, you should stop and check your tires as soon as
possible, and inflate them to the proper pressure. Driving
on a significantly under-inflated tire causes the tire to
176 UNDERSTANDING YOUR INSTRUMENT PANEL