2009 DODGE DAKOTA change time
[x] Cancel search: change timePage 24 of 449
To Unlock The Doors:
Press and release the UNLOCK button on the RKE
transmitter once to unlock only the driver's door, or twice
to unlock all the doors. When the unlock button is
pressed, the illuminated entry will initiate, and the
parking lights will flash twice.
The system can be programmed to unlock all the doors
upon the first unlock button press by using the following
procedure:
1. Press and hold the LOCK button on a programmed
RKE transmitter.
2. Continue to hold the LOCK button for at least 4 sec-
onds, but not longer than 10 seconds, then press and hold
the UNLOCK button. A single chime will sound to
indicate that this feature has changed.
3. Release both buttons at the same time.4. Test the feature while outside of the vehicle by press-
ing the LOCK/UNLOCK button on the RKE transmitter.
NOTE:Pressing the LOCK button on the RKE transmit-
ter while you are inside the vehicle will activate the
Vehicle Security Alarm. Opening a door with the Vehicle
Security Alarm System activated will cause the alarm to
sound. Press the UNLOCK button to deactivate the
Vehicle Security Alarm System.
5. If the desired programming was not achieved, or to
reactivate this feature, repeat the above steps.
To Lock The Doors:
Press and release the LOCK button on the RKE transmit-
ter to lock all doors. If the ignition is OFF, when the doors
are locked the parking lights will flash on once and the
horn will chirp once.
22 THINGS TO KNOW BEFORE STARTING YOUR VEHICLE
Page 25 of 449
Horn Chirp Programming
The horn chirp feature is shipped from the assembly
plant activated. If desired, this feature can be disabled by
using the following procedure:
1. Press and hold the LOCK button on the RKE trans-
mitter.
2. After holding the LOCK button for four seconds, also
press the PANIC button within six seconds. A single
chime will sound to indicate that this feature has
changed.
3. Release both buttons at the same time.
4. To reactivate this feature, repeat the above steps.
5. Test the horn chirp feature while outside of the vehicle
by pressing the LOCK button on the RKE transmitter
with the ignition in the OFF position and the key
removed.NOTE:Pressing the LOCK button on the RKE transmit-
ter while you are inside the vehicle will activate the
Vehicle Security Alarm. Opening a door with the Vehicle
Security Alarm activated will cause the alarm to sound.
Press the UNLOCK button to deactivate the Vehicle
Security Alarm System.
6. If the desired programming was not achieved, or to
reactivate this feature, repeat the above steps.
Flash Lamps With Lock Programming
1. Press and hold the UNLOCK button on the RKE
transmitter.
2. After holding the UNLOCK button for four seconds,
also press the LOCK button within six seconds. A single
chime will sound to indicate that this feature has
changed.
3. Release both buttons at the same time.
THINGS TO KNOW BEFORE STARTING YOUR VEHICLE 23
2
Page 74 of 449
compartment. In addition, inspect the exhaust system
each time the vehicle is raised for lubrication or oil
change. Replace or adjust as required.
Safety Checks You Should Make Inside The
Vehicle
Heater Defroster Ducts
Inspect the heater defroster ducts for proper operation.
Check for proper airflow through all defroster ducts. If
there is any question regarding the operation of your
heater defroster ducts, have the system checked by an
authorized dealer
Seat Belts
Inspect the seat belt system periodically, checking for
cuts, frays and loose parts. Damaged parts must be
replaced immediately. Do not disassemble or modify the
system.Seat belt assemblies must be replaced after an accident if
they have been damaged (bent retractor, torn webbing,
etc.) or if the front airbags have deployed. If there is any
question regarding seat belt or retractor condition, re-
place the seat belt.
Airbag Warning Light
The airbag warning light should come on, and remain on,
for six to eight seconds as a bulb check when the ignition
switch is first turned ON. If the light is not lit during
starting, see your authorized dealer. If the light stays on,
flickers or comes on while driving, have the system
checked by an authorized dealer. If there is a problem
with the airbag warning light, the seat belt light will
flash.
72 THINGS TO KNOW BEFORE STARTING YOUR VEHICLE
Page 100 of 449
numbers, followed by9Send,9is also to be used for
navigating through an automated customer service cen-
ter menu structure, and to leave a number on a pager.
You can also send stored UConnecttphonebook entries
as tones for fast and easy access to voice mail and pager
entries. To use this feature, dial the number you wish to
call and then press the ªVoice Recognitionº button and
say, ªSend.º The system will prompt you to enter the
name or number and say the name of the phonebook
entry you wish to send. The UConnecttsystem will then
send the corresponding phone number associated with
the phonebook entry, as tones over the phone.
NOTE:
²You may not hear all of the tones due to cellular phone
network configurations; this is normal.
²Some paging and voice mail systems have system time
out settings that are too short and may not allow the
use of this feature.
Barge In - Overriding Prompts
The ªVoice Recognitionº button can be used when you
wish to skip part of a prompt and issue your voice
recognition command immediately. For example, if a
prompt is asking9Would you like to pair a phone, clear
a{,9you could press the ªVoice Recognitionº button and
say,9Pair a Phone9to select that option without having to
listen to the rest of the voice prompt.
Turning Confirmation Prompts On/Off
Turning confirmation prompts off will stop the system
from confirming your choices (e.g., the UConnecttsys-
tem will not repeat a phone number before you dial it).
²Press the PHONE button to begin.
²After the9Ready9prompt and the following beep, say
9Setup Confirmations.9The UConnecttsystem will
play the current confirmation prompt status and you
will be given the choice to change it.
98 UNDERSTANDING THE FEATURES OF YOUR VEHICLE
Page 106 of 449
²smooth road surface,
²fully closed windows,
²dry weather conditions, and
²operation from the driver's seat.
²Performance, such as audio clarity, echo, and loudness
to a large degree rely on the phone and network, and
not the UConnecttsystem.
²Echo at the far end can sometimes be reduced by
lowering the in-vehicle audio volume.
²In a convertible vehicle, system performance may be
compromised with the convertible top down.
BluetoothtCommunication Link
Cellular phones have been found to lose connection to
the UConnecttsystem. When this happens, the connec-
tion can generally be re-established by switching the
phone off/on. Your cell phone is recommended to remain
in BluetoothtON mode.
Power-Up
After switching the ignition key from OFF to either ON
or ACC position, or after a language change, you must
wait at least five seconds prior to using the system.
104 UNDERSTANDING THE FEATURES OF YOUR VEHICLE
Page 113 of 449
When you press the VR hard-key, you will hear a beep.
The beep is your signal to give a command.
NOTE:If you do not say a command within a few
seconds, the system will present you with a list of
options.
If you ever wish to interrupt the system while it lists
options, press the VR hard-key, listen for the beep, and
say your command.
Pressing the VR hard-key while the system is speaking is
known as ªbarging in.º The system will be interrupted
and after the beep you can add or change commands.
This will become helpful once you start to learn the
options.
NOTE:At any time, you can say the words CANCEL,
HELP, or MAIN MENU.These commands are universal and can be used from any
menu. All other commands can be used depending upon
the active application.
For example, if you are in the disc menu and you are
listening to FM radio, you can speak commands from the
disc menu or from the FM radio menu.
When using this system, you should speak clearly and at
a normal speaking volume.
The system will best recognize your speech if the win-
dows are closed, and the heater/air-conditioning fan is
set to low.
At any point, if the system does not recognize one of your
commands, you will be prompted to repeat it.
To hear the first available Menu, press the VR hard-key
and say HELP or MAIN MENU.
UNDERSTANDING THE FEATURES OF YOUR VEHICLE 111
3
Page 114 of 449
Commands
The Voice Recognition System understands two types of
commands. Universal commands are available at all
times. Local commands are available if the supported
radio mode is active.
Changing the Volume
1. Start a dialogue by pressing the VR hard-key.
2. Say a command (e.g., HELP).
3. Use the ON/OFF VOLUME rotary knob to adjust the
volume to a comfortable level while the voice recognition
system is speaking. Please note the volume setting for VR
is different then the audio system.
Main Menu
Start a dialogue by pressing the VR hard-key. You may
say MAIN MENU to switch to the main menu.
In this mode, you can say the following commands:
²RADIO (to switch to the radio mode)
²DISC (to switch to the disc mode)
²MEMO (to switch to the memo recorder)
²SYSTEM SETUP (to switch to system setup)
Radio AM (or Radio Long Wave or Radio Medium
Wave - if equipped)
To switch to the AM band say AM or RADIO AM. In this
mode, you may say the following commands:
²FREQUENCY (to change the frequency)
²NEXT STATION (to select the next station)
²PREVIOUS STATION (to select the previous station)
²RADIO MENU (to switch to the radio menu)
²MAIN MENU (to switch to the main menu)
112 UNDERSTANDING THE FEATURES OF YOUR VEHICLE
Page 122 of 449
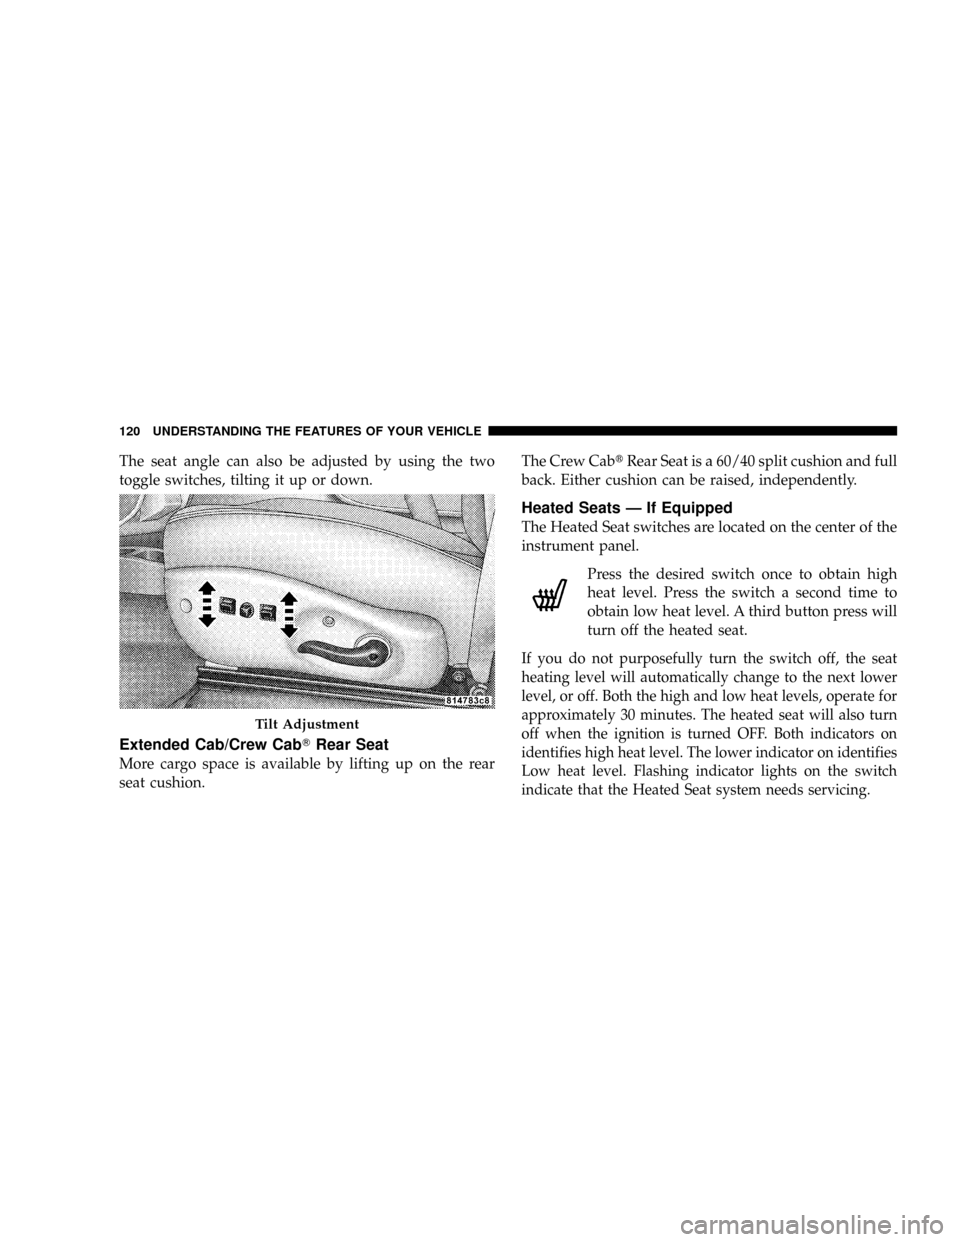
The seat angle can also be adjusted by using the two
toggle switches, tilting it up or down.
Extended Cab/Crew CabTRear Seat
More cargo space is available by lifting up on the rear
seat cushion.The Crew CabtRear Seat is a 60/40 split cushion and full
back. Either cushion can be raised, independently.
Heated Seats Ð If Equipped
The Heated Seat switches are located on the center of the
instrument panel.
Press the desired switch once to obtain high
heat level. Press the switch a second time to
obtain low heat level. A third button press will
turn off the heated seat.
If you do not purposefully turn the switch off, the seat
heating level will automatically change to the next lower
level, or off. Both the high and low heat levels, operate for
approximately 30 minutes. The heated seat will also turn
off when the ignition is turned OFF. Both indicators on
identifies high heat level. The lower indicator on identifies
Low heat level. Flashing indicator lights on the switch
indicate that the Heated Seat system needs servicing.
Tilt Adjustment
120 UNDERSTANDING THE FEATURES OF YOUR VEHICLE