Page 82 of 484
Defroster
Check operation by selecting the defrost mode and place
the blower control on high speed. You should be able to
feel the air directed against the windshield. See your
authorized dealer for service if your defroster is
inoperable.
Periodic Safety Checks You Should Make Outside
The Vehicle
Tires
Examine tires for excessive tread wear and uneven wear
patterns. Check for stones, nails, glass, or other objects
lodged in the tread. Inspect the tread and sidewall for
cuts and cracks. Check the wheel nuts for tightness.
Check the tires (including spare) for proper pressure.
Lights
Have someone observe the operation of exterior lights
while you work the controls. Check turn signal and high
beam indicator lights on the instrument panel.
Door Latches
Check for positive closing, latching, and locking.
Fluid Leaks
Check area under vehicle after overnight parking for fuel,
engine coolant, oil, or other fluid leaks. Also, if gasoline
fumes are detected or if fuel, power steering fluid, or
brake fluid leaks are suspected, the cause should be
located and corrected immediately.
80 THINGS TO KNOW BEFORE STARTING YOUR VEHICLE
Page 90 of 484
Power Mirrors
The power mirror switch is located on the drivers door
trim panel next to the power door lock switch. A rotary
knob selects the left mirror, right mirror or off position.After selecting a mirror, move the knob in the same
direction you want the mirror to move. Use the center off
position to guard against accidentally moving a mirror
position.
Heated Power Mirrors — If Equipped
These mirrors are heated to melt frost or ice. This
feature is activated whenever you turn on the rear
window defroster. Refer to “Rear Window Features” in
this Section, for further information.
Illuminated Vanity Mirrors — If Equipped
An illuminated vanity mirror is located on the sun visor.
To use the mirror, rotate the sun visor downward and
swing the mirror cover upward. The light turns on
automatically. Closing the mirror cover turns off the light.
Power Mirror Control
88 UNDERSTANDING THE FEATURES OF YOUR VEHICLE
Page 137 of 484
High Beam/Low Beam Select Switch
Push the multifunction lever away from you to switch
the headlights to high beam. Pull the multifunction lever
toward you to switch the headlights back to low beam.
Flash-to-Pass
You can signal another vehicle with your headlights by
lightly pulling the multifunction lever toward you. This
will cause the headlights to turn on at high beam and
remain on until the multifunction lever is released.
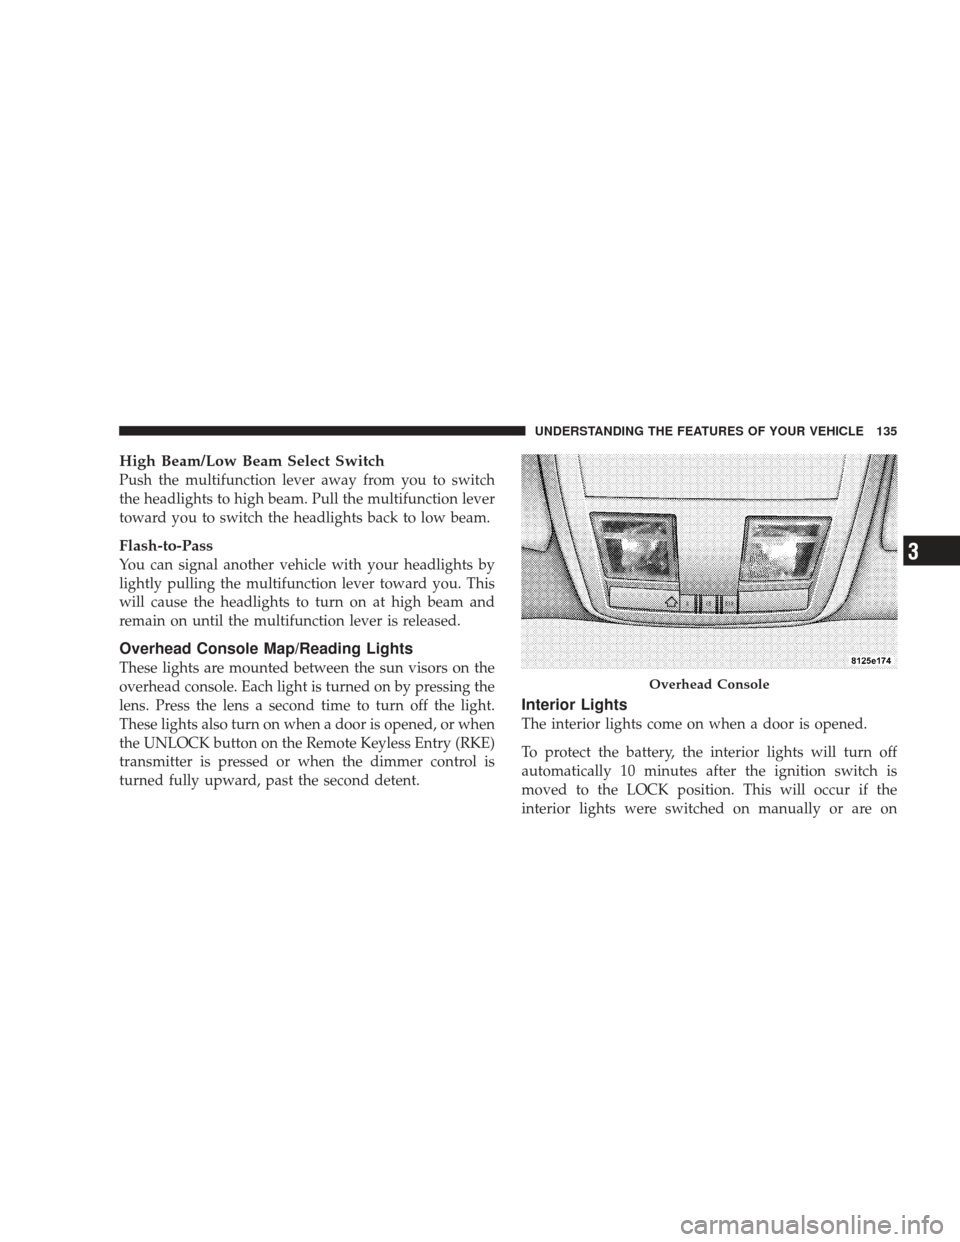
Overhead Console Map/Reading Lights
These lights are mounted between the sun visors on the
overhead console. Each light is turned on by pressing the
lens. Press the lens a second time to turn off the light.
These lights also turn on when a door is opened, or when
the UNLOCK button on the Remote Keyless Entry (RKE)
transmitter is pressed or when the dimmer control is
turned fully upward, past the second detent.
Interior Lights
The interior lights come on when a door is opened.
To protect the battery, the interior lights will turn off
automatically 10 minutes after the ignition switch is
moved to the LOCK position. This will occur if the
interior lights were switched on manually or are on
Overhead Console
UNDERSTANDING THE FEATURES OF YOUR VEHICLE 135
3
Page 147 of 484
OVERHEAD CONSOLE
The overhead console contains courtesy/reading lights,
an optional universal garage door opener (HomeLink�),
storage for sunglasses, and an optional power sunroof
switch.
Courtesy/Reading Lights
At the forward end of the console are two courtesy/
reading lights.
Press the lens to turn on the light. Press it a second time
to turn off the light.
These lights also turn on when a door is opened, or when
the UNLOCK button on the Remote Keyless Entry (RKE)
transmitter is pressed, or when the dimmer control is
turned fully upward, past the second detent.
Sunglasses Storage
At the rear of the console, a compartment is provided for
the storage of a pair of sunglasses.
The storage compartment access is a�push/push�design.
Push on the raised bar on the compartment door to open.
Push on the raised bar to close.
Overhead Console
UNDERSTANDING THE FEATURES OF YOUR VEHICLE 145
3
Page 152 of 484
Gate Operator/Canadian Programming
Canadian radio-frequency laws require transmitter sig-
nals to “time-out” (or quit) after several seconds of
transmission – which may not be long enough for
HomeLink�to pick up the signal during programming.
Similar to this Canadian law, some U.S. gate operators are
designed to “time-out” in the same manner.
It may be helpful to unplug the device during the cycling
process to prevent possible overheating of the garage
door or gate motor.
If you are having difficulties programming a garage door
opener or a gate operator, replace “Programming
HomeLink” Step 3 with the following:
3. Continue to press and hold the HomeLink� button
while you press and release - every two seconds
(“cycle”) your hand-held transmitter until HomeLink �has successfully accepted the frequency signal. The
EVIC display will change from “CHANNEL # TRAIN-
ING” to “CHANNEL # TRAINED.”
If you unplugged the device for training, plug it back in
at this time.
Then proceed with Step 4 under “Programming
HomeLink�” earlier in this section.
Using HomeLink�
To operate, simply press and release the programmed
HomeLink�
button. Activation will now occur for the
trained device (i.e., garage door opener, gate operator,
security system, entry door lock, home/office lighting,
etc.) The hand-held transmitter of the device may also be
used at any time.
150 UNDERSTANDING THE FEATURES OF YOUR VEHICLE
Page 196 of 484
“Language”
When in this display you may select one of five lan-
guages for all display nomenclature, including the trip
functions and the navigation system (if equipped). Press
the FUNCTION SELECT button while in this display to
select English, Espanol, Deutsch, Italiano, or Francais.
Then, as you continue, the information will display in the
selected language.
NOTE:The EVIC will not change the uconnect� lan-
guage selection. Refer to “Language Selection” under
“uconnect� phone” in Section 3.
“Lock Doors Automatically at 15 mph (24 km/h)”
When ON is selected, all doors will lock automatically
when the vehicle reaches a speed of 15 mph (24 km/h).
To make your selection, press and release the FUNC-
TION SELECT button until “ON” or “OFF” appears.
“Unlock Doors Automatically on Exit”
When ON is selected, all doors will unlock when the
vehicle is stopped and the transmission is in the PARK or
NEUTRAL position and the driver’s door is opened. To
make your selection, press and release the FUNCTION
SELECT button until “ON” or “OFF” appears.
“Remote Key Unlock”
WhenDriver Door 1st Press is selected, only the driver’s
door will unlock on the first press of the Remote Keyless
Entry (RKE) transmitter UNLOCK button. When Driver
Door 1st Press is selected, you must press the RKE
transmitter UNLOCK button twice to unlock the passen-
ger’s doors. When All Doors 1st Press is selected, all of
the doors will unlock on the first press of the RKE
transmitter UNLOCK button. To make your selection,
press and release the FUNCTION SELECT button until
“Driver Door 1st Press” or “All Doors 1st Press” appears.
194 UNDERSTANDING YOUR INSTRUMENT PANEL
Page 197 of 484
“Sound Horn with Remote Key Lock”
When ON is selected, a short horn sound will occur when
the RKE transmitter LOCK button is pressed. This feature
may be selected with or without the flash lights on
lock/unlock feature. To make your selection, press and
release the FUNCTION SELECT button until “ON” or
“OFF” appears.
“Flash Lights with Remote Key Lock”
When ON is selected, the front and rear turn signals will
flash when the doors are locked or unlocked with the
RKE transmitter. This feature may be selected with or
without the sound horn on lock feature selected. To make
your selection, press and release the FUNCTION SE-
LECT button until “ON” or “OFF” appears.
“Headlights On with Wipers” (Available with Auto
Headlights Only)
When ON is selected, and the HEADLIGHT switch is in
the AUTO position, the headlights will turn on approxi-
mately 10 seconds after the wipers are turned on. The
headlights will also turn off when the wipers are turned
off if they were turned on by this feature. To make your
selection, press and release the FUNCTION SELECT
button until “ON” or “OFF” appears.
NOTE:Turning the headlights on during the daytime
causes the instrument panel lights to dim. To increase the
brightness, refer to “Lights” in Section 3.
“Delay Turning Headlights Off”
When this feature is selected, the driver can choose to
have the headlights remain on for 0, 30, 60, or 90 seconds
when exiting the vehicle. To make your selection, press
and release the FUNCTION SELECT button until “0,”
“30,” “60,” or “90” appears.
UNDERSTANDING YOUR INSTRUMENT PANEL 195
4
Page 198 of 484
“Turn Headlights On with Remote Key Unlock”
When this feature is selected, the headlights will activate
and remain on for up to 90 seconds when the doors are
unlocked with the RKE transmitter. To make your selec-
tion, press and release the FUNCTION SELECT button
until “OFF,” “30 sec.,” “60 sec.,” or “90 sec.” appears.
“Delay Power Off to Accessories Until Exit”
When this feature is selected, the power WINDOW
switches, radio, uconnect�phone (if equipped), DVD
video system (if equipped), power sunroof (if equipped),
and power outlets will remain active for up to 60 minutes
after the ignition switch is turned OFF. Opening a vehicle
door will cancel this feature. To make your selection,
press and release the FUNCTION SELECT button until
“Off,” “45 sec.,” “5 min.,” “10 min.,” “30 min.,” or “60
min.” appears.
“AWD System Displays”
When in this display you may select “ON” or “OFF”.
When ON is selected, the EVIC displays the current
mode of the transfer-case. A five second display appears
any time the transfer-case changes from All Wheel Drive
(AWD) to Rear Wheel Drive (RWD) or from RWD to
AWD. The EVIC also displays the current mode of the
transfer-case when you shift into drive or reverse. To
make your selection, press and release the FUNCTION
SELECT button until “ON” or “OFF” appears.
“Confirmation of Voice Commands” — If
Equipped
When ON is selected, all voice commands from the
uconnect� system are confirmed. To make your selection,
press and release the FUNCTION SELECT button until
“ON” or “OFF” appears.
196 UNDERSTANDING YOUR INSTRUMENT PANEL