Page 307 of 484
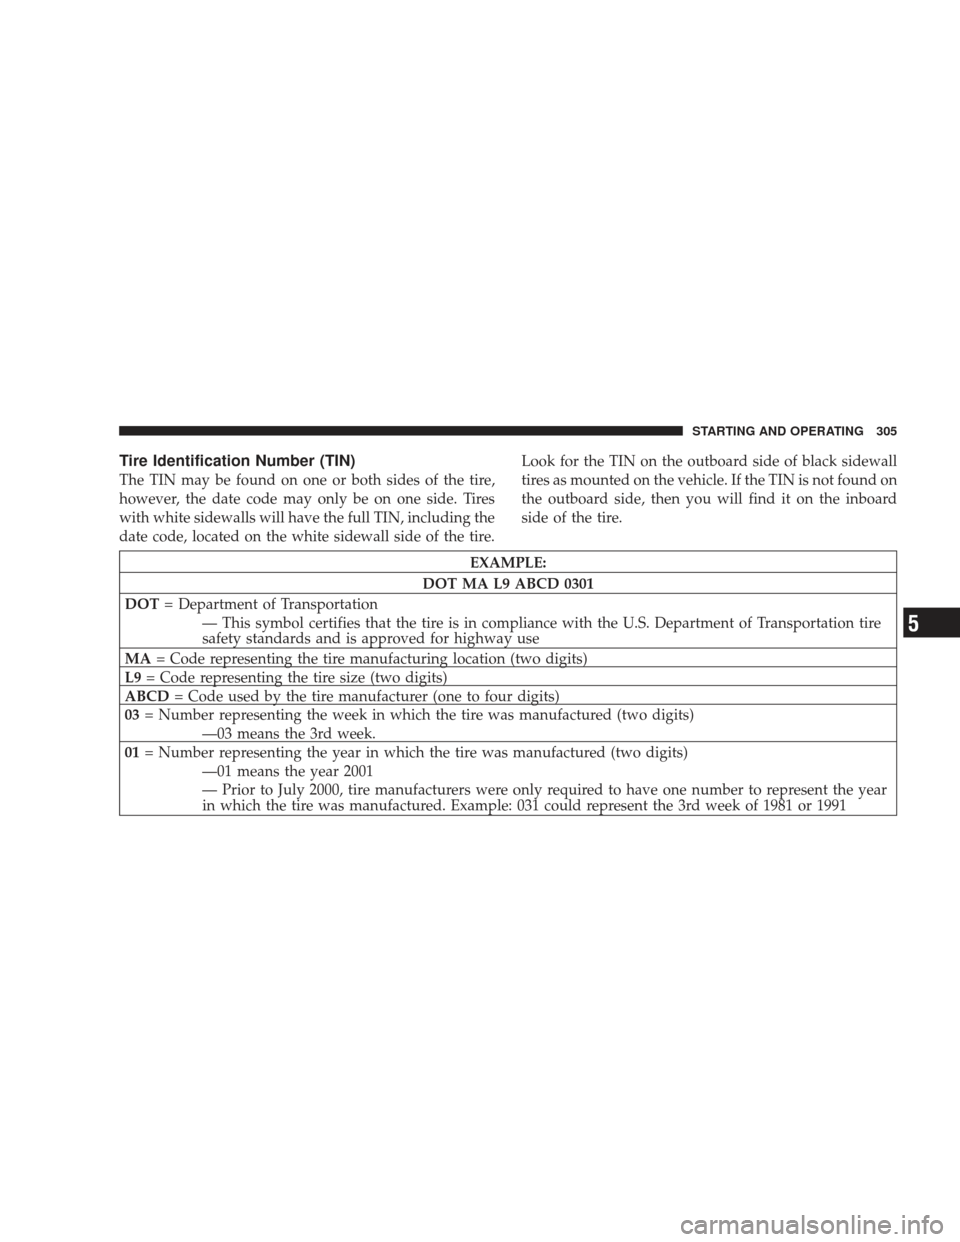
Tire Identification Number (TIN)
The TIN may be found on one or both sides of the tire,
however, the date code may only be on one side. Tires
with white sidewalls will have the full TIN, including the
date code, located on the white sidewall side of the tire.Look for the TIN on the outboard side of black sidewall
tires as mounted on the vehicle. If the TIN is not found on
the outboard side, then you will find it on the inboard
side of the tire.
EXAMPLE:
DOT MA L9 ABCD 0301
DOT = Department of Transportation
— This symbol certifies that the tire is in compliance with the U.S. Department of Transportation tire
safety standards and is approved for highway use
MA = Code representing the tire manufacturing location (two digits)
L9 = Code representing the tire size (two digits)
ABCD = Code used by the tire manufacturer (one to four digits)
03 = Number representing the week in which the tire was manufactured (two digits)
—03 means the 3rd week.
01 = Number representing the year in which the tire was manufactured (two digits)
—01 means the year 2001
— Prior to July 2000, tire manufacturers were only required to have one number to represent the year
in which the tire was manufactured. Example: 031 could represent the 3rd week of 1981 or 1991
STARTING AND OPERATING 305
5
Page 308 of 484
Tire Loading and Tire Pressure
Tire Placard Location
NOTE:The proper cold tire inflation pressure is listed
on the driver’s side B-Pillar.
Tire and Loading Information Placard
This placard tells you important information about
the:
1) number of people that can be carried in the vehicle
2) total weight your vehicle can carry
3) tire size designed for your vehicle
4) cold tire inflation pressures for the front, rear, and
spare tires.
Loading
The vehicle maximum load on the tire must not exceed
the load carrying capacity of the tire on your vehicle. You
will not exceed the tire’s load carrying capacity if you
adhere to the loading conditions, tire size, and cold tire
inflation pressures specified on the Tire and Loading
Information placard and in the “Vehicle Loading” section
of this manual.
NOTE: Under a maximum loaded vehicle condition,
gross axle weight ratings (GAWRs) for the front and rear
Tire and Loading Information Placard
306 STARTING AND OPERATING
Page 319 of 484
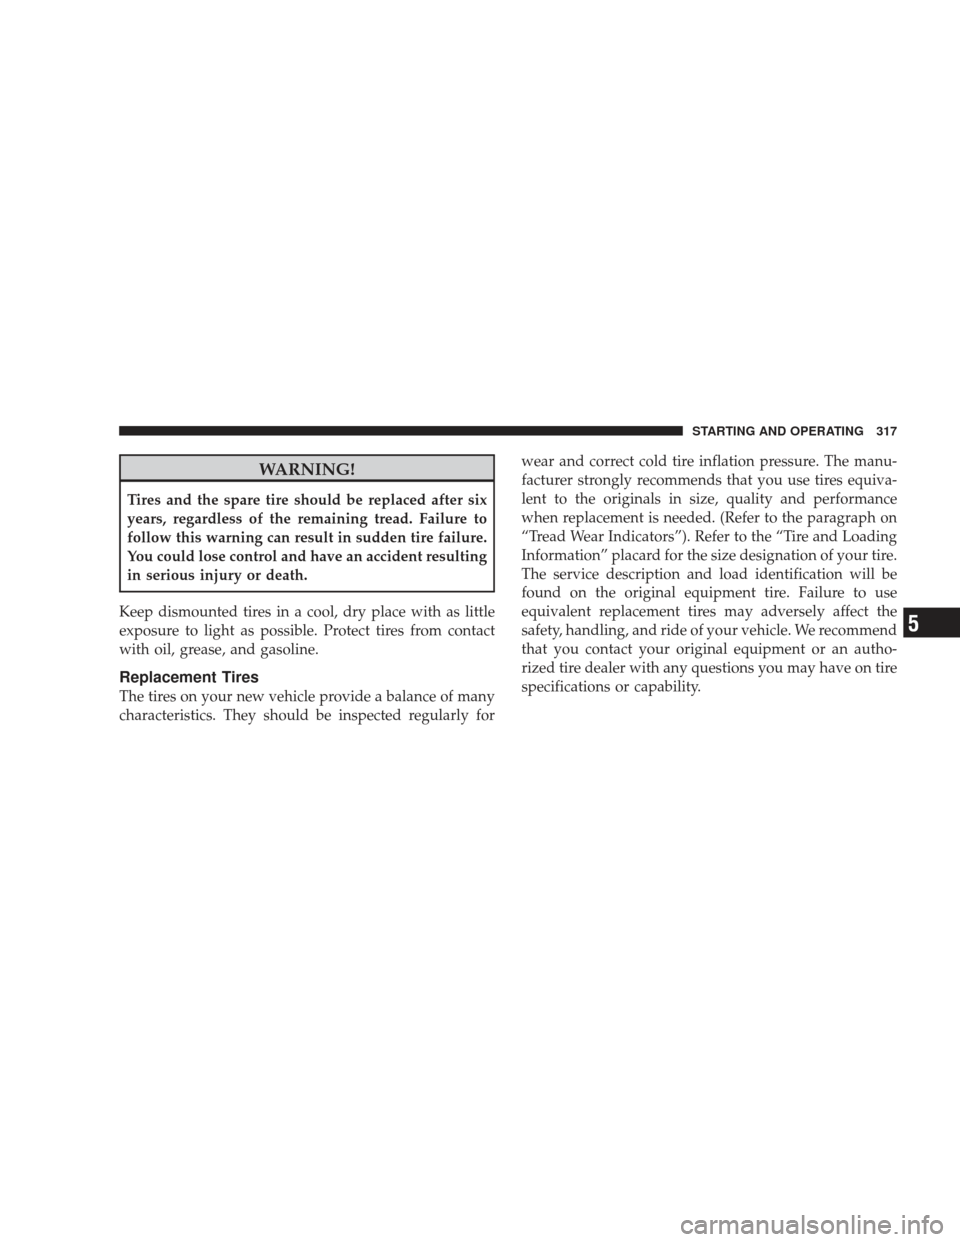
WARNING!
Tires and the spare tire should be replaced after six
years, regardless of the remaining tread. Failure to
follow this warning can result in sudden tire failure.
You could lose control and have an accident resulting
in serious injury or death.
Keep dismounted tires in a cool, dry place with as little
exposure to light as possible. Protect tires from contact
with oil, grease, and gasoline.
Replacement Tires
The tires on your new vehicle provide a balance of many
characteristics. They should be inspected regularly for wear and correct cold tire inflation pressure. The manu-
facturer strongly recommends that you use tires equiva-
lent to the originals in size, quality and performance
when replacement is needed. (Refer to the paragraph on
“Tread Wear Indicators”). Refer to the “Tire and Loading
Information” placard for the size designation of your tire.
The service description and load identification will be
found on the original equipment tire. Failure to use
equivalent replacement tires may adversely affect the
safety, handling, and ride of your vehicle. We recommend
that you contact your original equipment or an autho-
rized tire dealer with any questions you may have on tire
specifications or capability.
STARTING AND OPERATING 317
5
Page 320 of 484
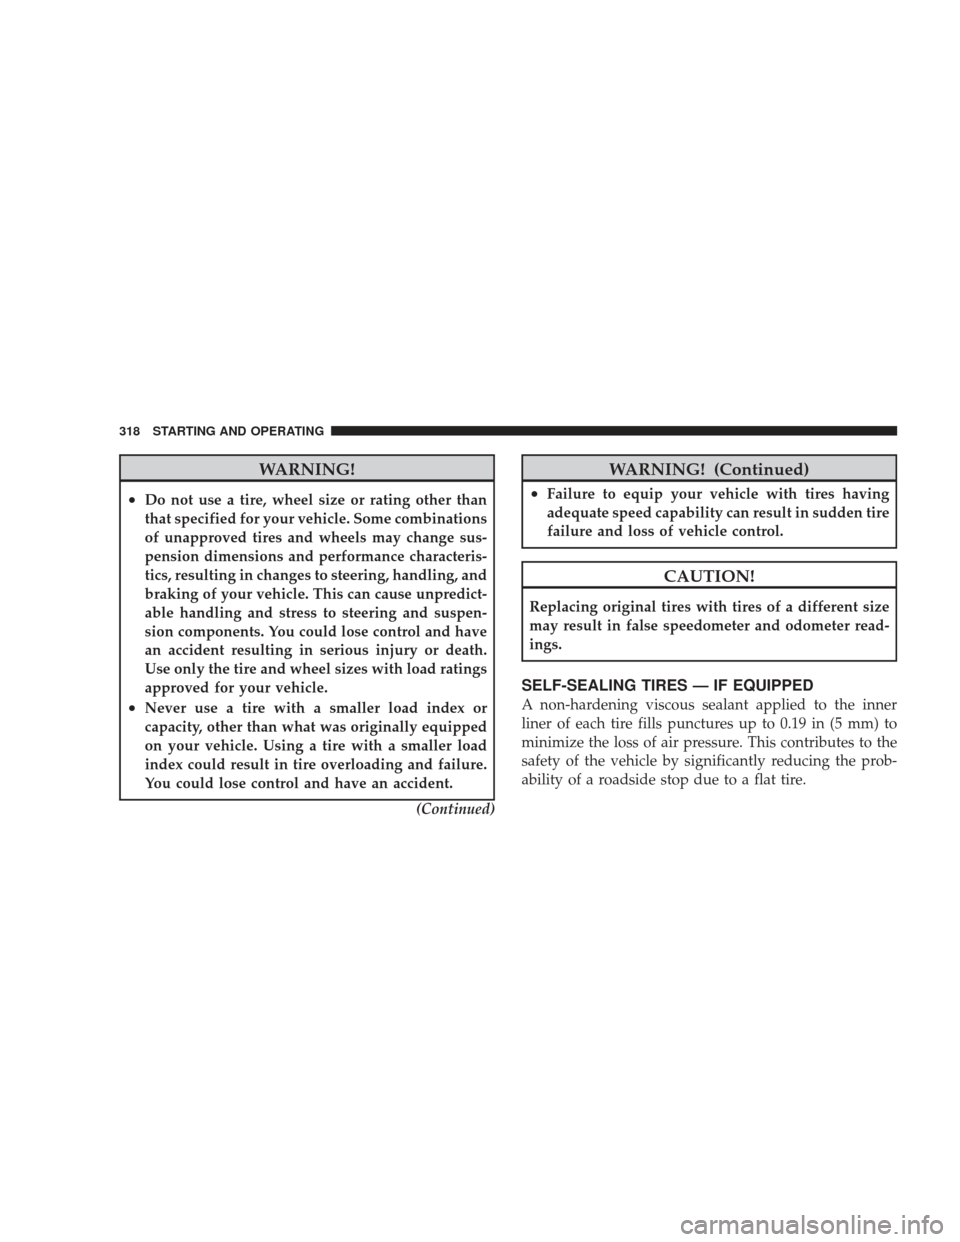
WARNING!
•Do not use a tire, wheel size or rating other than
that specified for your vehicle. Some combinations
of unapproved tires and wheels may change sus-
pension dimensions and performance characteris-
tics, resulting in changes to steering, handling, and
braking of your vehicle. This can cause unpredict-
able handling and stress to steering and suspen-
sion components. You could lose control and have
an accident resulting in serious injury or death.
Use only the tire and wheel sizes with load ratings
approved for your vehicle.
•Never use a tire with a smaller load index or
capacity, other than what was originally equipped
on your vehicle. Using a tire with a smaller load
index could result in tire overloading and failure.
You could lose control and have an accident.(Continued)
WARNING! (Continued)
•Failure to equip your vehicle with tires having
adequate speed capability can result in sudden tire
failure and loss of vehicle control.
CAUTION!
Replacing original tires with tires of a different size
may result in false speedometer and odometer read-
ings.
SELF-SEALING TIRES — IF EQUIPPED
A non-hardening viscous sealant applied to the inner
liner of each tire fills punctures up to 0.19 in (5 mm) to
minimize the loss of air pressure. This contributes to the
safety of the vehicle by significantly reducing the prob-
ability of a roadside stop due to a flat tire.
318 STARTING AND OPERATING
Page 321 of 484
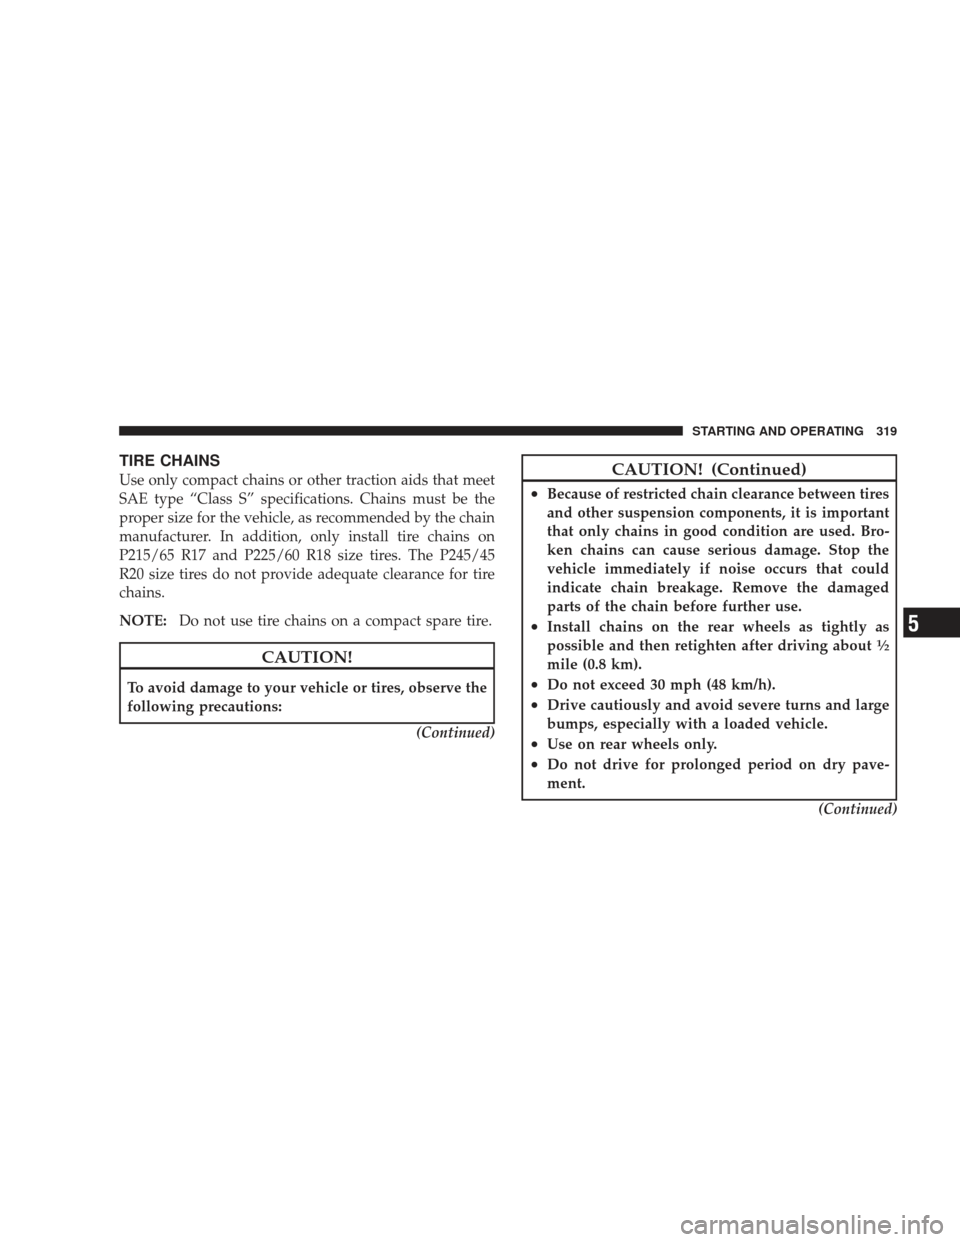
TIRE CHAINS
Use only compact chains or other traction aids that meet
SAE type “Class S” specifications. Chains must be the
proper size for the vehicle, as recommended by the chain
manufacturer. In addition, only install tire chains on
P215/65 R17 and P225/60 R18 size tires. The P245/45
R20 size tires do not provide adequate clearance for tire
chains.
NOTE:Do not use tire chains on a compact spare tire.
CAUTION!
To avoid damage to your vehicle or tires, observe the
following precautions:
(Continued)
CAUTION! (Continued)
•Because of restricted chain clearance between tires
and other suspension components, it is important
that only chains in good condition are used. Bro-
ken chains can cause serious damage. Stop the
vehicle immediately if noise occurs that could
indicate chain breakage. Remove the damaged
parts of the chain before further use.
•Install chains on the rear wheels as tightly as
possible and then retighten after driving about1�2
mile (0.8 km).
•Do not exceed 30 mph (48 km/h).
•Drive cautiously and avoid severe turns and large
bumps, especially with a loaded vehicle.
•Use on rear wheels only.
•Do not drive for prolonged period on dry pave-
ment.(Continued)
STARTING AND OPERATING 319
5
Page 322 of 484
CAUTION! (Continued)
•Observe the tire chain manufacturer’s instructions
on the method of installation, operating speed,
and conditions for use. Always use the lower
suggested operating speed of the chain manufac-
turer if different from the speed recommended by
the manufacture.
NOTE: In order to avoid damage to tires, chains, and
your vehicle do not drive for a prolonged period on dry
pavement. Observe the tire chain manufacturer’s instruc-
tions on method of installation, operating speed, and
conditions for usage.
Always use the lower suggested operating speed if both
the chain manufacturer and vehicle manufacturer sug-
gest a maximum speed. This notice applies to all chain
traction devices, including link and cable (radial) chains.
SNOW TIRES
Some areas of the country require the use of snow tires
during the winter. Standard tires are of the all season type
and satisfy this requirement as indicated by the M+S
designation on the tire sidewall.
If you need snow tires, select tires equivalent in size and
type to the original equipment tires. Use snow tires only
in sets of four. Failure to do so may adversely affect the
safety and handling of your vehicle.
Snow tires generally have lower speed ratings than what
was originally equipped with your vehicle and should
not be operated at sustained speeds over 75 mph
(120 km/h).
320 STARTING AND OPERATING
Page 325 of 484

For example, your vehicle may have a recommended
cold (parked for more than three hours) placard pressure
of 30 psi (207 kPa). If the ambient temperature is 68°F
(20°C) and the measured tire pressure is 27 psi (186 kPa),
a temperature drop to 20°F (-7°C) will decrease the tire
pressure to approximately 23 psi (158 kPa). This tire
pressure is sufficiently low enough to turn ON the TPM
Telltale Light. Driving the vehicle may cause the tire
pressure to rise to approximately 27 psi (186 kPa), but the
TPM Telltale Light will still be ON. In this situation, the
TPM Telltale Light will turn OFF only after the tires are
inflated to the vehicle’s recommended cold placard pres-
sure value.CAUTION!
•The TPMS has been optimized for the original
equipment tires and wheels. TPMS pressures and
warning have been established for the tire size
equipped on your vehicle. Undesirable system
operation or sensor damage may result when us-
ing replacement equipment that is not of the same
size, type, and/or style. Aftermarket wheels can
cause sensor damage. Do not use aftermarket tire
sealants or balance beads if your vehicle is
equipped with a TPMS, as damage to the sensors
may result.
•After inspecting or adjusting the tire pressure,
always reinstall the valve stem cap. This will
prevent moisture and dirt from entering the valve
stem, which could damage the TPM sensor.
STARTING AND OPERATING 323
5
Page 327 of 484

The matching full size spare wheel and tire assembly (if
equipped) has a TPM sensor. The matching full size spare
can be used in place of any of the four road tires. The
TPMS will only monitor the pressure in the full size spare
when it is used in place of a road tire. Otherwise, a spare
with a pressure below the low-pressure limit will not
cause the TPM Telltale Light to illuminate or the chime to
sound.
Tire Pressure Monitoring Low Pressure Warnings
The TPM Telltale Light will illuminate in the
instrument cluster and a chime will sound when
tire pressure is low in one or more of the four
active road tires. Should this occur, you should stop as
soon as possible, check the inflation pressure of each tire
on your vehicle, and inflate each tire to the vehicle’s
recommended cold placard pressure value. Once the
system receives the updated tire pressures, the system
will automatically update and the TPM Telltale Light will turn off. The vehicle may need to be driven for up to
20 minutes above 15 mph (25 km/h) in order for the
TPMS to receive this information.
Check TPMS Warning
If a system fault is detected, the TPM Telltale Light will
flash on and off for 75 seconds and then remain on solid.
The system fault will also sound a chime. If the ignition
key is cycled, this sequence will repeat, providing the
system fault still exists. The TPM Telltale Light will turn
off when the fault condition no longer exists. A system
fault can occur due to any of the following:
1. Signal interference due to electronic devices or driving
next to facilities emitting the same radio frequencies as
the TPM sensors.
2. Installing aftermarket window tinting that contains
materials that may block radio wave signals.
STARTING AND OPERATING 325
5