Page 27 of 469
Avoid touching the new battery with your fingers. Skin
oils may cause battery deterioration. If you touch a
battery, clean it with rubbing alcohol.
3. To reassemble the RKE transmitter case, snap the two
halves of the case together. Make sure there is an even
“gap” between the two halves. If equipped, install and
tighten the screw until snug. Test RKE transmitter
operation.
General Information
This device complies with Part 15 of the FCC rules and
RSS 210 of Industry Canada. Operation is subject to the
following conditions:
•This device may not cause harmful interference.
•This device must accept any interference received,
including interference that may cause undesired
operation.NOTE:Changes or modifications not expressly ap-
proved by the party responsible for compliance could
void the user’s authority to operate the equipment.
If your RKE transmitter fails to operate from a normal
distance, check for these two conditions:
1. A weak battery in the transmitter. The expected life of
the battery is a minimum of three years.
2. Closeness to a radio transmitter such as a radio station
tower, airport transmitter, and some mobile or CB radios.
2
THINGS TO KNOW BEFORE STARTING YOUR VEHICLE 25
Page 43 of 469
6. To release the belt, push the red button on the buckle.
The belt will automatically retract to its stowed position.
If necessary, slide the latch plate down the webbing to
allow the belt to retract fully.
WARNING!
A frayed or torn belt could rip apart in a collision and
leave you with no protection. Inspect the belt system
periodically, checking for cuts, frays, or loose parts.
Damaged parts must be replaced immediately. Do
not disassemble or modify the system. Seat belt
assemblies must be replaced after a collision if they
have been damaged (bent retractor, torn webbing,
etc.).
Lap/Shoulder Belt Untwisting Procedure
Use the following procedure to untwist a twisted lap/
shoulder belt.
1. Position the latch plate as close as possible to the
anchor point.Removing Slack From Belt
2
THINGS TO KNOW BEFORE STARTING YOUR VEHICLE 41
Page 65 of 469
most direct path between the anchor and the child
restraint. Finally, tighten all three straps as you push the
child restraint rearward and downward into the seat,
removing slack in the straps according to the child
restraint manufacturer’s instructions.
NOTE:
•Ensure that the tether strap does not slip into the
opening between the seatbacks as you remove slack in
the strap.
•When using the LATCH attaching system to install a
child restraint, please ensure that all seat belts not
being used for occupant restraints are stowed and out
of reach of children. It is recommended that before
installing the child restraint, buckle the seat belt so the
seat belt is tucked behind the child restraint and out of
reach. If the buckled seat belt interferes with the child
restraint installation, instead of tucking the seat belt
behind the child restraint, route the seat belt throughthe child restraint belt path and then buckle it. This
should stow the seat belt out of the reach of an
inquisitive child. Remind all children in the vehicle
that the seat belts are not toys and should not be
played with, and never leave your child unattended in
the vehicle.
WARNING!
Improper installation of a child restraint to the
LATCH anchorages can lead to failure of an infant or
child restraint. The child could be badly injured or
killed. Follow the manufacturer’s directions exactly
when installing an infant or child restraint.
Installing Child Restraints Using the Vehicle Seat
Belt
The passenger seat belts are equipped with either cinch-
ing latch plates or automatic locking retractors, which are
designed to keep the lap portion tight around the child
2
THINGS TO KNOW BEFORE STARTING YOUR VEHICLE 63
Page 81 of 469
For uconnect�customer support, visit the following
websites:
•www.chrysler.com/uconnect
•www.dodge.com/uconnect
•www.jeep.com/uconnect
•or call 1–877–855–8400
uconnect�allows you to transfer calls between the sys-
tem and your cellular phone as you enter or exit your
vehicle and enables you to mute the system’s microphone
for private conversation.
The uconnect�phone is driven through your Bluetooth�
“Hands-Free Profile” cellular phone. uconnect�features
Bluetooth�technology - the global standard that enables
different electronic devices to connect to each other
without wires or a docking station, so uconnect�phone
works no matter where you stow your cellular phone (beit your purse, pocket, or briefcase), as long as your phone
is turned on and has been paired to the vehicle’s
uconnect�phone. The uconnect�phone allows up to
seven cellular phones to be linked to the system. Only
one linked (or paired) cellular phone can be used with the
system at a time. The system is available in English,
Spanish, or French languages.
Phone Button
The rearview mirror contains the microphone
for the system (depending on the type of
mirror and radio equipped), and either the
radio or the mirror has the two control buttons
(PHONE Button and VOICE RECOGNITION button)
that will enable you to access the system.
Voice Recognition Button
Actual button location may vary with the ra-
dio. The individual buttons are described in the
“Operation” section.
3
UNDERSTANDING THE FEATURES OF YOUR VEHICLE 79
Page 95 of 469
Towing Assistance
If you need towing assistance:
•Press the PHONE button to begin.
•After the�Ready�prompt and the following beep, say
�Towing Assistance.�
NOTE:
•The towing assistance number dialed is based on the
country where the vehicle is purchased (1-800-528-
2069 for the U.S., 1-877-213-4525 for Canada, 55-14-
3454 for Mexico City and 1-800-712-3040 for outside
Mexico City in Mexico).
•If supported, this number may be programmable on
some systems. To do this, press the PHONE button
and say “Setup”, followed by “Towing Assistance”.
Paging
To learn how to page, refer to�Working with Automated
Systems.�Paging works properly except for pagers of
certain companies, which time out a little too soon to
work properly with the uconnect�phone.
Voice Mail Calling
To learn how to access your voice mail, refer to�Working
with Automated Systems.�
Working with Automated Systems
This method is used in instances where one generally has
to press numbers on the cellular phone keypad while
navigating through an automated telephone system.
You can use your uconnect�phone to access a voice mail
system or an automated service, such as a paging service
or automated customer service line. Some services re-
quire immediate response selection. In some instances,
that may be too quick for use of the uconnect�phone.
3
UNDERSTANDING THE FEATURES OF YOUR VEHICLE 93
Page 107 of 469
Voice Commands
Primary Alternate(s)
language
list names
list phones
mobile
mute
mute off
new entry
no
pager
pair a phone
phone pairing pairing
phonebook phone book
previous
record again
redialVoice Commands
Primary Alternate(s)
return to main menu return or main menu
select phone select
send
set up phone settings or phone
set up
towing assistance
transfer call
uconnect�Tutorial
try again
voice training
work
yes
3
UNDERSTANDING THE FEATURES OF YOUR VEHICLE 105
Page 125 of 469
High Beam/Low Beam Select Switch
Push the multifunction lever away from you to switch
the headlights to high beam. Pull the multifunction lever
toward you to switch the headlights back to low beam.
Flash-to-Pass
You can signal another vehicle with your headlights by
lightly pulling the multifunction lever toward you. This
will turn on the high beam headlights until the lever is
released.
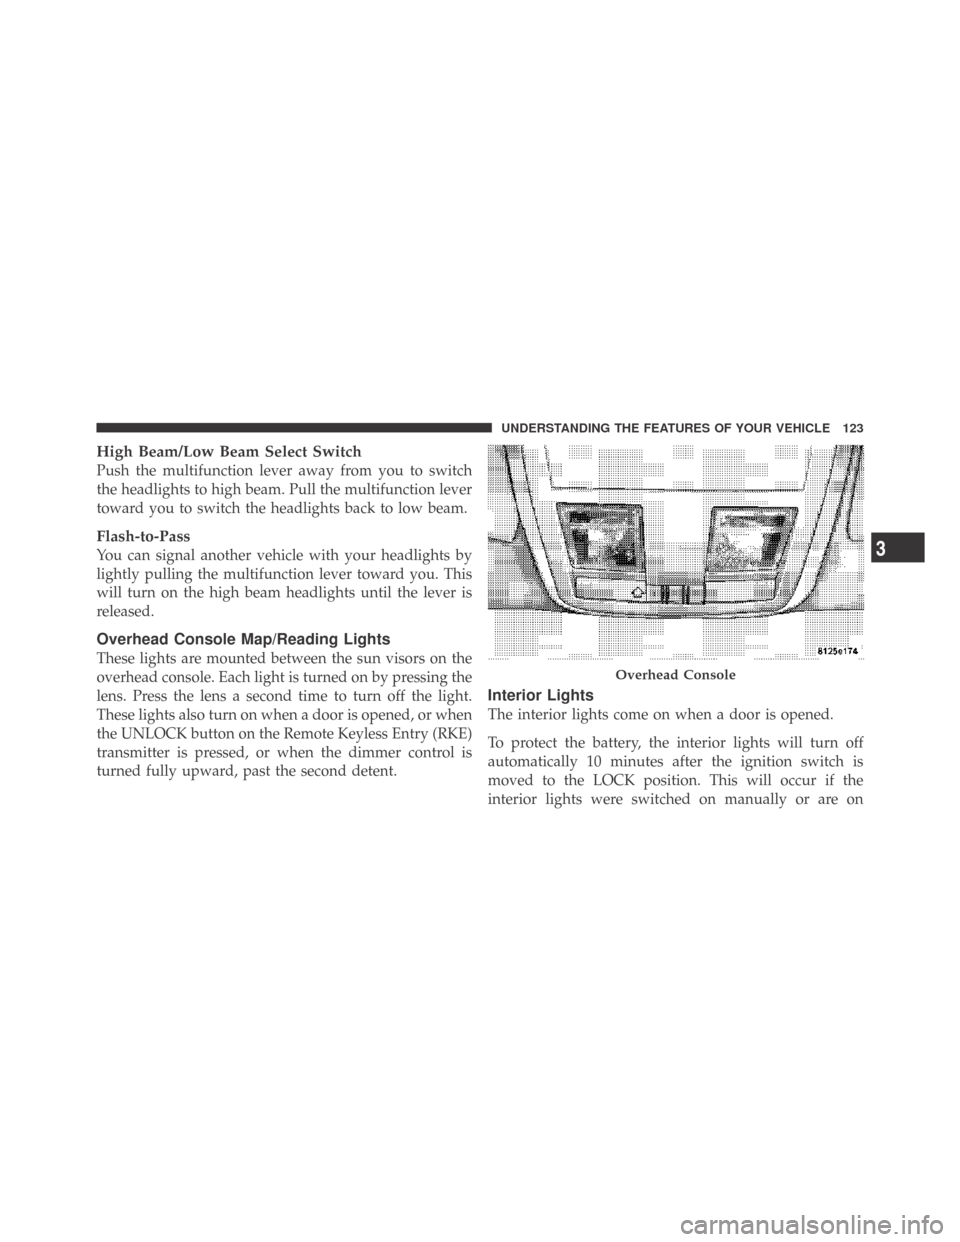
Overhead Console Map/Reading Lights
These lights are mounted between the sun visors on the
overhead console. Each light is turned on by pressing the
lens. Press the lens a second time to turn off the light.
These lights also turn on when a door is opened, or when
the UNLOCK button on the Remote Keyless Entry (RKE)
transmitter is pressed, or when the dimmer control is
turned fully upward, past the second detent.
Interior Lights
The interior lights come on when a door is opened.
To protect the battery, the interior lights will turn off
automatically 10 minutes after the ignition switch is
moved to the LOCK position. This will occur if the
interior lights were switched on manually or are on
Overhead Console
3
UNDERSTANDING THE FEATURES OF YOUR VEHICLE 123
Page 128 of 469
regulate the wipe interval from a minimum of one cycle
every second to a maximum of approximately 23 seconds
between cycles.
WARNING!
Sudden loss of visibility through the windshield
could lead to an accident. You might not see other
vehicles or other obstacles. To avoid sudden icing of
the windshield during freezing weather, warm the
windshield with the defroster before and during
windshield washer use.
Mist Feature
Push the multifunction lever inward (toward the steering
column) to the first detent to activate a single wipe cycle
to clear off road mist or spray from a passing vehicle. The
wipers will continue to operate until you release the
multifunction lever.
Windshield Washers
To use the washer, push the multifunction lever inward
(toward the steering column) to the second detent and
hold it for as long as washer spray is desired.
If you activate the washer while the windshield wiper
control is in the delay range, the wipers will operate for
two wipe cycles after releasing the multifunction lever
and then resume the intermittent interval previously
selected.
If you activate the washer while the windshield wiper is
turned off, the wipers will operate for three wipe cycles
and then turn off.
Headlights On With Wipers (Available with Auto
Headlights Only)
When this feature is active, the headlights will turn on
approximately 10 seconds after the wipers are turned on
if the headlight switch is placed in the AUTO (A)
126 UNDERSTANDING THE FEATURES OF YOUR VEHICLE