Page 297 of 411

will be displayed instead of dashes. A system fault can
occur with any of the following scenarios:
1. Jamming due to electronic devices or driving next to
facilities emitting the same radio frequencies as the TPM
sensors.
2. Installing some form of aftermarket window tinting
that affects radio wave signals.
3. Snow or ice around the wheels or wheel housings.
4. Using tire chains on the vehicle.
5. Using wheels/tires not equipped with TPM sensors.
NOTE:Your vehicle is equipped with a compact spare
wheel and tire assembly.
1. The compact spare tire does not have a tire pressure
monitoring sensor. Therefore, the TPMS will not monitor
the tire pressure in the compact spare tire.2. If you install the compact spare tire in place of a road
tire that has a pressure below the low-pressure warning
limit, upon the next ignition key cycle, a chime will
sound and the Tire Pressure Monitoring Telltale Light
will still turn ON due to the low tire.
3. However, after driving the vehicle for up to 20 min-
utes above 15 mph (25 km/h), the Tire Pressure Moni-
toring Telltale Light will flash on and off for 75 seconds
and then remain on solid.
4. For each subsequent ignition key cycle, a chime will
sound and the Tire Pressure Monitoring Telltale Light
will flash on and off for 75 seconds and then remain on
solid.
5. Once you repair or replace the original road tire and
reinstall it on the vehicle in place of the compact spare
tire, the TPMS will update automatically and the Tire
Pressure Monitoring Telltale Light will turn OFF, as long
as no tire pressure is below the low-pressure warning
STARTING AND OPERATING 295
5
Page 306 of 411
NOTE: ONLYvehicles equipped withMANUAL
TRANSAXLESmay be recreationally towed at any legal
highway speed, for any distance, if theMANUAL
TRANSAXLEis inNEUTRALand the ignition key is in
the ACC position.CAUTION!
Rear wheel lifts should not be used. Internal damage
to the transmission will occur if a rear wheel lift is
used when recreational towing.
304 STARTING AND OPERATING
Page 307 of 411
WHAT TO DO IN EMERGENCIES
CONTENTS
�Hazard Warning Flasher................. 306
�If Your Engine Overheats................ 306
�TIREFIT Kit.......................... 308
▫TIREFIT Storage..................... 308
▫TIREFIT Usage Precautions.............. 308
▫TIREFIT Kit Components & Operation...... 311▫Sealing a Tire With TIREFIT............. 312
�Jump-Starting Procedures................ 317
�Freeing A Stuck Vehicle................. 319
�Towing A Disabled Vehicle............... 320
▫With Ignition Key.................... 320
▫Without The Ignition Key............... 322
6
Page 308 of 411

HAZARD WARNING FLASHER
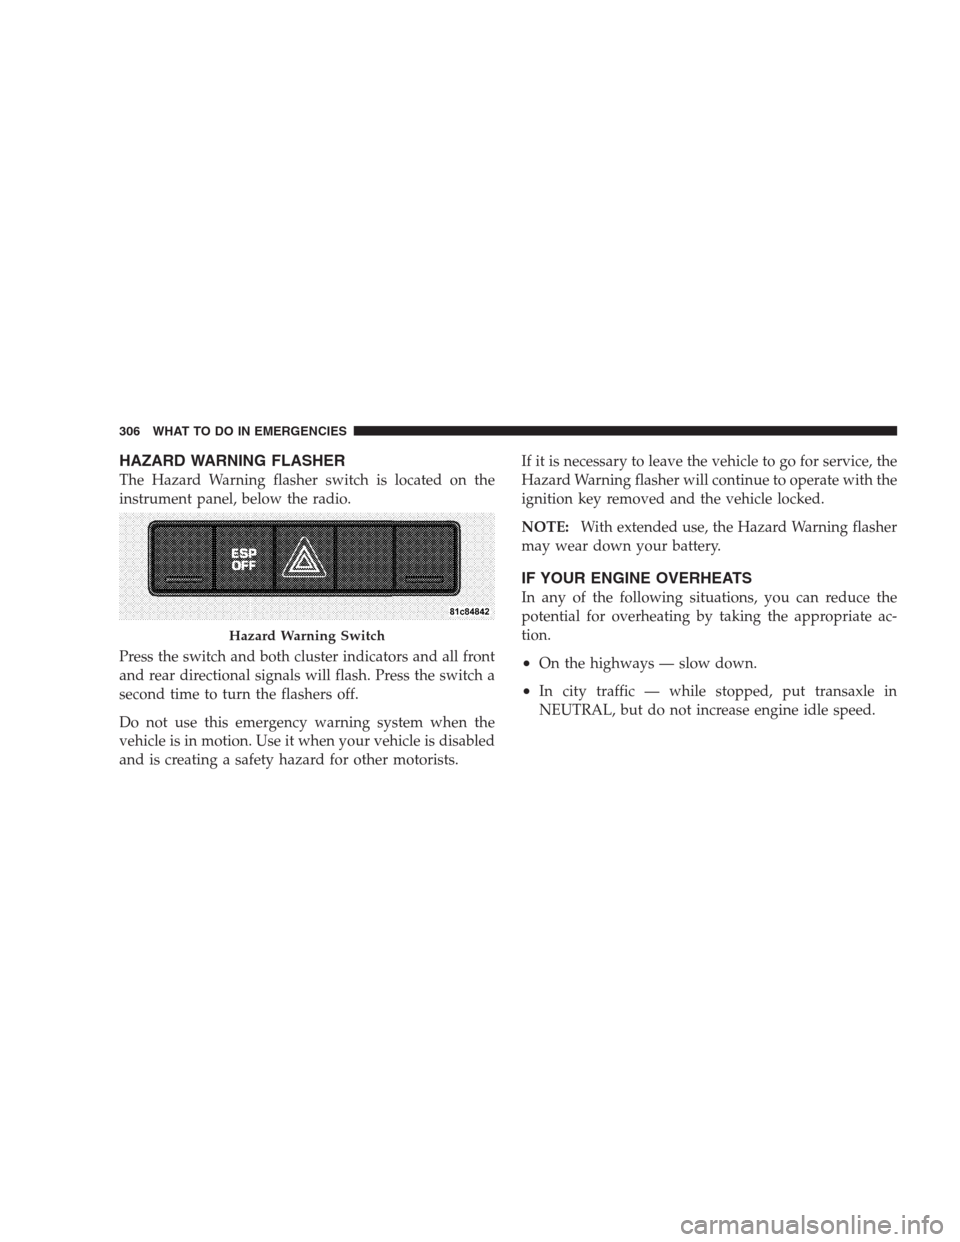
The Hazard Warning flasher switch is located on the
instrument panel, below the radio.
Press the switch and both cluster indicators and all front
and rear directional signals will flash. Press the switch a
second time to turn the flashers off.
Do not use this emergency warning system when the
vehicle is in motion. Use it when your vehicle is disabled
and is creating a safety hazard for other motorists.If it is necessary to leave the vehicle to go for service, the
Hazard Warning flasher will continue to operate with the
ignition key removed and the vehicle locked.
NOTE:With extended use, the Hazard Warning flasher
may wear down your battery.
IF YOUR ENGINE OVERHEATS
In any of the following situations, you can reduce the
potential for overheating by taking the appropriate ac-
tion.
•On the highways — slow down.
•In city traffic — while stopped, put transaxle in
NEUTRAL, but do not increase engine idle speed.
Hazard Warning Switch
306 WHAT TO DO IN EMERGENCIES
Page 319 of 411

(H) Sealant Bottle Replacement
1. Uncoil the Clear Sealant Hose (7).
2. Locate the rectangular SEALANT BOTTLE RELEASE
button in the recessed area where you place your fingers
to unlatch the hoses (6) (7) from their storage area.
3. Use the Yellow Cap on end of the Clear Sealant Hose
(7) to depress the SEALANT BOTTLE RELEASE button.
The Sealant Bottle (1) will pop up. Remove the bottle and
dispose of it accordingly.
4. Clean any remaining sealant from the TIREFIT hous-
ing.
5. Position the new Sealant Bottle (1) to the housing so
that the Clear Sealant Hose (7) aligns with the hose slot in
the front of the housing and the alignment keys on the
bottom of the bottle align with the alignment slots in thehousing. Then, press the bottle into the housing. An
audible click will be heard, indicating the bottle is locked
in place.
6. Verify the Yellow Cap is installed on the fitting at the
end of the Clear Sealant Hose (7) and return the hose to
its storage area.
7. Return the TIREFIT kit to its storage area in the
vehicle.
JUMP-STARTING PROCEDURES
WARNING!
•Take care to avoid the radiator cooling fan when-
ever the hood is raised. It can start anytime the
ignition switch is on. You can be hurt by the fan.
(Continued)
WHAT TO DO IN EMERGENCIES 317
6
Page 321 of 411

WARNING!
•Battery fluid is a corrosive acid solution; do not
allow battery fluid to contact eyes, skin or cloth-
ing. Don’t lean over the battery when attaching the
clamps or allow the clamps to touch each other. If
acid splashes in your eyes or on your skin, flush
the contaminated area immediately with large
quantities of water.
•A battery generates hydrogen gas which is flam-
mable and explosive. Keep flame or spark away
from the vent holes. Do not use a booster battery
or any other booster source with an output that
exceeds 12-Volts.
5. Connect the other cable, first to the negative terminal
of the booster battery and then to the negative terminal of
the discharged battery. Make sure you have a good
contact.6. If the vehicle is equipped with a Sentry Key�Immo-
bilizer, turn the ignition switch to the ON position for
three seconds before moving the ignition switch to the
START position.
7. Start the engine in the vehicle that has the booster
battery, let the engine idle a few minutes, then start the
engine in the vehicle with the discharged battery.
8. When removing the jumper cables, reverse the se-
quence exactly. Be careful of the moving belts and fan.
FREEING A STUCK VEHICLE
NOTE:If your vehicle is equipped with Traction Con-
trol or ESP, turn the system OFF before attempting to
“rock” the vehicle.
If your vehicle becomes stuck in mud, sand or snow, it
can often be moved by a rocking motion. Turn your
steering wheel right and left to clear the area around the
WHAT TO DO IN EMERGENCIES 319
6
Page 322 of 411

front wheels. Then shift back and forth between RE-
VERSE and 1st gear. Usually the least accelerator pedal
pressure to maintain the rocking motion without spin-
ning the wheels is most effective.
WARNING!
Fast spinning tires can be dangerous. Forces gener-
ated by excessive wheel speeds may cause axle, tire
damage or failure. A tire could explode and injure
someone. Do not spin your vehicle’s wheels faster
than 30 mph (48 km/h) or for longer than 30 seconds
continuously without stopping when you are stuck.
And don’t let anyone near a spinning wheel, no
matter what the speed.
CAUTION!
Racing the engine or spinning the wheels too fast
may lead to transaxle overheating and failure. It can
also damage the tires. Do not spin the wheels above
30 mph (48 km/h). Do not spin the wheels continu-
ously for more than 30 seconds.
TOWING A DISABLED VEHICLE
With Ignition Key
Automatic Transaxle
•
Front Wheel Drive (FWD) vehicles can be towed with
the front wheels elevated or on a flatbed truck (all four
wheels off the ground).
•All Wheel Drive (AWD) vehicles must be towed on a
flatbed truck (all four wheels off the ground).
320 WHAT TO DO IN EMERGENCIES
Page 323 of 411

CAUTION!
DO NOT flat tow any vehicle equipped with an
automatic transmission. Damage to the drivetrain
will result.
Manual Transaxle
•
Front Wheel Drive (FWD) or All Wheel Drive (AWD)
vehicles can be flat towed (all four wheels on the
ground) with the transmission in NEUTRAL.
•FWD vehicles can be towed with the front or rear
wheels elevated.
•FWD or AWD vehicles can be towed on a flatbed truck
(all wheels off the ground).
All Transaxles
If it is necessary to use the accessories while being towed
(wipers, defrosters, etc.), the key must be in the ON
position, not the ACC position. Make certain the trans-
mission remains in NEUTRAL.
CAUTION!
•If the vehicle being towed requires steering, the
ignition switch must be in the ACC position, not
in the LOCK position.
•Do not attempt to use sling type equipment when
towing. When securing the vehicle to a flat bed
truck, do not attach to front or rear suspension
components. Damage to your vehicle may result
from improper towing.
WHAT TO DO IN EMERGENCIES 321
6