Page 263 of 543
2. Press and hold the CMTC reset button (for approxi-
mately 10 seconds) until the current variance zone num-
ber is displayed.
3. Release the CMTC reset button, then press and hold
again for approximately 10 seconds, until the direction is
displayed, with the CAL indicator on continuously in the
display.
4. To complete the compass calibration, drive the vehicle
in one or more complete 360–degree circles, under 5 mph
(8 km/h) in an area free from power lines and large
metallic objects, until the CAL indicator turns off. The
compass will now function normally.
ELECTRONIC VEHICLE INFORMATION CENTER
(EVIC) — IF EQUIPPED
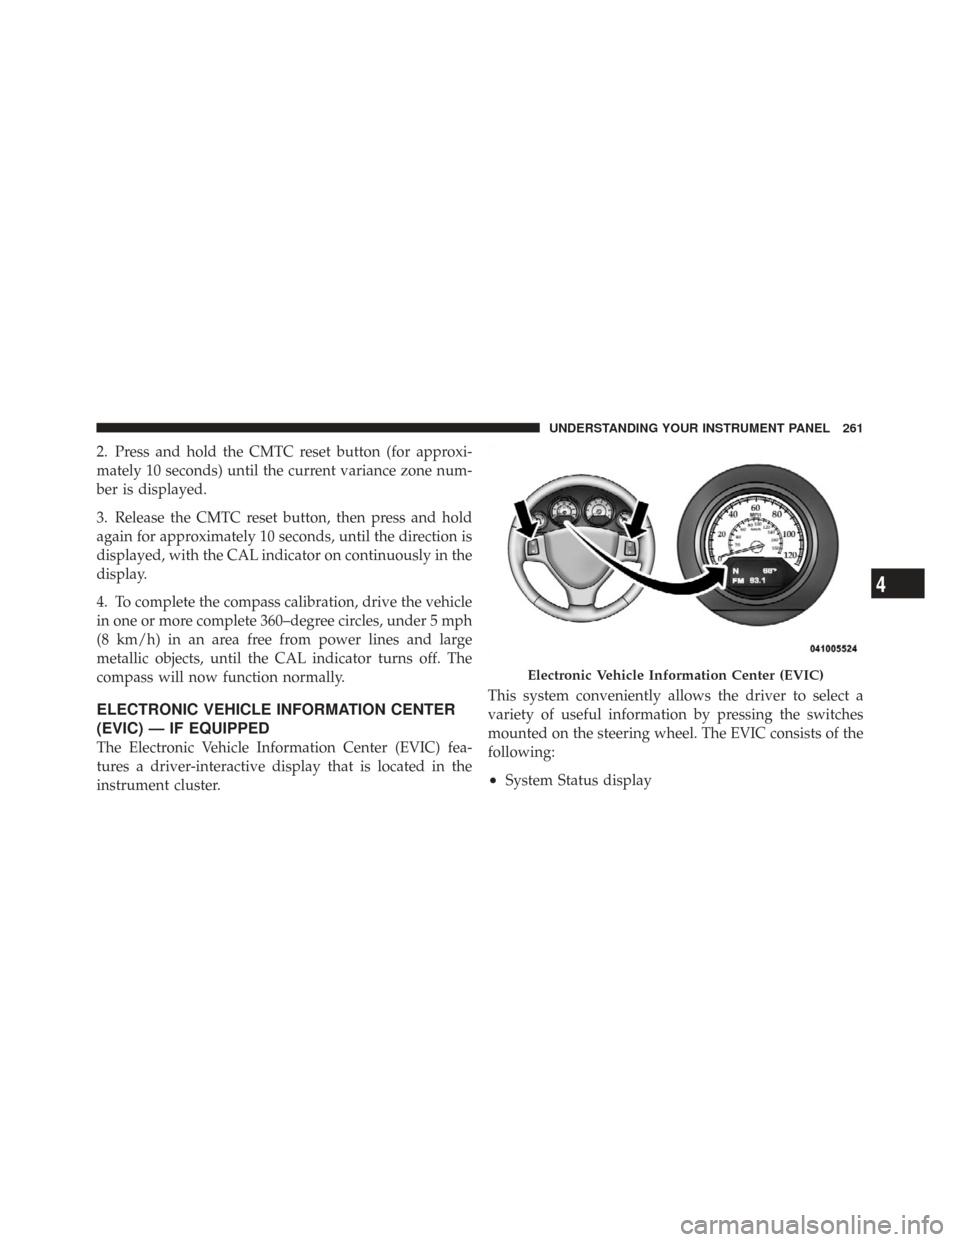
The Electronic Vehicle Information Center (EVIC) fea-
tures a driver-interactive display that is located in the
instrument cluster.This system conveniently allows the driver to select a
variety of useful information by pressing the switches
mounted on the steering wheel. The EVIC consists of the
following:
•System Status display
Electronic Vehicle Information Center (EVIC)
4
UNDERSTANDING YOUR INSTRUMENT PANEL 261
Page 274 of 543
Park ASST. System
When enable is selected, the Rear Park Assist System is
activated. When disable is selected the system is deacti-
vated and the instrument cluster will display the�PARK
ASSIST DISABLED� message. To make your selection,
press and release the RESET button until ENABLE or
DISABLE appears.
Display Units of Measure In
The EVIC, odometer, and navigation system (if
equipped) can be changed between English and Metric
units of measure. To make your selection, press and
release the RESET button until ENGLISH or METRIC
appears.
Door Alert
When this feature is selected the signal lamps activate
when power or manual sliding doors are in operation,
signaling other drivers that someone may be exiting or
entering the vehicle.
Sound Horn with Remote Key Lock
When ON is selected, a short horn sound will occur when
the RKE transmitter LOCK button is pressed. This feature
may be selected with or without the Flash Lamp Lock
feature. To make your selection, press and release the
RESET button until ON or OFF appears.
Turn Headlights On with Remote Key Unlock
When this feature is selected, the headlights will activate,
and remain on for up to 90 seconds, when the doors are
unlocked with the RKE transmitter. To make your selec-
tion, press and release the RESET button until OFF,
30 sec., 60 sec., or 90 sec. appears.
Automatic High Beams — If Equipped
When this feature is selected, the high beam headlights
will deactivate automatically under certain conditions. To
make your selection, press and release the RESET button
until “ON” or “OFF” appears. Refer to “SmartBeams” in
Section 3.
272 UNDERSTANDING YOUR INSTRUMENT PANEL
Page 341 of 543
moving the lever—/ + while in the DRIVE position, the
instrument cluster will display transaxle gear selection as
6, 5, 4, 3, 2, 1 for six-speed, and 4, 3, 2, 1 for four-speed
transaxles.
Gear Ranges
Do not race the engine when moving the shift lever from
PARK or NEUTRAL positions into another gear range.
PARK
This range supplements the parking brake by locking the
transaxle. The engine can be started in this gear. Never
attempt to use PARK while the vehicle is in motion.
Apply the parking brake when leaving the vehicle in this
gear.
When parking on a flat surface, place the shift lever in the
PARK position first, and then apply the parking brake.
When parking on a hill, it is important to set the parking
brake before placing the shift lever in PARK, otherwisethe load on the transaxle locking mechanism may make it
difficult to move the shift lever out of PARK. As an added
precaution, turn the front wheels toward the curb on a
downhill grade, and away from the curb on an uphill
grade.
WARNING!
•Never use the PARK position as a substitute for
the parking brake. Always apply the parking
brake fully when parked to guard against vehicle
movement and possible injury or damage.
(Continued)
5
STARTING AND OPERATING 339
Page 344 of 543
CAUTION!
If the transaxle operating temperature exceeds ac-
ceptable limits, the vehicle computer will override
DRIVE and select “5” range (on six-speed transaxles)
or “3” range (on four-speed transaxles) by changing
shift points. This is done to prevent transaxle damage
due to overheating.
Electronic Range Select (ERS) Operation
The Electronic Range Select (ERS) shift control allows
you to move the shift lever to the left (-) or right (+) when
the shift lever is in the DRIVE position, this allows the
selection of the desired top gear. For example, if you shift
the transaxle into third gear, the transaxle will never shift
above third gear, but can shift down to second or first
gear automatically, when needed.Switching from ERS to DRIVE can be done at any vehicle
speed. To shift from DRIVE mode to ERS mode, move the
shift lever to the left (-) once. The current gear will be
maintained as the top gear. To disable ERS, simply press
and hold the shift lever to the right (+) until “D” is
displayed in the instrument cluster odometer.
WARNING!
Do not downshift for additional engine braking on a
slippery surface. The drive wheels could lose their
grip and the vehicle could skid, causing an accident
or personal injury.
342 STARTING AND OPERATING
Page 351 of 543
If necessary, add fluid to restore to the proper indicated
level. With a clean cloth, wipe any spilled fluid from all
surfaces. Refer to “Fluids, Lubricants, and Genuine
Parts” in Section 7 for the correct fluid type.
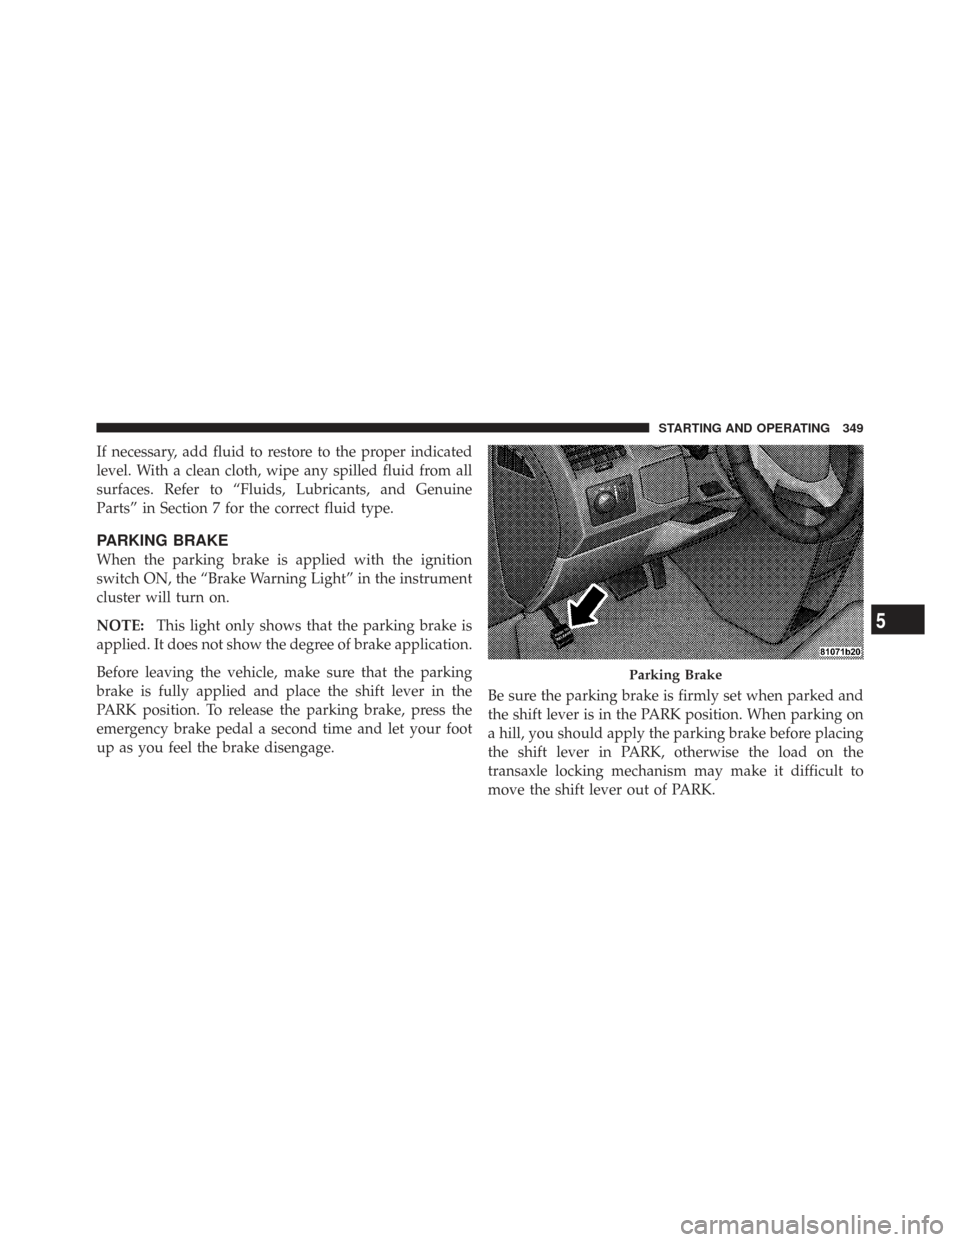
PARKING BRAKE
When the parking brake is applied with the ignition
switch ON, the “Brake Warning Light” in the instrument
cluster will turn on.
NOTE:This light only shows that the parking brake is
applied. It does not show the degree of brake application.
Before leaving the vehicle, make sure that the parking
brake is fully applied and place the shift lever in the
PARK position. To release the parking brake, press the
emergency brake pedal a second time and let your foot
up as you feel the brake disengage. Be sure the parking brake is firmly set when parked and
the shift lever is in the PARK position. When parking on
a hill, you should apply the parking brake before placing
the shift lever in PARK, otherwise the load on the
transaxle locking mechanism may make it difficult to
move the shift lever out of PARK.
Parking Brake
5
STARTING AND OPERATING 349
Page 358 of 543
ESP Partial Off
This mode is entered by momentarily pressing the “ESP
OFF” switch (located in the center switch bank, next to
the hazard flasher switch).When in the “Partial Off” mode, the TCS
portion of ESP, except for the “limited slip”
feature described in the TCS section, has been
disabled and the “ESP/TCS Indicator Light”
will be illuminated. When in the “Partial Off” mode, ESP
will operate without engine torque management. This
mode is intended to be used if the vehicle is in deep
snow, sand or gravel conditions and more wheel spin
than ESP would normally allow is required to gain
traction. To turn ESP on again, momentarily press the
“ESP OFF” switch. This will restore the normal “ESP On”
mode of operation.
NOTE: To improve the vehicle’s traction when driving
with snow chains, or starting off in deep snow, sand or gravel, it may be desirable to switch to the “Partial Off”
mode by pressing the “ESP OFF” switch. Once the
situation requiring ESP to be switched to the “Partial Off”
mode is overcome, turn ESP back on by momentarily
pressing the “ESP OFF” switch. This may be done while
the vehicle is in motion.
ESP/BAS Warning Light
The malfunction indicator light for the ESP is
combined with BAS. The “ESP/BAS Warning
Light” and the “ESP/TCS Indicator Light” (in
the instrument cluster) both come on when the
ignition switch is turned to the ON position. They should
go out with the engine running. If the “ESP/BAS Warn-
ing Light” comes on continuously with the engine run-
ning, a malfunction has been detected in either the ESP or
the BAS system. If this light remains on after several
ignition cycles, and the vehicle has been driven several
miles/kilometers at speeds greater than 30 mph
356 STARTING AND OPERATING
Page 381 of 543
The Basic TPMS consists of the following components:
•Receiver Module
•Four Tire Pressure Monitoring Sensors
•TPMS Telltale Warning Light
Tire Pressure Monitoring Low Tire Pressure
Warnings
The “TPMS Telltale Warning Light” will illu-
minate in the instrument cluster, and an au-
dible chime will be activated when one or more
of the four active road tire pressures are low.
Should this occur, you should stop as soon as possible,
check the inflation pressure of each tire on your vehicle,
and inflate each tire to the vehicle’s recommended cold
tire pressure value (located on the placard on the
driver’s-side B-Pillar). The system will automatically
update and the “TPMS Warning Lamp” will extinguish
once the updated tire pressures have been received. NOTE:
The vehicle may need to be driven for up to
20 minutes above 15 mph (25 km/h) to receive this
information.
The “TPMS Warning Lamp” will flash on and off for
75 seconds, and remain on solid when a system fault is
detected. The system fault will also sound a chime. If the
ignition key is cycled, this sequence will repeat, provid-
ing the system fault still exists. The “TPMS Warning
Lamp” will turn off when the fault condition no longer
exists. A system fault can occur with any of the following
scenarios:
1. Jamming due to electronic devices or driving next to
facilities emitting the same radio frequencies as the TPMS
sensors.
2. Installing some form of aftermarket window tinting
that affects radio wave signals.
5
STARTING AND OPERATING 379
Page 383 of 543
NOTE:It is particularly important to regularly check
and maintain proper tire pressure in all the tires.
The Premium TPMS consists of the following compo-
nents:
•Receiver Module
•Four TPMS Sensors
•Three Trigger Modules (mounted in three of the four
wheel wells)
•Various TPMS messages, which display in the Elec-
tronic Vehicle Information Center (EVIC), and graph-
ics displaying tire pressures
•Yellow TPMS Telltale Warning Light
TPMS Low Pressure Warnings
The “TPMS Telltale Warning Light” will illuminate in the
instrument cluster, and an audible chime will be acti-
vated when one or more of the four active road tire pressures are low. In addition, the EVIC will display a
Low Pressure message for three seconds and a graphic
display of the pressure value(s) with the low tire(s)
flashing.
Should a low tire condition occur on any of the four
active road tire(s), you should stop as soon as possible,Low Tire Pressure Display
5
STARTING AND OPERATING 381