2009 CHRYSLER PT CRUISER child seat
[x] Cancel search: child seatPage 69 of 410
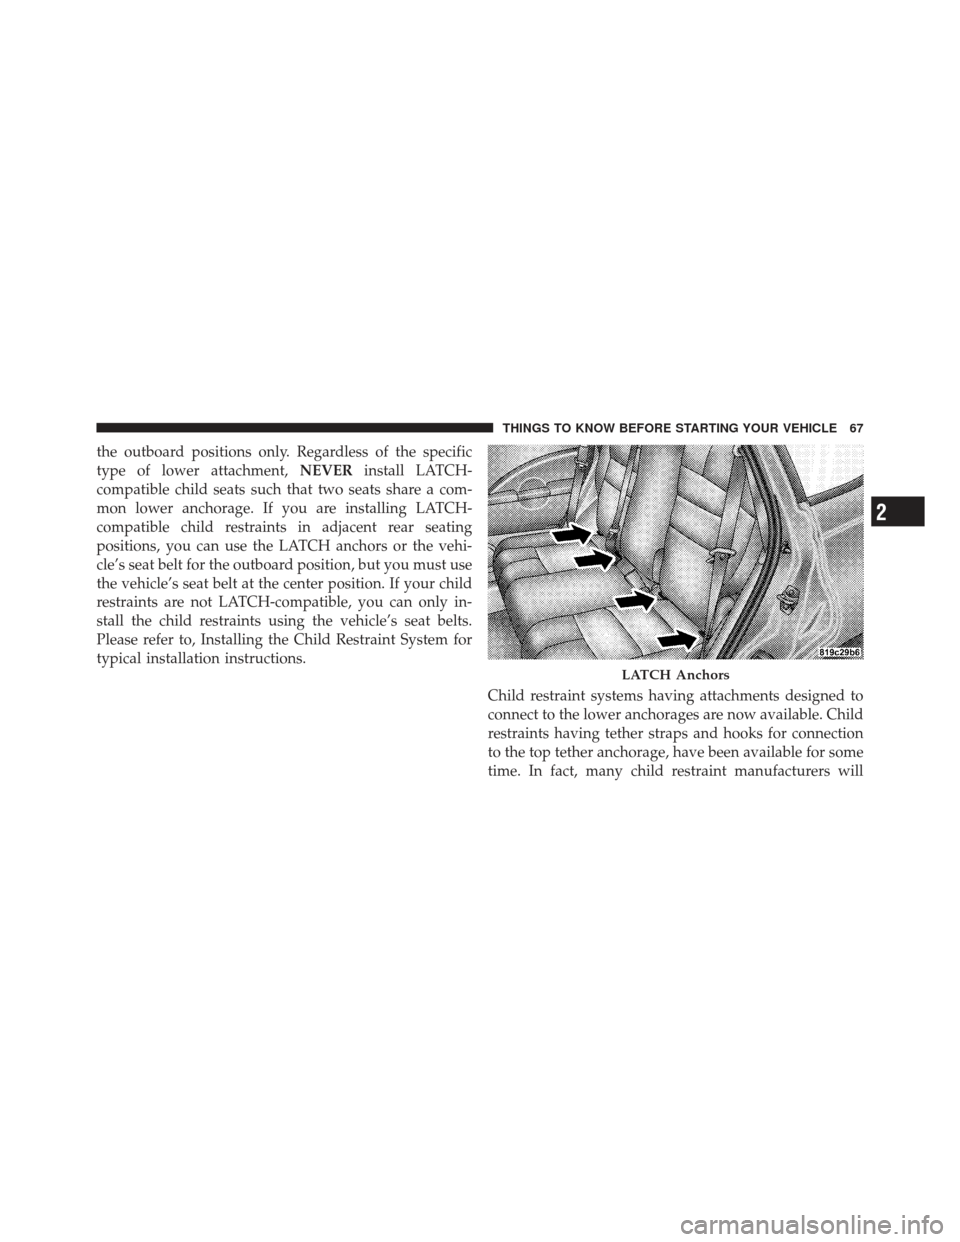
the outboard positions only. Regardless of the specific
type of lower attachment,NEVERinstall LATCH-
compatible child seats such that two seats share a com-
mon lower anchorage. If you are installing LATCH-
compatible child restraints in adjacent rear seating
positions, you can use the LATCH anchors or the vehi-
cle’s seat belt for the outboard position, but you must use
the vehicle’s seat belt at the center position. If your child
restraints are not LATCH-compatible, you can only in-
stall the child restraints using the vehicle’s seat belts.
Please refer to, Installing the Child Restraint System for
typical installation instructions.
Child restraint systems having attachments designed to
connect to the lower anchorages are now available. Child
restraints having tether straps and hooks for connection
to the top tether anchorage, have been available for some
time. In fact, many child restraint manufacturers will
LATCH Anchors
2
THINGS TO KNOW BEFORE STARTING YOUR VEHICLE 67
Page 70 of 410
provide add-on tether strap kits for some of their older
products. Tether anchorage kits are also available for
most older vehicles.
Because the lower anchorages are to be introduced to
passenger-carrying vehicles over a period of years, child
restraint systems having attachments for those anchor-
ages will continue to have features for installation in
vehicles using the lap or lap/shoulder belt. They will also
have tether straps, and you are urged to take advantage
of all of the available attachments provided with your
child restraint in any vehicle.
NOTE:When using the LATCH attaching system to
install a child restraint, please ensure that all seat belts
not being used for occupant restraints are stowed and out
of reach of children. It is recommended that before
installing the child restraint, buckle the seat belt so the
seat belt is tucked behind the child restraint and out of
reach. If the buckled seat belt interferes with the child restraint installation, instead of tucking the seat belt
behind the child restraint, route the seat belt through the
child restraint belt path and then buckle it. This should
stow the seat belt out of the reach of an inquisitive child.
Remind all children in the vehicle that the seat belts are
not toys and should not be played with, and never leave
your child unattended in the vehicle.
Installing the Child Restraint System
We urge you to carefully follow the directions of the
manufacturer when installing your child restraint. Many,
but not all, restraint systems will be equipped with
separate straps on each side, with each having a hook or
connector, and a means for adjusting the tension in the
strap. Forward-facing toddler restraints and some
rearward-facing infant restraints will also be equipped
with a tether strap with a hook and means for adjusting
the tension in the strap.
68 THINGS TO KNOW BEFORE STARTING YOUR VEHICLE
Page 71 of 410
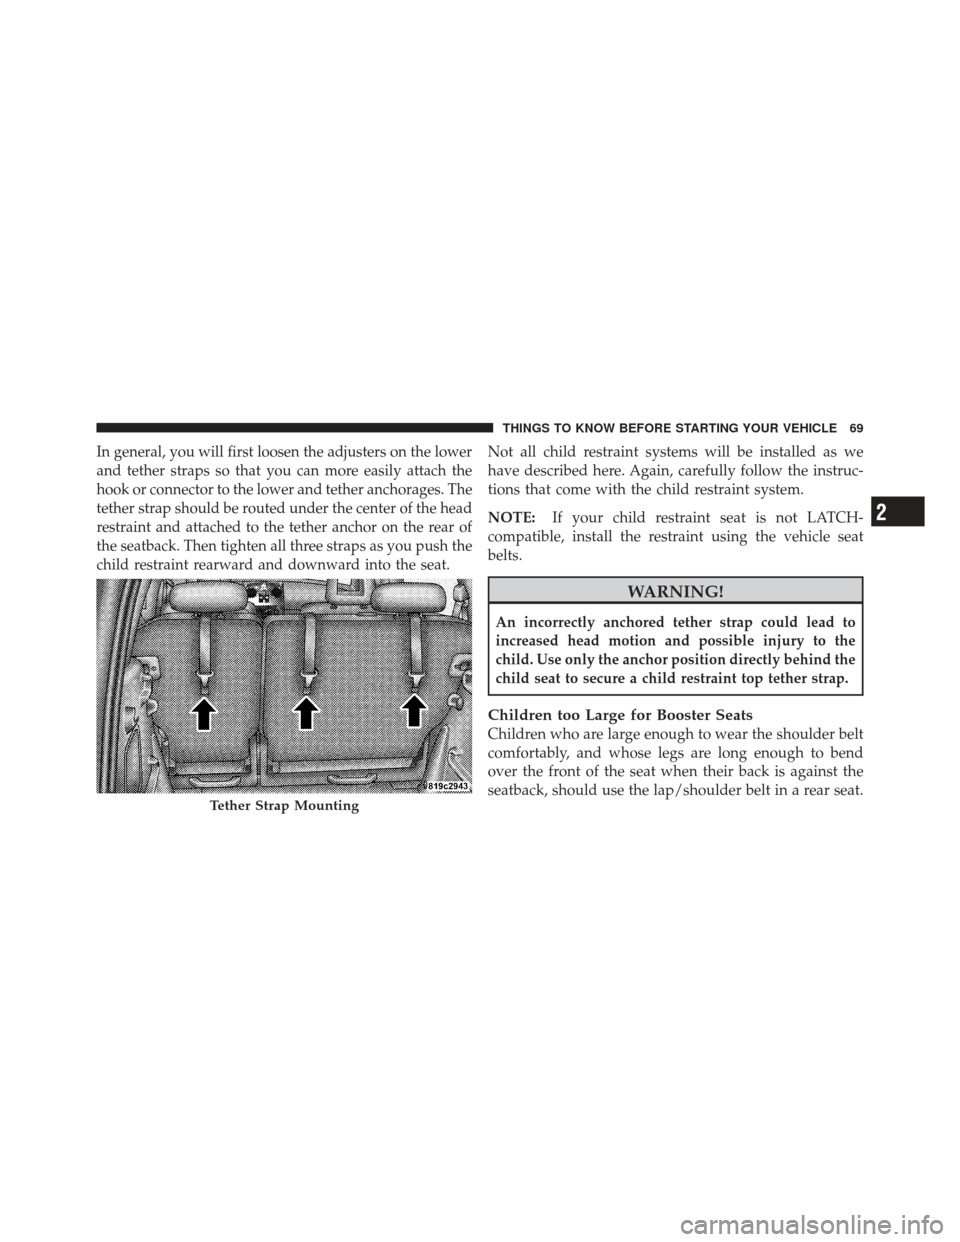
In general, you will first loosen the adjusters on the lower
and tether straps so that you can more easily attach the
hook or connector to the lower and tether anchorages. The
tether strap should be routed under the center of the head
restraint and attached to the tether anchor on the rear of
the seatback. Then tighten all three straps as you push the
child restraint rearward and downward into the seat.Not all child restraint systems will be installed as we
have described here. Again, carefully follow the instruc-
tions that come with the child restraint system.
NOTE:If your child restraint seat is not LATCH-
compatible, install the restraint using the vehicle seat
belts.
WARNING!
An incorrectly anchored tether strap could lead to
increased head motion and possible injury to the
child. Use only the anchor position directly behind the
child seat to secure a child restraint top tether strap.
Children too Large for Booster Seats
Children who are large enough to wear the shoulder belt
comfortably, and whose legs are long enough to bend
over the front of the seat when their back is against the
seatback, should use the lap/shoulder belt in a rear seat.
Tether Strap Mounting
2
THINGS TO KNOW BEFORE STARTING YOUR VEHICLE 69
Page 72 of 410

•Make sure that the child is upright in the seat.
•The lap portion should be low on the hips and as snug
as possible.
•Check belt fit periodically. A child’s squirming or
slouching can move the belt out of position.
•If the shoulder belt contacts the face or neck, move the
child closer to the center of the vehicle. Never allow a
child to put the shoulder belt under an arm or behind
their back.
Transporting Pets
Airbags deploying in the front seat could harm your pet.
An unrestrained pet will be thrown about and possibly
injured, or injure a passenger during panic braking or in
a collision.
Pets should be restrained in the rear seat in pet harnesses
or pet carriers that are secured by seat belts.
ENGINE BREAK-IN RECOMMENDATIONS
A long break-in period is not required for the engine in
your vehicle.
Drive moderately during the first 300 miles (500 km).
After the initial 60 miles (100 km), speeds up to 50 or
55 mph (80 or 90 km/h) are desirable.
While cruising, brief full-throttle acceleration within the
limits of local traffic laws, contributes to a good break-in.
Wide-open throttle acceleration in low gear can be detri-
mental and should be avoided.
The engine oil installed in the engine at the factory is a
high-quality energy conserving type lubricant. Oil
changes should be consistent with anticipated climate
conditions under which vehicle operations will occur.
The recommended viscosity and quality grades are
shown in “Engine Oil”, under “Maintenance Procedures”
in section 7 of this manual. NON-DETERGENT OR
STRAIGHT MINERAL OILS MUST NEVER BE USED.
70 THINGS TO KNOW BEFORE STARTING YOUR VEHICLE
Page 124 of 410
To reinstall the rear seat, insert the seat into the floor
attachments. Lower the release levers of the seat to latch
the front floor attachments and rotate the seat rearward
to latch the seat. Lift the seatback to its upright latched
position.
WARNING!
In an accident, you or others in your vehicle could be
injured if seats are not properly latched to their floor
attachments. Always be sure the seats are fully
latched.
EMERGENCY SEATBACK RELEASE
WARNING!
Do not allow children to have access to the liftgate
area with the rear shelf panel in position 1 (Top) or
position 2 (Middle), either by climbing into the
liftgate from outside, or through the inside of the
vehicle. Always close the liftgate when your vehicle
is unattended. Once in the liftgate area, young chil-
dren may not be able to escape, even if they entered
through the rear seat. If trapped in the liftgate,
children can die from suffocation or heat stroke.
As a security measure, a Seatback Emergency Release
lever is built into the left side rear seatback latching
mechanism. In the event of an individual being locked
inside the liftgate area with the rear shelf panel in
position 1 (Top) or position 2 (Middle), the left side rear
122 UNDERSTANDING THE FEATURES OF YOUR VEHICLE
Page 146 of 410
To close the sunroof, hold the switch in the forward
position. Again, any release of the switch will stop the
movement and the sunroof will remain in a partial open
condition until the switch is pushed forward again.
The sunshade can be opened manually. It will also open
as the sunroof opens. The sunshade cannot be closed if
the sunroof is open.
WARNING!
•Never leave children in a vehicle with the key in
the ignition switch. Occupants, particularly unat-
tended children, can become entrapped by the
power sunroof while operating the power sunroof
switch. Such entrapment may result in serious
injury or death.(Continued)
WARNING! (Continued)
•In an accident, there is a greater risk of being
thrown from a vehicle with an open sunroof. You
could also be seriously injured or killed. Always
fasten your seat belt properly and make sure all
passengers are properly secured too.
•Do not allow small children to operate the sun-
roof. Never allow your fingers, other body parts, or
any object to project through the sunroof opening.
Injury may result.
Wind Buffeting
Wind buffeting can be described as the perception of
pressure on the ears or a helicopter-type sound in the
ears. Your vehicle may exhibit wind buffeting with the
windows down, or the sunroof (if equipped) in certain
open or partially open positions. This is a normal occur-
rence and can be minimized. If the buffeting occurs with
the rear windows open, open the front and rear windows
144 UNDERSTANDING THE FEATURES OF YOUR VEHICLE
Page 226 of 410

STARTING PROCEDURES
Before starting your vehicle, adjust your seat, adjust both
inside and outside mirrors, and fasten your seat belts.
WARNING!
Never leave children alone in a vehicle. Leaving
unattended children in a vehicle is dangerous for a
number of reasons. A child or others could be seri-
ously or fatally injured. Do not leave the key in the
ignition. A child could operate power windows,
other controls, or move the vehicle.
Manual Transaxle — If Equipped
Before starting the engine, fully apply the parking brake,
press the clutch pedal to the floor and place the shift lever
into NEUTRAL.
NOTE:The engine will not start unless the clutch pedal
is pressed to the floor.
Automatic Transaxle — If Equipped
The shift lever must be in the NEUTRAL or PARK
position before you can start the engine. Apply the brakes
and press the shift lever knob button before shifting to
any driving gear.
NOTE: You must press the brake pedal before shifting
out of PARK.
Normal Starting
Normal starting of either a cold or a warm engine does
not require pumping or pressing the accelerator pedal.
Simply turn the ignition switch to the START position
and release when the engine starts. If the engine has not
started within three seconds, slightly press the accelera-
tor pedal while continuing to crank. If the engine fails to
start within 15 seconds, turn the ignition switch to the
OFF position, wait 10 to 15 seconds, then repeat the
“Normal Starting” procedure above.
224 STARTING AND OPERATING
Page 394 of 410

Check Engine Light
(Malfunction Indicator Light).............168,309
Checking Your Vehicle For Safety ............. 71
Checks, Safety ........................... 71
Child Restraint .......................... 62
Child Restraint Tether Anchors ............... 66
Child Restraint with Automatic Belts ........... 65
Child Safety Locks ........................ 30
Child Seat .............................. 68
Clean Air Gasoline ....................... 270
Cleaning Wheels ............................. 337
Climate Control ......................... 213
Clock ........................... 187,189,203
Clutch ............................... 329
Clutch Fluid ........................... 329
Coin Holder ........................... 148
Compact Disc (CD) Maintenance ............. 212
Compact Spare Tire ...................... 259 Compass
..................... 173,174,176,185
Compass Calibration .................. 176,185
Compass Variance ....................... 175
Computer, Trip/Travel .................... 173
Console .............................. 148
Contract, Service ........................ 383
Cool Down, Turbo ....................... 226
Coolant (Antifreeze) ................... 349,350
Coolant Pressure Cap (Radiator Cap) .......... 326
Cooling System ......................... 323
Adding Coolant (Antifreeze) .............. 325
Coolant Level ...................... 323,327
Disposal of Used Coolant ................ 327
Drain, Flush, and Refill .................. 324
Inspection ........................... 327
Points to Remember .................... 328
Pressure Cap ......................... 326
Radiator Cap ......................... 326
Selection of Coolant (Antifreeze) ........... 324
392 INDEX