2009 CHRYSLER ASPEN change time
[x] Cancel search: change timePage 233 of 481

If your vehicle is not equipped with or this feature is not
available on your vehicle, a ªNot Equipped With
UConnectº message will display on the radio screen.
TIME Button
Press the TIME button and the time of day will display. In
AM or FM mode, pressing the TIME button will switch
between the time and frequency displays.
Clock Setting Procedure
1. Press and hold the TIME button, until the hours blink.
2. Adjust the hours by turning the right side Tune/Scroll
control knob.
3. After adjusting the hours, press the right side Tune/
Scroll control knob to set the minutes. The minutes will
begin to blink.4. Adjust the minutes using the right side Tune/Scroll
control knob. Press the Tune/Scroll control knob to save
time change.
5. To exit, press any button/knob or wait five seconds.
The clock can also be set by pressing the SETUP button.
For vehicles equipped with satellite radio, press the
SETUP button, use the Tune/Scroll control to select SET
CLOCK, and then follow the above procedure, starting at
Step 2. For vehicles not equipped with satellite radio,
press the SETUP button and then follow the above
procedure, starting at Step 2.
INFO Button
Press the INFO button for an RDS station (one with call
letters displayed). The radio will return a Radio Text
message broadcast from an FM station (FM mode only).
UNDERSTANDING YOUR INSTRUMENT PANEL 231
4
Page 239 of 481

TIME Button
Press this button to change the display from a large CD
playing time display to a small CD playing time display.
RW/FF
Press the RW button to stop the CD at the beginning of
the current CD track/title.
Press and hold FF (Fast Forward) and the CD player will
begin to fast forward until FF is released or RW or
another CD button is pressed. The RW (Reverse) button
works in a similar manner.
AM/FM Button
Press the button to select either AM or FM mode.
SET/RND Button (Random Play Button)
Press this button while the CD is playing to activate
Random Play. This feature plays the selections on the
compact disc in random order to provide an interesting
change of pace.Press the right SEEK button to move to the next ran-
domly selected track.
Press the SET/RND button a second time to stop Ran-
dom Play.
Notes On Playing MP3 Files
The radio can play MP3 files; however, acceptable MP3
file recording media and formats are limited. When
writing MP3 files, pay attention to the following restric-
tions.
Supported Media (Disc Types)
The MP3 file recording media supported by the radio are
CDDA, CD-R, CD-RW, MP3, and CDDA+MP3.
Supported Medium Formats (File Systems)
The medium formats supported by the radio are ISO 9660
Level 1 and Level 2 and includes the Joliet extension.
When reading discs recorded using formats other than
ISO 9660 Level 1 and Level 2, the radio may fail to read
UNDERSTANDING YOUR INSTRUMENT PANEL 237
4
Page 242 of 481

LIST Button (CD Mode for MP3 Play)
Pressing the LIST button will bring up a list of all folders
on the disc. Scrolling up or down the list is done by
turning the Tune/Scroll control knob. Selecting a folder
by pressing the Tune/Scroll control knob will begin
playing the files contained in that folder (or the next
folder in sequence if the selection does not contain
playable files).
The folder list will time out after five seconds.
INFO Button (CD Mode for MP3 Play)
Pressing the INFO button repeatedly will scroll through
the following TAG information: Song Title, Artist, File
Name, and Folder Name (if available).
Press the INFO button once more to return to9elapsed
time9priority mode.
Press and hold the INFO button for three seconds or
more and the radio will display song titles for each file.Press and hold the INFO button again for three seconds
to return to9elapsed time9display.
Operation Instructions - Auxiliary Mode
The auxiliary (AUX) jack is an audio input jack, which
allows the user to plug in a portable device such as an
MP3 player, or cassette player, and utilize the vehicle's
audio system to amplify the source and play through the
vehicle speakers.
Pressing the AUX button will change the mode to auxil-
iary device if the AUX jack is connected.
NOTE:The AUX device must be turned on and the
device's volume set to proper level. If the AUX audio is
not loud enough, turn the device's volume up. If the AUX
audio sounds distorted, turn the device's volume down.
240 UNDERSTANDING YOUR INSTRUMENT PANEL
Page 243 of 481

TIME Button (Auxiliary Mode)
Press this button to change the display to time of day. The
time of day will display for five seconds (when ignition is
OFF).
Operating Instructions - Hands-Free Phone
(UConnectt) (If Equipped)
Refer to ªHands-Free Communication (UConnectt)º in
Section 3.
Operating Instructions - Satellite Radio Mode (If
Equipped)
Refer to ªSatellite Radioº in this section.
Operating Instructions - Video Entertainment
System (VES)t(If Equipped)
Refer to separate ªVideo Entertainment System (VES)t
Guide.º
UNIVERSAL CONSUMER INTERFACE (UCI) Ð IF
EQUIPPED
NOTE:This section is for sales code RES and REQ/
REL/RET radios only with UConnectt. For sales code
RER, REN and REZ touch-screen radio UCI feature, refer
to the separate RER, REN or REZ User's Manual. UCI is
available only if equipped as an option with these radios.
This feature allows you to plug an iPodtinto the
vehicle's sound system through a 16±pin connector using
the provided interface cable.
UCI supports Mini, 4G, Photo, Nano, 5G iPodtand
iPhonetdevices. Some iPodtsoftware versions may not
fully support the UCI features. Please visit Apple's
website for software updates.
UNDERSTANDING YOUR INSTRUMENT PANEL 241
4
Page 252 of 481

By pressing the SEEK button when the Music Type
function is active, the radio will be tuned to the next
channel with the same selected Music Type name.
If a preset button is activated while in the Music Type
(Program Type) mode, the Music Type mode will be
exited and the radio will tune to the preset channel.
MUSIC TYPE Button Ð REU Radio
Pressing this button provides a MUSIC TYPES list from
which you can make a selection. Once a selection is
made, you can seek up, or down, or scan the channels
and the radio will tune to the next station matching the
selected format. There is no time-out for this screen.
Pressing the MUSIC TYPE button again will close the
MUSIC TYPE screen. Once closed, seek up, seek down,
and scan will no longer be based on your selection.
SETUP Button
Pressing the SETUP button allows you to select the
following items:
²Display Sirius ID number Ð Press the AUDIO/
SELECT button to display the Sirius ID number. This
number is used to activate, deactivate, or change the
Sirius subscription.
SET Button ± To Set the Pushbutton Memory
When you are receiving a channel that you wish to
commit to pushbutton memory, press the SET button.
The symbol SET 1 will now show in the display window.
Select the button (1-6) you wish to lock onto this channel
and press and release that button. If a button is not
selected within five seconds after pressing the SET but-
ton, the channel will continue to play but will not be
stored into pushbutton memory.
250 UNDERSTANDING YOUR INSTRUMENT PANEL
Page 255 of 481

The left hand control is a rocker type switch with a push
button in the center. The function of the left hand control
is different depending on which mode you are in.
The following describes the left hand control operation in
each mode.
Radio Operation
Pressing the top of the switch will SEEK up for the next
listenable station and pressing the bottom of the switch
will SEEK down for the next listenable station.
The button located in the center of the left hand control
will tune to the next pre-set station that you have
programmed in the radio pre-set push-buttons.
CD Player
Pressing the top of the switch once will go to the next
track on the CD. Pressing the bottom of the switch oncewill go to the beginning of the current track or to the
beginning of the previous track if it is within one second
after the current track begins to play.
If you press the switch up or down twice it plays the
second track, three times, it will play the third, etc.
The button in the center of the left hand switch changes
CD's on the 6±Disc in-dash CD changer radio. This
button does not function for all other radios.
CD/DVD MAINTENANCE
To keep the CD/DVD in good condition, take the follow-
ing precautions:
1. Handle the disc by its edge; avoid touching the
surface.
2. If the disc is stained, clean the surface with a soft cloth,
wiping from center to edge.
UNDERSTANDING YOUR INSTRUMENT PANEL 253
4
Page 257 of 481

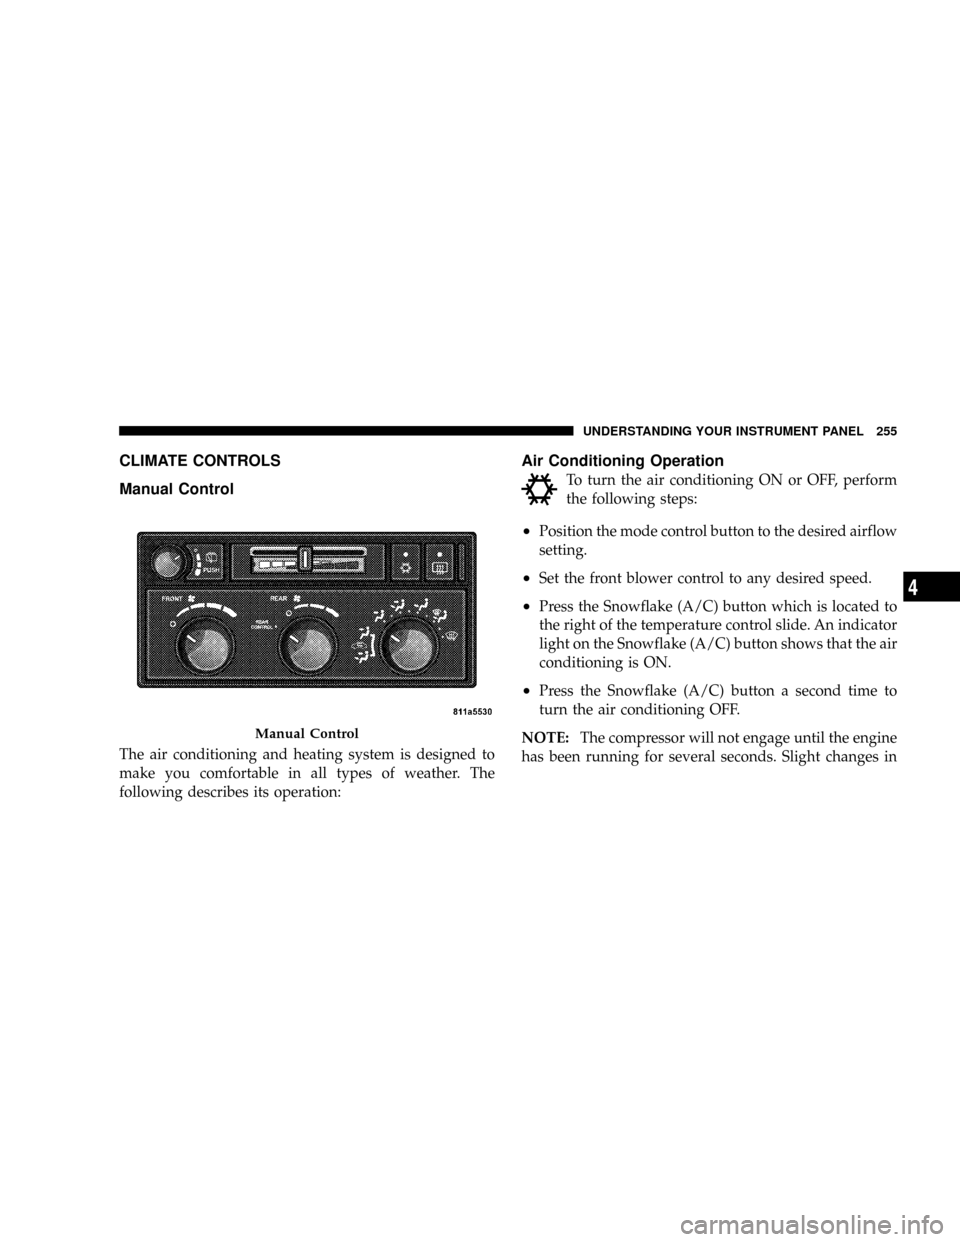
CLIMATE CONTROLS
Manual Control
The air conditioning and heating system is designed to
make you comfortable in all types of weather. The
following describes its operation:
Air Conditioning Operation
To turn the air conditioning ON or OFF, perform
the following steps:
²Position the mode control button to the desired airflow
setting.
²Set the front blower control to any desired speed.
²Press the Snowflake (A/C) button which is located to
the right of the temperature control slide. An indicator
light on the Snowflake (A/C) button shows that the air
conditioning is ON.
²Press the Snowflake (A/C) button a second time to
turn the air conditioning OFF.
NOTE:The compressor will not engage until the engine
has been running for several seconds. Slight changes in
Manual Control
UNDERSTANDING YOUR INSTRUMENT PANEL 255
4
Page 263 of 481

Level Of Automatic Control
72ÉF (22ÉC) is the recommended setting for maximum
comfort for the average person, however, this may vary.
NOTE:The temperature setting can be adjusted at any
time without affecting automatic control operation. It is
not necessary to move the temperature setting for cold or
hot vehicles. The system automatically adjusts the tem-
perature, mode and fan speed to provide comfort as
quickly as possible.
NOTE:In cold weather, the fan will not turn on in Auto
mode until the engine coolant has warmed up suffi-
ciently. This is indicated by the ªWARM UP DELAYº
message on the display.
NOTE:The temperature can be displayed in U.S. or
Metric by selecting the U.S./METRIC Customer-
Programmable feature. Refer to9Overhead ConsoleCustomer-Programmable Features9in Section 3. The
mode will also be shown in the display and will change
as required during automatic operation.
NOTE:The system can be put into recirculate mode
without affecting ATC operation. This will prevent out-
side air from entering the vehicle. Use this mode to
temporarily block out any outside odors, smoke, or dust.
Manual Control (ATC)
You may also choose to customize your comfort by
selecting the fan speed and mode manually. Turning the
fan speed knob or any mode button places the system
into manual operation.
While in manual operation there are six fan speeds
available and the choice of any mode. The airflow
temperature is adjusted automatically to maintain the
desired comfort level. You can adjust the temperature by
pressing the + or - Temp rocker switches.
UNDERSTANDING YOUR INSTRUMENT PANEL 261
4