Page 355 of 464
8. Reinstall the taillamp assembly by inserting the
outboard locating/retaining pins until the lamp is
seated.
9. Secure with the inboard screws.
License Plate Lamp
To replace one of these bulbs:
1. Remove the two screws holding each of the license
plate lamps to the fascia.
2. Turn and pull the license plate lamp forward
through the fascia opening.3. Turn the bulb socket counterclockwise and pull the
bulb straight out of the socket.
4. Push the new bulb into the bulb socket and turn it
clockwise to lock it into place.
5. Push and turn the license plate back through the
fascia opening.
6. Reinstall the two screws holding the license plate
lamps to the fascia.
Replacement Bulbs
Exterior Lamp Bulb Number
Back-up 3057KX
Front Turn Signal, DRL and
Parking3157NAK
High-Beam and Low-Beam
HeadlampsH11
License Plate Lamp 168
Sidemarker 194
Stoplamp, Taillamp and Turn
Signal3057KX
For replacement bulbs not listed here, contact your
dealer/retailer.
5-45
Page 356 of 464

Windshield Wiper Blade
Replacement
Windshield wiper blades should be inspected for wear
and cracking. SeeScheduled Maintenance on page 6-4
for more information.
Replacement blades come in different types and are
removed in different ways. For proper type and length,
seeMaintenance Replacement Parts on page 6-13.
To replace the windshield wiper blade assembly do the
following:
1. Lift the wiper arm and turn the blade until it is
facing away from the windshield.
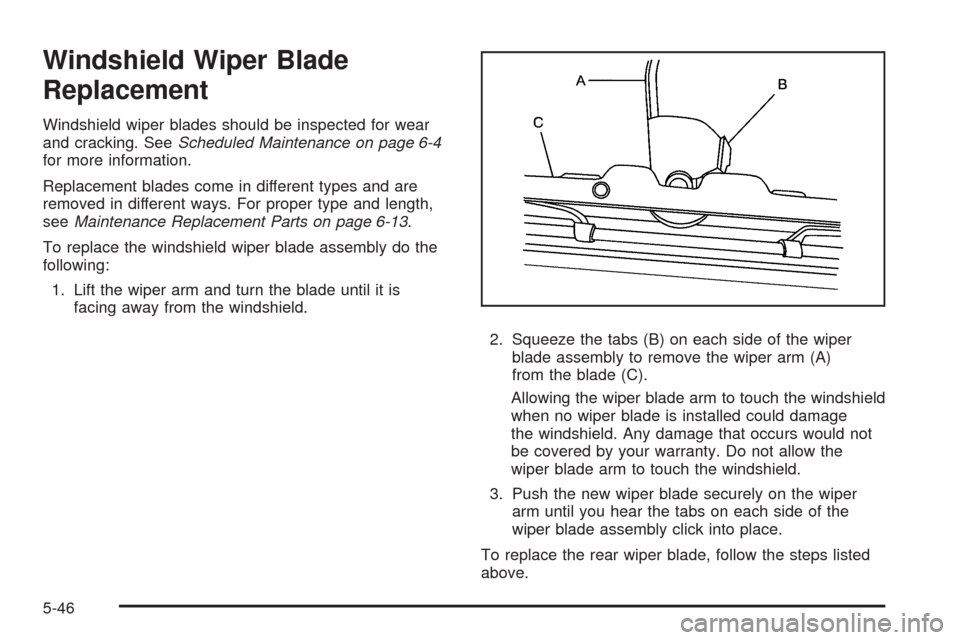
2. Squeeze the tabs (B) on each side of the wiper
blade assembly to remove the wiper arm (A)
from the blade (C).
Allowing the wiper blade arm to touch the windshield
when no wiper blade is installed could damage
the windshield. Any damage that occurs would not
be covered by your warranty. Do not allow the
wiper blade arm to touch the windshield.
3. Push the new wiper blade securely on the wiper
arm until you hear the tabs on each side of the
wiper blade assembly click into place.
To replace the rear wiper blade, follow the steps listed
above.
5-46
Page 373 of 464

Reset the Tire Pressure Monitor System. SeeTire
Pressure Monitor Operation on page 5-58.
Make certain that all wheel nuts are properly
tightened. See “Wheel Nut Torque” under
Capacities and Specifications on page 5-104.
{CAUTION:
Rust or dirt on a wheel, or on the parts to
which it is fastened, can make wheel nuts
become loose after time. The wheel could
come off and cause an accident. When you
change a wheel, remove any rust or dirt from
places where the wheel attaches to the
vehicle. In an emergency, you can use a cloth
or a paper towel to do this; but be sure to use a
scraper or wire brush later, if needed, to get all
the rust or dirt off. SeeChanging a Flat Tire on
page 5-74.
Make sure the spare tire is stored securely.
Push, pull, and then try to rotate or turn the tire.
If it moves, tighten the cable. SeeStoring a Flat
or Spare Tire and Tools on page 5-86.
When It Is Time for New Tires
Various factors, such as maintenance, temperatures,
driving speeds, vehicle loading, and road conditions
in�uence when you need new tires.
One way to tell when it
is time for new tires is to
check the treadwear
indicators, which will
appear when your tires
have only 1/16 inch
(1.6 mm) or less of
tread remaining.
5-63
Page 382 of 464

{CAUTION:
In�ating something too much can make it explode,
and you or others could be injured. Be sure to
read the in�ator instructions, and in�ate any object
only to its recommended pressure.
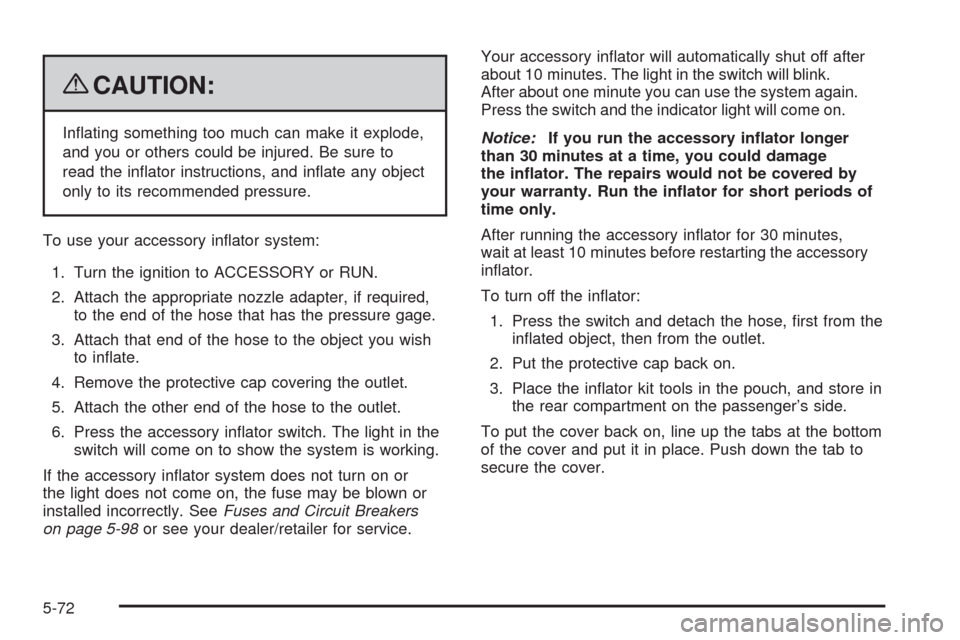
To use your accessory in�ator system:
1. Turn the ignition to ACCESSORY or RUN.
2. Attach the appropriate nozzle adapter, if required,
to the end of the hose that has the pressure gage.
3. Attach that end of the hose to the object you wish
to in�ate.
4. Remove the protective cap covering the outlet.
5. Attach the other end of the hose to the outlet.
6. Press the accessory in�ator switch. The light in the
switch will come on to show the system is working.
If the accessory in�ator system does not turn on or
the light does not come on, the fuse may be blown or
installed incorrectly. SeeFuses and Circuit Breakers
on page 5-98or see your dealer/retailer for service.Your accessory in�ator will automatically shut off after
about 10 minutes. The light in the switch will blink.
After about one minute you can use the system again.
Press the switch and the indicator light will come on.
Notice:If you run the accessory in�ator longer
than 30 minutes at a time, you could damage
the in�ator. The repairs would not be covered by
your warranty. Run the in�ator for short periods of
time only.
After running the accessory in�ator for 30 minutes,
wait at least 10 minutes before restarting the accessory
in�ator.
To turn off the in�ator:
1. Press the switch and detach the hose, �rst from the
in�ated object, then from the outlet.
2. Put the protective cap back on.
3. Place the in�ator kit tools in the pouch, and store in
the rear compartment on the passenger’s side.
To put the cover back on, line up the tabs at the bottom
of the cover and put it in place. Push down the tab to
secure the cover.
5-72
Page 388 of 464

Store the wheel cover securely in the rear of the vehicle
until you have the �at tire repaired or replaced. Once
the wheel cover has been removed, use the following
procedure to remove the �at tire and install the spare tire.
1. Do a safety check is done before proceeding.
SeeChanging a Flat Tire on page 5-74for more
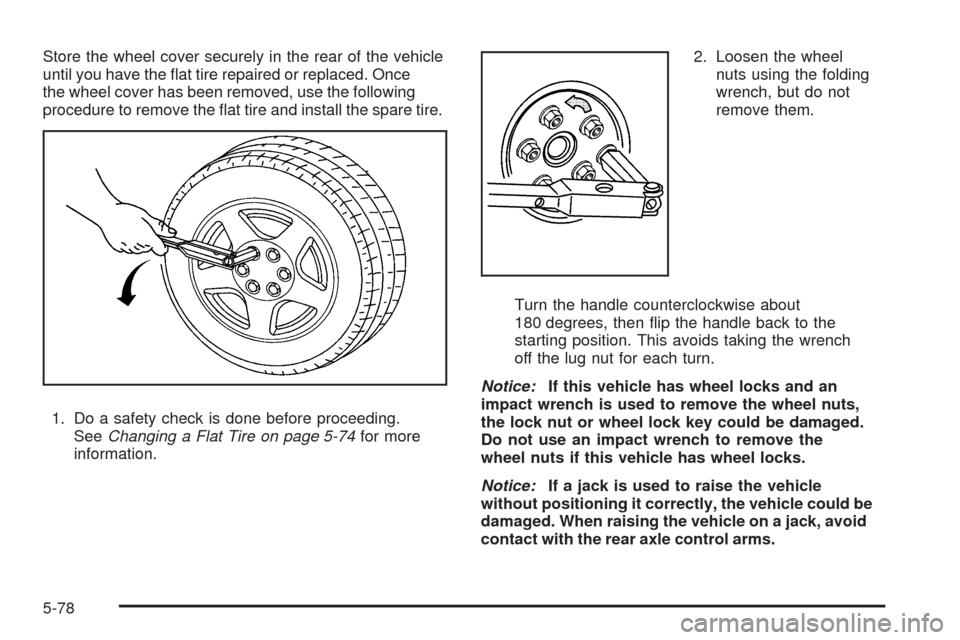
information.2. Loosen the wheel
nuts using the folding
wrench, but do not
remove them.
Turn the handle counterclockwise about
180 degrees, then �ip the handle back to the
starting position. This avoids taking the wrench
off the lug nut for each turn.
Notice:If this vehicle has wheel locks and an
impact wrench is used to remove the wheel nuts,
the lock nut or wheel lock key could be damaged.
Do not use an impact wrench to remove the
wheel nuts if this vehicle has wheel locks.
Notice:If a jack is used to raise the vehicle
without positioning it correctly, the vehicle could be
damaged. When raising the vehicle on a jack, avoid
contact with the rear axle control arms.
5-78
Page 397 of 464

To store the spare tire:
1. Lay the tire near the rear of the vehicle with the
valve stem down.
2. Remove the small center cap by tapping the back
of the cap with the extension of the shaft, if the
vehicle has aluminum wheels.
3. Slide the cable retainer through the center of the
wheel and start to raise the tire.
Make sure the retainer is fully seated across the
underside of the wheel.
4. When the tire is almost in the stored position, turn
the tire so the valve is towards the rear of the
vehicle.
This will help when you check and maintain tire
pressure in the spare.
5. Raise the tire fully against the underside of the
vehicle. Continue turning the folding wrench until
you feel more than two clicks. This indicates that
the compact spare tire is secure and the cable
is tight. The spare tire hoist cannot be
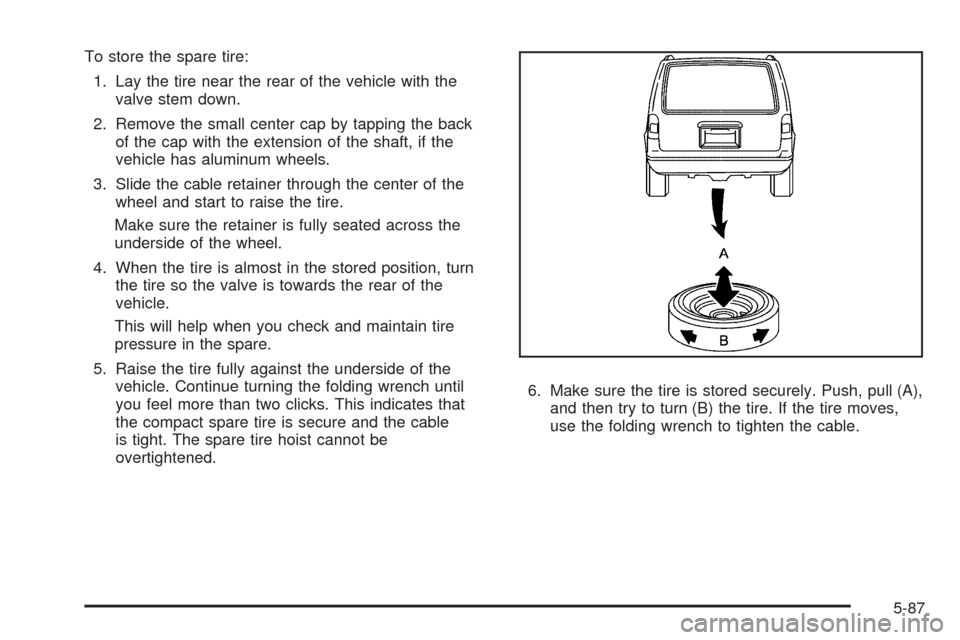
overtightened.6. Make sure the tire is stored securely. Push, pull (A),
and then try to turn (B) the tire. If the tire moves,
use the folding wrench to tighten the cable.
5-87
Page 398 of 464

Storing the Tools
A. Strap
B. Bag and Tools
C. Jack
Put back all tools as they were stored in the jack
storage compartment and put the compartment cover
back on.To replace the cover, line up the tabs on the right of
the cover with the slots in the cover opening. Push the
cover in place and push down the tab so that it rests
in the groove. This secures the cover in place.
Store the center cap or the plastic bolt-on wheel covers
until a full size tire is put back on the vehicle. When
you replace the compact spare with a full-size tire,
reinstall the bolt-on wheel covers or the center cap.
Hand-tighten them over the wheel nuts, using the
folding wrench.
Compact Spare Tire
Although the compact spare tire was fully in�ated
when the vehicle was new, it can lose air after a time.
Check the in�ation pressure regularly. It should be
60 psi (420 kPa).
After installing the compact spare on the vehicle, stop as
soon as possible and make sure the spare tire is correctly
in�ated. The compact spare is made to perform well at
speeds up to 65 mph (105 km/h) for distances up to
3,000 miles (5 000 km), so you can �nish your trip and
have the full-size tire repaired or replaced at your
convenience. Of course, it is best to replace the spare
with a full-size tire as soon as possible. The spare tire
will last longer and be in good shape in case it is needed
again.
5-88
Page 423 of 464

Engine Coolant Level Check
Check the engine coolant level and add DEX-COOL®
coolant mixture if necessary. SeeEngine Coolant
on page 5-24.
Windshield Washer Fluid Level Check
Check the windshield washer �uid level in the windshield
washer �uid reservoir and add the proper �uid if
necessary.
At Least Once a Month
Tire In�ation Check
Inspect the vehicle’s tires and make sure they are
in�ated to the correct pressures. Do not forget to
check the spare tire. SeeInflation - Tire Pressure on
page 5-54. Check to make sure the spare tire is stored
securely. SeeChanging a Flat Tire on page 5-74.
Tire Wear Inspection
Tire rotation may be required for high mileage highway
drivers prior to the Engine Oil Life System service
noti�cation. Check the tires for wear and, if necessary,
rotate the tires. SeeTire Inspection and Rotation on
page 5-62.
At Least Once a Year
Starter Switch Check
{CAUTION:
When you are doing this inspection, the vehicle
could move suddenly. If the vehicle moves, you or
others could be injured.
1. Before starting this check, be sure there is enough
room around the vehicle.
2. Firmly apply both the parking brake and the regular
brake. SeeParking Brake on page 2-38.
Do not use the accelerator pedal, and be ready to
turn off the engine immediately if it starts.
3. Try to start the engine in each gear. The vehicle
should start only in P (Park) or N (Neutral). If the
vehicle starts in any other position, contact
your dealer/retailer for service.
6-9