Page 297 of 464

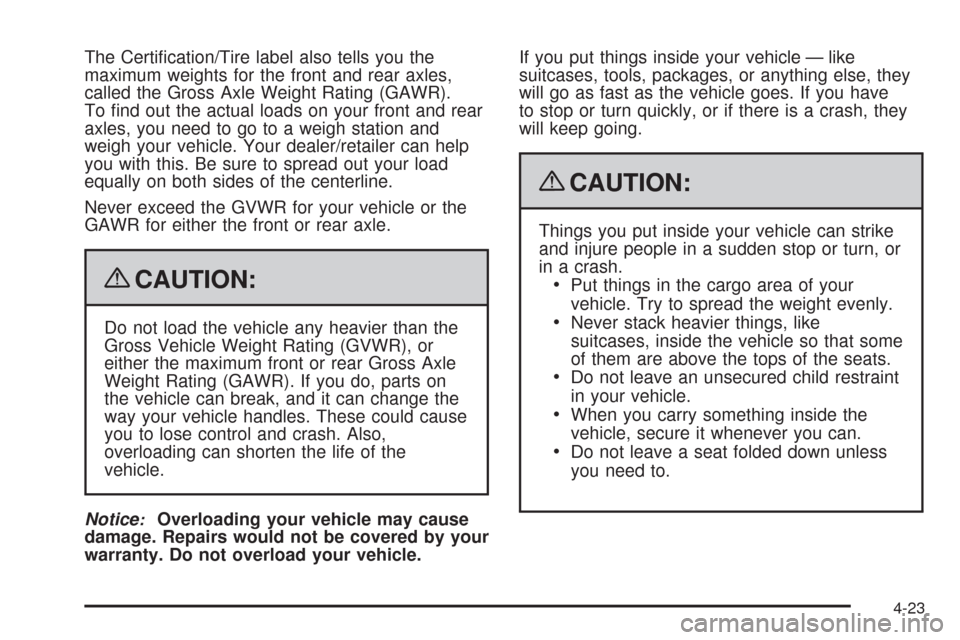
The Certi�cation/Tire label also tells you the
maximum weights for the front and rear axles,
called the Gross Axle Weight Rating (GAWR).
To �nd out the actual loads on your front and rear
axles, you need to go to a weigh station and
weigh your vehicle. Your dealer/retailer can help
you with this. Be sure to spread out your load
equally on both sides of the centerline.
Never exceed the GVWR for your vehicle or the
GAWR for either the front or rear axle.
{CAUTION:
Do not load the vehicle any heavier than the
Gross Vehicle Weight Rating (GVWR), or
either the maximum front or rear Gross Axle
Weight Rating (GAWR). If you do, parts on
the vehicle can break, and it can change the
way your vehicle handles. These could cause
you to lose control and crash. Also,
overloading can shorten the life of the
vehicle.
Notice
:Overloading your vehicle may cause
damage. Repairs would not be covered by your
warranty. Do not overload your vehicle.If you put things inside your vehicle — like
suitcases, tools, packages, or anything else, they
will go as fast as the vehicle goes. If you have
to stop or turn quickly, or if there is a crash, they
will keep going.
{CAUTION:
Things you put inside your vehicle can strike
and injure people in a sudden stop or turn, or
in a crash.
Put things in the cargo area of your
vehicle. Try to spread the weight evenly.
Never stack heavier things, like
suitcases, inside the vehicle so that some
of them are above the tops of the seats.
Do not leave an unsecured child restraint
in your vehicle.
When you carry something inside the
vehicle, secure it whenever you can.
Do not leave a seat folded down unless
you need to.
4-23
Page 299 of 464

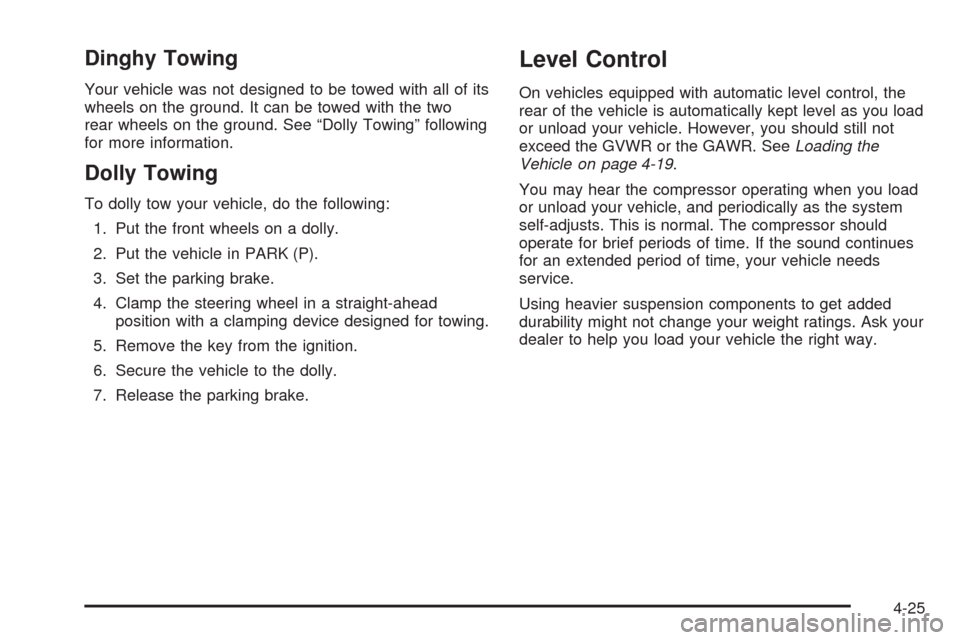
Dinghy Towing
Your vehicle was not designed to be towed with all of its
wheels on the ground. It can be towed with the two
rear wheels on the ground. See “Dolly Towing” following
for more information.
Dolly Towing
To dolly tow your vehicle, do the following:
1. Put the front wheels on a dolly.
2. Put the vehicle in PARK (P).
3. Set the parking brake.
4. Clamp the steering wheel in a straight-ahead
position with a clamping device designed for towing.
5. Remove the key from the ignition.
6. Secure the vehicle to the dolly.
7. Release the parking brake.
Level Control
On vehicles equipped with automatic level control, the
rear of the vehicle is automatically kept level as you load
or unload your vehicle. However, you should still not
exceed the GVWR or the GAWR. SeeLoading the
Vehicle on page 4-19.
You may hear the compressor operating when you load
or unload your vehicle, and periodically as the system
self-adjusts. This is normal. The compressor should
operate for brief periods of time. If the sound continues
for an extended period of time, your vehicle needs
service.
Using heavier suspension components to get added
durability might not change your weight ratings. Ask your
dealer to help you load your vehicle the right way.
4-25
Page 302 of 464

Weight of the Trailer
How heavy can a trailer safely be?
It depends on how you plan to use your rig. For
example, speed, altitude, road grades, outside
temperature, and how much your vehicle is used to pull a
trailer are all important. It can also depend on any special
equipment that you have on your vehicle, and the amount
of tongue weight the vehicle can carry. See “Weight of the
Trailer Tongue” later in this section for more information.Maximum trailer weight is calculated assuming only the
driver is in the tow vehicle and it has all the required
trailering equipment. The weight of additional optional
equipment, passengers and cargo in the tow vehicle
must be subtracted from the maximum trailer weight.
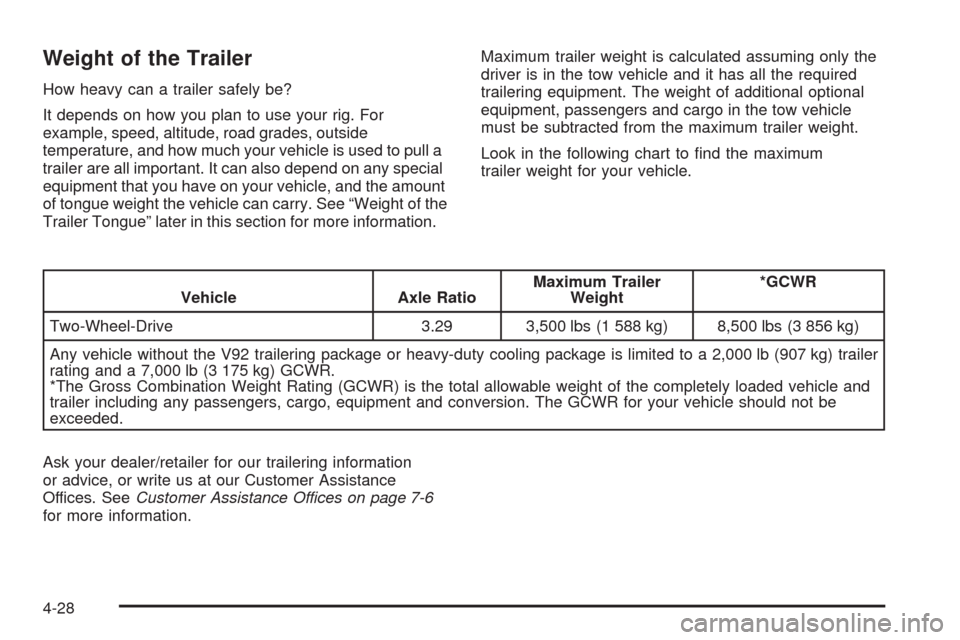
Look in the following chart to �nd the maximum
trailer weight for your vehicle.
Vehicle Axle RatioMaximum Trailer
Weight*GCWR
Two-Wheel-Drive 3.29 3,500 lbs (1 588 kg) 8,500 lbs (3 856 kg)
Any vehicle without the V92 trailering package or heavy-duty cooling package is limited to a 2,000 lb (907 kg) trailer
rating and a 7,000 lb (3 175 kg) GCWR.
*The Gross Combination Weight Rating (GCWR) is the total allowable weight of the completely loaded vehicle and
trailer including any passengers, cargo, equipment and conversion. The GCWR for your vehicle should not be
exceeded.
Ask your dealer/retailer for our trailering information
or advice, or write us at our Customer Assistance
Offices. SeeCustomer Assistance Offices on page 7-6
for more information.
4-28
Page 307 of 464

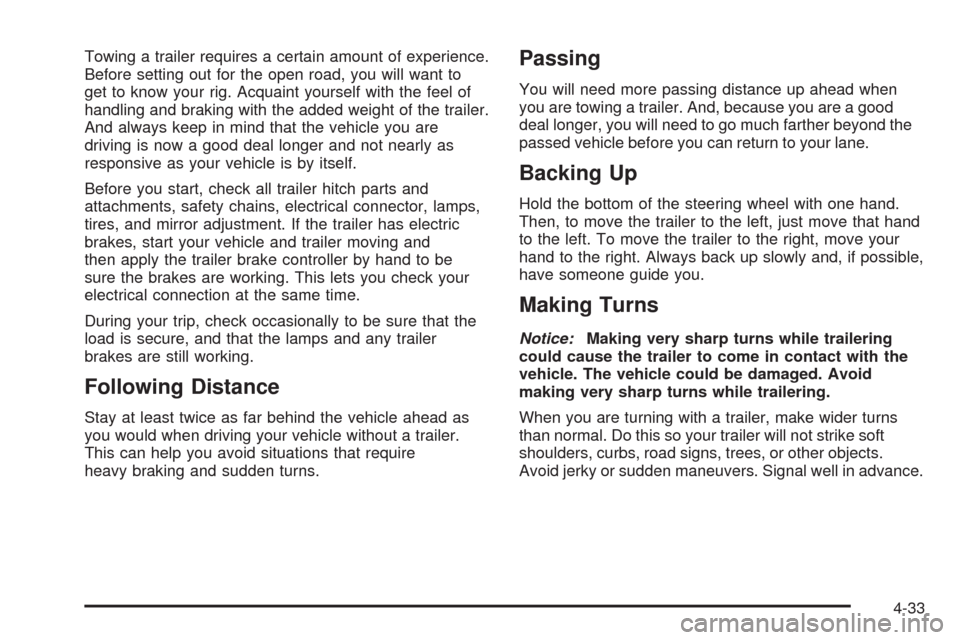
Towing a trailer requires a certain amount of experience.
Before setting out for the open road, you will want to
get to know your rig. Acquaint yourself with the feel of
handling and braking with the added weight of the trailer.
And always keep in mind that the vehicle you are
driving is now a good deal longer and not nearly as
responsive as your vehicle is by itself.
Before you start, check all trailer hitch parts and
attachments, safety chains, electrical connector, lamps,
tires, and mirror adjustment. If the trailer has electric
brakes, start your vehicle and trailer moving and
then apply the trailer brake controller by hand to be
sure the brakes are working. This lets you check your
electrical connection at the same time.
During your trip, check occasionally to be sure that the
load is secure, and that the lamps and any trailer
brakes are still working.
Following Distance
Stay at least twice as far behind the vehicle ahead as
you would when driving your vehicle without a trailer.
This can help you avoid situations that require
heavy braking and sudden turns.
Passing
You will need more passing distance up ahead when
you are towing a trailer. And, because you are a good
deal longer, you will need to go much farther beyond the
passed vehicle before you can return to your lane.
Backing Up
Hold the bottom of the steering wheel with one hand.
Then, to move the trailer to the left, just move that hand
to the left. To move the trailer to the right, move your
hand to the right. Always back up slowly and, if possible,
have someone guide you.
Making Turns
Notice:Making very sharp turns while trailering
could cause the trailer to come in contact with the
vehicle. The vehicle could be damaged. Avoid
making very sharp turns while trailering.
When you are turning with a trailer, make wider turns
than normal. Do this so your trailer will not strike soft
shoulders, curbs, road signs, trees, or other objects.
Avoid jerky or sudden maneuvers. Signal well in advance.
4-33
Page 330 of 464

Engine Air Cleaner/Filter
SeeEngine Compartment Overview on page 5-14for
the location of the engine air cleaner/�lter.
When to Inspect the Engine Air
Cleaner/Filter
Inspect the air cleaner/�lter at the MaintenanceII
intervals and replace it at the �rst oil change after each
50,000 mile (85 000 km) interval. SeeScheduled
Maintenance on page 6-4for more information. If driving
in dusty/dirty conditions, inspect the �lter at each engine
oil change.
How to Inspect the Engine Air
Cleaner/Filter
To inspect the air cleaner/�lter, remove the �lter from
the vehicle and lightly shake the �lter to release loose
dust and dirt. If the �lter remains caked with dirt, a new
�lter is required. Do not use compressed air to clean the
�lter.
To inspect or replace the air cleaner/�lter, do the
following:
1. Remove the two clamps on the duct.
2. Remove the duct.
3. Unlatch the two hooks on top of the engine air
cleaner/�lter housing.
4. Inspect or replace the engine air cleaner/�lter.
5. Align the tabs located on the bottom of the panel
with the slots at the bottom of the housing.
6. Latch the hooks to secure the panel in place. If the
panel moves easily, check that the tabs are seated
correctly in the slots.
7. Put the duct back on and reinstall the clamps.
5-20
Page 338 of 464
8. Then �ll the coolant recovery tank to the full
cold mark.
9. Put the cap back on the coolant recovery tank.
Notice:If the pressure cap is not tightly installed,
coolant loss and possible engine damage may
occur. Be sure the cap is properly and tightly
secured.
Radiator Pressure Cap
Notice:The radiator cap on your vehicle is a
pressure-type cap and must be tightly installed to
prevent coolant loss and possible engine damage
from overheating. Be sure the cap is properly
closed.
SeeEngine Compartment Overview on page 5-14for
more information on location.
Engine Overheating
The vehicle has several indicators to warn of engine
overheating.
There is an engine coolant temperature gage on the
vehicle’s instrument panel. SeeEngine Coolant
Temperature Gage on page 3-37.
The vehicle might have an ENGINE COOLANT HOT
message displayed in the Driver Information Center
(DIC). SeeDIC Warnings and Messages on page 3-51. Filling the Coolant Recovery Tank
5-28
Page 353 of 464

3. Remove the screw (B) from the top of the headlamp
assembly.
4. Pull the assembly away from the vehicle.
5. Disconnect the socket wiring harness connector
from the headlamp assembly.
6. Turn the bulb socket counterclockwise to remove
from the assembly.
7. To replace a headlamp bulb, disconnect the bulb
socket wiring harness and connect to the new bulb
socket.
To replace a sidemarker bulb, pull the old bulb out
and push a new bulb in.
8. Reinstall the bulb socket by inserting into the bulb
assembly and turning it clockwise to secure.
9. Reverse steps 1 through 5 to reinstall.Front Turn Signal, Parking and
Daytime Running Lamps (DRL)
To replace one of these bulbs (A):
1. Follow the Steps 1 through 4 to remove the
headlamp assembly. SeeHeadlamps and
Sidemarker Lamps on page 5-42for more
information.
2. Turn the bulb socket counterclockwise to remove
from the assembly.
3. Pull the old bulb out from the bulb socket.
4. Replace with a new bulb
5. Reinstall the bulb socket by inserting into the bulb
assembly and turning it clockwise to secure.
6. Reverse the steps to reinstall the headlamp
assembly.
5-43
Page 354 of 464
Taillamps, Turn Signal, Stoplamps
and Back-up Lamps
To change a stoplamp/taillamp, turn signal or back-up
lamp bulb:
1. Open the liftgate. SeeLiftgate on page 2-22for
more information.
2. Remove the two screws
from the taillamp
housing on the
inboard side.
3. Pull out the taillamp housing.
4. Disconnect the wiring harness connector from the
taillamp assembly.A. Stoplamp/Taillamp
B. Turn Signal Lamp
C. Back-up Lamp Bulb
5. Turn the bulb socket counterclockwise to remove.
6. Replace the bulb by pulling the old bulb out of
the socket and gently pushing in a new bulb.
7. Replace the bulb socket by inserting and turning
clockwise to secure.
5-44