2009 CHEVROLET TRAVERSE warning light
[x] Cancel search: warning lightPage 1 of 422

Seats and Restraint
System............................... 1-1
Head Restraints
.............. 1-2
Front Seats
.................... 1-3
Rear Seats
.................... 1-9
Safety Belts
..................1-14
Child Restraints
.............1-27
Airbag System
..............1-46
Restraint System
Check
......................1-59
Features and Controls...... 2-1
Keys
............................. 2-2
Doors and Locks
............ 2-8
Windows
......................2-14
Theft-Deterrent
Systems
...................2-16
Starting and Operating
Your Vehicle
.............2-20
Mirrors
.........................2-31
Object Detection
Systems
...................2-36
OnStar
®System
............2-43Universal Home Remote
System
.....................2-47
Storage Areas
...............2-52
Sunroof
........................2-56
Instrument Panel............... 3-1
Instrument Panel
Overview
.................... 3-4
Climate Controls
............3-19
Warning Lights, Gages,
and Indicators
............3-30
Driver Information
Center (DIC)
.............3-44
Audio System(s)
............3-73
Driving Your Vehicle......... 4-1
Your Driving, the Road,
and the Vehicle
........... 4-1
Towing
........................4-21
Service and
Appearance Care............... 5-1
Service
.......................... 5-3
Fuel
.............................. 5-5
Checking Things Under
the Hood
.................... 5-9Headlamp Aiming
..........5-33
Bulb Replacement
.........5-33
Windshield Wiper Blade
Replacement
.............5-35
Tires
...........................5-36
Appearance Care
..........5-78
Vehicle Identi�cation
......5-85
Electrical System
...........5-85
Capacities and
Speci�cations
............5-92
Maintenance Schedule...... 6-1
Maintenance Schedule
..... 6-1
Customer Assistance
Information........................ 7-1
Customer Assistance and
Information
................. 7-1
Reporting Safety
Defects
.....................7-14
Vehicle Data Recording
and Privacy
...............7-16
Index....................................i-1
2009 Chevrolet Traverse Owner ManualM
Page 4 of 422

Vehicle Symbol Chart
Here are some additional symbols
that may be found on the vehicle
and what they mean. For more
information on the symbol, refer to
the index.
9:Airbag Readiness Light
#:Air Conditioning
!:Antilock Brake System (ABS)
g:Audio Steering Wheel
Controls or OnStar®
$:Brake System Warning Light
":Charging System
I:Cruise Control
B:Engine Coolant Temperature
O:Exterior Lamps
#:Fog Lamps
.:Fuel Gage
+:Fuses
i:Headlamp High/Low-Beam
Changer
j:LATCH System Child Restraints
*:Malfunction Indicator Lamp
::Oil Pressure
g:Outside Power Foldaway
Mirrors
}:Power
/:Remote Vehicle Start
>:Safety Belt Reminders
7:Tire Pressure Monitor
_:Tow/Haul Mode
F:Traction Control
M:Windshield Washer Fluid
iv Preface
Page 76 of 422

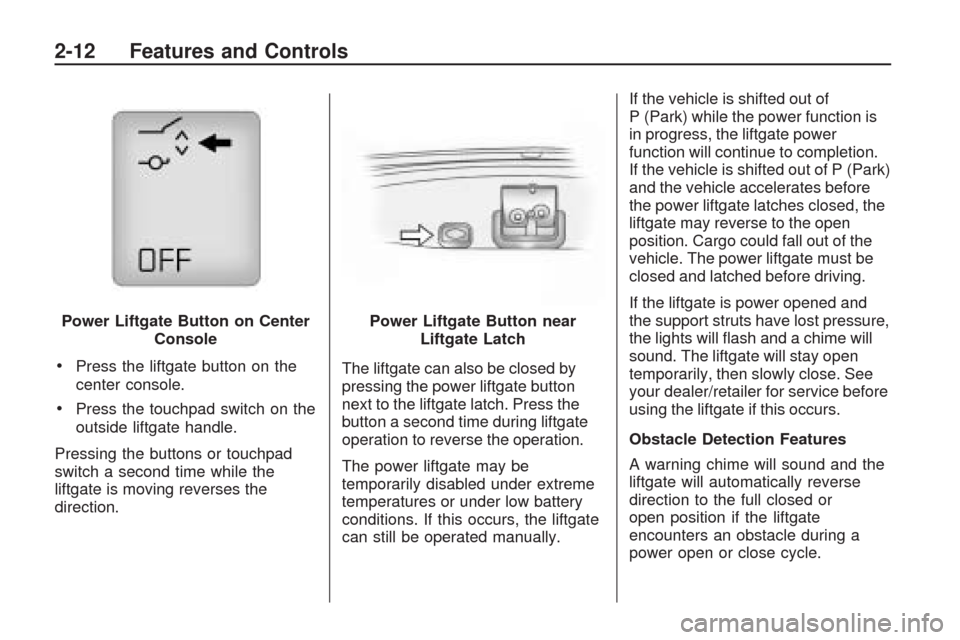
Press the liftgate button on the
center console.
Press the touchpad switch on the
outside liftgate handle.
Pressing the buttons or touchpad
switch a second time while the
liftgate is moving reverses the
direction.The liftgate can also be closed by
pressing the power liftgate button
next to the liftgate latch. Press the
button a second time during liftgate
operation to reverse the operation.
The power liftgate may be
temporarily disabled under extreme
temperatures or under low battery
conditions. If this occurs, the liftgate
can still be operated manually.If the vehicle is shifted out of
P (Park) while the power function is
in progress, the liftgate power
function will continue to completion.
If the vehicle is shifted out of P (Park)
and the vehicle accelerates before
the power liftgate latches closed, the
liftgate may reverse to the open
position. Cargo could fall out of the
vehicle. The power liftgate must be
closed and latched before driving.
If the liftgate is power opened and
the support struts have lost pressure,
the lights will �ash and a chime will
sound. The liftgate will stay open
temporarily, then slowly close. See
your dealer/retailer for service before
using the liftgate if this occurs.
Obstacle Detection Features
A warning chime will sound and the
liftgate will automatically reverse
direction to the full closed or
open position if the liftgate
encounters an obstacle during a
power open or close cycle. Power Liftgate Button on Center
Console
Power Liftgate Button near
Liftgate Latch
2-12 Features and Controls
Page 85 of 422

Ignition Positions
The ignition switch has four different
positions.
In order to shift out of P (Park),
the ignition must be in ON/RUN or
ACC/ACCESSORY and the
brake pedal must be applied.Notice:Using a tool to force the
key to turn in the ignition could
cause damage to the switch or
break the key. Use the correct key,
make sure it is all the way in, and
turn it only with your hand. If the
key cannot be turned by hand,
see your dealer/retailer.
((LOCK/OFF):This position locks
the ignition and transmission. The
key can be removed in LOCK/OFF.
The shift lever must be in P (Park)
to turn the ignition switch to
LOCK/OFF.
The steering can bind with the
wheels turned off center. If this
happens, move the steering wheel
from right to left while turning
the key to ACC/ACCESSORY.
If this doesn’t work, then the vehicle
needs service.
ACC (ACC/ACCESSORY):This is
the position in which you can operate
the electrical accessories or items
plugged into the accessory poweroutlets. This position unlocks the
ignition and steering wheel. Use this
position if the vehicle must be
pushed or towed.
R(ON/RUN):This position can be
used to operate the electrical
accessories and to display some
instrument panel warning and
indicator lights. The switch stays in
this position when the engine is
running. The transmission is also
unlocked in this position. If you leave
the key in the ACC/ACCESSORY or
ON/RUN position with the engine off,
the battery could be drained.
You may not be able to start the
vehicle if the battery is allowed to
drain for an extended period of time.
/(START):This is the position
that starts the engine. When the
engine starts, release the key.
The ignition switch will return to
ON/RUN for driving.
Features and Controls 2-21
Page 91 of 422

When Tow/Haul is activated the
Tow/Haul symbol will come on the
instrument panel cluster. See
“Tow/Haul Mode” underTowing a
Trailer on page 4-25for more
information.
Automatic Engine Grade
Braking
Automatic Engine Grade Braking
assists when driving on a downhill
grade. It maintains vehicle speed by
automatically implementing a shift
schedule that uses the engine and
the transmission to slow the vehicle.
The system will automatically
command downshifts to reduce
vehicle speed, until the brake pedal
is no longer being pressed.
While in the Electronic Range
Select (ERS) mode, grade braking
is deactivated, allowing the
driver to select a range and limiting
the highest gear available. Grade
braking is available for normal
driving and in Tow/Haul mode.
SeeAutomatic Transmission
Operation on page 2-24.
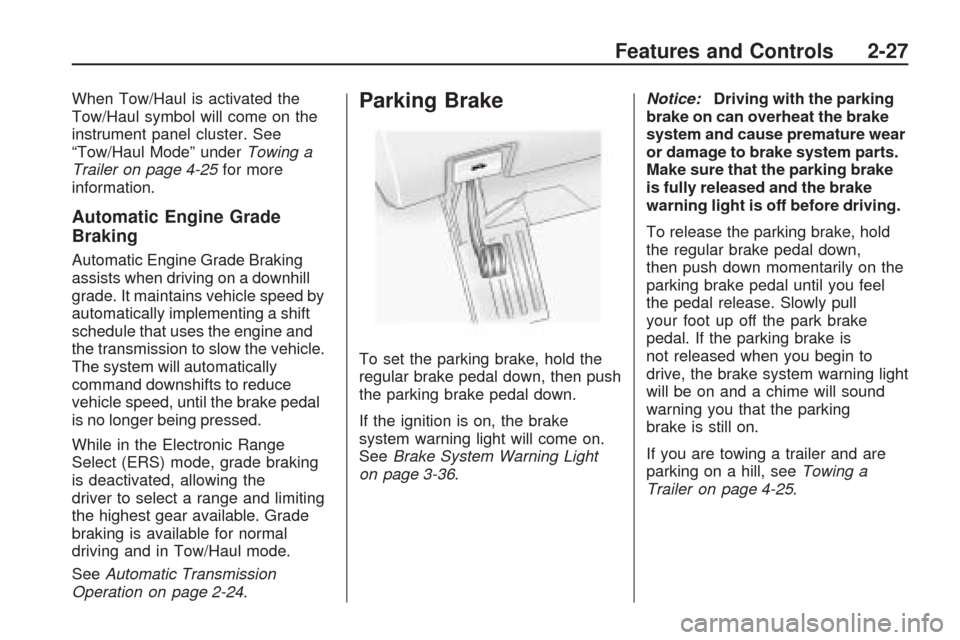
Parking Brake
To set the parking brake, hold the
regular brake pedal down, then push
the parking brake pedal down.
If the ignition is on, the brake
system warning light will come on.
SeeBrake System Warning Light
on page 3-36.Notice:Driving with the parking
brake on can overheat the brake
system and cause premature wear
or damage to brake system parts.
Make sure that the parking brake
is fully released and the brake
warning light is off before driving.
To release the parking brake, hold
the regular brake pedal down,
then push down momentarily on the
parking brake pedal until you feel
the pedal release. Slowly pull
your foot up off the park brake
pedal. If the parking brake is
not released when you begin to
drive, the brake system warning light
will be on and a chime will sound
warning you that the parking
brake is still on.
If you are towing a trailer and are
parking on a hill, seeTowing a
Trailer on page 4-25.
Features and Controls 2-27
Page 121 of 422

Instrument Panel
Instrument Panel OverviewInstrument Panel Overview.....3-4
Hazard Warning Flashers.......3-5
Horn....................................3-5
Tilt and Telescopic Steering
Wheel................................3-6
Turn Signal/Multifunction
Lever.................................3-6
Turn and Lane-Change
Signals...............................3-6
Headlamp High/Low-Beam
Changer.............................3-7
Flash-to-Pass........................3-7
Windshield Wipers.................3-7
Windshield Washer................3-8
Rear Window Wiper/Washer. . .3-9
Cruise Control......................3-9
Exterior Lamps....................3-11
Delayed Headlamps.............3-12
Daytime Running
Lamps (DRL)/Automatic
Headlamp System..............3-12
Fog Lamps.........................3-13
Instrument Panel
Brightness.........................3-13Courtesy Lamps..................3-14
Dome Lamps......................3-14
Dome Lamp Override...........3-14
Entry Lighting......................3-14
Delayed Entry Lighting.........3-15
Delayed Exit Lighting...........3-15
Parade Dimming..................3-15
Reading Lamps...................3-15
Electric Power
Management.....................3-15
Battery Run-Down
Protection.........................3-16
Accessory Power Outlet(s). . . .3-17
Power Outlet 115 Volt
Alternating Current.............3-18
Climate ControlsClimate Control System........3-19
Dual Automatic Climate
Control System..................3-22
Outlet Adjustment................3-27
Rear Air Conditioning and
Heating System.................3-28
Rear Air Conditioning and
Heating System and
Electronic Climate
Controls............................3-29
Warning Lights, Gages, and
Indicators
Warning Lights, Gages, and
Indicators..........................3-30
Instrument Panel Cluster.......3-31
Speedometer and
Odometer.........................3-32
Tachometer........................3-32
Safety Belt Reminders..........3-32
Airbag Readiness Light.........3-33
Passenger Airbag Status
Indicator...........................3-33
Charging System Light.........3-34
Voltmeter Gage...................3-35
Brake System Warning
Light................................3-36
Antilock Brake System
(ABS) Warning Light...........3-37
StabiliTrak
®Indicator Light. . . .3-37
Engine Coolant Temperature
Warning Light....................3-38
Engine Coolant
Temperature Gage.............3-38
Tire Pressure Light..............3-39
Malfunction
Indicator Lamp..................3-39
Oil Pressure Light................3-42
Security Light......................3-43
Instrument Panel 3-1
Page 122 of 422

Cruise Control Light.............3-43
Highbeam On Light..............3-43
Tow/Haul Mode Light...........3-43
Fuel Gage..........................3-43
Driver Information
Center (DIC)
Driver Information
Center (DIC).....................3-44
DIC Operation and Displays
(With DIC Buttons).............3-45
DIC Operation and Displays
(Without DIC Buttons).........3-51
DIC Compass.....................3-54
DIC Warnings and
Messages.........................3-56
DIC Vehicle Customization
(With DIC Buttons).............3-65
Audio System(s)Audio System(s)..................3-73
Setting the Clock.................3-74
Radio(s).............................3-75
Using an MP3
(Radio with CD).................3-92
Using an MP3 (Radio with
CD and DVD Player)..........3-96
XM Radio Messages..........3-102Navigation/Radio System.....3-103
Bluetooth
®........................3-103
Rear Seat Entertainment
(RSE) System..................3-114
Rear Seat Audio (RSA)......3-123
Theft-Deterrent Feature.......3-125
Audio Steering Wheel
Controls..........................3-125
Radio Reception................3-126
Multi-Band Antenna............3-127
3-2 Instrument Panel
Page 132 of 422

2(Headlamps):Turns on
the headlamps together with
the following lamps listed below.
A warning chime sounds if the driver
door is opened when the ignition
switch is off and the headlamps
are on.
Parking Lamps
Taillamps
License Plate Lamps
Instrument Panel Lights
#(Fog Lamps) (If Equipped):
Turns on the fog lamps.
SeeFog Lamps on page 3-13.
Delayed Headlamps
Delayed headlamps provide a
period of exterior lighting as you
leave the area around your vehicle.
This feature is activated when the
headlamps are on due to the
automatic headlamps control feature,
and when the ignition is turned off.
The headlamps remain on until the
exterior lamps control is moved to
the parking lamps position or until
the pre-selected delayed headlamp
lighting period has ended.
If the ignition is turned off with the
headlamps switch in the parking
lamps or headlamps position,
the delayed headlamps cycle
will not occur.
To disable the delayed headlamps
feature or change the time of delay,
seeDIC Vehicle Customization
(With DIC Buttons) on page 3-65.
Daytime Running
Lamps (DRL)/Automatic
Headlamp System
Daytime Running Lamps (DRL) can
make it easier for others to see the
front of your vehicle during the day.
Fully functional daytime running
lamps are required on all vehicles
�rst sold in Canada.
The DRL system makes the
low-beam headlamps come on
at a reduced brightness when the
following conditions are met:
The ignition is in the ON/RUN
position.
The exterior lamps control is
in AUTO.
The engine is running.
3-12 Instrument Panel