Page 125 of 484

Universal Home Remote System
Operation (With One Triangular LED)
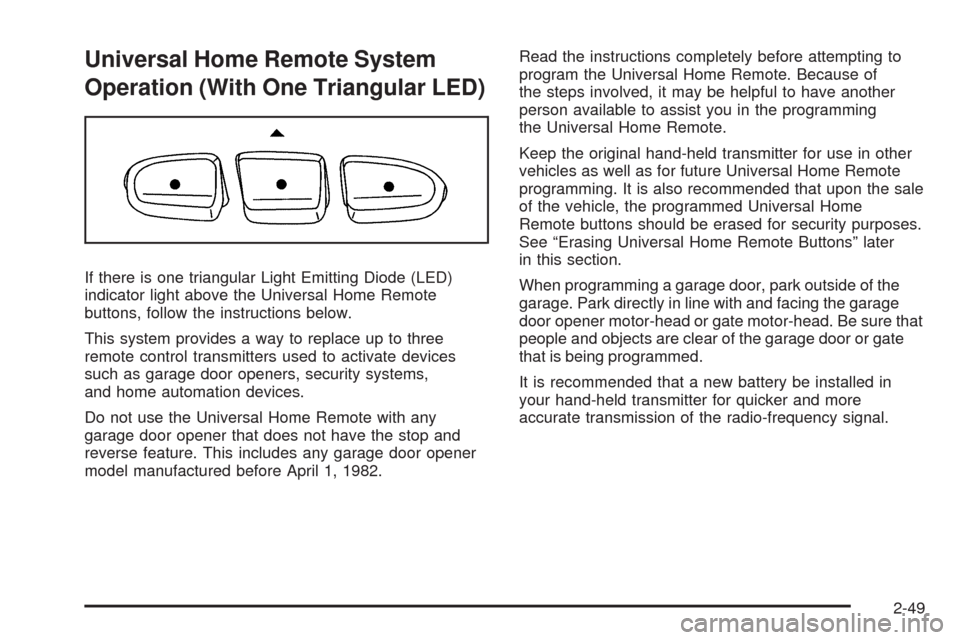
If there is one triangular Light Emitting Diode (LED)
indicator light above the Universal Home Remote
buttons, follow the instructions below.
This system provides a way to replace up to three
remote control transmitters used to activate devices
such as garage door openers, security systems,
and home automation devices.
Do not use the Universal Home Remote with any
garage door opener that does not have the stop and
reverse feature. This includes any garage door opener
model manufactured before April 1, 1982.Read the instructions completely before attempting to
program the Universal Home Remote. Because of
the steps involved, it may be helpful to have another
person available to assist you in the programming
the Universal Home Remote.
Keep the original hand-held transmitter for use in other
vehicles as well as for future Universal Home Remote
programming. It is also recommended that upon the sale
of the vehicle, the programmed Universal Home
Remote buttons should be erased for security purposes.
See “Erasing Universal Home Remote Buttons” later
in this section.
When programming a garage door, park outside of the
garage. Park directly in line with and facing the garage
door opener motor-head or gate motor-head. Be sure that
people and objects are clear of the garage door or gate
that is being programmed.
It is recommended that a new battery be installed in
your hand-held transmitter for quicker and more
accurate transmission of the radio-frequency signal.
2-49
Page 156 of 484

Rear Window Defogger
The rear window defogger uses a warming grid to
remove fog from the rear window.
<(Rear):Press to turn the rear window defogger
on or off. An indicator light in the button comes on to
show that the rear window defogger is on. The rear
window defogger automatically turns off approximately
ten minutes after the button is pressed.
For vehicles with heated mirrors, they turn on when the
rear window defogger button is pressed.
Notice:Do not use anything sharp on the inside of
the rear window. If you do, you could cut or damage
the warming grid, and the repairs would not be
covered by the vehicle warranty. Do not attach a
temporary vehicle license, tape, a decal or anything
similar to the defogger grid.
Dual Automatic Climate Control
System
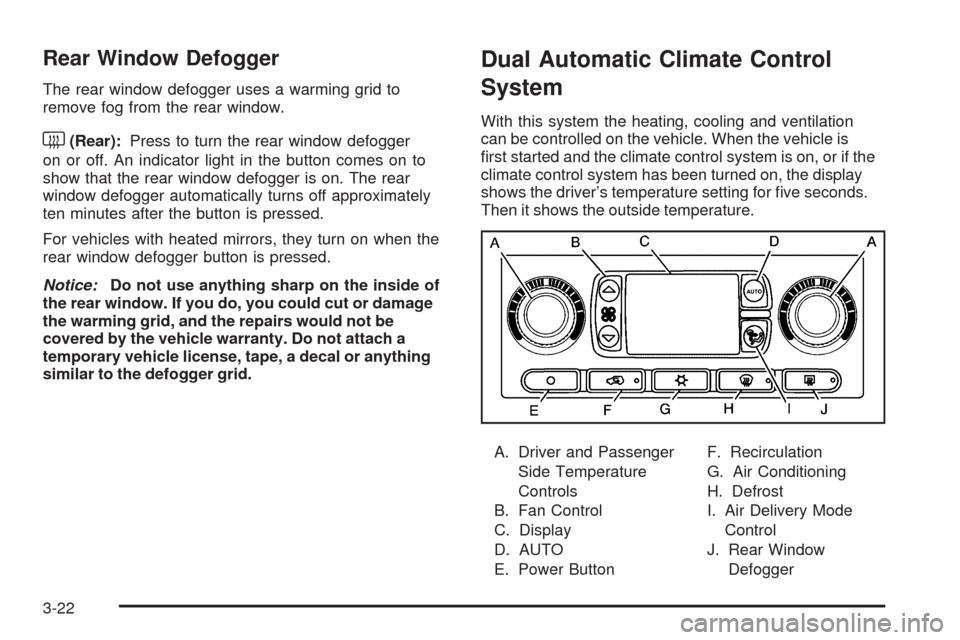
With this system the heating, cooling and ventilation
can be controlled on the vehicle. When the vehicle is
�rst started and the climate control system is on, or if the
climate control system has been turned on, the display
shows the driver’s temperature setting for �ve seconds.
Then it shows the outside temperature.
A. Driver and Passenger
Side Temperature
Controls
B. Fan Control
C. Display
D. AUTO
E. Power ButtonF. Recirculation
G. Air Conditioning
H. Defrost
I. Air Delivery Mode
Control
J. Rear Window
Defogger
3-22
Page 158 of 484

Passenger Side Temperature Knob:Turn clockwise
or counterclockwise to increase or decrease the
temperature on the passenger side of the vehicle. The
display will show the temperature setting decreasing or
increasing and an arrow pointing toward the passenger.
The passenger temperature setting can be set to match
and link to the driver’s temperature setting by pressing
and holding the AUTO button for three seconds. When
adjusting the driver side temperature setting, the
passenger side temperature setting will follow and both
arrows will appear on the display. The passenger side
temperature setting also resets and re-links to the driver
side temperature setting if the vehicle has been off for
more than three hours.
w9x(Fan Control):Press the arrows to increase
or decrease the fan speed. The display shows the
selected fan speed and the driver side temperature
setting for �ve seconds.
C(Air Delivery Mode Control):Press to change the
direction of the air�ow in the vehicle. The air delivery
modes will appear on the display as it is being adjusted.
The display shows the selected air delivery mode and
the driver temperature setting for �ve seconds.To change the current air delivery mode, select one of
the following:
H(Vent):Air is directed to the instrument panel
outlets.
)(Bi-Level):Air is divided between the instrument
panel and �oor outlets. Some air is directed toward
the windshield and side window outlets. Cooler air is
directed to the upper outlets and warmer air to the
�oor outlets.
6(Floor):Air is directed to the �oor outlets. Some
air also comes out of the defroster and side window
outlets. The recirculation button cannot be selected
in �oor mode.
-(Defog):This mode clears the windows of fog or
moisture. Air is directed to the �oor and windshield
outlets.
0(Front Defrost):Press the front defrost button
to clear the windows of fog or frost more quickly. The
system automatically controls the fan speed if defrost is
selected from AUTO mode. If the outside temperature is
40°F (4°C) or warmer, the air conditioning compressor
runs automatically to help dehumidify the air and dry the
windshield.
Do not drive the vehicle until all the windows are clear.
3-24
Page 161 of 484
Rear Climate Control System
The vehicle has one of the following rear climate control
systems. With either of these systems, the rear climate
controls will be disabled when the front climate control
system is in defrost. This occurs to provide maximum
air�ow to clear the windshield.
A. Power Button
B. Air Delivery Mode Control
The temperature of the air coming through the rear
outlets is determined by the front passenger temperature
setting.
PWR (Power):Press to turn the rear climate controls
on or off.Air Delivery Mode Control:Turn clockwise or
counterclockwise to change the direction of the
air�ow to the rear seat area.
H(Panel):Air is directed to the rear console outlets.
)(Bi-level):Air is directed to the second seat
side �oor outlets and the rear console outlets.
6(Floor):Air is directed to the second seat side �oor
outlets.
A. Fan Control
B. Power Button
C. Air Delivery Mode Control
3-27
Page 162 of 484

If the vehicle has the rear seat audio system, the lower
buttons are used to adjust the rear seat climate control
system. The temperature of the air coming through the
rear outlets is determined by the front passenger
temperature setting.
P(On/Off):Press to turn the rear climate controls on
or off.
z9y(Fan Control):Press to increase or decrease
the fan speed.
z\y(Air Delivery Mode Control):Press to
change the direction of air�ow (panel, bi-level or �oor)
to the rear seat area.
The rear control only turns on if the front climate control
system is on and not in defrost mode.
Warning Lights, Gages, and
Indicators
Warning lights and gages can signal that something is
wrong before it becomes serious enough to cause an
expensive repair or replacement. Paying attention to
the warning lights and gages could prevent injury.
Warning lights come on when there may be or is a
problem with one of the vehicle’s functions. Some
warning lights come on brie�y when the engine is
started to indicate they are working.
Gages can indicate when there may be or is a problem
with one of the vehicle’s functions. Often gages and
warning lights work together to indicate a problem with
the vehicle.
When one of the warning lights comes on and stays on
while driving, or when one of the gages shows there
may be a problem, check the section that explains
what to do. Follow this manual’s advice. Waiting to
do repairs can be costly and even dangerous.
3-28
Page 163 of 484
Instrument Panel Cluster
Your instrument panel cluster is designed to let you know at a glance how your vehicle is running. You will know
how fast you are going, about how much fuel you have used, and many other things you will need to know to drive
safely and economically.
United States Uplevel version shown, Canada, Base and SS Model similar
3-29
Page 169 of 484

Voltmeter Gage
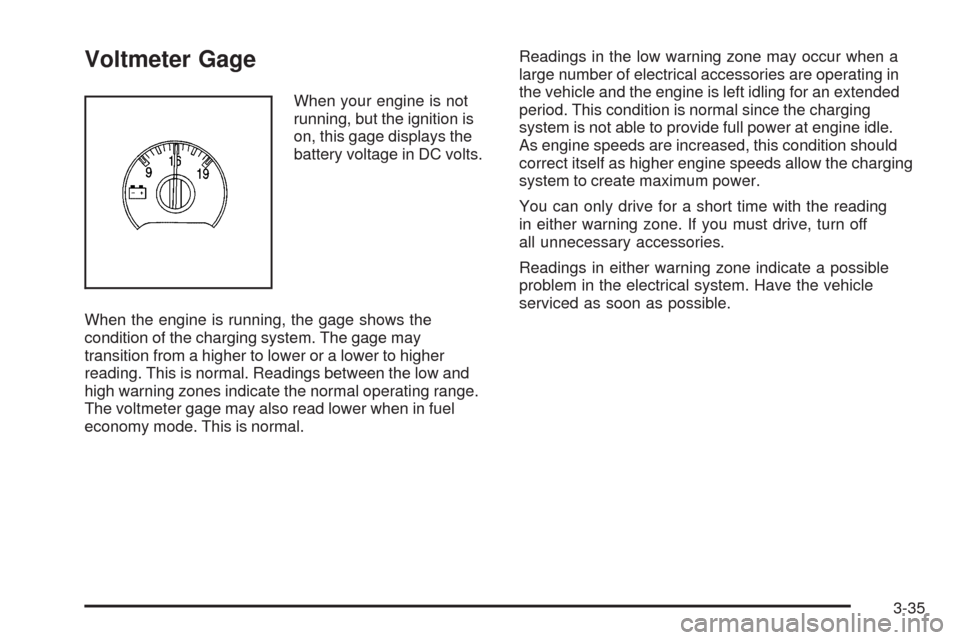
When your engine is not
running, but the ignition is
on, this gage displays the
battery voltage in DC volts.
When the engine is running, the gage shows the
condition of the charging system. The gage may
transition from a higher to lower or a lower to higher
reading. This is normal. Readings between the low and
high warning zones indicate the normal operating range.
The voltmeter gage may also read lower when in fuel
economy mode. This is normal.Readings in the low warning zone may occur when a
large number of electrical accessories are operating in
the vehicle and the engine is left idling for an extended
period. This condition is normal since the charging
system is not able to provide full power at engine idle.
As engine speeds are increased, this condition should
correct itself as higher engine speeds allow the charging
system to create maximum power.
You can only drive for a short time with the reading
in either warning zone. If you must drive, turn off
all unnecessary accessories.
Readings in either warning zone indicate a possible
problem in the electrical system. Have the vehicle
serviced as soon as possible.
3-35
Page 182 of 484

3(Trip Information):Press this button to display
the odometer, trip odometers, tire pressure, and timer.
t(Fuel Information):Press this button to display
the current range, fuel used, average fuel economy,
and engine oil life.
4(Customization):Press this button to access the
vehicle settings menu and customize the personal
settings on your vehicle.
r(Select):Press this button to reset certain DIC
functions and set your customization settings.
Pressing any of the DIC buttons will acknowledge DIC
messages and clear them from the DIC display.
DIC Operation and Displays
The DIC comes on when the ignition is on. After a short
delay the DIC will display the information that was
last displayed before the engine was turned off.
If a problem is detected, a warning message will appear
on the display. Pressing the trip stem will acknowledge
any warning or service messages. Pressing any of
the DIC steering wheel buttons — trip information,
fuel information, customization, or select button — will
also acknowledge any warnings or service messages.
You should take any message that appears on the
display seriously and remember that clearing the
message will only make the message disappear,
not correct the problem.
The DIC has different modes which can be accessed
by pressing the four DIC buttons located on the steering
wheel. These buttons are trip information, fuel
information, customization, and select. The button
functions are detailed in the following pages.
3-48