2009 CHEVROLET TAHOE light
[x] Cancel search: lightPage 359 of 574

To save fuel, run the engine for only short periods as
needed to warm the vehicle and then shut the engine off
and close the window most of the way to save heat.
Repeat this until help arrives but only when you
feel really uncomfortable from the cold. Moving about
to keep warm also helps.
If it takes some time for help to arrive, now and then
when you run the engine, push the accelerator
pedal slightly so the engine runs faster than the idle
speed. This keeps the battery charged to restart
the vehicle and to signal for help with the headlamps.
Do this as little as possible to save fuel.
If Your Vehicle is Stuck in Sand,
Mud, Ice, or Snow
Slowly and cautiously spin the wheels to free the
vehicle when stuck in sand, mud, ice, or snow. See
Rocking Your Vehicle to Get It Out on page 4-32.
If the vehicle has a traction system, it can often help to
free a stuck vehicle. Refer to the vehicle’s traction
system in the Index. If stuck too severely for the traction
system to free the vehicle, turn the traction system off
and use the rocking method.
{CAUTION:
If you let your vehicle’s tires spin at high speed,
they can explode, and you or others could be
injured. The vehicle can overheat, causing an
engine compartment re or other damage. Spin
the wheels as little as possible and avoid going
above 35 mph (55 km/h) as shown on the
speedometer.
For information about using tire chains on the vehicle,
seeTire Chains on page 5-84.
4-31
Page 360 of 574

Rocking Your Vehicle to Get It Out
Turn the steering wheel left and right to clear the
area around the front wheels. For four-wheel-drive
vehicles, shift into Four-Wheel High or Four-Wheel Low.
For vehicles with StabiliTrak
®, turn the traction control
part of the system off. Shift back and forth between
R (Reverse) and a forward gear, spinning the wheels as
little as possible. To prevent transmission wear, wait
until the wheels stop spinning before shifting gears.
Release the accelerator pedal while shifting, and press
lightly on the accelerator pedal when the transmission
is in gear. Slowly spinning the wheels in the forward and
reverse directions causes a rocking motion that could
free the vehicle. If that does not get the vehicle out after
a few tries, it might need to be towed out. Recovery
hooks can be used, if the vehicle has them. If the vehicle
does need to be towed out, seeTowing Your Vehicle
on page 4-43.
Recovery Hooks
{CAUTION:
These hooks, when used, are under a lot of force.
Always pull the vehicle straight out. Never pull on
the hooks at a sideways angle. The hooks could
break off and you or others could be injured from
the chain or cable snapping back.
4-32
Page 377 of 574

{CAUTION:
Shifting a four-wheel-drive vehicle’s transfer case
into N (Neutral) can cause the vehicle to roll even
if the transmission is in P (Park). The driver or
others could be injured. Make sure the parking
brake is rmly set before the transfer case is
shifted to N (Neutral).
7. Shift the transfer case to N (Neutral). See “Shifting
into N (Neutral)” underFour-Wheel Drive on
page 2-40
8. Turn the ignition to LOCK/OFF.
After towing, see “Shifting Out of N (Neutral)” under
Four-Wheel Drive on page 2-40.
Level Control
Automatic Level Control
The automatic level control rear suspension is available
on light-duty vehicles and comes as a part of the
Autoride
®suspension, if equipped.
This type of level control is fully automatic and will
provide a better leveled riding position as well as better
handling under a variety of passenger and loading
conditions. An air compressor connected to the rear
shocks will raise or lower the rear of the vehicle
to maintain proper vehicle height. The system is
activated when the ignition key is turned to ON/RUN
and will automatically adjust vehicle height thereafter.
The system may exhaust (lower vehicle height) for up to
ten minutes after the ignition key has been turned off.
You may hear the air compressor operating when
the height is being adjusted.
If a weight-distributing hitch is being used, it is
recommended to allow the shocks to inate, thereby
leveling the vehicle prior to adjusting the hitch.
4-49
Page 385 of 574

Tow/Haul Mode
Pressing this button at
the end of the shift lever
turns on and off the
tow/haul mode.
This indicator light on the
instrument panel cluster
comes on when the
tow/haul mode is on.
Tow/Haul is a feature that assists when pulling a heavy
trailer or a large or heavy load. SeeTow/Haul Mode
on page 2-38for more information.Tow/Haul is designed to be most effective when the
vehicle and trailer combined weight is at least 75 percent
of the vehicle’s Gross Combined Weight Rating
(GCWR). See “Weight of the Trailer” earlier in the
section. Tow/Haul is most useful under the following
driving conditions:
When pulling a heavy trailer or a large or heavy
load through rolling terrain.
When pulling a heavy trailer or a large or heavy
load in stop and go traffic.
When pulling a heavy trailer or a large or heavy
load in busy parking lots where improved low
speed control of the vehicle is desired.
Operating the vehicle in Tow/Haul when lightly loaded
or with no trailer at all will not cause damage. However,
there is no benet to the selection of Tow/Haul when
the vehicle is unloaded. Such a selection when unloaded
may result in unpleasant engine and transmission
driving characteristics and reduced fuel economy.
Tow/Haul is recommended only when pulling a heavy
trailer or a large or heavy load.
4-57
Page 396 of 574

Driving On Grades
Reduce speed and shift to a lower gearbefore
starting down a long or steep downgrade. If the
transmission is not shifted down, the brakes might have
to be used so much that they would get hot and no
longer work well.
Vehicles can tow in D (Drive). Shift the transmission to
a lower gear if the transmission shifts too often under
heavy loads and/or hilly conditions.
The tow/haul mode may be used if the transmission
shifts too often. SeeTow/Haul Mode Light on page 3-49.
When towing at high altitude on steep uphill grades,
consider the following: Engine coolant will boil at a lower
temperature than at normal altitudes. If the engine is
turned off immediately after towing at high altitude on
steep uphill grades, the vehicle may show signs similar to
engine overheating. To avoid this, let the engine run while
parked, preferably on level ground, with the automatic
transmission in P (Park) for a few minutes before turning
the engine off. If the overheat warning comes on, see
Engine Overheating on page 5-34.
Parking on Hills
{CAUTION:
Parking the vehicle on a hill with the trailer
attached can be dangerous. If something goes
wrong, the rig could start to move. People can be
injured, and both the vehicle and the trailer can be
damaged. When possible, always park the rig on a
at surface.
If parking the rig on a hill:
1. Press the brake pedal, but do not shift into P (Park)
yet. Turn the wheels into the curb if facing downhill
or into traffic if facing uphill.
2. Have someone place chocks under the trailer
wheels.
3. When the wheel chocks are in place, release the
regular brakes until the chocks absorb the load.
4. Reapply the brake pedal. Then apply the parking
brake and shift into P (Park).
4-68
Page 398 of 574
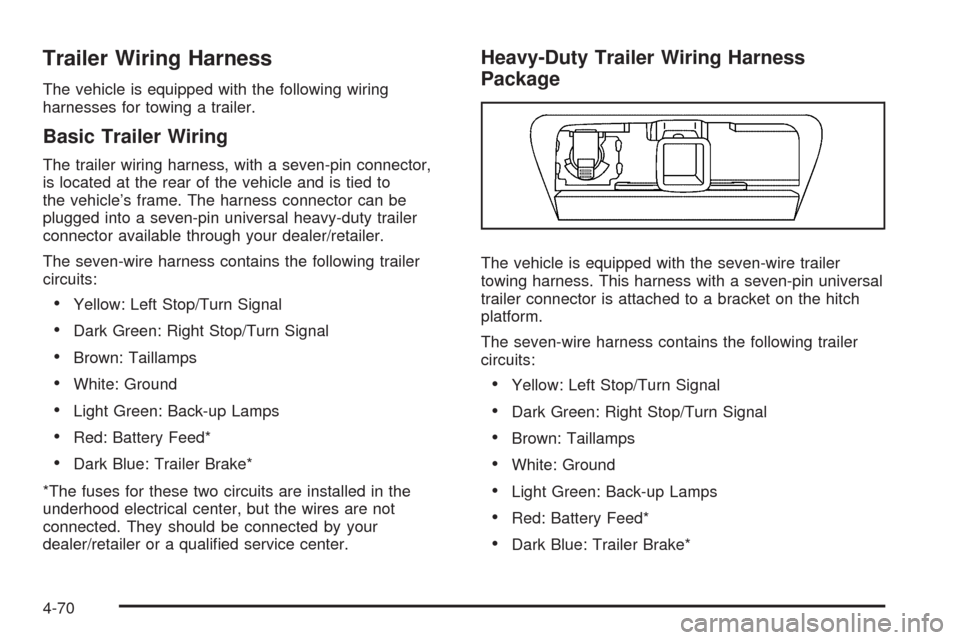
Trailer Wiring Harness
The vehicle is equipped with the following wiring
harnesses for towing a trailer.
Basic Trailer Wiring
The trailer wiring harness, with a seven-pin connector,
is located at the rear of the vehicle and is tied to
the vehicle’s frame. The harness connector can be
plugged into a seven-pin universal heavy-duty trailer
connector available through your dealer/retailer.
The seven-wire harness contains the following trailer
circuits:
Yellow: Left Stop/Turn Signal
Dark Green: Right Stop/Turn Signal
Brown: Taillamps
White: Ground
Light Green: Back-up Lamps
Red: Battery Feed*
Dark Blue: Trailer Brake*
*The fuses for these two circuits are installed in the
underhood electrical center, but the wires are not
connected. They should be connected by your
dealer/retailer or a qualied service center.
Heavy-Duty Trailer Wiring Harness
Package
The vehicle is equipped with the seven-wire trailer
towing harness. This harness with a seven-pin universal
trailer connector is attached to a bracket on the hitch
platform.
The seven-wire harness contains the following trailer
circuits:
Yellow: Left Stop/Turn Signal
Dark Green: Right Stop/Turn Signal
Brown: Taillamps
White: Ground
Light Green: Back-up Lamps
Red: Battery Feed*
Dark Blue: Trailer Brake*
4-70
Page 399 of 574

*The fuses for these two circuits are installed in the
underhood electrical center, but the wires are not
connected. They should be connected by your
dealer/retailer or a qualied service center.
If charging a remote (non-vehicle) battery, press the
Tow/Haul mode button, if equipped, located at the end
of the shift lever. This will boost the vehicle system
voltage and properly charge the battery. If the trailer is
too light for Tow/Haul mode, or the vehicle is not
equipped with Tow/Haul, turn on the headlamps as a
second way to boost the vehicle system and charge the
battery.
Electric Brake Control Wiring
Provisions
These wiring provisions are included with the vehicle as
part of the trailer wiring package. These provisions
are for an electric brake controller. The instrument panel
contains blunt cut wires near the data link connector
for the trailer brake controller. The harness contains the
following wires:
Dark Blue: Brake Signal to Trailer Connector
Red/Black: Battery
Light Blue/White: Brake Switch
White: GroundIt should be installed by your dealer/retailer or a
qualied service center.
If the vehicle is equipped with an ITBC, the blunt cuts
exist, but are not connected further in the harness. If an
aftermarket trailer brake controller is installed, the
ITBC must be disconnected. Do not power both ITBC
and aftermarket controllers to control the trailer brakes at
the same time.
Trailer Recommendations
Subtract the hitch loads from the Cargo Weight Rating
(CWR). CWR is the maximum weight of the load
the vehicle can carry. It does not include the weight of
the people inside, but you can gure about 150 lbs.
(68 kg) for each passenger. The total cargo load must
not be more than the vehicles CWR.
Weigh the vehicle with the trailer attached, so the
GVWR or GAWR are not exceeded. If using a
weight-distributing hitch, weigh the vehicle without the
spring bars in place.
The best performance is obtained by correctly spreading
out the weight of the load and choosing the correct
hitch and trailer brakes.
For more information seeTowing a Trailer on page 4-50.
4-71
Page 405 of 574

This vehicle has an airbag system. Before attempting
to do your own service work, seeServicing Your
Airbag-Equipped Vehicle on page 1-96.
Keep a record with all parts receipts and list the mileage
and the date of any service work performed. See
Maintenance Record on page 6-17.
Adding Equipment to the Outside of
the Vehicle
Things added to the outside of the vehicle can affect the
airow around it. This can cause wind noise and can
affect fuel economy and windshield washer performance.
Check with your dealer/retailer before adding equipment
to the outside of the vehicle.
Fuel
Use of the recommended fuel is an important part of the
proper maintenance of this vehicle. To help keep the
engine clean and maintain optimum vehicle performance,
we recommend the use of gasoline advertised as TOP
TIER Detergent Gasoline.
The 8th digit of the Vehicle Identication Number (VIN)
shows the code letter or number that identies the
vehicle’s engine. The VIN is at the top left of the
instrument panel. SeeVehicle Identification Number
(VIN) on page 5-113.If the vehicle has the 5.3L V8 engine (VIN Code 0), the
5.3L V8 engine (VIN Code 3), or the 6.2L V8 engine
(VIN Code 2–), you can use either unleaded gasoline or
ethanol fuel containing up to 85% ethanol (E85). See
Fuel E85 (85% Ethanol) on page 5-7. In all other
engines, use only unleaded gasoline. SeeGasoline
Octane on page 5-5.
Gasoline Octane
For all vehicles except those with the 6.2L V8 engine
(VIN Code 2), use regular unleaded gasoline with
a posted octane rating of 87 or higher. If the octane
rating is less than 87, you might notice an audible
knocking noise when you drive, commonly referred to
as spark knock. If this occurs, use a gasoline rated at
87 octane or higher as soon as possible. If you are using
gasoline rated at 87 octane or higher and you hear
heavy knocking, the engine needs service.
If the vehicle has the 6.2L V8 engine (VIN Code 2), use
premium unleaded gasoline with a posted octane rating
of 91 or higher. You can also use regular unleaded
gasoline rated at 87 octane or higher, but the vehicle’s
acceleration could be slightly reduced, and you might
notice a slight audible knocking noise, commonly referred
to as spark knock. If the octane is less than 87, you
might notice a heavy knocking noise when you drive.
5-5