2009 CHEVROLET SUBURBAN warning
[x] Cancel search: warningPage 147 of 578

2m(Two-Wheel Drive High):This setting is used
for driving in most street and highway situations.
The front axle is not engaged in two-wheel drive.
This setting also provides the best fuel economy.
AUTO (Automatic Four-Wheel Drive):This setting is
ideal for use when road surface traction conditions are
variable. When driving your vehicle in AUTO, the front
axle is engaged, but the vehicle’s power is primarily
sent to the rear wheels. When the vehicle’s software
determines a need for more traction, the system will
transfer more power to the front wheels. Driving in
this mode results in slightly lower fuel economy than
Two-Wheel Drive High.
4
m(Four-Wheel Drive High):Use the four-wheel high
position when you need extra traction, such as on snowy
or icy roads or in most off-road situations. This setting
also engages your front axle to help drive the vehicle.
This is the best setting to use when plowing snow.
4
n(Four-Wheel Drive Low):This setting also engages
the front axle and delivers extra torque. You may never
need this setting. It sends maximum power to all four
wheels. You might choose Four-Wheel Drive Low if you
are driving off-road in deep sand, deep mud, deep snow,
and while climbing or descending steep hills.The vehicle has StabiliTrak
®. Shifting into
Four-Wheel-Drive Low will turn Traction Control and
StabiliTrak
®off. SeeStabiliTrak®System on page 4-6.
{CAUTION:
Shifting the transfer case to N (Neutral) can cause
the vehicle to roll even if the transmission is in
P (Park). You or someone else could be seriously
injured. Be sure to set the parking brake before
placing the transfer case in N (Neutral). See
Parking Brake on page 2-45.
N (Neutral):Shift the vehicle’s transfer case
to N (Neutral) only when towing the vehicle.
SeeRecreational Vehicle Towing on page 4-43
orTowing Your Vehicle on page 4-43for more
information.
If the SERVICE 4 WHEEL DRIVE message stays on,
you should take the vehicle to your dealer/retailer
for service. See “SERVICE 4 WHEEL DRIVE message”
underDIC Warnings and Messages on page 3-64.
2-41
Page 151 of 578
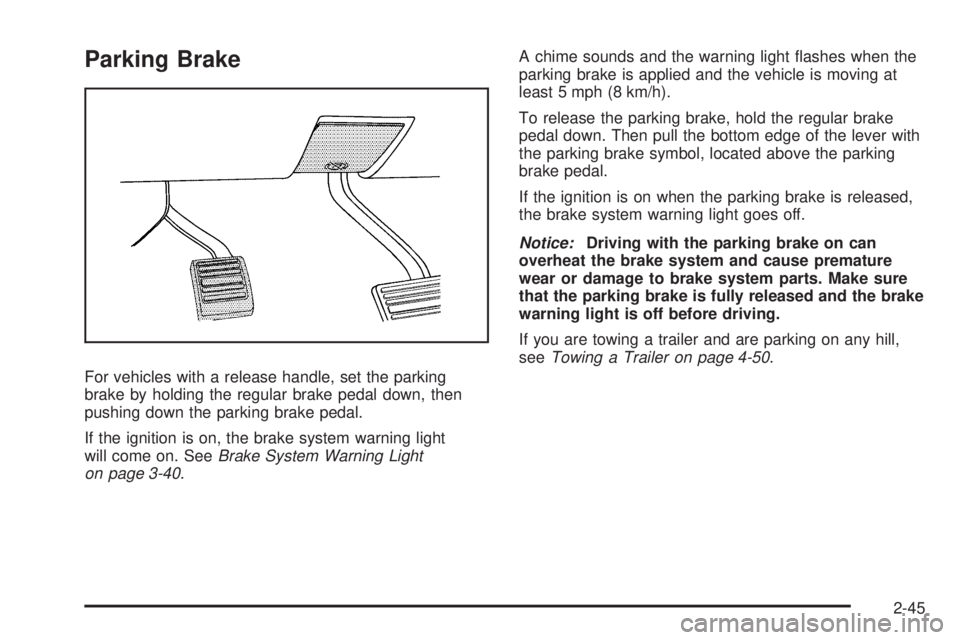
Parking Brake
For vehicles with a release handle, set the parking
brake by holding the regular brake pedal down, then
pushing down the parking brake pedal.
If the ignition is on, the brake system warning light
will come on. SeeBrake System Warning Light
on page 3-40.A chime sounds and the warning light �ashes when the
parking brake is applied and the vehicle is moving at
least 5 mph (8 km/h).
To release the parking brake, hold the regular brake
pedal down. Then pull the bottom edge of the lever with
the parking brake symbol, located above the parking
brake pedal.
If the ignition is on when the parking brake is released,
the brake system warning light goes off.
Notice:Driving with the parking brake on can
overheat the brake system and cause premature
wear or damage to brake system parts. Make sure
that the parking brake is fully released and the brake
warning light is off before driving.
If you are towing a trailer and are parking on any hill,
seeTowing a Trailer on page 4-50.
2-45
Page 152 of 578
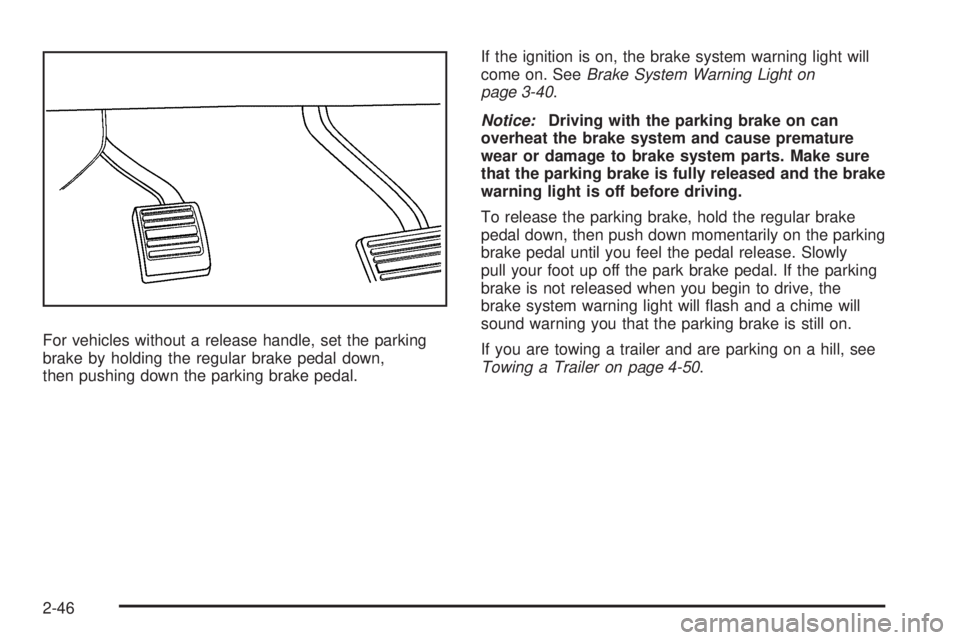
For vehicles without a release handle, set the parking
brake by holding the regular brake pedal down,
then pushing down the parking brake pedal.If the ignition is on, the brake system warning light will
come on. SeeBrake System Warning Light on
page 3-40.
Notice:Driving with the parking brake on can
overheat the brake system and cause premature
wear or damage to brake system parts. Make sure
that the parking brake is fully released and the brake
warning light is off before driving.
To release the parking brake, hold the regular brake
pedal down, then push down momentarily on the parking
brake pedal until you feel the pedal release. Slowly
pull your foot up off the park brake pedal. If the parking
brake is not released when you begin to drive, the
brake system warning light will �ash and a chime will
sound warning you that the parking brake is still on.
If you are towing a trailer and are parking on a hill, see
Towing a Trailer on page 4-50.
2-46
Page 163 of 578
How the System Works
URPA comes on automatically when the shift lever is
moved into R (Reverse). The rear display brie�y
illuminates to indicate the system is working.
URPA operates only at speeds less than 5 mph
(8 km/h). If the vehicle is above this speed, the red
light on the rear display will �ash.
To be detected, objects must be at least 10 inches
(25.4 cm) off the ground and below liftgate level.
Objects must also be within 8 feet (2.5 m) from the
rear bumper. This distance may be less during warmer
or humid weather.
A single beep will sound the �rst time an object is
detected between 40 inches (1 m) and 8 feet (2.5 m)
away. Beeping will occur continuously when the vehicle
is at 23 inches (0.6 m) or closer to an object.The following describes what will occur with the URPA
display as the vehicle gets closer to a detected object:
Description English Metric
amber light 8 ft 2.5 m
amber/amber lights 40 in 1.0 m
amber/amber/red lights
and continuous beeping
for �ve seconds23 in 0.6 m
amber/amber/red lights
�ashing and continuous
beeping for �ve seconds1 ft 0.3 m
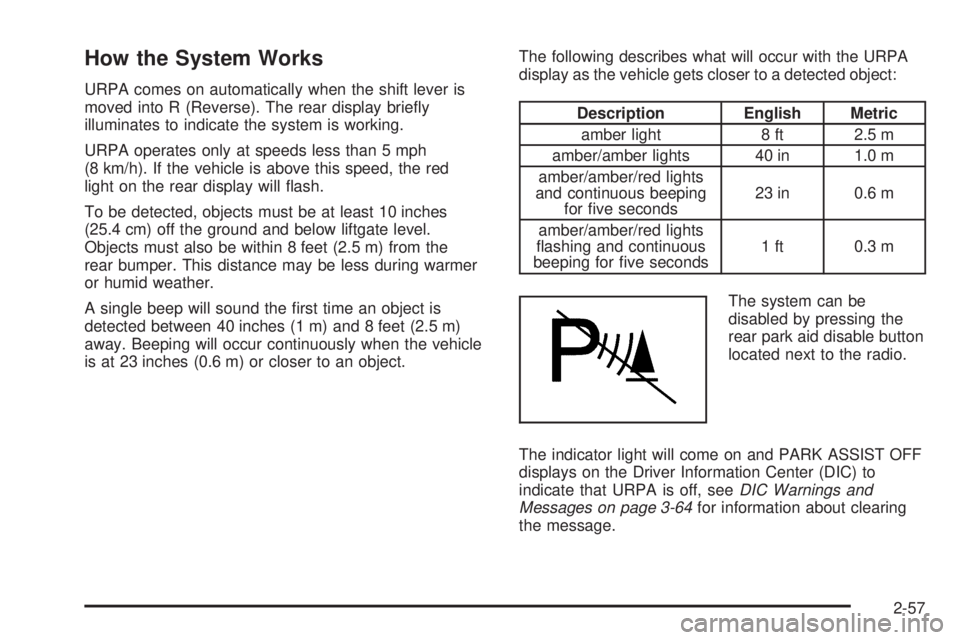
The system can be
disabled by pressing the
rear park aid disable button
located next to the radio.
The indicator light will come on and PARK ASSIST OFF
displays on the Driver Information Center (DIC) to
indicate that URPA is off, seeDIC Warnings and
Messages on page 3-64for information about clearing
the message.
2-57
Page 166 of 578
SBZA Detection Zones
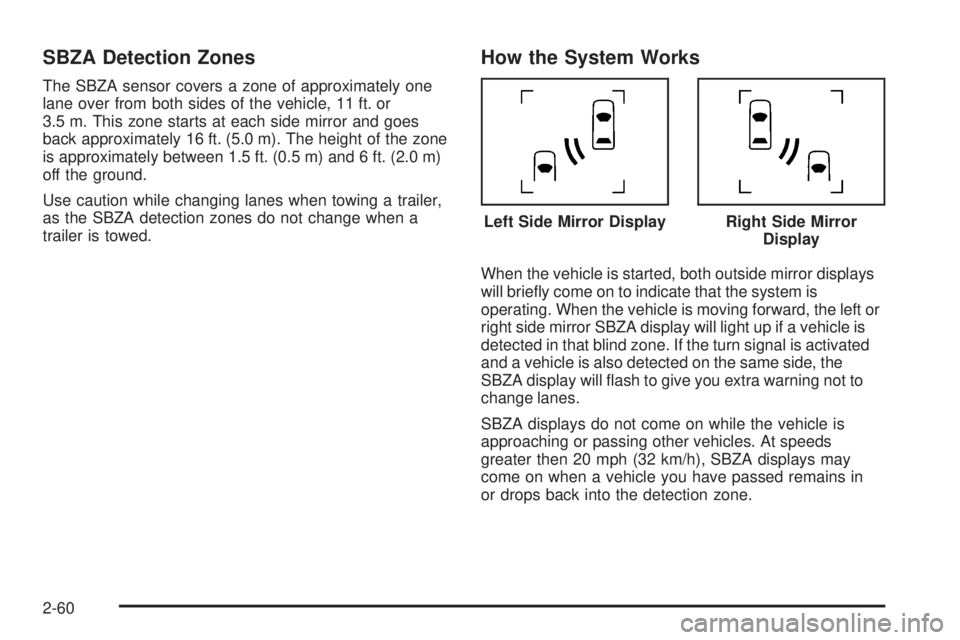
The SBZA sensor covers a zone of approximately one
lane over from both sides of the vehicle, 11 ft. or
3.5 m. This zone starts at each side mirror and goes
back approximately 16 ft. (5.0 m). The height of the zone
is approximately between 1.5 ft. (0.5 m) and 6 ft. (2.0 m)
off the ground.
Use caution while changing lanes when towing a trailer,
as the SBZA detection zones do not change when a
trailer is towed.
How the System Works
When the vehicle is started, both outside mirror displays
will brie�y come on to indicate that the system is
operating. When the vehicle is moving forward, the left or
right side mirror SBZA display will light up if a vehicle is
detected in that blind zone. If the turn signal is activated
and a vehicle is also detected on the same side, the
SBZA display will �ash to give you extra warning not to
change lanes.
SBZA displays do not come on while the vehicle is
approaching or passing other vehicles. At speeds
greater then 20 mph (32 km/h), SBZA displays may
come on when a vehicle you have passed remains in
or drops back into the detection zone.Left Side Mirror Display
Right Side Mirror
Display
2-60
Page 189 of 578

Instrument Panel Overview...............................3-4
Hazard Warning Flashers................................3-6
Horn .............................................................3-6
Tilt Wheel.....................................................3-6
Turn Signal/Multifunction Lever.........................3-7
Turn and Lane-Change Signals........................3-7
Headlamp High/Low-Beam Changer..................3-8
Flash-to-Pass.................................................3-8
Windshield Wipers..........................................3-9
Rainsense™ II Wipers.....................................3-9
Windshield Washer.......................................3-10
Rear Window Wiper/Washer...........................3-11
Cruise Control..............................................3-12
Exterior Lamps.............................................3-14
Headlamps on Reminder................................3-15
Daytime Running Lamps (DRL).......................3-16
Automatic Headlamp System..........................3-16
Fog Lamps ..................................................3-17
Auxiliary Roof-Mounted Lamp.........................3-18
Instrument Panel Brightness...........................3-18
Dome Lamps ...............................................3-18
Dome Lamp Override....................................3-19
Entry Lighting...............................................3-19
Exit Lighting.................................................3-19
Reading Lamps............................................3-19
Electric Power Management...........................3-19
Battery Run-Down Protection..........................3-20Accessory Power Outlet(s).............................3-20
Ashtray(s) and Cigarette Lighter......................3-21
Climate Controls............................................3-22
Climate Control System.................................3-22
Dual Automatic Climate Control System...........3-24
Outlet Adjustment.........................................3-30
Rear Air Conditioning and Heating System.......3-31
Rear Air Conditioning and Heating System
and Electronic Climate Controls
...................3-32
Warning Lights, Gages, and Indicators............3-34
Instrument Panel Cluster................................3-35
Speedometer and Odometer...........................3-36
Trip Odometer..............................................3-36
Tachometer.................................................3-36
Safety Belt Reminders...................................3-36
Airbag Readiness Light..................................3-37
Passenger Airbag Status Indicator...................3-38
Charging System Light..................................3-39
Voltmeter Gage............................................3-39
Brake System Warning Light..........................3-40
Antilock Brake System (ABS) Warning Light.....3-41
StabiliTrak
®Indicator Light.............................3-42
Engine Coolant Temperature Gage..................3-42
Tire Pressure Light.......................................3-43
Malfunction Indicator Lamp.............................3-43
Oil Pressure Gage........................................3-46
Section 3 Instrument Panel
3-1
Page 190 of 578

Oil Pressure Light.........................................3-48
Security Light...............................................3-48
Fog Lamp Light............................................3-49
Cruise Control Light......................................3-49
Highbeam On Light.......................................3-49
Tow/Haul Mode Light....................................3-49
Fuel Gage...................................................3-50
Low Fuel Warning Light.................................3-51
Driver Information Center (DIC).......................3-51
DIC Operation and Displays
(With DIC Buttons)....................................3-52
DIC Operation and Displays
(Without DIC Buttons)................................3-58
DIC Compass..............................................3-61
DIC Warnings and Messages.........................3-64
DIC Vehicle Customization
(With DIC Buttons)....................................3-74Audio System(s).............................................3-83
Setting the Clock..........................................3-84
Radio(s)......................................................3-86
Using an MP3 (Radio with CD or
Six-Disc CD Player).................................3-105
Using an MP3 (Radio with CD and DVD
Player)...................................................3-109
XM Radio Messages...................................3-114
Navigation/Radio System..............................3-115
Bluetooth
®.................................................3-115
Rear Seat Entertainment (RSE) System.........3-127
Rear Seat Audio (RSA)................................3-136
Theft-Deterrent Feature................................3-138
Audio Steering Wheel Controls......................3-138
Radio Reception.........................................3-139
Rear Side Window Antenna..........................3-140
XM™ Satellite Radio Antenna System............3-140
Section 3 Instrument Panel
3-2
Page 193 of 578
The main components of the instrument panel are the following:
A.Outlet Adjustment on page 3-30.
B.Turn Signal/Multifunction Lever on page 3-7.
C.Instrument Panel Cluster on page 3-35.
D.Hazard Warning Flashers on page 3-6.
E. Shift Lever. SeeAutomatic Transmission Operation
on page 2-32.
F.Tow/Haul Mode on page 2-38(If Equipped).
G.Driver Information Center (DIC) on page 3-51.
H.Audio System(s) on page 3-83.
I.Exterior Lamps on page 3-14.
J.Dome Lamp Override on page 3-19.Instrument
Panel Brightness on page 3-18.Fog Lamps
on page 3-17(If Equipped).
K.Hood Release on page 5-13.
L. Integrated Trailer Brake Controller (If Equipped).
Towing a Trailer on page 4-50.
M. Automatic Transfer Case Control. (If Equipped). See
Four-Wheel Drive on page 2-40.N.Cruise Control on page 3-12.
O.Tilt Wheel on page 3-6.
P.Horn on page 3-6.
Q.Audio Steering Wheel Controls on page 3-138.
R.Climate Control System on page 3-22orDual
Automatic Climate Control System on page 3-24
(If Equipped).
S.Accessory Power Outlet(s) on page 3-20. Cigarette
Lighter (If Equipped). SeeAshtray(s) and Cigarette
Lighter on page 3-21.
T.StabiliTrak
®System on page 4-6(If Equipped).
Pedal Adjust Button (If Equipped). SeeAdjustable
Throttle and Brake Pedal on page 2-30.Ultrasonic
Rear Parking Assist (URPA) on page 2-56
(If Equipped). Heated Windshield Washer Fluid
Button (If Equipped). SeeWindshield Washer on
page 3-10.Power Assist Steps on page 2-18
(If Equipped).
U.Glove Box on page 2-78.
3-5