2009 CHEVROLET SILVERADO center console
[x] Cancel search: center consolePage 102 of 600
Park Tilt Mirrors............................................2-60
Outside Convex Mirror...................................2-61
Outside Heated Mirrors..................................2-61
Object Detection Systems...............................2-62
Ultrasonic Rear Parking
Assist (URPA)...........................................2-62
Rear Vision Camera (RVC)............................2-65
OnStar
®System.............................................2-71
Universal Home Remote System......................2-74
Universal Home Remote System Operation
(With Three Round LED)............................2-75Storage Areas................................................2-81
Glove Box...................................................2-81
Cupholders..................................................2-81
Instrument Panel Storage...............................2-81
Center Console Storage.................................2-82
Luggage Carrier...........................................2-82
Rear Seat Armrest........................................2-83
Cargo Management System...........................2-83
Sunroof.........................................................2-85
Section 2 Features and Controls
2-2
Page 181 of 600
Storage Areas
Glove Box
Lift up on the glove box lever to open it.
Cupholders
Vehicles with cupholders, have them located on and
behind the center console and in the rear seat armrest.
Pull the loop down on the rear seat armrest to access
the cupholders.
Pull downward on the lid to access the cupholders
behind the center console.
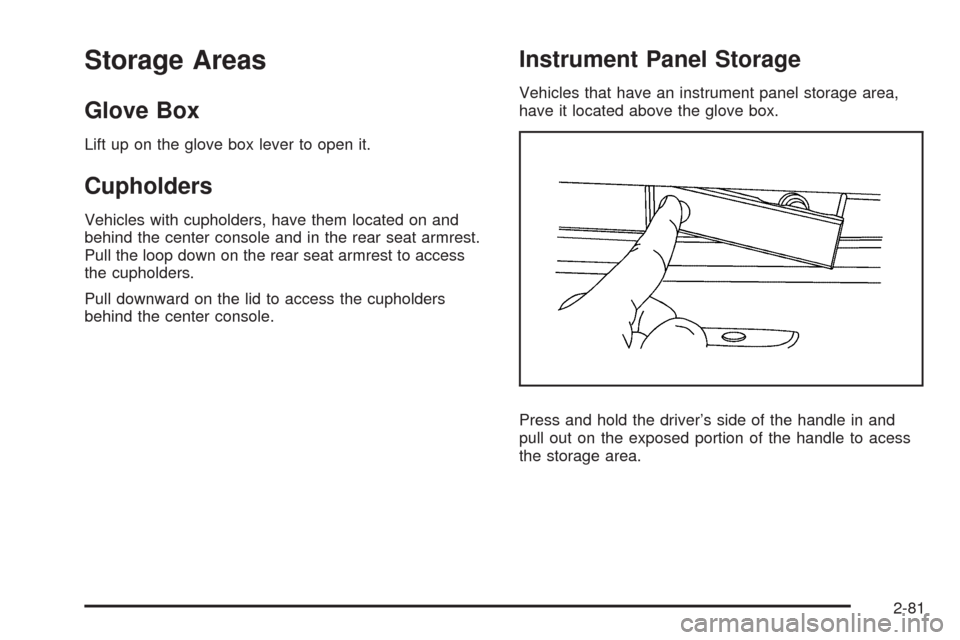
Instrument Panel Storage
Vehicles that have an instrument panel storage area,
have it located above the glove box.
Press and hold the driver’s side of the handle in and
pull out on the exposed portion of the handle to acess
the storage area.
2-81
Page 182 of 600
Center Console Storage
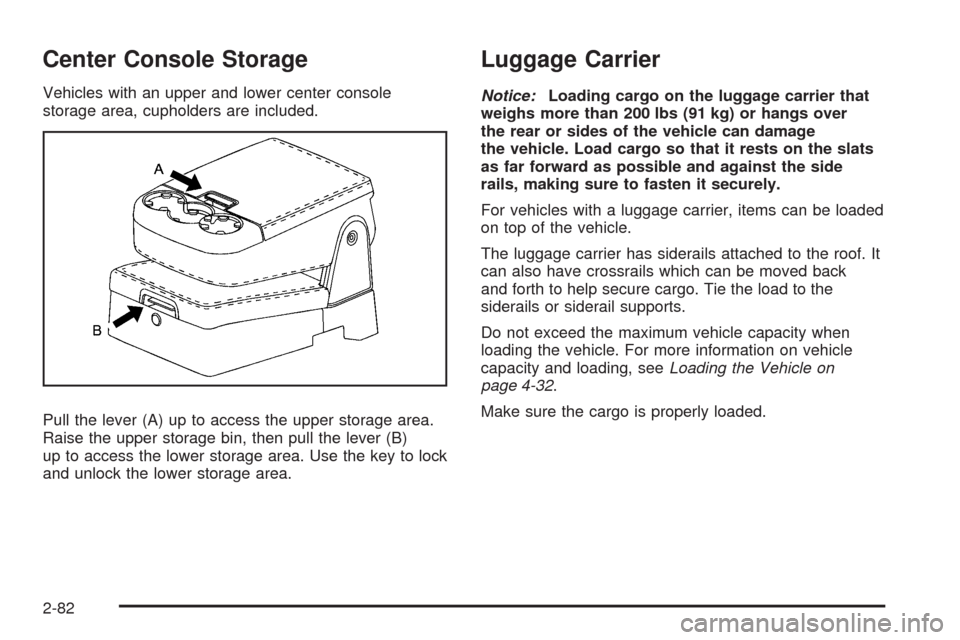
Vehicles with an upper and lower center console
storage area, cupholders are included.
Pull the lever (A) up to access the upper storage area.
Raise the upper storage bin, then pull the lever (B)
up to access the lower storage area. Use the key to lock
and unlock the lower storage area.
Luggage Carrier
Notice:Loading cargo on the luggage carrier that
weighs more than 200 lbs (91 kg) or hangs over
the rear or sides of the vehicle can damage
the vehicle. Load cargo so that it rests on the slats
as far forward as possible and against the side
rails, making sure to fasten it securely.
For vehicles with a luggage carrier, items can be loaded
on top of the vehicle.
The luggage carrier has siderails attached to the roof. It
can also have crossrails which can be moved back
and forth to help secure cargo. Tie the load to the
siderails or siderail supports.
Do not exceed the maximum vehicle capacity when
loading the vehicle. For more information on vehicle
capacity and loading, seeLoading the Vehicle on
page 4-32.
Make sure the cargo is properly loaded.
2-82
Page 205 of 600
Puddle Lamps
If the vehicle has puddle lamps, they come on when the
unlock button on the Remote Keyless Entry (RKE)
Transmitter is pressed. The lamps time out or turn off
once the engine is started.
Fog Lamps
For vehicles with fog lamps, the control is located next
to the exterior lamps control on the instrument panel,
to the left of the steering column.
The ignition must be in the ON/RUN position for the fog
lamps to come on.
#(Fog Lamps):Press to turn the fog lamps on or off.
A light will come on in the instrument panel cluster.
When the fog lamps are turned on, the parking lamps
automatically turn on.
When the headlamps are changed to high-beam, the
fog lamps also go off. When the high-beam headlamps
are turned off, the fog lamps will come on again.
Some localities have laws that require the headlamps to
be on along with the fog lamps.
Auxiliary Roof Mounted Lamp
If the vehicle has this feature, this button includes wiring
provisions for a dealer or a quali�ed service center to
install an auxiliary roof lamp.
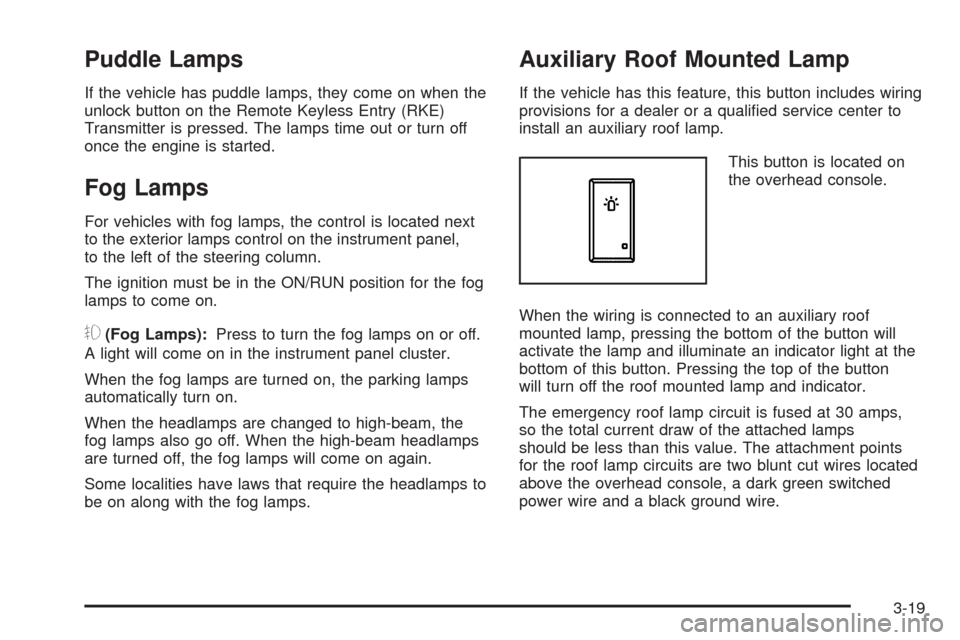
This button is located on
the overhead console.
When the wiring is connected to an auxiliary roof
mounted lamp, pressing the bottom of the button will
activate the lamp and illuminate an indicator light at the
bottom of this button. Pressing the top of the button
will turn off the roof mounted lamp and indicator.
The emergency roof lamp circuit is fused at 30 amps,
so the total current draw of the attached lamps
should be less than this value. The attachment points
for the roof lamp circuits are two blunt cut wires located
above the overhead console, a dark green switched
power wire and a black ground wire.
3-19
Page 207 of 600
Reading Lamps
For vehicles with reading lamps, they are located on
the overhead console.
To turn on the reading lamps, press the button
located next to each lamp. To turn them off, press the
button again.
The vehicle may also have reading lamps in other
locations. To turn the lamps on or off, press the button
located next to the lamp.
If the vehicle has a DVD Rear Seat Entertainment (RSE)
system, press the lamp lenses to turn the lamps on
or off.
The lamps are �xed and cannot be adjusted.
Cargo Lamp
The cargo lamps come on by turning the instrument
panel brightness control knob to the farthest clockwise
position. This knob is located on the instrument
panel and also turns on the dome lamps.
The cargo lamp can be used if more light is needed
in the cargo area of the vehicle or in the top-box
storage units.
Electric Power Management
The vehicle has Electric Power Management (EPM)
that estimates the battery’s temperature and state
of charge. It then adjusts the voltage for best
performance and extended life of the battery.
When the battery’s state of charge is low, the voltage is
raised slightly to quickly bring the charge back up.
When the state of charge is high, the voltage is lowered
slightly to prevent overcharging. If the vehicle has a
voltmeter gage or a voltage display on the Driver
Information Center (DIC), you may see the voltage move
up or down. This is normal. If there is a problem, an
alert will be displayed.
The battery can be discharged at idle if the electrical
loads are very high. This is true for all vehicles.
This is because the generator (alternator) may not be
spinning fast enough at idle to produce all the power that
is needed for very high electrical loads.
A high electrical load occurs when several of the
following are on, such as: headlamps, high beams,
fog lamps, rear window defogger, climate control fan at
high speed, heated seats, engine cooling fans, trailer
loads, and loads plugged into accessory power outlets.
3-21
Page 208 of 600
EPM works to prevent excessive discharge of the
battery. It does this by balancing the generator’s output
and the vehicle’s electrical needs. It can increase
engine idle speed to generate more power, whenever
needed. It can temporarily reduce the power demands of
some accessories.
Normally, these actions occur in steps or levels, without
being noticeable. In rare cases at the highest levels
of corrective action, this action may be noticeable to
the driver. If so, a Driver Information Center (DIC)
message might be displayed, such as BATTERY
SAVER ACTIVE, BATTERY VOLTAGE LOW, or
LOW BATTERY. If this message is displayed, it is
recommended that the driver reduce the electrical loads
as much as possible. SeeDIC Warnings and Messages
on page 3-66.
Battery Run-Down Protection
This feature shuts off the dome and reading lamps,
if they are left on for more than 10 minutes after
the ignition is turned off. The cargo lamp shuts off
after 20 minutes. This prevents the battery from
running down.
Accessory Power Outlet(s)
Accessory power outlets can be used to connect
auxiliary electrical equipment, such as a cellular
telephone.
The vehicle may have two accessory power outlets
located below the climate control system, or may have
one accessory power outlet and one cigarette lighter.
The cigarette lighter is designed to �t only in the
receptacle closest to the driver.
There may be another accessory power outlet in the
rear cargo area. If the vehicle has a �oor console, there
is an accessory power outlet inside the storage bin
and one on the rear of the �oor console.
To use an accessory power outlet, remove the protective
cap. When not in use, always cover the accessory
power outlet with the protective cap.
Notice:Leaving electrical equipment plugged in for
an extended period of time while the vehicle is off
will drain the battery. Power is always supplied
to the outlets. Always unplug electrical equipment
when not in use and do not plug in equipment
that exceeds the maximum 20 ampere rating.
3-22
Page 371 of 600
See your dealer/retailer for additional advice and
information about using a snow plow on your vehicle.
Also, seeLoading the Vehicle on page 4-32.
Emergency Roof Lamp Provisions
Vehicles with the RPO VYU snow plow prep package
also have an emergency roof lamp provision package,
RPO TRW. Wiring for the emergency roof lamp is
provided above the overhead console. SeeAuxiliary
Roof Mounted Lamp on page 3-19for switch location.
Truck-Camper Loading Information
A vehicle speci�c Truck-Camper Loading
information label is attached to the inside of your
vehicle’s glove box. This label will tell you if
your vehicle can carry a slide-in camper, how
much of a load your vehicle can carry, and how to
correctly spread out the load. Also, it will help
you match the right slide-in camper to your vehicle.
When you carry a slide-in camper, the total
cargo load of your vehicle is the weight of the
camper, plus the following:
Everything else added to the camper after it
left the factory
Everything in the camper
All the people insideThe Cargo Weight Rating (CWR) is the maximum
weight of the load your vehicle can carry. It
does not include the weight of the people inside.
But, you can �gure about 150 lbs (68 kg) for
each seat.
The total cargo load must not be more than your
vehicle’s CWR.
Refer to the Truck-Camper Loading Information
label in the glove box for dimensions A and B as
shown in the following illustration.
Use the rear edge of the load �oor for
measurement purposes. The recommended
location for the cargo center of gravity is at point
C for the CWR. It is the point where the mass of a
body is concentrated and, if suspended at that
point, would balance the front and rear.
4-43
Page 587 of 600
Capacities and Speci�cations..........................5-130
Carbon Monoxide...........................2-12, 2-55, 4-28
Care of
Safety Belts..............................................5-117
Cargo Lamp...................................................3-21
Cargo Management System.............................2-83
CD, MP3 ............................................3-108, 3-113
Center Console Storage Area...........................2-82
Center High-Mounted Stoplamp (CHMSL) and
Cargo Lamp...............................................5-59
Center Seat...................................................1-14
Chains, Tire...................................................5-90
Charging System Light....................................3-41
Check
Engine Lamp..............................................3-45
Checking Things Under the Hood......................5-12
Chemical Paint Spotting.................................5-121
Child Restraints
Child Restraint Systems...............................1-45
Infants and Young Children...........................1-41
Lower Anchors and Tethers for Children..........1-49
Older Children.............................................1-38
Securing a Child Restraint in a Rear Seat
Position..................................................1-58Child Restraints (cont.)
Securing a Child Restraint in the Center
Front Seat Position...................................1-61
Securing a Child Restraint in the Right
Front Seat Position..................1-61, 1-66, 1-71
Where to Put the Restraint...........................1-47
Cigarette Lighter.............................................3-23
Cleaning
Aluminum or Chrome-Plated Wheels.............5-120
Exterior Lamps/Lenses................................5-118
Fabric/Carpet............................................5-116
Finish Care...............................................5-119
Instrument Panel, Vinyl, and Other Plastic
Surfaces...............................................5-117
Interior.....................................................5-114
Leather....................................................5-116
Tires........................................................
5-121
Underbody Maintenance.............................5-121
Washing Your Vehicle.................................5-118
Weatherstrips............................................5-117
Windshield and Wiper Blades......................5-119
Climate Control System...........................3-24, 3-26
Dual Automatic............................................3-28
Outlet Adjustment........................................3-33
3