2009 CHEVROLET CORVETTE remote control
[x] Cancel search: remote controlPage 1 of 434

Seats and Restraint System............................. 1-1
Front Seats
............................................... 1-2
Safety Belts
.............................................. 1-8
Child Restraints
.......................................1-25
Airbag System
.........................................1-44
Restraint System Check
............................1-60
Features and Controls..................................... 2-1
Keys
........................................................ 2-3
Doors and Locks
......................................2-10
Windows
.................................................2-16
Theft-Deterrent Systems
............................2-18
Starting and Operating Your Vehicle
...........2-21
Mirrors
....................................................2-37
OnStar
®System
......................................2-40
Universal Home Remote System
................2-44
Storage Areas
.........................................2-51
Roof Panel
..............................................2-54
Convertible Top
.......................................2-59
Instrument Panel............................................. 3-1
Instrument Panel Overview
.......................... 3-4
Climate Controls
......................................3-24
Warning Lights, Gages, and Indicators
........3-31
Driver Information Center (DIC)
..................3-49
Audio System(s)
.......................................3-80Driving Your Vehicle....................................... 4-1
Your Driving, the Road, and the Vehicle
....... 4-2
Towing
...................................................4-28
Service and Appearance Care.......................... 5-1
Service
..................................................... 5-3
Fuel
......................................................... 5-6
Checking Things Under the Hood
...............5-12
Rear Axle
...............................................5-55
Headlamp Aiming
.....................................5-56
Bulb Replacement
....................................5-56
Windshield Replacement
...........................5-60
Windshield Wiper Blade Replacement
.........5-60
Tires
......................................................5-62
Appearance Care
.....................................5-91
Vehicle Identi�cation
...............................5-101
Electrical System
....................................5-102
Capacities and Speci�cations
...................5-110
Maintenance Schedule..................................... 6-1
Maintenance Schedule
................................ 6-2
Customer Assistance Information.................... 7-1
Customer Assistance and Information
........... 7-2
Reporting Safety Defects
...........................7-14
Vehicle Data Recording and Privacy
...........7-16
Index................................................................ 1
2009 Chevrolet Corvette Owner ManualM
Page 4 of 434
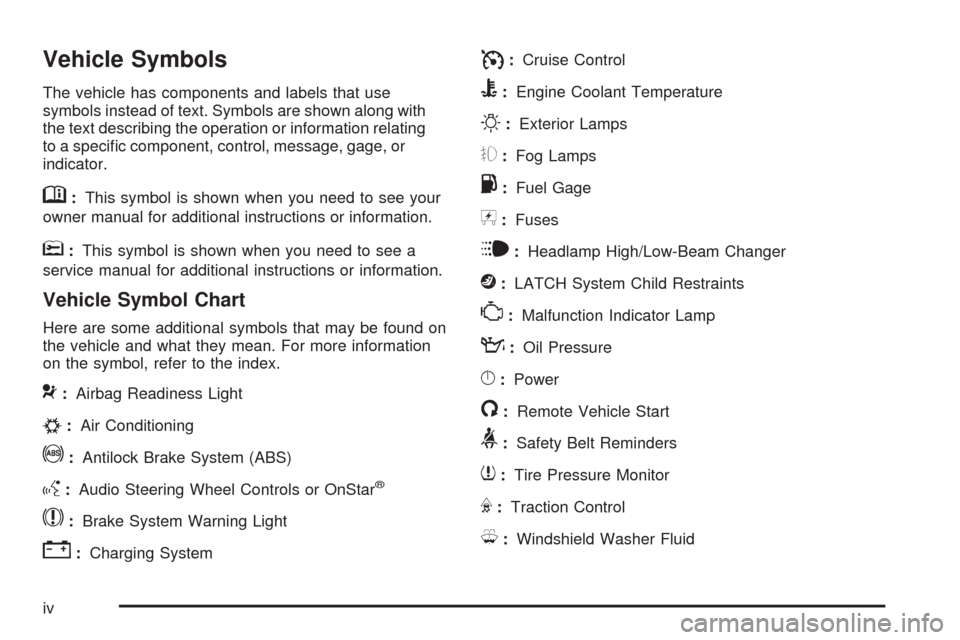
Vehicle Symbols
The vehicle has components and labels that use
symbols instead of text. Symbols are shown along with
the text describing the operation or information relating
to a speci�c component, control, message, gage, or
indicator.
M:This symbol is shown when you need to see your
owner manual for additional instructions or information.
*:This symbol is shown when you need to see a
service manual for additional instructions or information.
Vehicle Symbol Chart
Here are some additional symbols that may be found on
the vehicle and what they mean. For more information
on the symbol, refer to the index.
9:Airbag Readiness Light
#:Air Conditioning
!:Antilock Brake System (ABS)
g:Audio Steering Wheel Controls or OnStar®
$:Brake System Warning Light
":Charging System
I:Cruise Control
B:Engine Coolant Temperature
O:Exterior Lamps
#:Fog Lamps
.:Fuel Gage
+:Fuses
i:Headlamp High/Low-Beam Changer
j:LATCH System Child Restraints
*:Malfunction Indicator Lamp
::Oil Pressure
}:Power
/:Remote Vehicle Start
>:Safety Belt Reminders
7:Tire Pressure Monitor
F:Traction Control
M:Windshield Washer Fluid
iv
Page 67 of 434

Keys...............................................................2-3
Keyless Access System...................................2-4
Keyless Access System Operation....................2-5
Doors and Locks............................................2-10
Door Locks..................................................2-10
Power Door Locks........................................2-12
Automatic Door Lock.....................................2-12
Programmable Automatic Door Unlock.............2-12
Lockout Protection........................................2-12
Hatch..........................................................2-13
Windows........................................................2-16
Power Windows............................................2-17
Sun Visors...................................................2-18
Theft-Deterrent Systems..................................2-18
Theft-Deterrent System..................................2-18
Immobilizer..................................................2-19
Immobilizer Operation....................................2-20
Starting and Operating Your Vehicle................2-21
New Vehicle Break-In....................................2-21
Front Air Dam..............................................2-21
Ignition Positions..........................................2-22Retained Accessory Power (RAP)...................2-23
Starting the Engine.......................................2-23
Automatic Transmission Operation...................2-26
Manual Transmission Operation......................2-30
Parking Brake..............................................2-32
Shifting Into Park (Automatic Transmission)......2-33
Shifting Out of Park......................................2-34
Parking the Vehicle (Manual Transmission).......2-34
Parking Over Things That Burn.......................2-35
Engine Exhaust............................................2-35
Running the Vehicle While Parked..................2-36
Mirrors...........................................................2-37
Automatic Dimming Rearview Mirror...............
.2-37
Compass.....................................................2-37
Outside Power Mirrors...................................2-39
Outside Automatic Dimming Mirror..................2-39
Outside Convex Mirror...................................2-40
Outside Heated Mirrors..................................2-40
OnStar
®System.............................................2-40
Universal Home Remote System......................2-44
Universal Home Remote System Operation......2-44
Section 2 Features and Controls
2-1
Page 109 of 434
How OnStar Service Works
The OnStar system can record and transmit vehicle
information. This information is automatically sent to an
OnStar Call Center when the OnStar button is pressed,
the emergency button is pressed, or if the airbags or
AACN system deploy. This information usually includes
the vehicle’s GPS location and, in the event of a crash,
additional information regarding the crash that the vehicle
was involved in (e.g. the direction from which the vehicle
was hit). When the Virtual Advisor feature of OnStar
Hands-Free Calling is used, the vehicle also sends
OnStar the vehicle’s GPS location so they can provide
services where it is located.
OnStar service cannot work unless the vehicle is in a
place where OnStar has an agreement with a wireless
service provider for service in that area. OnStar service
also cannot work unless the vehicle is in a place where
the wireless service provider OnStar has hired for that
area has coverage, network capacity and reception when
the service is needed, and technology that is compatible
with the OnStar service. Not all services are available
everywhere, particularly in remote or enclosed areas,
or at all times.Location information about the vehicle is only available if
the GPS satellite signals are unobstructed and available.
The vehicle must have a working electrical system,
including adequate battery power, for the OnStar
equipment to operate. There are other problems OnStar
cannot control that may prevent OnStar from providing
OnStar service at any particular time or place. Some
examples are damage to important parts of the vehicle
in a crash, hills, tall buildings, tunnels, weather or
wireless phone network congestion.
Your Responsibility
Increase the volume of the radio if the OnStar advisor
cannot be heard. If the light next to the OnStar buttons
is red, the system may not be functioning properly.
Press the OnStar button and request a vehicle
diagnostic. If the light appears clear (no light is
appearing), your OnStar subscription has expired and
all services have been deactivated. Press the OnStar
button to con�rm that the OnStar equipment is active.
2-43
Page 110 of 434
Universal Home Remote
System
The Universal Home Remote System provides a way to
replace up to three hand-held radio-frequency (RF)
transmitters used to activate devices such as garage
door openers, security systems, and home lighting.
This device complies with Part 15 of the FCC Rules.
Operation is subject to the following two conditions:
1. This device may not cause harmful interference.
2. This device must accept any interference received,
including interference that may cause undesired
operation.
The FCC Grant of Equipment Authorization Certi�cate
number is KOBGTV06A.
This device complies with RSS-210 of Industry Canada.
Operation is subject to the following two conditions:
1. This device may not cause interference.
2. This device must accept any interference received,
including interference that may cause undesired
operation of the device.
The Canadian Registration ID number is
3521A-GTV06A.
Changes or modi�cations to this system by other than
an authorized service facility could void authorization to
use this equipment.
Universal Home Remote System
Operation
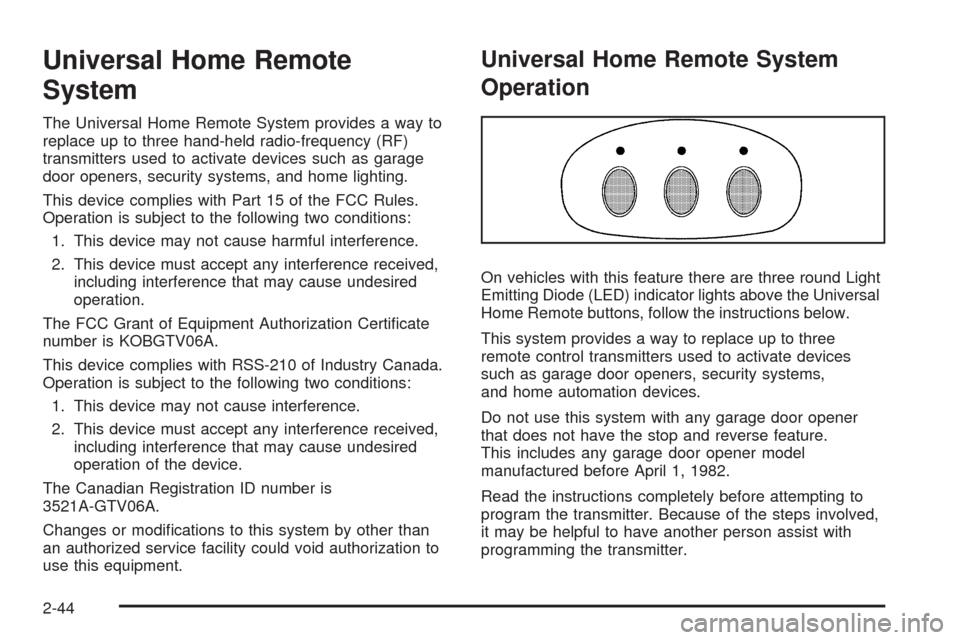
On vehicles with this feature there are three round Light
Emitting Diode (LED) indicator lights above the Universal
Home Remote buttons, follow the instructions below.
This system provides a way to replace up to three
remote control transmitters used to activate devices
such as garage door openers, security systems,
and home automation devices.
Do not use this system with any garage door opener
that does not have the stop and reverse feature.
This includes any garage door opener model
manufactured before April 1, 1982.
Read the instructions completely before attempting to
program the transmitter. Because of the steps involved,
it may be helpful to have another person assist with
programming the transmitter.
2-44
Page 111 of 434
Be sure to keep the original remote control
transmitter for use in other vehicles, as well as,
for future programming. Only the original remote control
transmitter is needed for Fixed Code programming.
The programmed buttons should be erased when the
vehicle is sold or the lease ends. See “Erasing Universal
Home Remote Buttons” later in this section.
Park the vehicle outside of the garage when
programming a garage door. Be sure that people
and objects are clear of the garage door or gate
that is being programmed.
Programming Universal Home
Remote — Rolling Code
For questions or help programming the Universal
Home Remote System, call 1-866-572-2728 or go to
learcar2u.com.
Most garage door openers sold after 1996 are Rolling
Code units.
Programming a garage door opener involves
time-sensitive actions, so read the entire procedure
before starting. Otherwise, the device will time out
and the procedure will have to be repeated.To program up to three devices:
1. Press START or put the vehicle in accessory mode.
SeeIgnition Positions on page 2-22for additional
information.
Programming can only occur when the vehicle is
running or in accessory mode.
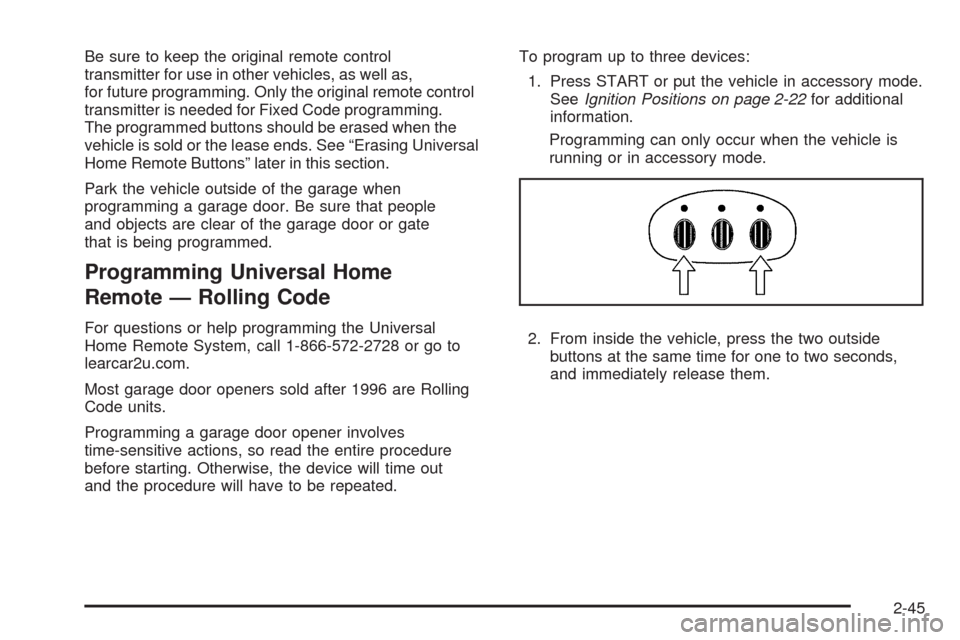
2. From inside the vehicle, press the two outside
buttons at the same time for one to two seconds,
and immediately release them.
2-45
Page 112 of 434
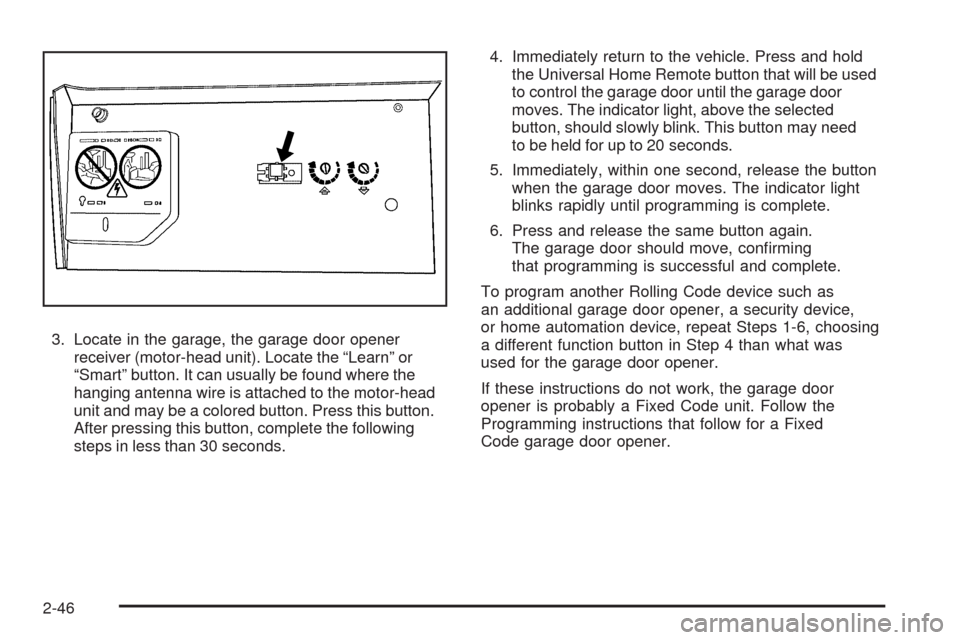
3. Locate in the garage, the garage door opener
receiver (motor-head unit). Locate the “Learn” or
“Smart” button. It can usually be found where the
hanging antenna wire is attached to the motor-head
unit and may be a colored button. Press this button.
After pressing this button, complete the following
steps in less than 30 seconds.4. Immediately return to the vehicle. Press and hold
the Universal Home Remote button that will be used
to control the garage door until the garage door
moves. The indicator light, above the selected
button, should slowly blink. This button may need
to be held for up to 20 seconds.
5. Immediately, within one second, release the button
when the garage door moves. The indicator light
blinks rapidly until programming is complete.
6. Press and release the same button again.
The garage door should move, con�rming
that programming is successful and complete.
To program another Rolling Code device such as
an additional garage door opener, a security device,
or home automation device, repeat Steps 1-6, choosing
a different function button in Step 4 than what was
used for the garage door opener.
If these instructions do not work, the garage door
opener is probably a Fixed Code unit. Follow the
Programming instructions that follow for a Fixed
Code garage door opener.
2-46
Page 116 of 434
6. After entering all of the switch positions, again,
�rmly press and release all three buttons at the
same time. The indicator lights turn on.
7. Press and hold the button that will be used to
control the garage door until the garage door
moves. The indicator light above the selected button
should slowly blink. This button may need to be
held for up to 55 seconds.
8. Immediately release the button when the garage
door moves. The indicator light blinks rapidly until
programming is complete.
9. Press and release the same button again.
The garage door should move, con�rming
that programming is successful and complete.
To program another Fixed Code device such as an
additional garage door opener, a security device,
or home automation device, repeat Steps 1-9, choosing
a different button in Step 7 than what was used for
the garage door opener.Using Universal Home Remote
Press and hold the appropriate button for at least
half of a second. The indicator light comes on while
the signal is being transmitted.
Operation can occur:
If the vehicle is in accessory mode.
If the vehicle is in running.
If the vehicle is in Retained Accessory Mode (RAP).
SeeRetained Accessory Power (RAP) on page 2-23
for more information.
Up to an additional 10 minutes after RAP �nishes.
Up to 10 minutes after any door is opened.
Reprogramming Universal Home
Remote Buttons
Any of the three buttons can be reprogrammed by
repeating the instructions.
2-50