2009 CHEVROLET CORVETTE center console
[x] Cancel search: center consolePage 8 of 434
Heated Seats
On vehicles with heated seats, the buttons are located
on the center console.
The ignition must be on for this feature to work.
L:Press to turn the seat on at the high setting, and
twice to turn it to the low setting.
9:Press to turn the system off.
Memory Seat, Mirrors and Steering
Wheel
On vehicles with the memory package, the controls are
located on the driver’s door.
1:Saves the seating position for driver 1.
2:Saves the seating position for driver 2.
B:Recalls the easy exit position.
The numbers on the back of the keyless access
transmitters correspond to the numbers on the memory
buttons.To save seating positions in the memory:
1. Adjust the driver’s seat, both outside mirrors, and
the telescopic steering column to a comfortable
driving position.
2. Press and hold button 1 until two beeps let you
know that the position has been stored in the
memory.
A second seating, mirror, and telescopic steering
column position can be set by repeating the above steps
and pressing button 2.
To recall a memory position:
On vehicles with an automatic transmission, press
and release the desired button.
If the vehicle is in P (Park), a single beep sounds
and the memory position is recalled after a brief
delay.
If the vehicle is not in P (Park), three beeps sound
and the memory position is not recalled.
On vehicles with a manual transmission, when the
vehicle is on, the parking brake needs to be set to
recall the memory position. Press and release
the desired button.
A single beep sounds and the memory position is
recalled after a brief delay.
If the vehicle is on and the parking brake is not set,
three beeps sound and the memory position is
not recalled.
1-4
Page 68 of 434
Storage Areas................................................2-51
Glove Box...................................................2-51
Cupholders..................................................2-51
Center Console Storage.................................2-51
Floor Mats...................................................2-51
Rear Storage Area........................................2-52
Convenience Net..........................................2-53
Cargo Cover................................................2-53Roof Panel.....................................................2-54
Removing the Roof Panel..............................2-55
Storing the Roof Panel..................................2-57
Installing the Roof Panel................................2-58
Convertible Top..............................................2-59
Convertible Top (Manual)...............................2-59
Convertible Top (Power)................................2-66
Section 2 Features and Controls
2-2
Page 98 of 434
Downshifting (Manual Transmission)
Do not downshift into the gear shown below at a speed
greater than shown in the table:
1 (First) 50 mph (80 km/h)
2 (Second) 74 mph (119 km/h)
3 (Third) 101 mph (163 km/h)
4 (Fourth) 130 mph (209 km/h)
Notice:If you skip more than one gear when
you downshift, or if you race the engine when you
release the clutch pedal while downshifting, you
could damage the engine, clutch, driveshaft or the
transmission. Do not skip gears or race the engine
when downshifting.
The six-speed transmission has a spring that centers the
shift lever near 3 (Third) and 4 (Fourth). This spring helps
you know which gear you are in when you are shifting.
Be careful when shifting from 1 (First) to 2 (Second) or
downshifting from 6 (Sixth) to 5 (Fifth). The spring will try
to pull the shift lever toward 4 (Fourth) and 3 (Third).
Make sure you move the lever into 2 (Second) or
5 (Fifth). If you let the shift lever move in the direction
of the pulling, you may end up shifting from 1 (First) to
4 (Fourth) or from 6 (Sixth) to 3 (Third).
Parking Brake
The parking brake lever is located to the right of the
center console.
To set the parking brake, hold the brake pedal down.
Pull the parking brake lever up. If the ignition is on,
the brake system warning light will come on.
To release the parking brake, hold the brake pedal
down. Then push the release button in as you move
the parking brake lever all the way down.
Notice:Driving with the parking brake on can
overheat the brake system and cause premature
wear or damage to brake system parts. Make sure
that the parking brake is fully released and the brake
warning light is off before driving.
2-32
Page 117 of 434
Erasing Universal Home Remote
Buttons
The programmed buttons should be erased when the
vehicle is sold or the lease ends.
To erase either Rolling Code or Fixed Code on the
Universal Home Remote device:
1. Press and hold the two outside buttons at the same
time for approximately 20 seconds, until the indicator
lights, located directly above the buttons, begin to
blink rapidly.
2. Once the indicator lights begin to blink, release both
buttons. The codes from all buttons are erased.
For help or information on the Universal Home Remote
System, call the customer assistance phone number
underCustomer Assistance Offices on page 7-6.
Storage Areas
Glove Box
Open the glove box by lifting up on the lever. Use the
key to lock and unlock the lighted glove box.
Cupholders
Two cupholders are located on the center console next
to the shift lever. Slide the handle from the left to the
right side to access the lid.
Center Console Storage
To use this storage area, pull the cover up on the driver
side front edge of the console and swing it to the
passenger side.
Floor Mats
The �oor mats are designed to remain in position
and out of reach of the accelerator pedal. The driver
side �oor mat is held in place by two locator pins and
the passenger side is held in place by one.
Make sure that the driver side �oor mat is properly
placed on the �oor so that it does not block the
movement of the accelerator pedal.
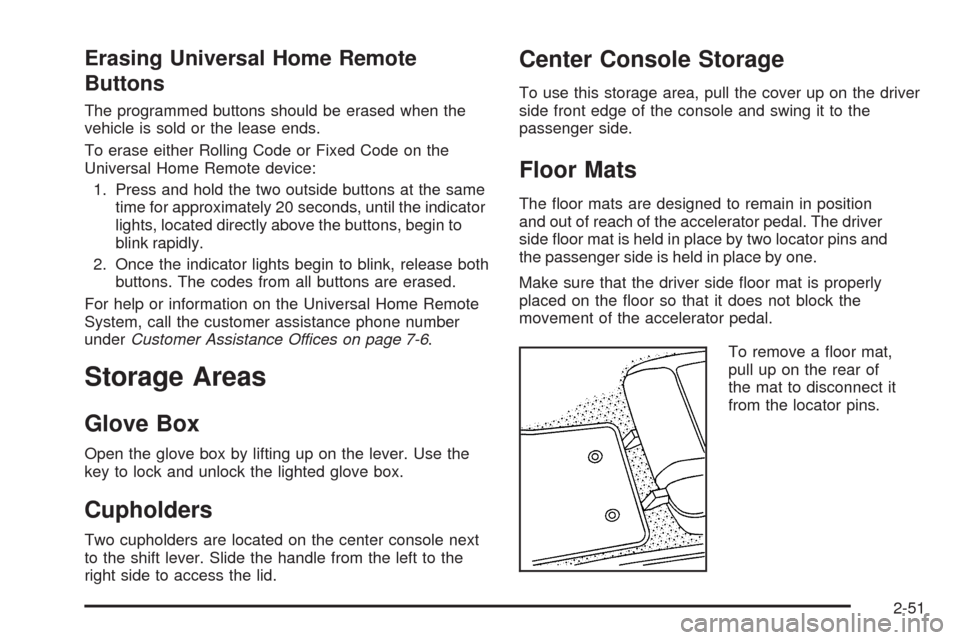
To remove a �oor mat,
pull up on the rear of
the mat to disconnect it
from the locator pins.
2-51
Page 136 of 434
Be careful when opening the tonneau cover by hand.
If the tonneau cover is opened quickly, damage can
occur to the hinging mechanism, which can prevent
proper operation of the convertible top.
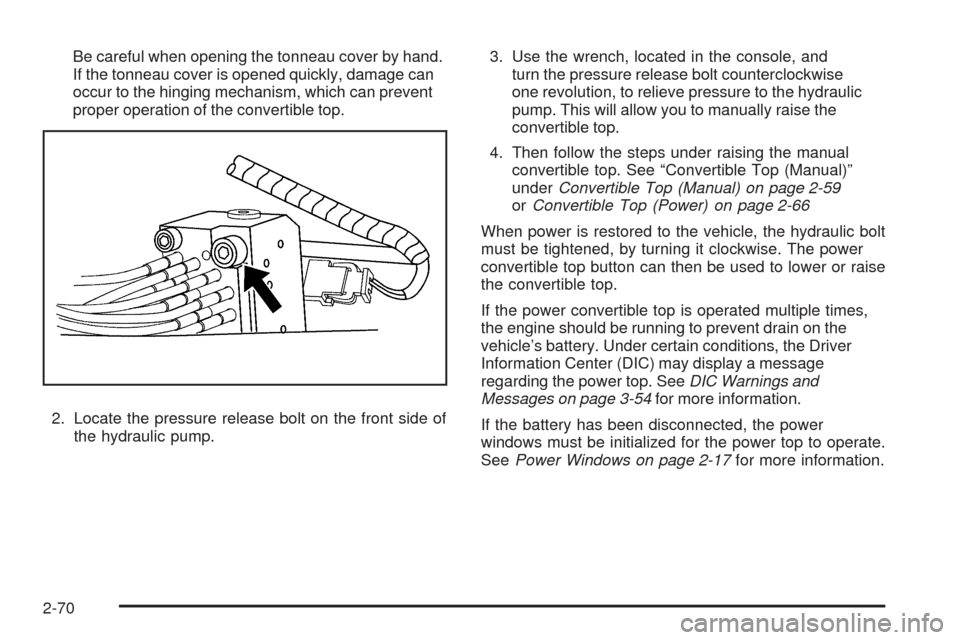
2. Locate the pressure release bolt on the front side of
the hydraulic pump.3. Use the wrench, located in the console, and
turn the pressure release bolt counterclockwise
one revolution, to relieve pressure to the hydraulic
pump. This will allow you to manually raise the
convertible top.
4. Then follow the steps under raising the manual
convertible top. See “Convertible Top (Manual)”
underConvertible Top (Manual) on page 2-59
orConvertible Top (Power) on page 2-66
When power is restored to the vehicle, the hydraulic bolt
must be tightened, by turning it clockwise. The power
convertible top button can then be used to lower or raise
the convertible top.
If the power convertible top is operated multiple times,
the engine should be running to prevent drain on the
vehicle’s battery. Under certain conditions, the Driver
Information Center (DIC) may display a message
regarding the power top. SeeDIC Warnings and
Messages on page 3-54for more information.
If the battery has been disconnected, the power
windows must be initialized for the power top to operate.
SeePower Windows on page 2-17for more information.
2-70
Page 154 of 434

Instrument Panel Brightness
The knob for this feature is
located on the left side of
the instrument panel.
Push the knob in to turn on the interior lights.
Turn and hold the knob clockwise to brighten the lights
or counterclockwise to dim them. During the day,
this knob will adjust the instrument panel brightness
and at night will adjust all interior lighting.
Be sure not to have this knob turned all the way down
with the lamps on during the day. Your Driver
Information Center (DIC) may not be visible.
Courtesy Lamps
When any door or the hatch/trunk lid is opened, the
interior lamps will go on unless it is bright outside.
You can also turn the courtesy lamps on and off
by pressing the instrument panel brightness knob.
Entry/Exit Lighting
With entry lighting, the interior lamps will come on when
entering the vehicle. The interior lamps will come on
for about 20 seconds when the engine is off.
You can turn exit and entry lighting off by quickly turning
the courtesy lamps on and off.
Reading Lamps
The inside rearview mirror includes two reading lamps.
The lamps will go on when a door is opened.
When the doors are closed, press each lamp switch
to turn them on individually.
Battery Run-Down Protection
This vehicle has a feature to help prevent the battery
from being drained in case any of the following
lamps are left on; the underhood lamp, if your vehicle
has this feature, vanity mirror lamps, cargo lamps,
reading lamps, console or glove box lamps. If any of
these lamps are left on, they will automatically time-out
after about 10 minutes. To reset it, all of the above
lamps must be turned off or the ignition key on.
3-18
Page 159 of 434
Accessory Power Outlet(s)
The accessory power outlet can be used to connect
electrical equipment, such as a cellular phone.
The accessory power outlet is located inside the center
console storage compartment, on the forward left side.
To use the outlet, remove the tethered cap. When not
using it, always cover the outlet with the protective cap.
Notice:Leaving electrical equipment plugged in
for an extended period of time while the vehicle is
off will drain the battery. Power is always supplied to
the outlets. Always unplug electrical equipment
when not in use and do not plug in equipment that
exceeds the maximum 20 ampere rating.
Certain electrical accessories may not be compatible
with the accessory power outlet and could result
in blown vehicle or adapter fuses. If you experience a
problem, see your dealer/retailer for additional
information on accessory power outlets.Notice:Adding any electrical equipment to the
vehicle can damage it or keep other components
from working as they should. The repairs would not
be covered by the vehicle warranty. Do not use
equipment exceeding maximum amperage rating of
20 amperes. Check with your dealer/retailer before
adding electrical equipment.
When adding electrical equipment, be sure to follow the
installation instructions included with the equipment.
We recommend that you see a quali�ed technician or
your dealer/retailer for the proper installation of your
equipment.
Notice:Improper use of the power outlet can cause
damage not covered by the warranty. Do not hang
any type of accessory or accessory bracket from the
plug because the power outlets are designed for
accessory power plugs only.
3-23
Page 197 of 434
To acknowledge the message, press the RESET button.
The message reappears every 10 minutes until this
condition changes.
NO FOBS DETECTED
This message displays if the vehicle does not detect the
presence of a keyless access transmitter when you
have attempted to start the vehicle or a vehicle door has
just closed. The following conditions may cause this
message to appear:
Driver-added equipment plugged into the accessory
power outlet on the center console is causing
interference. Examples of these devices are cell
phones and cell phone chargers, two-way radios,
power inverters, or similar items. Try moving the
keyless access transmitter away from these devices
when starting the vehicle. In addition, PDA devices
and remote garage and gate openers may also
generate Electromagnetic Interference (EMI) that
may interfere with the keyless access transmitter.
Do not carry the keyless access transmitter in the
same pocket or bag as these devices.
The vehicle is experiencing Electromagnetic
Interference (EMI). Some locations, such as airports,
automatic toll booths, and some gas stations have
EMI �elds which may interfere with the keyless
access transmitter.
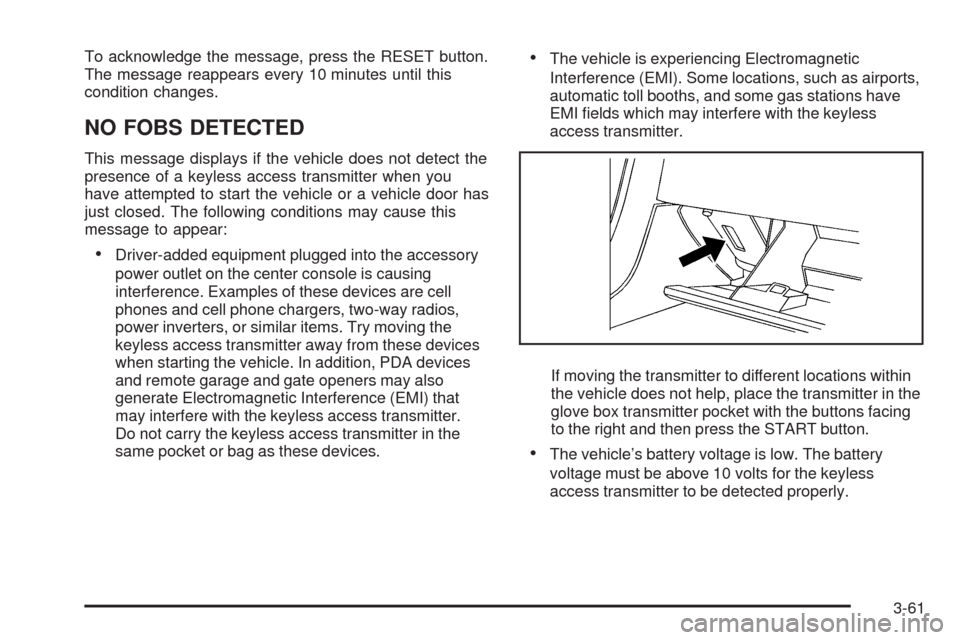
If moving the transmitter to different locations within
the vehicle does not help, place the transmitter in the
glove box transmitter pocket with the buttons facing
to the right and then press the START button.
The vehicle’s battery voltage is low. The battery
voltage must be above 10 volts for the keyless
access transmitter to be detected properly.
3-61