2009 CHEVROLET CORVETTE set clock
[x] Cancel search: set clockPage 80 of 434

Hatch/Trunk Lid Release
There are several ways to release the hatch/trunk lid.
If your vehicle has an automatic transmission, the shift
lever must be in P (Park). For manual transmission
vehicles, the parking brake must be set when the
ignition is started for the hatch/trunk release to operate.
The parking brake does not need to be set when the
ignition is off for the hatch/trunk release to operate.
SeeParking Brake on page 2-32.
V(Hatch/Trunk):Press the hatch/trunk lid release
button, located on the instrument panel to the left of the
steering wheel. The theft-deterrent alarm system
must not be armed.
}(Hatch/Trunk):Press the hatch/trunk lid release
button on the keyless access transmitter. SeeKeyless
Access System on page 2-4.
Press the hatch/trunk release button located on the rear
of the hatch/trunk lid above the license plate, as long
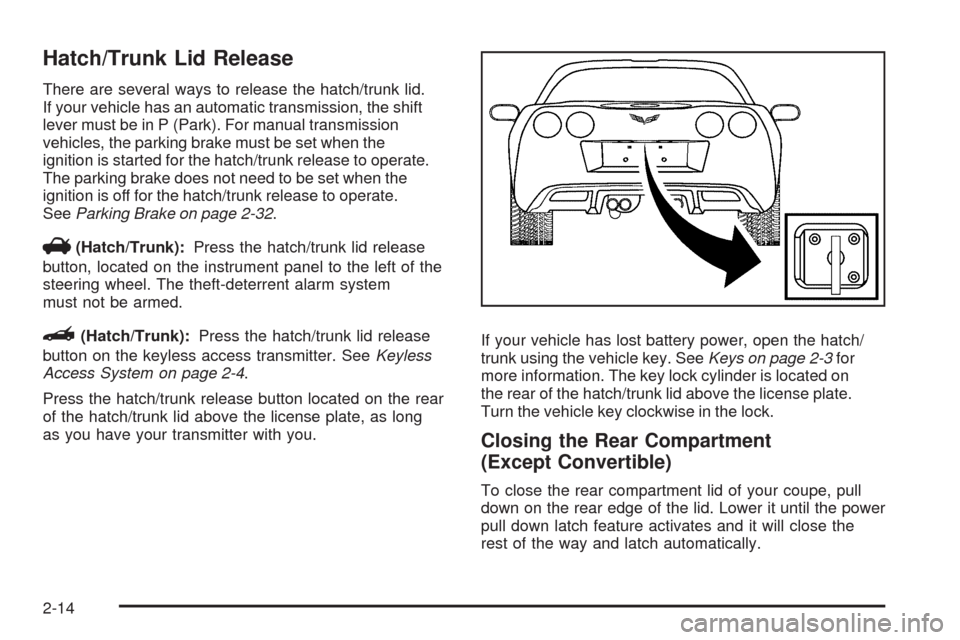
as you have your transmitter with you.If your vehicle has lost battery power, open the hatch/
trunk using the vehicle key. SeeKeys on page 2-3for
more information. The key lock cylinder is located on
the rear of the hatch/trunk lid above the license plate.
Turn the vehicle key clockwise in the lock.
Closing the Rear Compartment
(Except Convertible)
To close the rear compartment lid of your coupe, pull
down on the rear edge of the lid. Lower it until the power
pull down latch feature activates and it will close the
rest of the way and latch automatically.
2-14
Page 127 of 434

Lowering the Manual Convertible Top
1. Park on a level surface. Shift an automatic
transmission into P (Park) and set the parking
brake. Shift a manual transmission into N (Neutral)
and set the parking brake.
2. Make sure the ignition is off.
3. Make sure the trunk is closed.
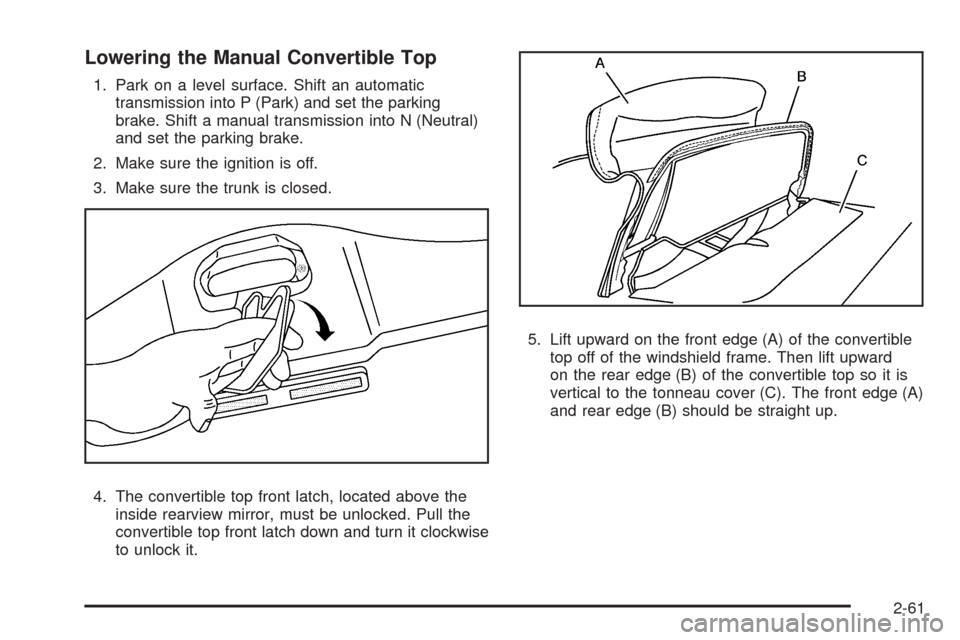
4. The convertible top front latch, located above the
inside rearview mirror, must be unlocked. Pull the
convertible top front latch down and turn it clockwise
to unlock it.5. Lift upward on the front edge (A) of the convertible
top off of the windshield frame. Then lift upward
on the rear edge (B) of the convertible top so it is
vertical to the tonneau cover (C). The front edge (A)
and rear edge (B) should be straight up.
2-61
Page 133 of 434

Notice:If you lower the top on your vehicle in cold
weather (0°F/-18°C or lower), you may damage top
components. Do not lower the top in cold weather.
Notice:If you raise or lower the convertible top
while the vehicle is in motion, you could damage the
top or the top mechanism. The repairs would not be
covered by your warranty. Always put an automatic
transmission in P (Park) or a manual transmission
in N (Neutral) before raising or lowering the
convertible top.
Lowering the Power Convertible Top
1. Park on a level surface. Start the engine. Shift an
automatic transmission into P (Park) and set the
parking brake. Shift a manual transmission
into N (Neutral), and set the parking brake.
2. Make sure the trunk is closed and the rear trunk
partition in the rear storage area is in the fastened
upright position, and that no objects are forward
of the divider. See “Rear Trunk Partition” under
Rear Storage Area on page 2-52.3. Release the convertible top front latch, located
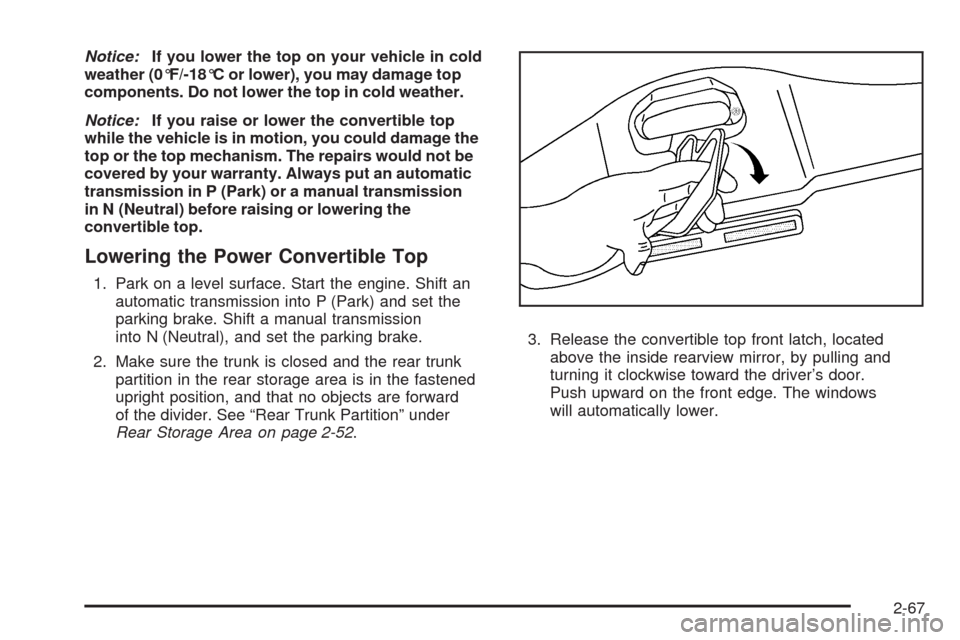
above the inside rearview mirror, by pulling and
turning it clockwise toward the driver’s door.
Push upward on the front edge. The windows
will automatically lower.
2-67
Page 134 of 434

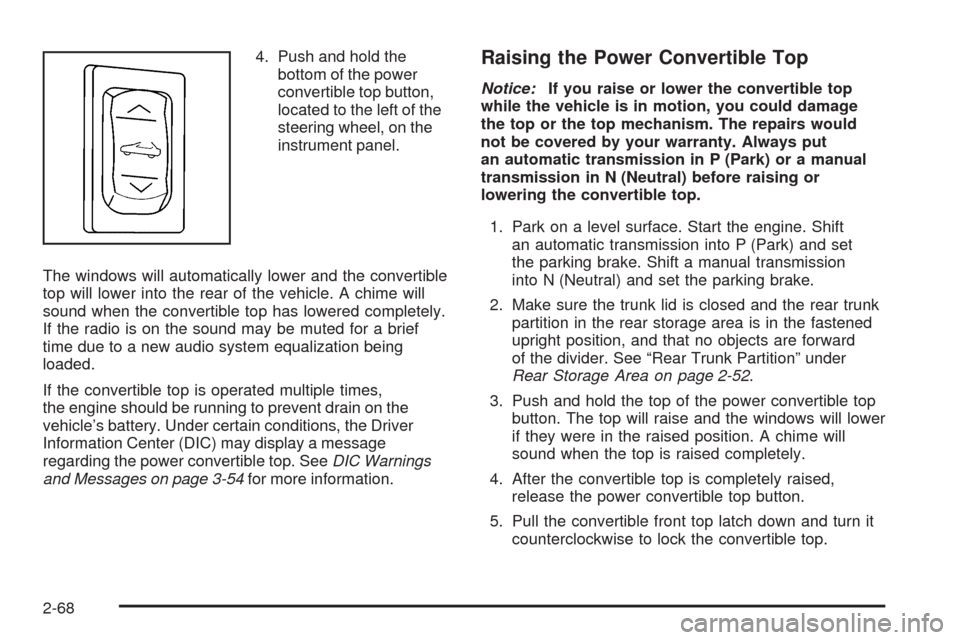
4. Push and hold the
bottom of the power
convertible top button,
located to the left of the
steering wheel, on the
instrument panel.
The windows will automatically lower and the convertible
top will lower into the rear of the vehicle. A chime will
sound when the convertible top has lowered completely.
If the radio is on the sound may be muted for a brief
time due to a new audio system equalization being
loaded.
If the convertible top is operated multiple times,
the engine should be running to prevent drain on the
vehicle’s battery. Under certain conditions, the Driver
Information Center (DIC) may display a message
regarding the power convertible top. SeeDIC Warnings
and Messages on page 3-54for more information.Raising the Power Convertible Top
Notice:If you raise or lower the convertible top
while the vehicle is in motion, you could damage
the top or the top mechanism. The repairs would
not be covered by your warranty. Always put
an automatic transmission in P (Park) or a manual
transmission in N (Neutral) before raising or
lowering the convertible top.
1. Park on a level surface. Start the engine. Shift
an automatic transmission into P (Park) and set
the parking brake. Shift a manual transmission
into N (Neutral) and set the parking brake.
2. Make sure the trunk lid is closed and the rear trunk
partition in the rear storage area is in the fastened
upright position, and that no objects are forward
of the divider. See “Rear Trunk Partition” under
Rear Storage Area on page 2-52.
3. Push and hold the top of the power convertible top
button. The top will raise and the windows will lower
if they were in the raised position. A chime will
sound when the top is raised completely.
4. After the convertible top is completely raised,
release the power convertible top button.
5. Pull the convertible front top latch down and turn it
counterclockwise to lock the convertible top.
2-68
Page 138 of 434

Driver Information Center (DIC).......................3-49
DIC Operation and Displays...........................3-49
DIC Warnings and Messages.........................3-54
Other Messages...........................................3-70
DIC Vehicle Personalization............................3-71
Audio System(s).............................................3-80
Setting the Clock..........................................3-80
Radio(s)......................................................3-81
Using an MP3..............................................3-92XM Radio Messages.....................................3-95
Navigation/Radio System...............................3-95
Bluetooth
®...................................................3-96
Theft-Deterrent Feature................................3-106
Audio Steering Wheel Controls......................3-106
Radio Reception.........................................3-108
Diversity Antenna System.............................3-108
XM™ Satellite Radio Antenna System..............3-108
Section 3 Instrument Panel
3-2
Page 154 of 434

Instrument Panel Brightness
The knob for this feature is
located on the left side of
the instrument panel.
Push the knob in to turn on the interior lights.
Turn and hold the knob clockwise to brighten the lights
or counterclockwise to dim them. During the day,
this knob will adjust the instrument panel brightness
and at night will adjust all interior lighting.
Be sure not to have this knob turned all the way down
with the lamps on during the day. Your Driver
Information Center (DIC) may not be visible.
Courtesy Lamps
When any door or the hatch/trunk lid is opened, the
interior lamps will go on unless it is bright outside.
You can also turn the courtesy lamps on and off
by pressing the instrument panel brightness knob.
Entry/Exit Lighting
With entry lighting, the interior lamps will come on when
entering the vehicle. The interior lamps will come on
for about 20 seconds when the engine is off.
You can turn exit and entry lighting off by quickly turning
the courtesy lamps on and off.
Reading Lamps
The inside rearview mirror includes two reading lamps.
The lamps will go on when a door is opened.
When the doors are closed, press each lamp switch
to turn them on individually.
Battery Run-Down Protection
This vehicle has a feature to help prevent the battery
from being drained in case any of the following
lamps are left on; the underhood lamp, if your vehicle
has this feature, vanity mirror lamps, cargo lamps,
reading lamps, console or glove box lamps. If any of
these lamps are left on, they will automatically time-out
after about 10 minutes. To reset it, all of the above
lamps must be turned off or the ignition key on.
3-18
Page 216 of 434

Audio System(s)
Determine which radio the vehicle has and read the
following pages to become familiar with its features.
{CAUTION:
Taking your eyes off the road for extended periods
could cause a crash resulting in injury or death to
you or others. Do not give extended attention to
entertainment tasks while driving.
This system provides access to many audio and non
audio listings.
To minimize taking your eyes off the road while driving,
do the following while the vehicle is parked:
Become familiar with the operation and controls of
the audio system.
Set up the tone, speaker adjustments, and preset
radio stations.
For more information, seeDefensive Driving on
page 4-2.Notice:Contact your dealer/retailer before adding
any equipment.
Adding audio or communication equipment could
interfere with the operation of the vehicle’s engine,
radio, or other systems, and could damage them.
Follow federal rules covering mobile radio and
telephone equipment.
The vehicle has Retained Accessory Power (RAP).
With RAP, the audio system can be played even after
the ignition is turned off. SeeRetained Accessory Power
(RAP) on page 2-23for more information.
Setting the Clock
To set the clock:
1. Press and hold H until the correct hour displays.
2. Press and hold M until the correct minute displays.
3. Press the tune knob to select between the 12 or
24 hour display format.
The clock mode automatically times out with the
changed display format set as the current default setting.
3-80
Page 422 of 434

Audio System.................................................3-80
Audio Steering Wheel Controls....................3-106
Diversity Antenna System............................3-108
Navigation/Radio System,
see Navigation Manual..............................3-95
Radio Reception........................................3-108
Setting the Clock.........................................3-80
Theft-Deterrent Feature...............................3-106
XM™ Satellite Radio Antenna System...........3-108
Audio System(s).............................................3-81
Automatic Door Lock.......................................2-12
Automatic Transmission
Fluid..........................................................5-30
Operation...................................................2-26
B
Battery..........................................................5-50
Exterior Lighting Battery Saver......................3-17
Run-Down Protection...................................3-18
Bluetooth
®.....................................................3-96
Boost Gage...................................................3-49
Brake
Emergencies................................................ 4-6
Brake Fluid....................................................5-44
Brakes..........................................................5-44
System Warning Light..................................3-38
Braking........................................................... 4-4
Braking in Emergencies..................................... 4-6Break-In, New Vehicle.....................................2-21
Bulb Replacement...........................................5-56
Halogen Bulbs............................................5-57
Headlamp Aiming........................................5-56
Headlamps, Front Turn Signal,
and Parking Lamps..................................5-57
High Intensity Discharge (HID) Lighting...........5-56
Replacement Bulbs......................................5-59
Taillamps, Turn Signal, and Stoplamps............5-59
Buying New Tires...........................................5-78
C
Calibration.....................................................2-37
California Fuel.................................................. 5-7
California Perchlorate Materials Requirements....... 5-4
California Proposition 65 Warning....................... 5-4
Canadian Owners................................................ ii
Capacities and Speci�cations..........................5-110
Carbon Monoxide...........................2-13, 2-35, 4-19
Care of
Safety Belts................................................5-95
Cargo Cover..................................................2-53
CD, MP3 .......................................................3-92
Center Console Storage Area...........................2-51
Chains, Tire...................................................5-85
Check
Engine Lamp..............................................3-42
Checking Things Under the Hood......................5-12
2