2009 CHEVROLET COBALT instrument panel
[x] Cancel search: instrument panelPage 69 of 402

If you ever pull the shoulder portion of the belt out all
the way, you will engage the child restraint locking
feature. This may unintentionally cause the passenger
sensing system to turn the airbag(s) off for some
adult size occupants. If this happens, just let the belt go
back all the way and start again.
{CAUTION:
If the airbag readiness light in the instrument
panel cluster ever comes on and stays on,
it means that something may be wrong with
the airbag system. If this ever happens, have
the vehicle serviced promptly, because an
adult-size person sitting in the right front
passenger’s seat may not have the protection
of the airbag(s). SeeAirbag Readiness Light
on page 3-27for more on this, including
important safety information.A thick layer of additional material, such as a blanket
or cushion, or aftermarket equipment such as seat
covers, seat heaters, and seat massagers can affect
how well the passenger sensing system operates.
We recommend that you not use seat covers or other
aftermarket equipment other than any that GM has
approved for your speci�c vehicle. SeeAdding
Equipment to Your Airbag-Equipped Vehicle on
page 1-66for more information about modi�cations
that can affect how the system operates.
{CAUTION:
Stowing of articles under the passenger’s seat
or between the passenger’s seat cushion and
seatback may interfere with the proper
operation of the passenger sensing system.
1-65
Page 70 of 402

Servicing Your Airbag-Equipped
Vehicle
Airbags affect how your vehicle should be serviced.
There are parts of the airbag system in several places
around your vehicle. Your dealer/retailer and the service
manual have information about servicing your vehicle
and the airbag system. To purchase a service manual,
seeService Publications Ordering Information on
page 7-16.
{CAUTION:
For up to 10 seconds after the ignition is
turned off and the battery is disconnected, an
airbag can still in�ate during improper service.
You can be injured if you are close to an
airbag when it in�ates. Avoid yellow
connectors. They are probably part of the
airbag system. Be sure to follow proper
service procedures, and make sure the person
performing work for you is quali�ed to do so.
Adding Equipment to Your
Airbag-Equipped Vehicle
Q:Is there anything I might add to or change
about the vehicle that could keep the airbags
from working properly?
A:Yes. If you add things that change your vehicle’s
frame, bumper system, height, front end or side
sheet metal, they may keep the airbag system from
working properly. Changing or moving any parts
of the front seats, safety belts, the airbag sensing
and diagnostic module, steering wheel, instrument
panel, roof-rail airbag modules, ceiling headliner
or pillar garnish trim, front sensors, or airbag wiring
can affect the operation of the airbag system.
In addition, your vehicle has a passenger sensing
system for the right front passenger’s position,
which includes sensors that are part of the
passenger’s seat. The passenger sensing system
may not operate properly if the original seat
trim is replaced with non-GM covers, upholstery
1-66
Page 87 of 402

Lockout Protection
If your vehicle has power door locks, it will have this
feature. If you press the power door lock switch
when the key is in the ignition and any door is open,
all the doors will lock and the driver’s door will unlock.
Be sure to remove the key from the ignition when
locking your vehicle.
The lockout protection can be overridden by pressing
and holding the power door lock in the lock position
for three seconds.
Trunk
To release the trunk lid from the outside, use the key
or the remote keyless entry transmitter, if equipped.
{CAUTION:
It can be dangerous to drive with the trunk lid
open because carbon monoxide (CO) gas can
come into your vehicle. You cannot see or
smell CO. It can cause unconsciousness and
even death. If you must drive with the trunk lid
open or if electrical wiring or other cable
connections must pass through the seal
between the body and the trunk lid:
Make sure all other windows are shut.
Turn the fan on your heating or cooling
system to its highest speed and select
the control setting that will force outside
air into your vehicle. See Climate
Control System.
If you have air outlets on or under the
instrument panel, open them all the way.
SeeEngine Exhaust on page 2-36.
2-13
Page 88 of 402

Remote Trunk Release
To open the trunk from
inside the vehicle, press
the remote trunk release
button located inside
the driver’s storage
compartment located on
the lower left side of
the instrument panel.
SeeInstrument Panel Overview on page 3-4or
Driver’s Storage Compartment on page 2-43.
The remote trunk release works when the ignition
is either off or in ACC/ACCESSORY, or the vehicle
speed is less than 2 mph (3 km/h).
Emergency Trunk Release Handle
Notice:Do not use the emergency trunk release
handle as a tie-down or anchor point when securing
items in the trunk as it could damage the handle.
The emergency trunk release handle is only
intended to aid a person trapped in a latched trunk,
enabling them to open the trunk from the inside.
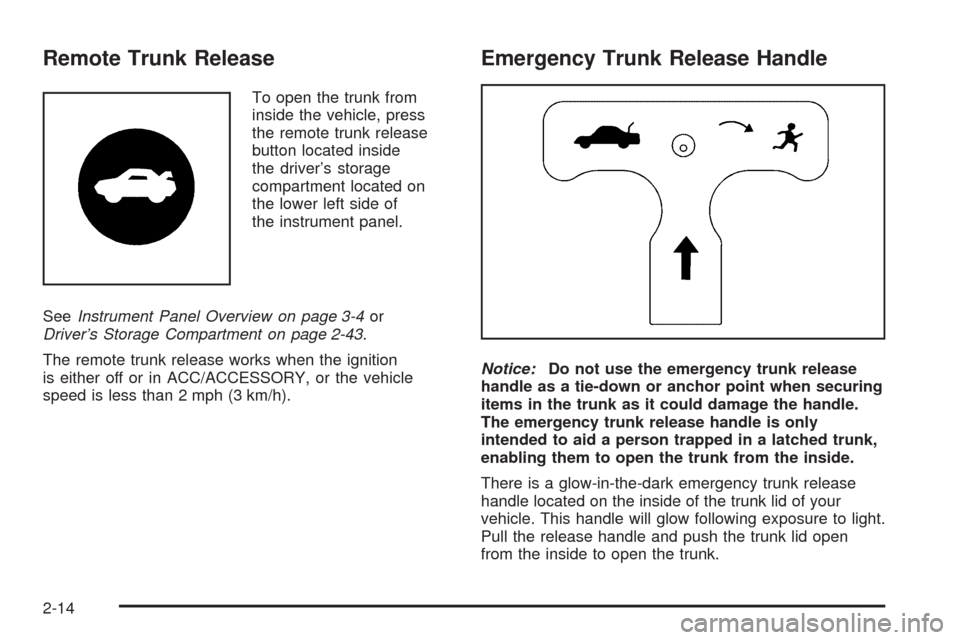
There is a glow-in-the-dark emergency trunk release
handle located on the inside of the trunk lid of your
vehicle. This handle will glow following exposure to light.
Pull the release handle and push the trunk lid open
from the inside to open the trunk.
2-14
Page 92 of 402

Theft-Deterrent Systems
Vehicle theft is big business, especially in some cities.
Although your vehicle has a number of theft-deterrent
features, we know that nothing we put on it can make
it impossible to steal.
Content Theft-Deterrent
Your vehicle may have
a content theft-deterrent
alarm system.
Arming the System
With the ignition off, you can arm the system by pressing
the remote keyless entry transmitter lock button.
The system will arm after either of these things occur:
Thirty seconds after all the doors are closed.
Sixty seconds with any door open.
If you press the lock button on the transmitter a second
time while all the doors are closed, the system will
arm immediately. The system will still arm in 60 seconds
if a door is open. When the open door is closed, it will
also become armed.The security light, located on the instrument panel cluster,
will turn on to indicate that arming has been initiated.
Once the system is armed, the security light will �ash
once every three seconds.
If the security light is �ashing twice per second, this
means that a door is open.
If you do not want to arm the system, you may lock the
car with the manual lock knobs on the doors.
Disarming the System
You can disarm the system by doing any one of the
following:
Press the remote keyless entry transmitter
unlock button.
Turn the ignition on.
If the system is armed and the trunk is opened using
the trunk release button on the transmitter, the system
will temporarily disarm itself and re-arm when the
trunk has been closed. This allows you to exit the
vehicle, lock the doors using the transmitter, and open
the trunk using the transmitter without having to
disarm and re-arm the system.
Once the system is disarmed, the security light will
stop �ashing.
2-18
Page 117 of 402

Your Responsibility
Increase the radio volume if you cannot hear the
OnStar advisor. If the light next to the OnStar buttons
is red, this means that your system is not functioning
properly and should be checked by your dealer/retailer.
If the light appears clear (no light is appearing), your
OnStar subscription has expired. You can always
press the OnStar button to con�rm that your
OnStar equipment is active.
Storage Areas
Glove Box
To open the glove box, lift up on the lever.
Cupholder(s)
There are two cupholders located at the front of
the center console, in front of the shift lever. These
cupholders have a black rubber liner that can be
removed for cleaning or to accommodate larger cup
sizes. There are also cupholders for the rear seat
passengers located at the rear of the center console.
Center Console Storage
Your vehicle may have a center console armrest with
storage area. Use the lever on the front of the console
to open it.
Driver’s Storage Compartment
The driver’s storage compartment is located near
the left side of the steering column on the bottom of
the instrument panel. Pull the cover down to open.
Convenience Net
Your vehicle may have a convenience net in the
rear of the vehicle. Store small loads as far forward
as possible. The net should not be used to store
heavy loads.
2-43
Page 119 of 402

Instrument Panel Overview...............................3-4
Hazard Warning Flashers................................3-6
Other Warning Devices...................................3-6
Horn.............................................................3-6
Tilt Wheel.....................................................3-6
Turn Signal/Multifunction Lever.........................3-7
Turn and Lane-Change Signals........................3-7
Headlamp High/Low-Beam Changer..................3-8
Flash-to-Pass.................................................3-8
Windshield Wipers..........................................3-8
Windshield Washer.........................................3-9
Cruise Control..............................................3-10
Headlamps..................................................3-12
Wiper Activated Headlamps............................3-13
Headlamps on Reminder................................3-13
Daytime Running Lamps (DRL).......................3-13
Fog Lamps..................................................3-14
Instrument Panel Brightness...........................3-14
Dome Lamp.................................................3-15Entry/Exit Lighting.........................................3-15
Mirror Reading Lamps...................................3-15
Electric Power Management...........................3-15
Battery Run-Down Protection..........................3-16
Accessory Power Outlet(s).............................3-16
Ashtray(s) and Cigarette Lighter......................3-17
Climate Controls............................................3-18
Climate Control System.................................3-18
Outlet Adjustment.........................................3-21
Passenger Compartment Air Filter...................3-21
Warning Lights, Gages, and Indicators............3-23
Instrument Panel Cluster................................3-24
Speedometer and Odometer...........................3-25
Tachometer.................................................3-25
Safety Belt Reminders...................................3-26
Airbag Readiness Light..................................3-27
Passenger Airbag Status Indicator...................3-28
Charging System Light..................................3-30
Up-Shift Light...............................................3-30
Section 3 Instrument Panel
3-1
Page 120 of 402

Brake System Warning Light..........................3-31
Anti-lock Brake System (ABS) Warning Light. . . .3-32
Enhanced Traction System Indicator/
Warning Light...........................................3-32
Electronic Stability Control (ESC)/Traction
Control System (TCS) Indicator/
Warning Light...........................................3-33
Engine Coolant Temperature Warning Light......3-34
Tire Pressure Light.......................................3-34
Malfunction Indicator Lamp.............................3-35
Oil Pressure Light.........................................3-38
Security Light...............................................3-38
Fog Lamp Light............................................3-39
Highbeam On Light.......................................3-39
Fuel Gage...................................................3-39Driver Information Center (DIC).......................3-40
DIC Operation and Displays...........................3-40
DIC Warnings and Messages.........................3-43
DIC Vehicle Personalization............................3-48
Audio System(s).............................................3-54
Setting the Clock..........................................3-55
Radio(s)......................................................3-58
Using an MP3..............................................3-69
XM Radio Messages.....................................3-74
Theft-Deterrent Feature..................................3-75
Audio Steering Wheel Controls.......................3-76
Radio Reception...........................................3-76
Fixed Mast Antenna......................................3-77
XM™ Satellite Radio Antenna System.............3-77
Section 3 Instrument Panel
3-2