2009 CHEVROLET AVALANCHE light
[x] Cancel search: lightPage 358 of 550
6. Use an adequate clamping device designed for
towing to ensure that the front wheels are locked
into the straight position.
{CAUTION:
Shifting a four-wheel-drive vehicle’s transfer case
into N (Neutral) can cause the vehicle to roll even
if the transmission is in P (Park). The driver or
others could be injured. Make sure the parking
brake is �rmly set before the transfer case is
shifted to N (Neutral).
7. Shift the transfer case to N (Neutral). See “Shifting
into Neutral” underFour-Wheel Drive on page 2-43
for the proper procedure to select the neutral
position for the vehicle.
8. Turn the ignition to LOCK/OFF.
After towing, see “Shifting Out of Neutral” under
Four-Wheel Drive on page 2-43.
Level Control
Automatic Level Control
The automatic level control rear suspension is available
on light-duty vehicles and comes as a part of the
Autoride
®suspension, if equipped.
This type of level control is fully automatic and will
provide a better leveled riding position as well as better
handling under a variety of passenger and loading
conditions. An air compressor connected to the rear
shocks will raise or lower the rear of the vehicle
to maintain proper vehicle height. The system is
activated when the ignition key is turned to ON/RUN
and will automatically adjust vehicle height thereafter.
The system may exhaust (lower vehicle height) for up to
ten minutes after the ignition key has been turned off.
You may hear the air compressor operating when
the height is being adjusted.
If a weight-distributing hitch is being used, it is
recommended to allow the shocks to in�ate, thereby
leveling the vehicle prior to adjusting the hitch.
4-46
Page 366 of 550
Tow/Haul Mode
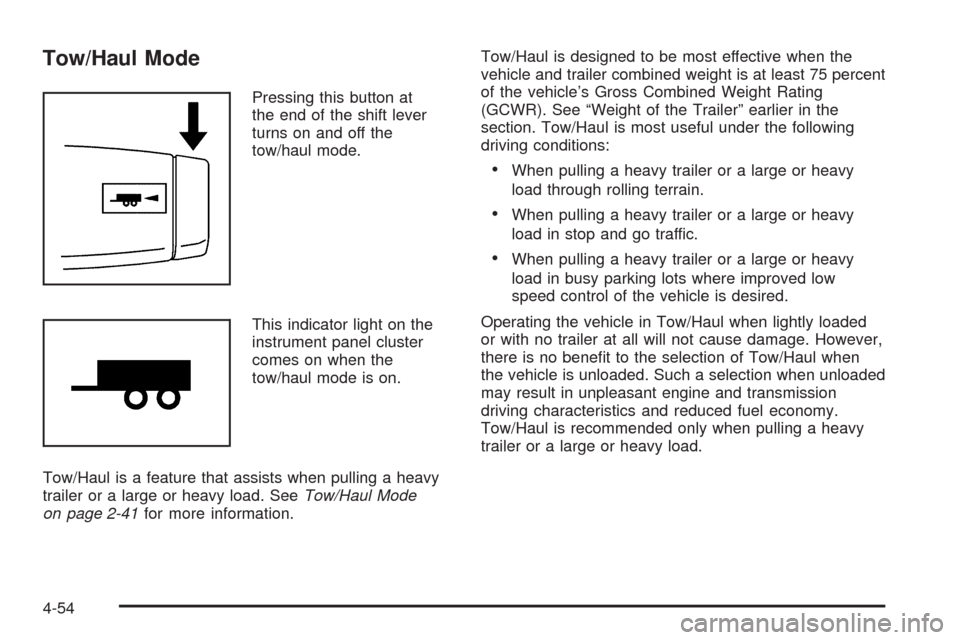
Pressing this button at
the end of the shift lever
turns on and off the
tow/haul mode.
This indicator light on the
instrument panel cluster
comes on when the
tow/haul mode is on.
Tow/Haul is a feature that assists when pulling a heavy
trailer or a large or heavy load. SeeTow/Haul Mode
on page 2-41for more information.Tow/Haul is designed to be most effective when the
vehicle and trailer combined weight is at least 75 percent
of the vehicle’s Gross Combined Weight Rating
(GCWR). See “Weight of the Trailer” earlier in the
section. Tow/Haul is most useful under the following
driving conditions:
When pulling a heavy trailer or a large or heavy
load through rolling terrain.
When pulling a heavy trailer or a large or heavy
load in stop and go traffic.
When pulling a heavy trailer or a large or heavy
load in busy parking lots where improved low
speed control of the vehicle is desired.
Operating the vehicle in Tow/Haul when lightly loaded
or with no trailer at all will not cause damage. However,
there is no bene�t to the selection of Tow/Haul when
the vehicle is unloaded. Such a selection when unloaded
may result in unpleasant engine and transmission
driving characteristics and reduced fuel economy.
Tow/Haul is recommended only when pulling a heavy
trailer or a large or heavy load.
4-54
Page 378 of 550

Trailer Wiring Harness
Heavy-Duty Trailer Wiring Harness
Package
Your vehicle is equipped with the seven-wire trailer
towing harness. This harness with a seven-pin universal
heavy-duty trailer connector is attached to the rear
bumper beam. It is located next to the integrated trailer
hitch.The seven-wire harness contains the following trailer
circuits:
Yellow: Left Stop/Turn Signal
Dark Green: Right Stop/Turn Signal
Brown: Taillamps
White: Ground
Light Green: Back-up Lamps
Red: Battery Feed*
Dark Blue: Trailer Brake*
*The fuses for these two circuits are installed in the
underhood electrical center, but the wires are not
connected. They should be connected by your
dealer/retailer or a quali�ed service center.
If charging a remote (non-vehicle) battery, press the
Tow/Haul mode button, if equipped, located at the end
of the shift lever. This will boost the vehicle system
voltage and properly charge the battery. If the trailer is
too light for Tow/Haul mode, or the vehicle is not
equipped with Tow/Haul, turn on the headlamps as a
second way to boost the vehicle system and charge the
battery.
4-66
Page 379 of 550
Electric Brake Control Wiring
Provisions
These wiring provisions are included with the vehicle as
part of the trailer wiring package. These provisions
are for an electric brake controller. The instrument panel
contains blunt cut wires near the data link connector
for the trailer brake controller. The harness contains the
following wires:
Dark Blue: Brake Signal to Trailer Connector
Red/Black: Battery
Light Blue/White: Brake Switch
White: Ground
It should be installed by your dealer/retailer or a
quali�ed service center.
If the vehicle is equipped with an ITBC, the blunt cuts
exist, but are not connected further in the harness. If an
aftermarket trailer brake controller is installed, the
ITBC must be disconnected. Do not power both ITBC
and aftermarket controllers to control the trailer brakes at
the same time.
Trailer Recommendations
Subtract the hitch loads from the Cargo Weight Rating
(CWR). CWR is the maximum weight of the load
the vehicle can carry. It does not include the weight of
the people inside, but you can �gure about 150 lbs.
(68 kg) for each passenger. The total cargo load must
not be more than the vehicles CWR.
Weigh the vehicle with the trailer attached, so the
GVWR or GAWR are not exceeded. If using a
weight-distributing hitch, weigh the vehicle without the
spring bars in place.
The best performance is obtained by correctly spreading
out the weight of the load and choosing the correct
hitch and trailer brakes.
For more information seeTowing a Trailer on page 4-47.
4-67
Page 391 of 550

{CAUTION:
Fuel can spray out on you if you open the fuel cap
too quickly. If you spill fuel and then something
ignites it, you could be badly burned. This spray
can happen if the tank is nearly full, and is more
likely in hot weather. Open the fuel cap slowly and
wait for any hiss noise to stop. Then unscrew the
cap all the way.
Be careful not to spill fuel. Do not top off or over�ll the
tank and wait a few seconds after you have �nished
pumping before removing the nozzle. Clean fuel
from painted surfaces as soon as possible. See
Washing Your Vehicle on page 5-103.
When replacing the fuel cap, insert the tether in its hole
before tightening the cap. Turn the fuel cap clockwise
until it clicks. It will require more effort to turn the
fuel cap on the last turn as you tighten it. Make sure the
cap is fully installed. The diagnostic system can
determine if the fuel cap has been left off or improperly
installed. This would allow fuel to evaporate into the
atmosphere. SeeMalfunction Indicator Lamp on
page 3-39.The TIGHTEN GAS CAP message displays on the
Driver Information Center (DIC) if the fuel cap is
not properly installed. SeeDIC Warnings and Messages
on page 3-58for more information.
{CAUTION:
If a �re starts while you are refueling, do not
remove the nozzle. Shut off the �ow of fuel by
shutting off the pump or by notifying the station
attendant. Leave the area immediately.
Notice:If you need a new fuel cap, be sure to get
the right type. Your dealer/retailer can get one
for you. If you get the wrong type, it may not �t
properly. This may cause the malfunction indicator
lamp to light and may damage the fuel tank and
emissions system. SeeMalfunction Indicator Lamp
on page 3-39.
5-11
Page 399 of 550
Always reset the engine oil life to 100% after every oil
change. It will not reset itself. To reset the Engine
Oil Life System:
1. Display the OIL LIFE REMAINING on the DIC. If
the vehicle does not have DIC buttons, the vehicle
must be in P (Park) to access this display. See
DIC Operation and Displays (With DIC Buttons) on
page 3-46orDIC Operation and Displays (Without
DIC Buttons) on page 3-52.
2. Press and hold the SET/RESET button on the DIC,
or the trip odometer reset stem if the vehicle does
not have DIC buttons, for more than �ve seconds.
The oil life will change to 100%.
If the CHANGE ENGINE OIL SOON message comes
back on when the vehicle is started, the Engine Oil Life
System has not reset. Repeat the procedure.
What to Do with Used Oil
Used engine oil contains certain elements that can be
unhealthy for your skin and could even cause cancer.
Do not let used oil stay on your skin for very long. Clean
your skin and nails with soap and water, or a good
hand cleaner. Wash or properly dispose of clothing or
rags containing used engine oil. See the manufacturer’s
warnings about the use and disposal of oil products.Used oil can be a threat to the environment. If you
change your own oil, be sure to drain all the oil from the
�lter before disposal. Never dispose of oil by putting it
in the trash, pouring it on the ground, into sewers, or into
streams or bodies of water. Recycle it by taking it to a
place that collects used oil.
Engine Air Cleaner/Filter
SeeEngine Compartment Overview on page 5-14for
the location of the engine air cleaner/�lter.
Inspect the air cleaner/�lter at the MaintenanceII
intervals and replace it at the �rst oil change after each
50,000 mile (80 000 km) interval. SeeScheduled
Maintenance on page 6-4for more information. If driving
on dusty/dirty conditions, inspect the �lter at each
engine oil change.
How to Inspect the Engine Air
Cleaner/Filter
To inspect the air cleaner/�lter, remove the engine air
cleaner/�lter from the vehicle by following Steps 1
through 6. When the engine air cleaner/�lter is removed,
lightly shake it to release loose dust and dirt. If the
engine air cleaner/�lter remains caked with dirt, a new
�lter is required.
5-19
Page 416 of 550

Brakes
Brake Fluid
The brake master cylinder
reservoir is �lled with
DOT-3 brake �uid. See
Engine Compartment
Overview on page 5-14for
the location of the
reservoir.
There are only two reasons why the brake �uid level in
the reservoir might go down:
The brake �uid level goes down because of normal
brake lining wear. When new linings are installed,
the �uid level goes back up.
A �uid leak in the brake hydraulic system can also
cause a low �uid level. Have the brake hydraulic
system �xed, since a leak means that sooner
or later the brakes will not work well.Do not top off the brake �uid. Adding �uid does not
correct a leak. If �uid is added when the linings
are worn, there will be too much �uid when new brake
linings are installed. Add or remove brake �uid, as
necessary, only when work is done on the brake
hydraulic system.
{CAUTION:
If too much brake �uid is added, it can spill on the
engine and burn, if the engine is hot enough. You
or others could be burned, and the vehicle could
be damaged. Add brake �uid only when work is
done on the brake hydraulic system. See
“Checking Brake Fluid” in this section.
When the brake �uid falls to a low level, the brake
warning light comes on. SeeBrake System Warning
Light on page 3-36.
Refer to the Maintenance Schedule to determine when
to check the brake �uid. SeeScheduled Maintenance
on page 6-4.
5-36
Page 418 of 550
Brake Wear
This vehicle has disc brakes. Disc brake pads have
built-in wear indicators that make a high-pitched warning
sound when the brake pads are worn and new pads
are needed. The sound can come and go or be heard all
the time the vehicle is moving, except when applying
the brake pedal �rmly.
{CAUTION:
The brake wear warning sound means that soon
the brakes will not work well. That could lead to an
accident. When the brake wear warning sound is
heard, have the vehicle serviced.
Notice:Continuing to drive with worn-out brake
pads could result in costly brake repair.
Some driving conditions or climates can cause a brake
squeal when the brakes are �rst applied or lightly
applied. This does not mean something is wrong with
the brakes.Properly torqued wheel nuts are necessary to help
prevent brake pulsation. When tires are rotated, inspect
brake pads for wear and evenly tighten wheel nuts in
the proper sequence to torque speci�cations in
Capacities and Speci�cations on page 5-116.
Brake linings should always be replaced as complete
axle sets.
Brake Pedal Travel
See your dealer/retailer if the brake pedal does not
return to normal height, or if there is a rapid increase in
pedal travel. This could be a sign that brake service
might be required.
Brake Adjustment
Every brake stop, the disc brakes adjust for wear.
5-38