2009 CADILLAC CTS seat adjustment
[x] Cancel search: seat adjustmentPage 12 of 490

The vertical control is used for reclining the seatback.
See “Power Reclining Seatbacks” underReclining
Seatbacks on page 1-10for more information.
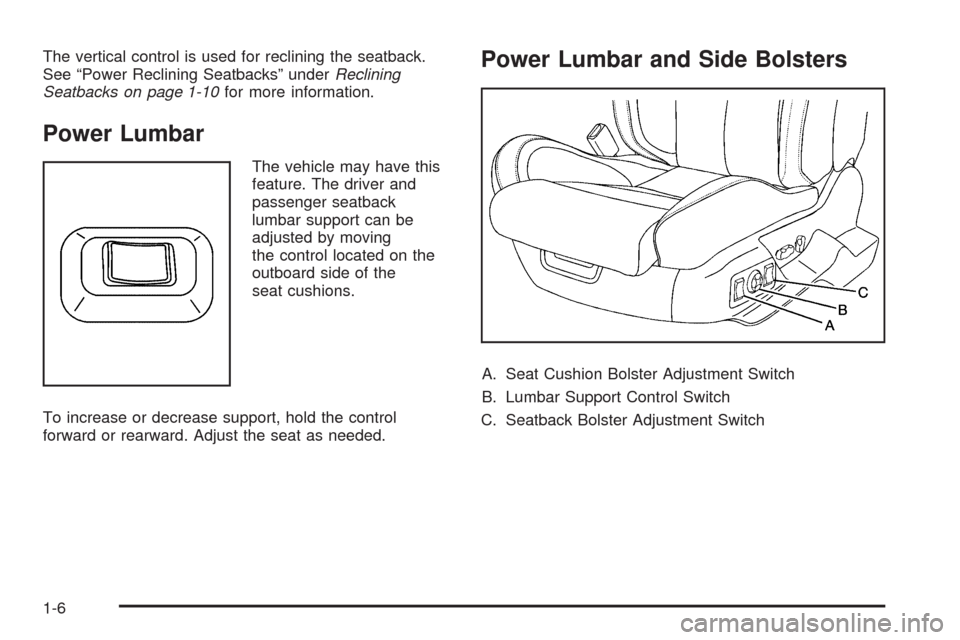
Power Lumbar
The vehicle may have this
feature. The driver and
passenger seatback
lumbar support can be
adjusted by moving
the control located on the
outboard side of the
seat cushions.
To increase or decrease support, hold the control
forward or rearward. Adjust the seat as needed.
Power Lumbar and Side Bolsters
A. Seat Cushion Bolster Adjustment Switch
B. Lumbar Support Control Switch
C. Seatback Bolster Adjustment Switch
1-6
Page 15 of 490

On vehicles with the Keyless Access System, automatic
adjustment occurs when the driver door is opened.
See “MEMORY SEAT RECALL” underDIC Vehicle
Customization on page 3-72for more information.
To stop recall movement of the memory feature at any
time, press one of the power seat controls, memory
buttons, power tilt wheel control, or power mirror
buttons.
If something has blocked the driver seat or the steering
column while recalling a memory position, the recall
may stop. Remove the obstruction, then press the
appropriate control for the area that is not recalling for
two seconds. Try recalling the memory position again by
pressing the appropriate memory button. If the memory
position is still not recalling, see your dealer/retailer
for service.Easy Exit Recall
S
:With the vehicle in P (Park) for an automatic
transmission or the parking brake applied for a manual
transmission, press the exit button to recall the exit
position.
If the easy exit seat feature is on in the DIC, automatic
seat and power telescopic steering column movement
occurs when the key is removed from the ignition.
On vehicles with the Keyless Access System, automatic
adjustment occurs when the ignition is turned to OFF
and the driver door is opened.
A single beep sounds. The driver seat moves back, and
if the vehicle has the power tilt wheel and telescopic
steering feature, it moves up and forward.
See “EASY EXIT RECALL” underDIC Vehicle
Customization on page 3-72for more information.
For more programming information, seeDIC Vehicle
Customization on page 3-72.
1-9
Page 34 of 490

Lap-Shoulder Belt
All seating positions in the vehicle have a
lap-shoulder belt.
The following instructions explain how to wear a
lap-shoulder belt properly.
1. Adjust the seat, if the seat is adjustable, so you can
sit up straight. To see how, see “Seats” in the
Index.
2. Pick up the latch plate and pull the belt across you.
Do not let it get twisted.
The lap-shoulder belt may lock if you pull the belt
across you very quickly. If this happens, let the belt
go back slightly to unlock it. Then pull the belt
across you more slowly.
If the shoulder portion of a passenger belt is pulled
out all the way, the child restraint locking feature
may be engaged. If this happens, let the belt go
back all the way and start again.3. Push the latch plate into the buckle until it clicks.
Pull up on the latch plate to make sure it is secure.
If the belt is not long enough, seeSafety Belt
Extender on page 1-33.
Position the release button on the buckle so that
the safety belt could be quickly unbuckled if
necessary.
4. If equipped with a shoulder belt height adjuster,
move it to the height that is right for you. See
“Shoulder Belt Height Adjustment” later in this
section for use and important safety information.
1-28
Page 36 of 490

Shoulder Belt Height Adjuster
The vehicle has a shoulder belt height adjuster for the
driver and right front passenger seating positions.
Adjust the height so that the shoulder portion of the belt
is centered on the shoulder. The belt should be away
from the face and neck, but not falling off the shoulder.
Improper shoulder belt height adjustment could
reduce the effectiveness of the safety belt in a crash.
Push down on the release
button (A) and move
the height adjuster to
the desired position.
The adjuster can be moved
up by pushing up on the
shoulder belt guide.
After the height adjuster is set to the desired position,
try to move it down without pressing the release
button to make sure it has locked into position.
Safety Belt Pretensioners
This vehicle has safety belt pretensioners for
front outboard occupants. Although the safety belt
pretensioners cannot be seen, they are part of the
safety belt assembly. They can help tighten the safety
belts during the early stages of a moderate to severe
frontal or near frontal crash if the threshold conditions for
pretensioner activation are met. And, if the vehicle has
side impact airbags, safety belt pretensioners can help
tighten the safety belts in a side or rear crash.
Pretensioners work only once. If the pretensioners
activate in a crash, They will need to be replaced,
and probably other new parts for the vehicle’s safety
belt system. SeeReplacing Restraint System Parts After
a Crash on page 1-75.
1-30
Page 153 of 490

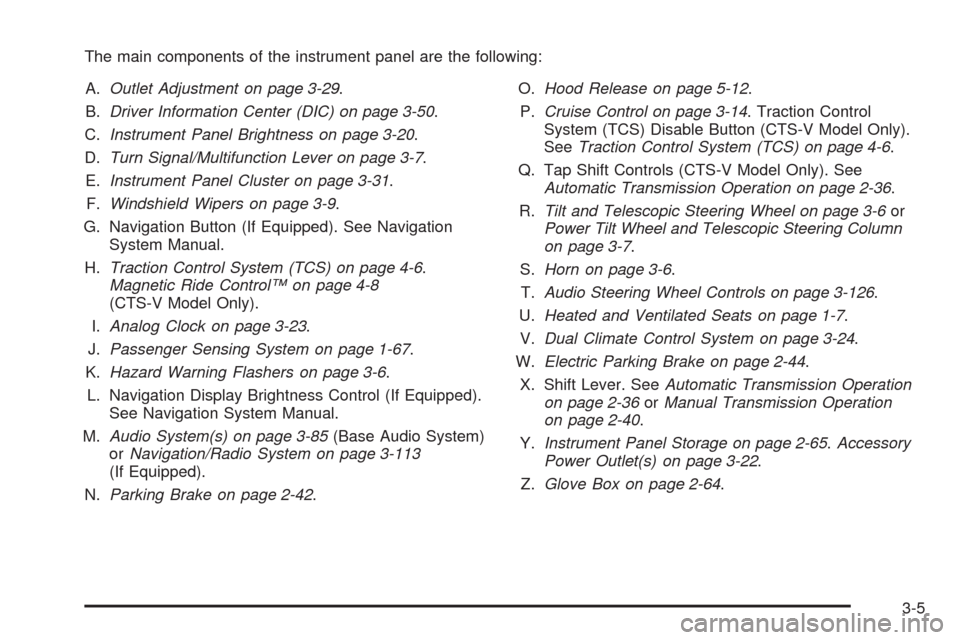
The main components of the instrument panel are the following:
A.Outlet Adjustment on page 3-29.
B.Driver Information Center (DIC) on page 3-50.
C.Instrument Panel Brightness on page 3-20.
D.Turn Signal/Multifunction Lever on page 3-7.
E.Instrument Panel Cluster on page 3-31.
F.Windshield Wipers on page 3-9.
G. Navigation Button (If Equipped). See Navigation
System Manual.
H.Traction Control System (TCS) on page 4-6.
Magnetic Ride Control™ on page 4-8
(CTS-V Model Only).
I.Analog Clock on page 3-23.
J.Passenger Sensing System on page 1-67.
K.Hazard Warning Flashers on page 3-6.
L. Navigation Display Brightness Control (If Equipped).
See Navigation System Manual.
M.Audio System(s) on page 3-85(Base Audio System)
orNavigation/Radio System on page 3-113
(If Equipped).
N.Parking Brake on page 2-42.O.Hood Release on page 5-12.
P.Cruise Control on page 3-14. Traction Control
System (TCS) Disable Button (CTS-V Model Only).
SeeTraction Control System (TCS) on page 4-6.
Q. Tap Shift Controls (CTS-V Model Only). See
Automatic Transmission Operation on page 2-36.
R.Tilt and Telescopic Steering Wheel on page 3-6or
Power Tilt Wheel and Telescopic Steering Column
on page 3-7.
S.Horn on page 3-6.
T.Audio Steering Wheel Controls on page 3-126.
U.Heated and Ventilated Seats on page 1-7.
V.Dual Climate Control System on page 3-24.
W.Electric Parking Brake on page 2-44.
X. Shift Lever. SeeAutomatic Transmission Operation
on page 2-36orManual Transmission Operation
on page 2-40.
Y.Instrument Panel Storage on page 2-65.Accessory
Power Outlet(s) on page 3-22.
Z.Glove Box on page 2-64.
3-5
Page 177 of 490

The climate control system uses the information from
these sensors to adjust the fan speed and the air
delivery, in order to maintain the selected temperature.
The system may also supply cooler air to the side of
the vehicle facing the sun. The recirculation mode
will also be activated, as necessary.
Do not cover the sensors or the automatic climate
control system will not work properly.
Outlet Adjustment
Use the air outlets located in the center and on the side
of the instrument panel to direct the air�ow. Use the
thumbwheels near the air outlets to open or close off the
air�ow.
Operation Tips
Clear away any ice, snow, or leaves from air inlets
at the base of the windshield that could block the
�ow of air into the vehicle.
Keep the path under the front seats clear of objects
to help circulate the air inside of the vehicle more
effectively.
Use of non-GM approved hood de�ectors can
adversely affect the performance of the system.
Check with your dealer/retailer before adding
equipment to the outside of the vehicle.
Passenger Compartment Air Filter
The passenger compartment air �lter traps most of
the dust and pollen from the air entering the vehicle.
The �lter will need to be changed periodically.
SeeScheduled Maintenance on page 6-4.
Using the climate control system without the passenger
air �lter installed could let water or other debris enter
the system. This could cause a water leak or noises.
Make sure a new air �lter is installed after removing the
old one.
The passenger compartment air �lter is located under
the hood below the windshield wiper arm and the screen
on the passenger side of the vehicle. SeeEngine
Compartment Overview on page 5-14for more
information on location.
3-29
Page 479 of 490

Chemical Paint Spotting.................................5-113
Child Restraints
Child Restraint Systems...............................1-41
Infants and Young Children...........................1-37
Lower Anchors and Tethers for Children..........1-45
Older Children.............................................1-34
Securing a Child Restraint in a
Rear Seat Position...................................1-51
Securing a Child Restraint in the
Right Front Seat Position..........................1-54
Where to Put the Restraint...........................1-44
Cigarette Lighter.............................................3-23
Cleaning
Aluminum or Chrome-Plated Wheels.............5-112
Exterior Lamps/Lenses................................5-110
Fabric/Carpet............................................5-107
Finish Care...............................................5-110
Instrument Panel, Vinyl, and Other
Plastic Surfaces.....................................5-108
Interior.....................................................5-106
Leather....................................................5-108
Speaker Covers.........................................5-109
Tires........................................................5-113
Underbody Maintenance.............................5-113
Washing Your Vehicle.................................5-110
Weatherstrips............................................5-109
Windshield and Wiper Blades......................5-111
Wood Panels............................................5-109Climate Control System
Air Filter, Passenger Compartment.................3-29
Dual ..........................................................3-24
Outlet Adjustment........................................3-29
Clock............................................................3-23
Clutch, Hydraulic.............................................5-30
Collision Damage Repair..................................7-11
Compact Spare Tire......................................5-105
Compass.......................................................3-56
Competitive Driving.........................................4-13
Compressor Kit
Storing.......................................................5-95
Compressor Kit, Tire Sealant............................5-86
Control of a Vehicle.......................................... 4-3
Convenience Net............................................2-65
Coolant
Engine.......................................................5-32
Engine Temperature Gage............................3-42
Engine Temperature Warning Light.................3-41
Surge Tank Pressure Cap.............................5-37
Cooling System..............................................5-31
Cruise Control................................................3-14
Cruise Control Light........................................3-48
Cupholders....................................................2-64
Customer Assistance Information
Courtesy Transportation................................7-10
Customer Assistance for
Text Telephone (TTY) Users........................ 7-6
3
Page 490 of 490

V
Vehicle
Control........................................................ 4-3
Loading......................................................4-20
Parking Your...............................................2-49
Running While Parked..................................2-51
Symbols......................................................... iv
Vehicle Customization, DIC..............................3-72
Vehicle Data Recording and Privacy..................7-16
Vehicle Identi�cation
Number (VIN)............................................5-114
Service Parts Identi�cation Label..................5-114
Vehicle, Remote Start......................................2-14
Ventilated Seats............................................... 1-7
Ventilation Adjustment......................................3-29
Visors...........................................................2-25
W
Warning Lights, Gages, and Indicators...............3-30
Warnings
DIC Warnings and Messages........................3-58
Hazard Warning Flashers............................... 3-6
Safety and Symbols......................................... iv
Washer, Headlamps........................................3-13Wheels
Alignment and Tire Balance..........................5-82
Different Size..............................................5-80
Replacement...............................................5-82
Where to Put the Restraint...............................1-44
Windows.......................................................2-22
Power ........................................................2-23
Windshield
Rainsense™ Wipers.....................................3-10
Washer......................................................3-12
Washer Fluid..............................................5-41
Wiper Blade Replacement.............................5-59
Wiper Blades, Cleaning..............................5-111
Wiper Fuses.............................................5-115
Wipers......................................................... 3-9
Winter Driving................................................4-17
Winter Tires...................................................5-62
Wiper Activated Headlamps..............................3-17X
XM Radio Messages.....................................3-112
XM™ Satellite Radio Antenna System..............3-128
Y
Your Vehicle and the Environment....................... 6-2
14