2009 BMW Z4 SDRIVE30I ROADSTER warning
[x] Cancel search: warningPage 79 of 248
Controls
77Reference
At a glance
Driving tips
Communications
Navigation
Entertainment
Mobility
Technology for driving comfort and safety
Park Distance Control PDC*
The concept
The PDC assists you with maneuvering in tight
parking spaces. Acoustic signals and a visual
indicator
warn you of the presence of an object
in front of
* or behind your ve hicle. To measure
the distance, there are four ultrasonic sensors
in either bumper.
These sensors have a range of approx. 6.5 ft/
2 m. However, an acoustic warning does not
sound until an object is approx. 24 in/60 cm
from the corner sensors, or approx. 5 ft/1.50 m
from the center sensors.
PDC is a parking aid that can indicate
objects when they are approached
slowly, as is usually th e case when parking.
Avoid approaching an obje ct a t h i g h s p e e d , o t h -
erwise physical circumstances may lead to the
system warning being issued too late. <
Switching on automatically
With the engine running or the ignition switched
on, the system is activated after approx. 1 sec-
ond when you engage reverse gear or move the
automatic transmission selector lever to
position R. Wait this short period before driving.
Switching off automatically
After approx. 165 ft/50 m of driving or above
approx. 20 mph or 30 km/h, the system
switches off and the LED goes out.
Signal tones
When nearing an object, its position is indicated
correspondingly by an in terval tone. As the dis-
tance between vehicle and object decreases,
the intervals between the tones become
shorter. If the distance to the nearest object
falls to below roughly 1 f t/30 cm, then a contin-
uous tone sounds.
An interval tone is interrupted after approx.
3seconds >
if you remain in front of an object that has
been detected by only one of the corner
sensors
> if you are driving parallel to a wall.
Malfunction
The indicator lamp in the instrument
cluster comes on. PDC is malfunc-
tioning. A message appears on the
Control Display. Have the system checked.
To avoid this problem, keep the sensors clean
and free of ice or snow in order to ensure that
they will continue to operate effectively. When
using a high-pressure cleaner, do not spray the
sensors for extended periods of time and only
from a distance of at least 4 in/10 cm.
PDC with visual warning
The approach of the vehicle to an object is
shown on the Control Display. Objects that are
farther away are displayed on the Control Dis-
play before a signal to ne sounds. The display
appears on the Control Display as soon as PDC
is activated.
System limitations
Even with PDC, final responsibility for
estimating the distance between the
vehicle and any obstructions always remains
with the driver. Even when sensors are pro-
vided, there is a blind spot in which objects can
no longer be detected. The system is also sub-
ject to the physical limit s that apply to all forms
of ultrasonic measurement, such as those
encountered with trailer towbars and hitches,
thin or wedge-shaped objects, etc. Low objects
that have already been displayed, e.g. curbs,
can disappear again from the detection area of
the sensors before or af ter a continuous tone
sounds. Higher, protruding objects, e.g. ledges,
cannot be detected. Therefore, always drive
cautiously, otherwise there is a risk of personal
injury or property damage.
Page 83 of 248
Controls
81Reference
At a glance
Driving tips
Communications
Navigation
Entertainment
Mobility
Flat Tire Monitor FTM*
The concept
The Flat Tire Monitor detects pressure loss in a
tire by comparing the rotating speeds of the
individual tires while moving.
In the event of pressure loss, the rolling circum-
ference changes and, thus, the rotating speed
of the affected wheel. This change is detected
and is reported as a flat tire.
Functional requirement
In order to assure the reliable reporting of a flat
tire, the system must be initialized for the cor-
rect tire inflation pressure.The system must be reinitialized each
time a tire inflation pressure has been cor-
rected or a wheel or tire has been changed. <
System limitations
The Flat Tire Monitor is unable to warn
the driver of sudden, severe tire damage
caused by external factors, nor can it identify
the gradual loss of pressure that will inevitably
occur in all four tires over a lengthy period
of time. <
In the following situations, the system could be
delayed or malfunction:
> System has not been initialized
> Driving on snowy or slippery road surface
> Performance-oriented style of driving: slip
in the drive wheels, hi gh lateral acceleration
> Snow chains are attached
Initializing the system
The initialization is completed during driv-
ing, which can be interrupted at any time.
When driving resumes, the initialization is con-
tinued automatically.
Do not initialize the syst em while snow chains
are attached. <
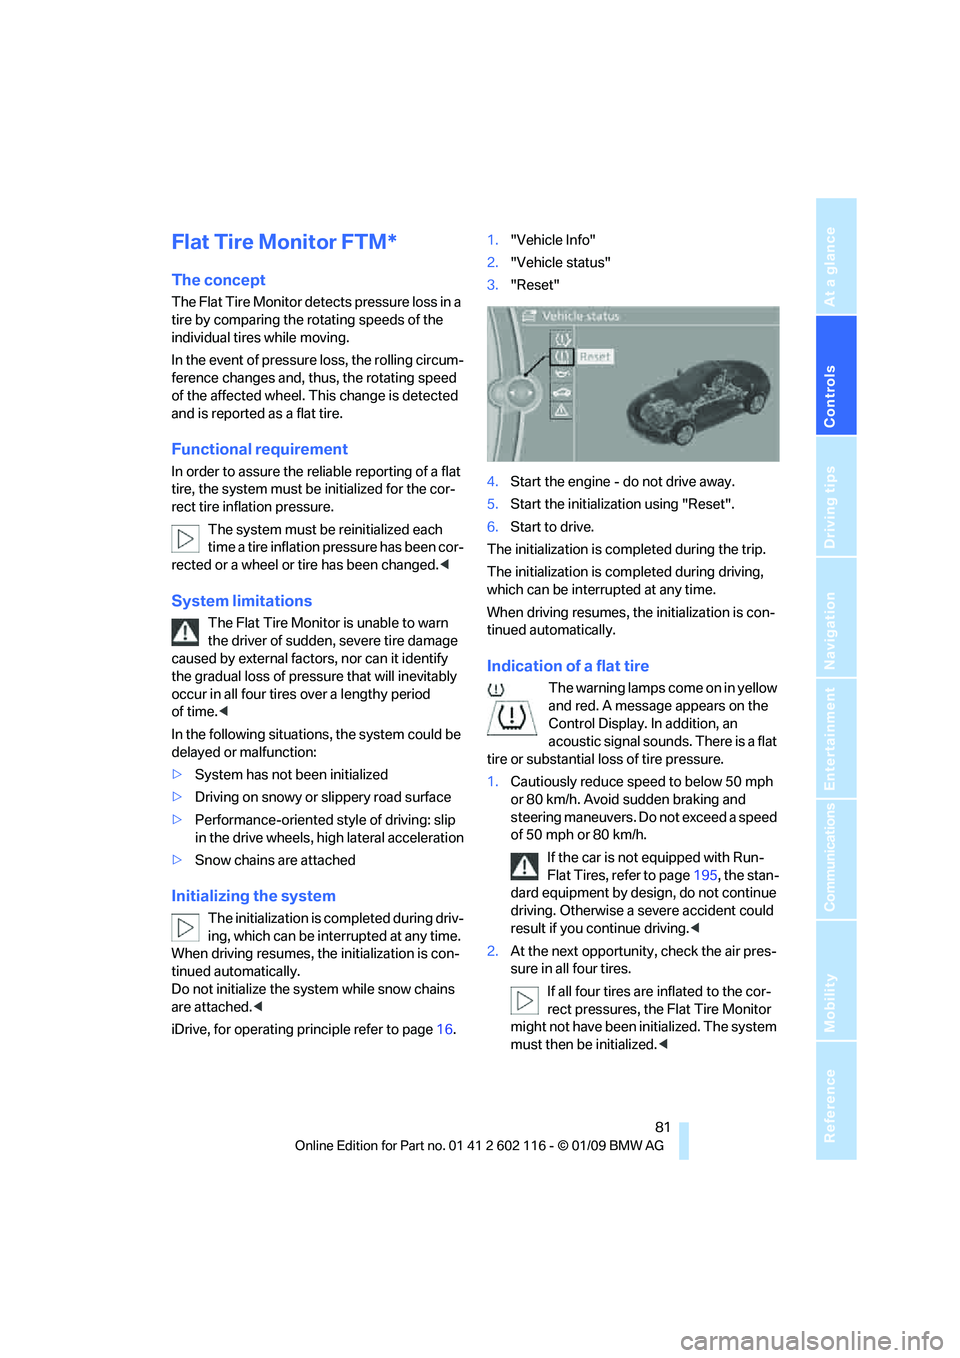
iDrive, for operating principle refer to page 16.1.
"Vehicle Info"
2. "Vehicle status"
3. "Reset"
4. Start the engine - do not drive away.
5. Start the initializat ion using "Reset".
6. Start to drive.
The initialization is completed during the trip.
The initialization is comp leted during driving,
which can be interrupted at any time.
When driving resumes, the initialization is con-
tinued automatically.
Indication of a flat tire
The warning lamps come on in yellow
and red. A message appears on the
Control Display. In addition, an
acoustic signal sounds. There is a flat
tire or substantial loss of tire pressure.
1. Cautiously reduce speed to below 50 mph
or 80 km/h. Avoid sudden braking and
steering maneuvers. Do not exceed a speed
of 50 mph or 80 km/h.
If the car is not equipped with Run-
Flat Tires, refer to page 195, the stan-
dard equipment by design, do not continue
driving. Otherwise a severe accident could
result if you continue driving. <
2. At the next opportunity, check the air pres-
sure in all four tires.
If all four tires are inflated to the cor-
rect pressures, the Flat Tire Monitor
might not have been initialized. The system
must then be initialized. <
Page 85 of 248
Controls
83Reference
At a glance
Driving tips
Communications
Navigation
Entertainment
Mobility
Green
The tire inflation pressure corresponds to the
established target value.
"TPM active" appears on the Control Display.
One wheel yellow
There is a flat tire or substantial loss of tire pres-
sure in the indicated tire. A message appears on
the Control Display.
All wheels yellow
There is a flat tire or su bstantial loss of tire pres-
sure in several tires. A message appears on the
Control Display.
Gray
The system cannot detect a puncture.
Possible reasons for this:
> TPM is being reset
> Temporary malfunction caused by systems
or devices using the same radio frequency
> Malfunction
Resetting the system
Each time a tire inflation pressure has
been corrected or a wheel or tire has been
changed, reset the system. <
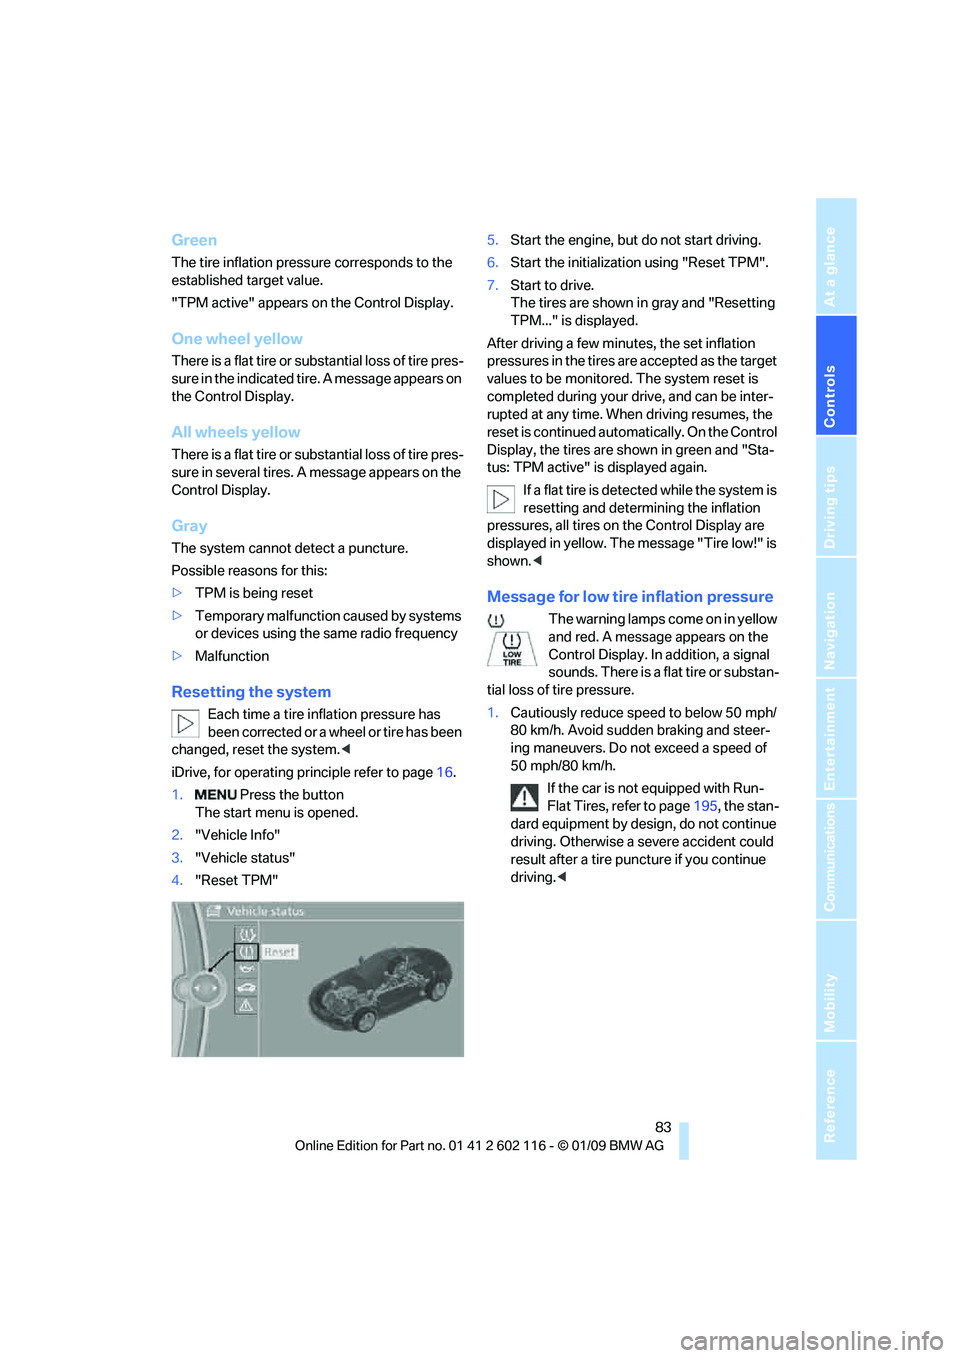
iDrive, for operating principle refer to page 16.
1. Press the button
The start menu is opened.
2. "Vehicle Info"
3. "Vehicle status"
4. "Reset TPM" 5.
Start the engine, but do not start driving.
6. Start the initializatio n using "Reset TPM".
7. Start to drive.
The tires are shown in gray and "Resetting
TPM..." is displayed.
After driving a few minutes, the set inflation
pressures in the tires are accepted as the target
values to be monitored. The system reset is
completed during your drive, and can be inter-
rupted at any time. When driving resumes, the
reset is continued automatically. On the Control
Display, the tires are shown in green and "Sta-
tus: TPM active" is displayed again. If a flat tire is detected while the system is
resetting and determining the inflation
pressures, all tires on the Control Display are
displayed in yellow. The message "Tire low!" is
shown. <
Message for low tire inflation pressure
The warning lamps come on in yellow
and red. A message appears on the
Control Display. In addition, a signal
sounds. There is a flat tire or substan-
tial loss of tire pressure.
1. Cautiously reduce speed to below 50 mph/
80 km/h. Avoid sudden braking and steer-
ing maneuvers. Do not exceed a speed of
50 mph/80 km/h.
If the car is not equipped with Run-
Flat Tires, refer to page 195, the stan-
dard equipment by design, do not continue
driving. Otherwise a severe accident could
result after a tire punc ture if you continue
driving. <
Page 86 of 248
Technology for driving comfort and safety
84
2.
In the event of complete pressure loss,
0 psi/0 kPa, you can estimate the possible
distance for continued driving on the basis
of the following guidelines:
>With a light load:
1 person without luggage:
approx. 155 miles/250 km
> With a medium load:
1 person, cargo bay full, or 2 people
without luggage:
approx. 95 miles/150 km
> With a full load:
2 people, cargo bay full:
approx. 30 miles/50 km
Drive cautiously and do not exceed a
speed of 50 mph/80 km/h. In the event of
pressure loss, vehicle handling changes. This
includes reduced tracking stability in braking,
extended braking distance and altered natural
steering characteristics.
If unusual vibration or lo ud noises occur during
the journey, this may be an indication that the
damaged tire has finally failed. Reduce your
speed and pull over as soon as possible at a
suitable location. Otherw ise parts of the tire
could come loose, resulting in an accident. Do
not continue driving. Instead, contact your
BMW center. <
Message for unsuccessful system
reset
The warning lamp lights up yellow. A
message will appear on the Control
Display. The system is not reset after
a tire has been changed, for example.
Check the tire inflation pressure and reset the
system, refer to page 83.
Status display
iDrive, for operating pr inciple refer to page16.
1. Press the button
The start menu is opened.
2. "Vehicle Info"
3. "Vehicle status"
4. "TPM"
5. The status is displayed.
Malfunction
The small warning lamp flashes in
yellow and then lights up continu-
ously; the larger warning lamp comes
on in yellow. On the Control Display,
the tires are shown in gray and a message
appears. No punctures can be detected.
This type of message is shown in the following
situations:
> If there is a malfunction
Have the system checked.
> If a wheel without TPM electronics has
been mounted
> If TPM is temporarily malfunctioning due to
other systems or devices using the same
radio frequency.
Declaration according to
NHTSA/FMVSS 138
Tire Pressure Monitoring Systems
Each tire should be checked monthly when cold
and inflated to the inflation pressure recom-
mended by the vehicle manufacturer on the
vehicle placard or tire infl ation pressure label. If
your vehicle has tires of a different size than the
size indicated on the vehicle placard or tire infla-
tion pressure label, yo u should determine the
proper tire inflation pressure for those tires. As
an added safety feature, your vehicle has been
equipped with a tire pressure monitoring sys-
tem, TPMS, that illuminates a low tire pressure
telltale when one or more of your tires are signif-
icantly under-inflated. Accordingly, when the
low tire pressure telltale illuminates, you should
stop and check your tires as soon as possible,
and inflate them to the proper pressure. Driving
on a significantly underi nflated tire causes the
tire to overheat and ca n lead to tire failure.
Underinflation also reduces fuel efficiency and
tire tread life, and may affect the vehicle’s han-
dling and stopping ability. Please note that the
TPMS is not a substitute for proper tire mainte-
nance, and it is the dr iver’s responsibility to
maintain correct tire pressure, even if underin-
flation has not reached the level at which the
TPMS low tire pressure telltale illuminates.
Page 88 of 248
Technology for driving comfort and safety
86
Do not attempt to remove
the airbag retention
system from the vehicle. Do not modify the indi-
vidual components of the system or its wiring in
any way. This includes the upholstered covers
of the steering wheel, the dashboard and the
seats. Do not attempt to remove or dismantle
the steering wheel.
Do not touch the individual components imme-
diately after the system has been triggered,
because there is a danger of burns.
In the event of malfunctions, deactivation or
triggering of the airbag restraint system, have
the testing, repair, remo val and disposal of air-
bag generators executed only by a BMW center
or a workshop that works according to repair
procedures of BMW with correspondingly
trained personnel and th at has the required
explosives licenses. Unprofessional attempts to
work on the system could lead to failure in an
emergency or to undesi red airbag activation,
either of which could resu lt in personal injury.<
Warning notices and information about the air-
bags can also be found on the sun visors.
Automatic deactivation of the
passenger airbags
The system determines whether the passenger
seat is occupied by meas uring the resistance of
the human body. Front, knee and side airbags
on the passenger side ar e activated or deacti-
vated accordingly.
Make sure that the passenger keeps his
or her feet in the footwell; otherwise, the
passenger airbags may not function properly. <
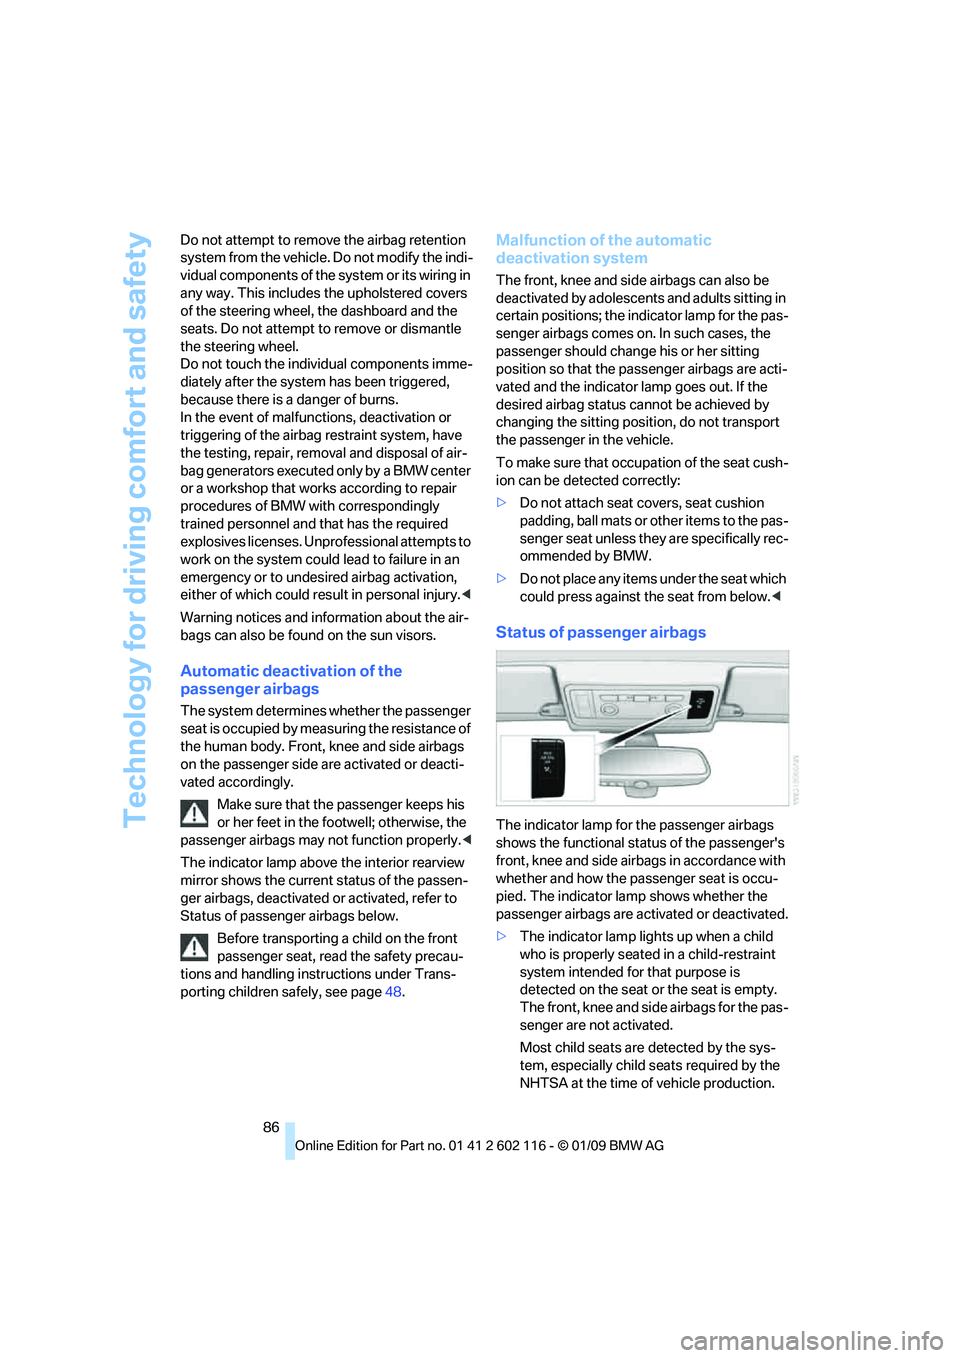
The indicator lamp above the interior rearview
mirror shows the current status of the passen-
ger airbags, deactivated or activated, refer to
Status of passenger airbags below.
Before transporting a child on the front
passenger seat, read the safety precau-
tions and handling instructions under Trans-
porting children safely, see page 48.
Malfunction of the automatic
deactivation system
The front, knee and side airbags can also be
deactivated by adolescents and adults sitting in
certain positions; the in dicator lamp for the pas-
senger airbags comes on. In such cases, the
passenger should change his or her sitting
position so that the pa ssenger airbags are acti-
vated and the indicator la mp goes out. If the
desired airbag status cannot be achieved by
changing the sitting posi tion, do not transport
the passenger in the vehicle.
To make sure that occupa tion of the seat cush-
ion can be detected correctly:
> Do not attach seat covers, seat cushion
padding, ball mats or other items to the pas-
senger seat unless they are specifically rec-
ommended by BMW.
> Do not place any items under the seat which
could press against the seat from below. <
Status of passenger airbags
The indicator lamp for the passenger airbags
shows the functional status of the passenger's
front, knee and side airbags in accordance with
whether and how the passenger seat is occu-
pied. The indicator lamp shows whether the
passenger airbags are activated or deactivated.
> The indicator lamp lights up when a child
who is properly seated in a child-restraint
system intended for that purpose is
detected on the seat or the seat is empty.
The front, knee and side airbags for the pas-
senger are not activated.
Most child seats are detected by the sys-
tem, especially child seats required by the
NHTSA at the time of vehicle production.
Page 89 of 248
Controls
87Reference
At a glance
Driving tips
Communications
Navigation
Entertainment
Mobility
After mounting a child seat, ensure that the
indicator lamp for the pa ssenger airbag is lit.
It indicates that the child seat has been
detected and that th e passenger airbags
are deactivated.
> The indicator lamp does not come on as
long as a person of sufficient size and in a
correct sitting position is detected on
the seat.
The front, knee and passenger airbags for
the passenger are activated.
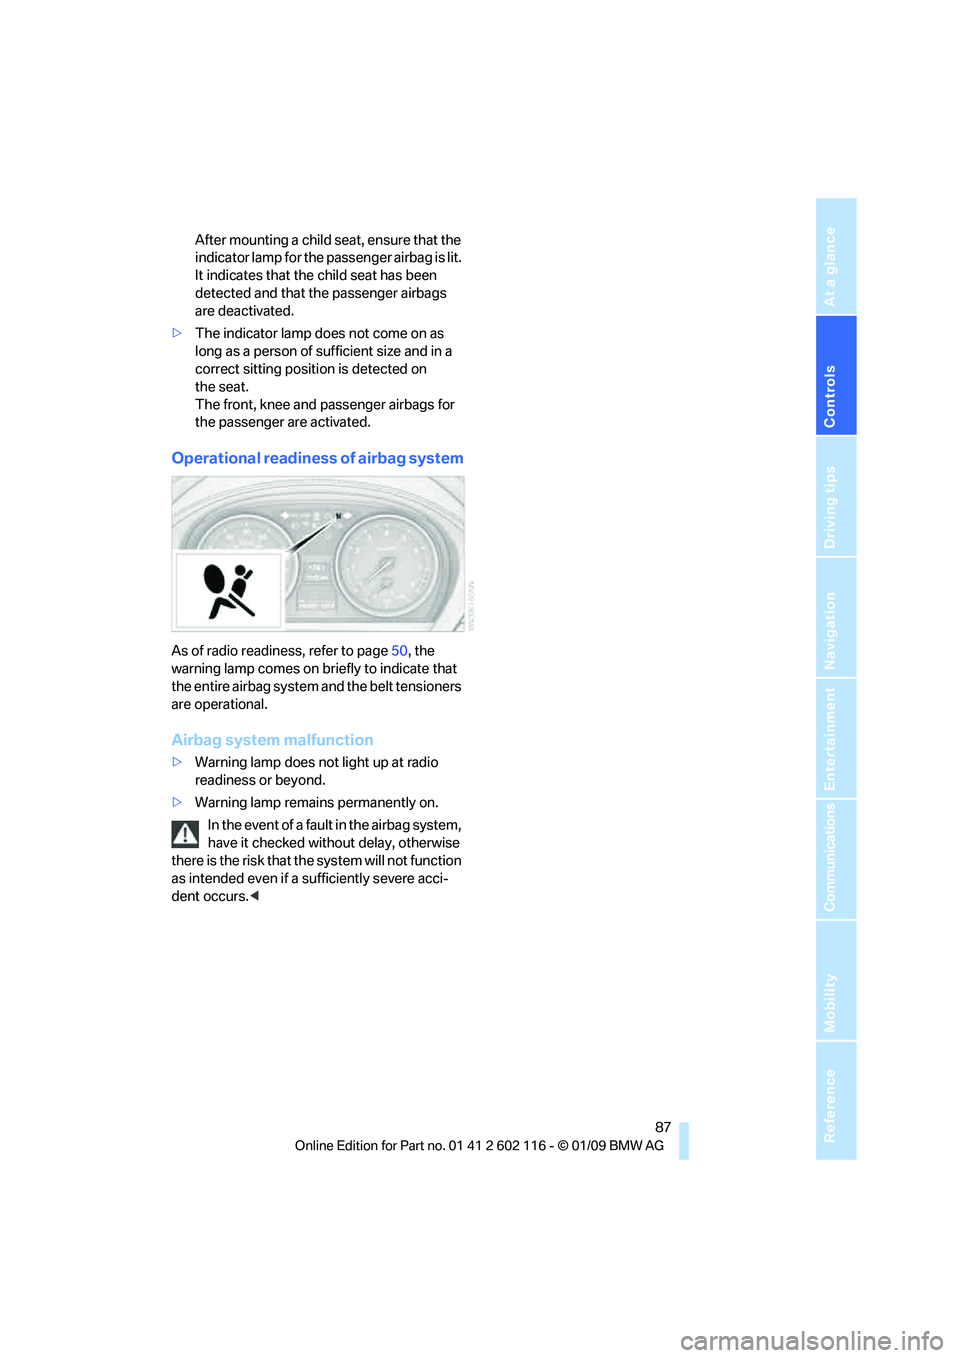
Operational readiness of airbag system
As of radio readiness, refer to page 50, the
warning lamp comes on br iefly to indicate that
the entire airbag system and the belt tensioners
are operational.
Airbag system malfunction
> Warning lamp does not light up at radio
readiness or beyond.
> Warning lamp remains permanently on.
In the event of a fault in the airbag system,
have it checked without delay, otherwise
there is the risk that th e system will not function
as intended even if a sufficiently severe acci-
dent occurs. <
Page 185 of 248
183
Entertainment
Reference
At a glance
Controls
Driving tips
Communications
Navigation
Mobility
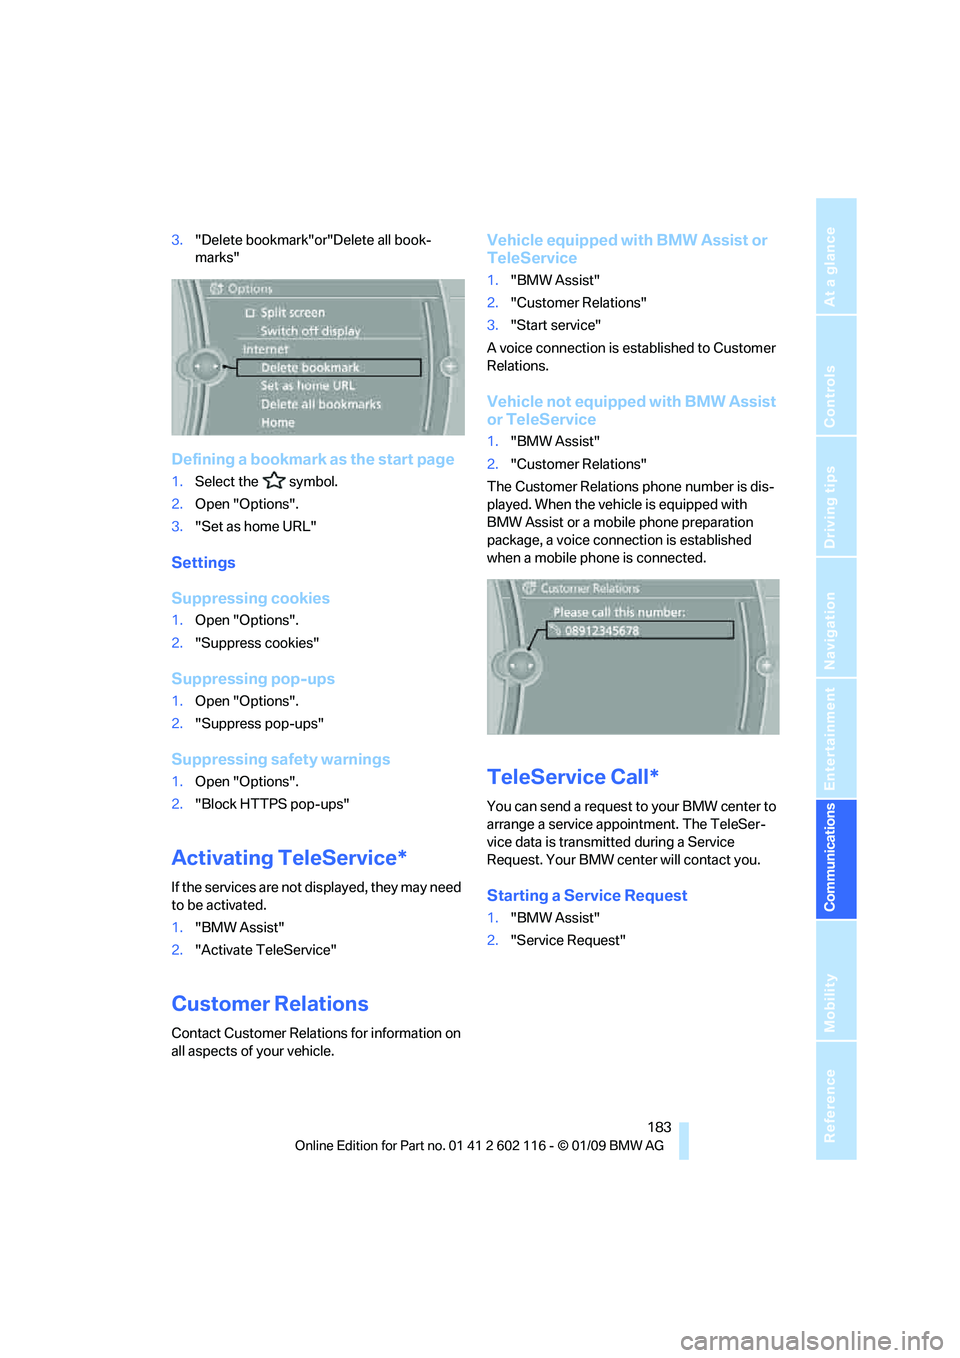
3. "Delete bookmark"or" Delete all book-
marks"
Defining a bookmark as the start page
1. Select the symbol.
2. Open "Options".
3. "Set as home URL"
Settings
Suppressing cookies
1.Open "Options".
2. "Suppress cookies"
Suppressing pop-ups
1.Open "Options".
2. "Suppress pop-ups"
Suppressing safety warnings
1.Open "Options".
2. "Block HTTPS pop-ups"
Activating TeleService*
If the services are not displayed, they may need
to be activated.
1."BMW Assist"
2. "Activate TeleService"
Customer Relations
Contact Customer Relations for information on
all aspects of your vehicle.
Vehicle equipped with BMW Assist or
TeleService
1."BMW Assist"
2. "Customer Relations"
3. "Start service"
A voice connection is established to Customer
Relations.
Vehicle not equipped with BMW Assist
or TeleService
1. "BMW Assist"
2. "Customer Relations"
The Customer Relations phone number is dis-
played. When the vehicle is equipped with
BMW Assist or a mobile phone preparation
package, a voice connection is established
when a mobile phone is connected.
TeleService Call*
You can send a request to your BMW center to
arrange a service appointment. The TeleSer-
vice data is transmitted during a Service
Request. Your BMW center will contact you.
Starting a Service Request
1. "BMW Assist"
2. "Service Request"
Page 202 of 248
Under the hood
200
>
"Measurement inactive. Have this
checked."
Do not add engine oil. You can continue
your journey. Note the newly calculated dis-
tance remaining to the ne xt oil service, refer
to page 69. Have the system checked as
soon as possible.
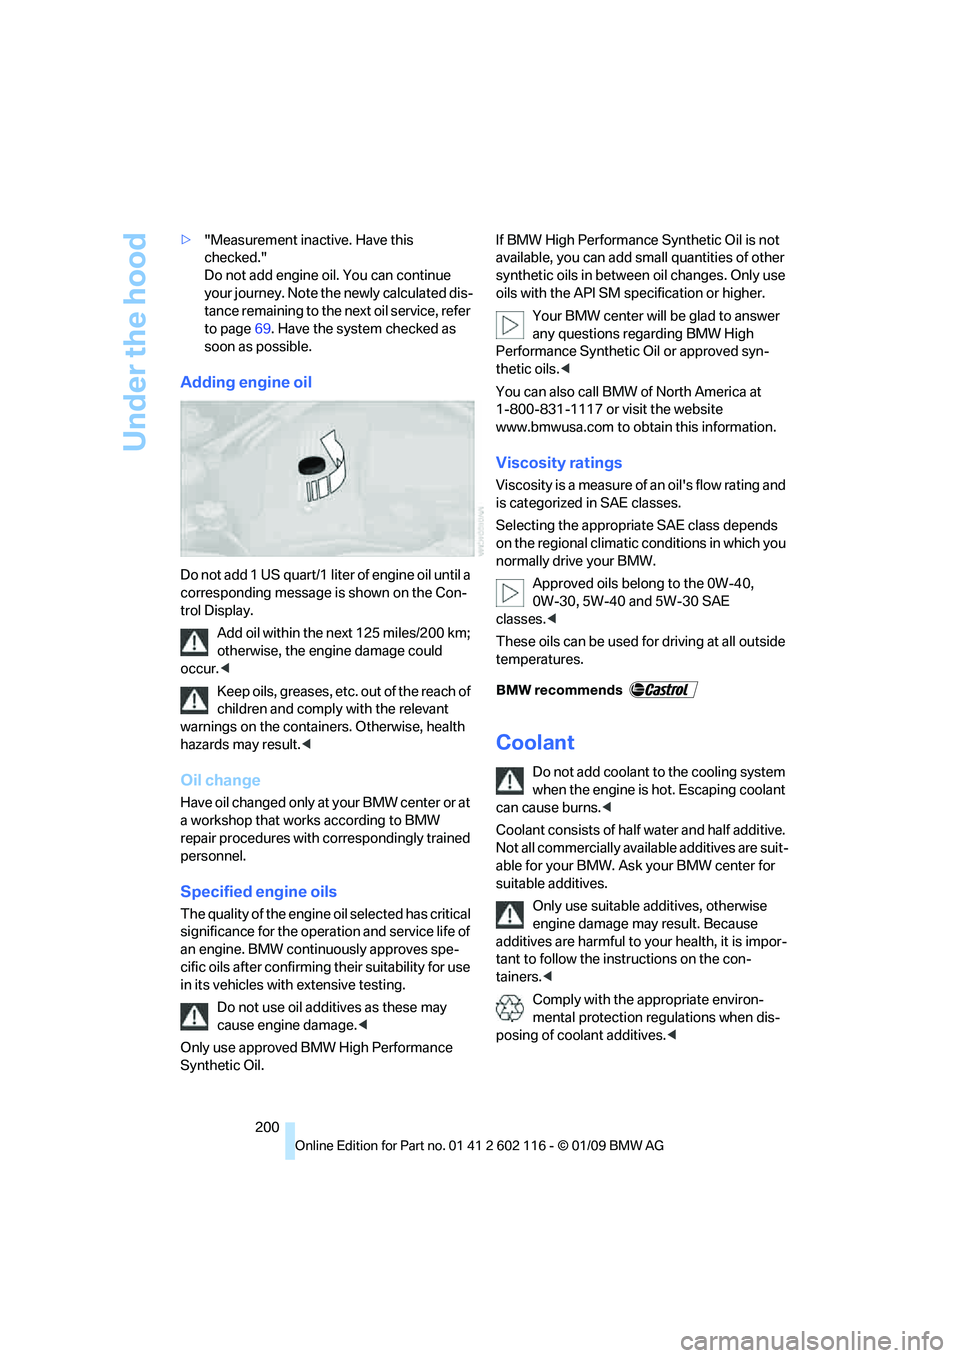
Adding engine oil
Do not add 1 US quart/1 liter of engine oil until a
corresponding message is shown on the Con-
trol Display.
Add oil within the next 125 miles/200 km;
otherwise, the engine damage could
occur. <
Keep oils, greases, etc. out of the reach of
children and comply with the relevant
warnings on the containers. Otherwise, health
hazards may result. <
Oil change
Have oil changed only at your BMW center or at
a workshop that works according to BMW
repair procedures with correspondingly trained
personnel.
Specified engine oils
The quality of the engine oil selected has critical
significance for the oper ation and service life of
an engine. BMW continuously approves spe-
cific oils after confirming their suitability for use
in its vehicles with extensive testing.
Do not use oil additives as these may
cause engine damage. <
Only use approved BMW High Performance
Synthetic Oil. If BMW High Performance Synthetic Oil is not
available, you can add small quantities of other
synthetic oils in betwee
n oil changes. Only use
oils with the API SM sp ecification or higher.
Your BMW center will be glad to answer
any questions regarding BMW High
Performance Synthetic Oil or approved syn-
thetic oils. <
You can also call BMW of North America at
1-800-831-1117 or visit the website
www.bmwusa.com to obtain this information.
Viscosity ratings
Viscosity is a measure of an oil's flow rating and
is categorized in SAE classes.
Selecting the appropri ate SAE class depends
on the regional climatic conditions in which you
normally drive your BMW.
Approved oils belong to the 0W-40,
0W-30, 5W-40 and 5W-30 SAE
classes. <
These oils can be used fo r driving at all outside
temperatures.
Coolant
Do not add coolant to the cooling system
when the engine is hot. Escaping coolant
can cause burns. <
Coolant consists of half water and half additive.
Not all commercially available additives are suit-
able for your BMW. Ask your BMW center for
suitable additives.
Only use suitable ad ditives, otherwise
engine damage may result. Because
additives are harmful to your health, it is impor-
tant to follow the instructions on the con-
tainers. <
Comply with the appropriate environ-
mental protection regulations when dis-
posing of coolant additives. <