2009 BMW Z4 SDRIVE30I ROADSTER warning
[x] Cancel search: warningPage 64 of 248
Driving
62
Maintaining current speed
Tap the lever, arrow 1, or pull it briefly, arrow 2.
The car's current speed is stored and main-
tained. It is displayed on the speedometer and
briefly in the instrument cluster.
On uphill gradients, it may prove impossible to
maintain the set speed if current engine power
output is insufficient. If the engine braking
effect is insufficient on downhill slopes, the sys-
tem will brake the vehicle slightly.
Increasing desired speed
Repeatedly press the lever to the resistance
point or beyond, arrow 1, until the desired
speed is reached.
> Each time the lever is pressed to the resis-
tance point, the desired speed is increased
by approx. 1 mph or 1 km/h.
> Each time the lever is pressed beyond the
resistance point, the desired speed is
increased by up to 5 mph or 10 km/h.
The system stores and maintains the speed.
Accelerating using the lever
Accelerating slightly:
Press the lever to the resistance point, arrow 1,
and hold until the desired speed is reached.
Accelerating significantly:
Press the lever beyond the resistance point,
arrow 1, and hold until the desired speed is
reached.
The vehicle accelerates without pressure on
the accelerator pedal. The system stores and
maintains the speed.
Decreasing speed
Repeatedly pull the lever to the resistance point
or beyond, arrow 2, until the desired speed is
displayed.
> Each time the lever is pulled to the resis-
tance point, the desired speed is decreased
by approx. 1 mph or 1 km/h.
> Each time the lever is pulled beyond the
resistance point, the desired speed is
reduced by up to 5 mph o r 10 km/h until the minimum speed of 20 mph or 30 km/h is
achieved.
The system stores and maintains the speed.
Interrupting the system
Tap the lever upwards or downwards, arrow 3.
The displays in the speedometer change color.
In addition, the system is automatically deacti-
vated:
> When you brake the vehicle
> When you switch gears very slowly or shift
to neutral in cars with a manual trans-
mission
> When you engage selector lever position N
in cars with an automatic transmission
> When you engage transmission position N
in 7-gear sport automatic transmissions
with a dual clutch
> When you activate the DTC Dynamic Trac-
tion Control or deactivate DSC.
> When DSC or ABS is intervening
Cruise control is not de activated by depressing
the accelerator pedal. Once the accelerator
pedal is released, the st ored speed is achieved
again and maintained.
Warning lamp
The warning lamp comes on, for
example, when cruise control has
been deactivated as a result of DSC
intervention. A message appears on the Control
Display.
Deactivating the system
> Press the lever upward or downward twice,
arrow 3.
> Switch off the ignition.
The stored speed is cleared.
Resuming a speed stored beforehand
Press the button, arrow 4. The last stored
speed is resumed and maintained.
Page 65 of 248
Controls
63Reference
At a glance
Driving tips
Communications
Navigation
Entertainment
Mobility
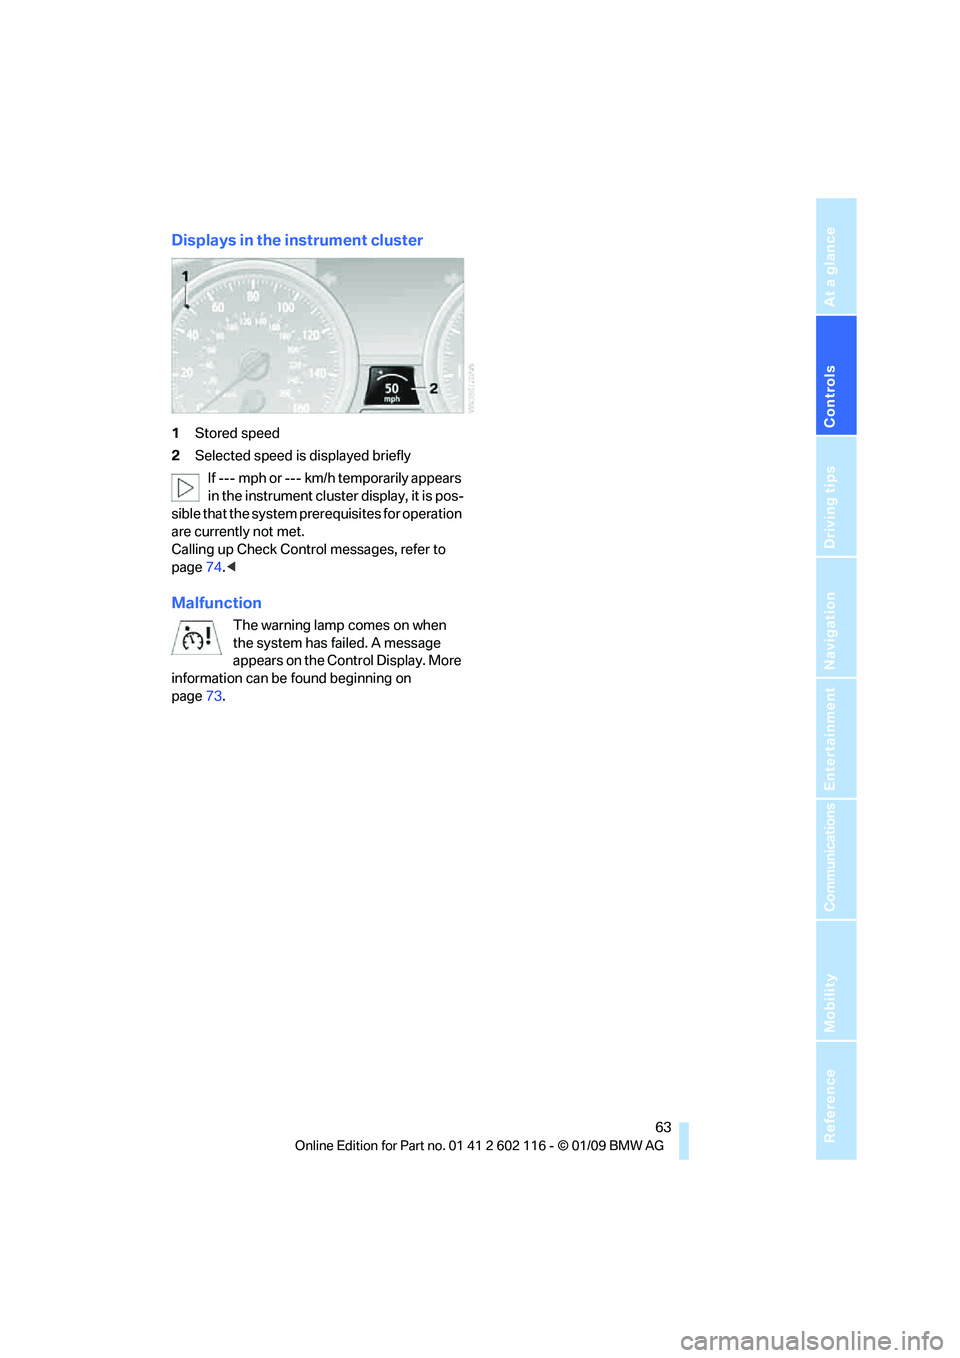
Displays in the instrument cluster
1Stored speed
2 Selected speed is displayed briefly
If --- mph or --- km/h temporarily appears
in the instrument cluster display, it is pos-
sible that the system prerequisites for operation
are currently not met.
Calling up Check Control messages, refer to
page 74.<
Malfunction
The warning lamp comes on when
the system has failed. A message
appears on the Control Display. More
information can be found beginning on
page 73.
Page 66 of 248
Everything under control
64
Everything under control
Odometer, outside
temperature display, clock
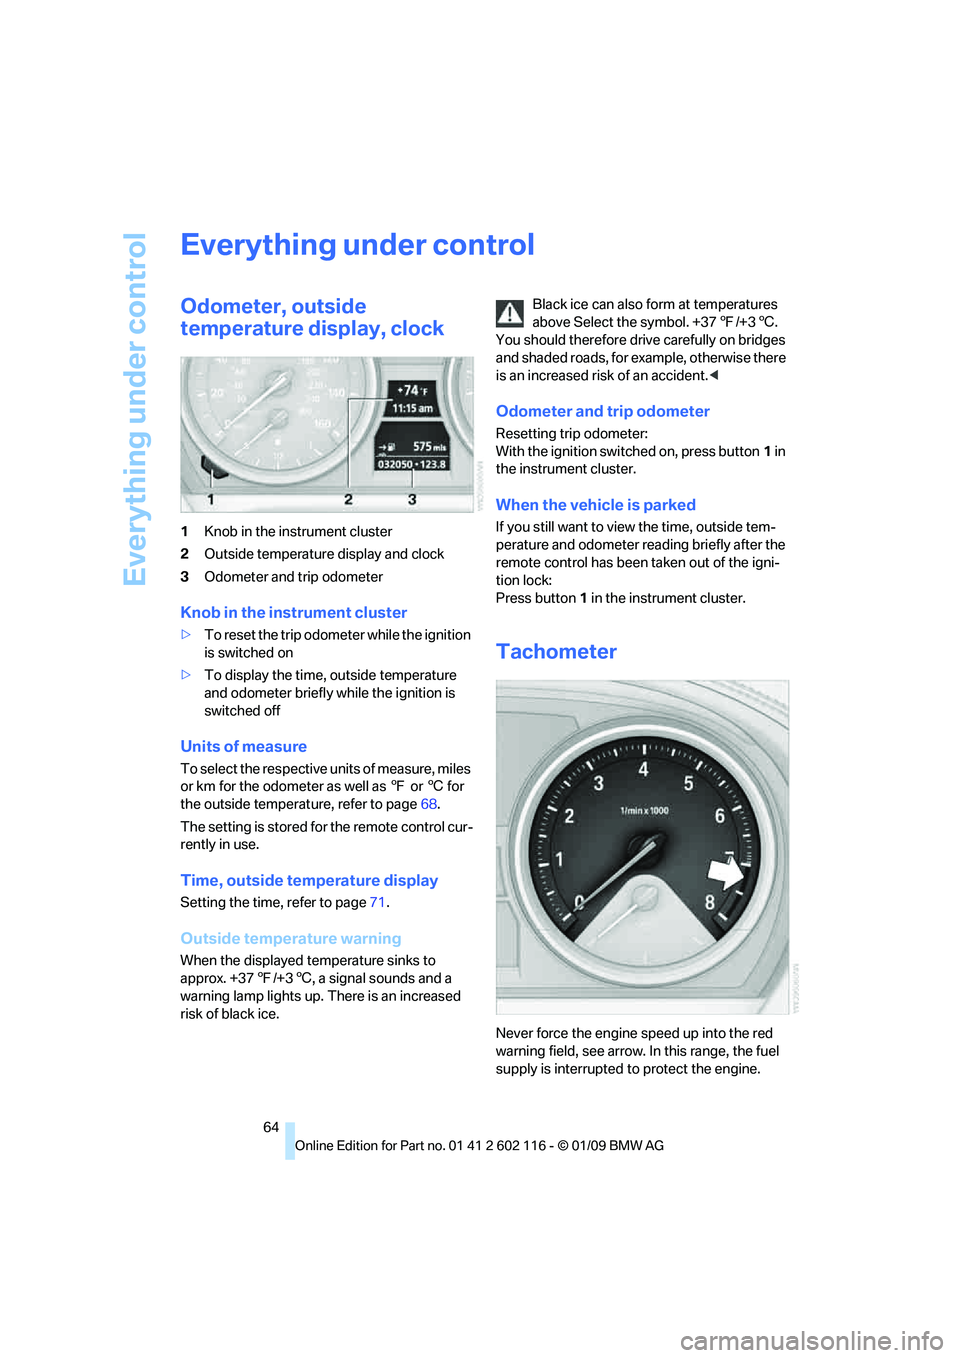
1Knob in the instrument cluster
2 Outside temperature display and clock
3 Odometer and trip odometer
Knob in the instrument cluster
>To reset the trip odometer while the ignition
is switched on
> To display the time, outside temperature
and odometer briefly while the ignition is
switched off
Units of measure
To select the respective units of measure, miles
or km for the odometer as well as 7 or 6 for
the outside temperat ure, refer to page68.
The setting is stored fo r the remote control cur-
rently in use.
Time, outside temperature display
Setting the time, refer to page 71.
Outside temperature warning
When the displayed temperature sinks to
approx. +37 7/+3 6, a signal sounds and a
warning lamp lights up. There is an increased
risk of black ice. Black ice can also form at temperatures
above Select the symbol. +37
7/+3 6.
You should therefore driv e carefully on bridges
and shaded roads, for example, otherwise there
is an increased risk of an accident. <
Odometer and trip odometer
Resetting trip odometer:
With the ignition switched on, press button 1 in
the instrument cluster.
When the vehicle is parked
If you still want to view the time, outside tem-
perature and odometer re ading briefly after the
remote control has been taken out of the igni-
tion lock:
Press button 1 in the instrument cluster.
Tachometer
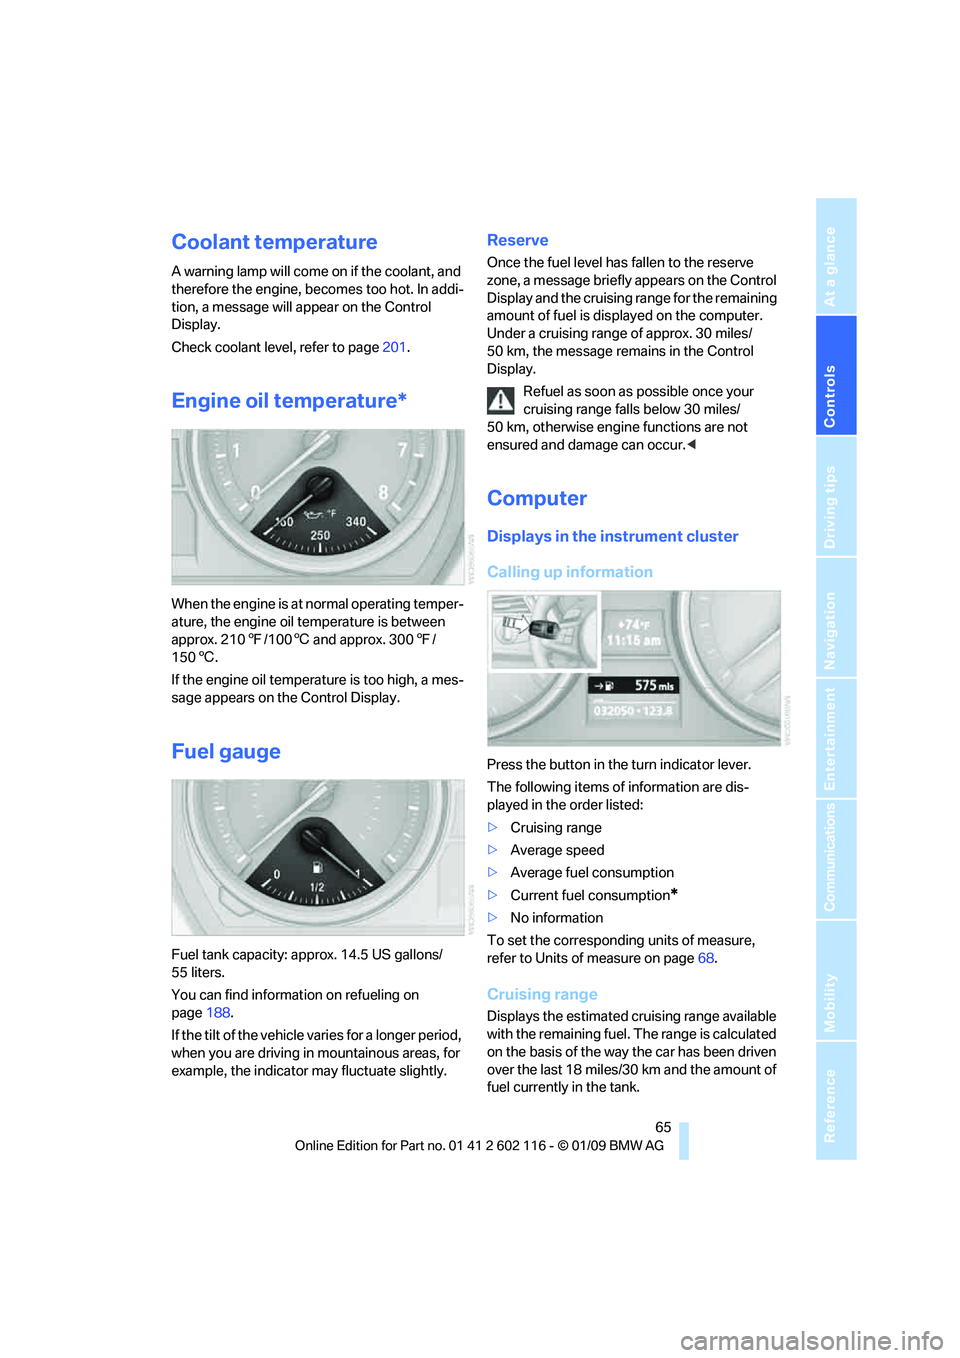
Never force the engine speed up into the red
warning field, see arrow. In this range, the fuel
supply is interrupted to protect the engine.
Page 67 of 248
Controls
65Reference
At a glance
Driving tips
Communications
Navigation
Entertainment
Mobility
Coolant temperature
A warning lamp will come on if the coolant, and
therefore the engine, becomes too hot. In addi-
tion, a message will appear on the Control
Display.
Check coolant level, refer to page201.
Engine oil temperature*
When the engine is at normal operating temper-
ature, the engine oil temperature is between
approx. 210 7/100 6 and approx. 300 7/
150 6.
If the engine oil temperature is too high, a mes-
sage appears on the Control Display.
Fuel gauge
Fuel tank capacity: approx. 14.5 US gallons/
55 liters.
You can find information on refueling on
page 188.
If the tilt of the vehicle varies for a longer period,
when you are driving in mountainous areas, for
example, the indicator may fluctuate slightly.
Reserve
Once the fuel level has fallen to the reserve
zone, a message briefly appears on the Control
Display and the cruising range for the remaining
amount of fuel is displayed on the computer.
Under a cruising range of approx. 30 miles/
50 km, the message remains in the Control
Display.
Refuel as soon as possible once your
cruising range falls below 30 miles/
50 km, otherwise engine functions are not
ensured and damage can occur. <
Computer
Displays in the instrument cluster
Calling up information
Press the button in the turn indicator lever.
The following items of information are dis-
played in the order listed:
>Cruising range
> Average speed
> Average fuel consumption
> Current fuel consumption
*
>No information
To set the corresponding units of measure,
refer to Units of measure on page 68.
Cruising range
Displays the estimated cr uising range available
with the remaining fuel. The range is calculated
on the basis of the way the car has been driven
over the last 18 miles/30 km and the amount of
fuel currently in the tank.
Page 75 of 248
Controls
73Reference
At a glance
Driving tips
Communications
Navigation
Entertainment
Mobility
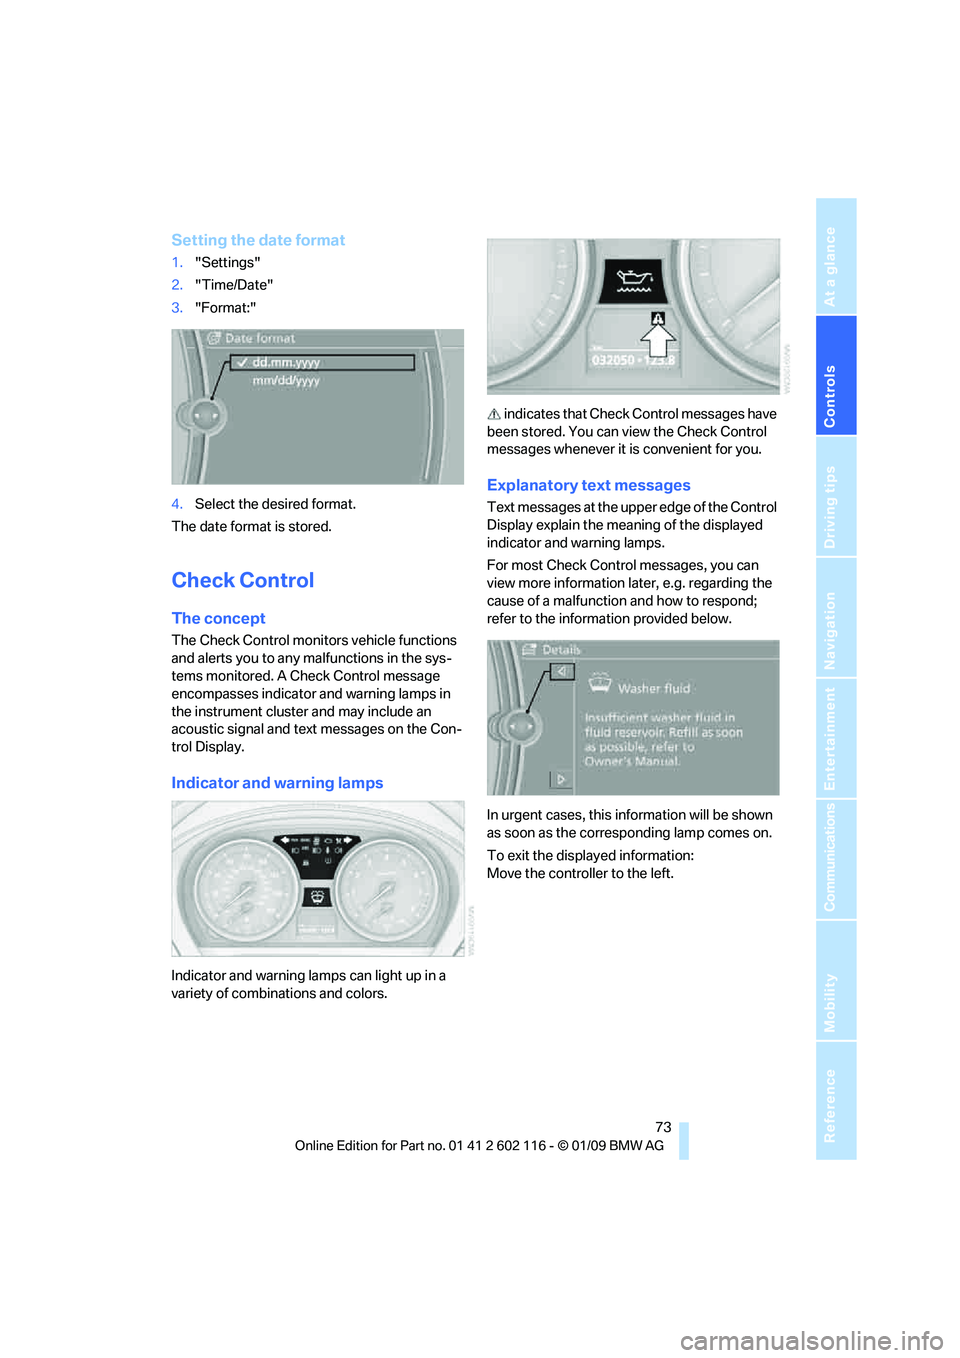
Setting the date format
1."Settings"
2. "Time/Date"
3. "Format:"
4. Select the desired format.
The date format is stored.
Check Control
The concept
The Check Control monitors vehicle functions
and alerts you to any malfunctions in the sys-
tems monitored. A Ch eck Control message
encompasses indicator and warning lamps in
the instrument cluster and may include an
acoustic signal and text messages on the Con-
trol Display.
Indicator and warning lamps
Indicator and warning la mps can light up in a
variety of combinations and colors. indicates that Check
Control messages have
been stored. You can view the Check Control
messages whenever it is convenient for you.
Explanatory text messages
Text messages at the upper edge of the Control
Display explain the meaning of the displayed
indicator and warning lamps.
For most Check Control messages, you can
view more information la ter, e.g. regarding the
cause of a malfunction and how to respond;
refer to the information provided below.
In urgent cases, this information will be shown
as soon as the corresponding lamp comes on.
To exit the displayed information:
Move the controller to the left.
Page 76 of 248
Everything under control
74
Hiding Check Control messages
Press the button in the turn indicator lever.
Some Check Control messages are displayed
until the malfunctions have been rectified. They
cannot be hidden. If several malfunctions
occur at the same time, they are displayed in
succession.
They are marked with the symbol
shown here.
Other messages are automatically hidden after
approx. 20 seconds, but are kept in memory. They are marked with the symbol
shown here.
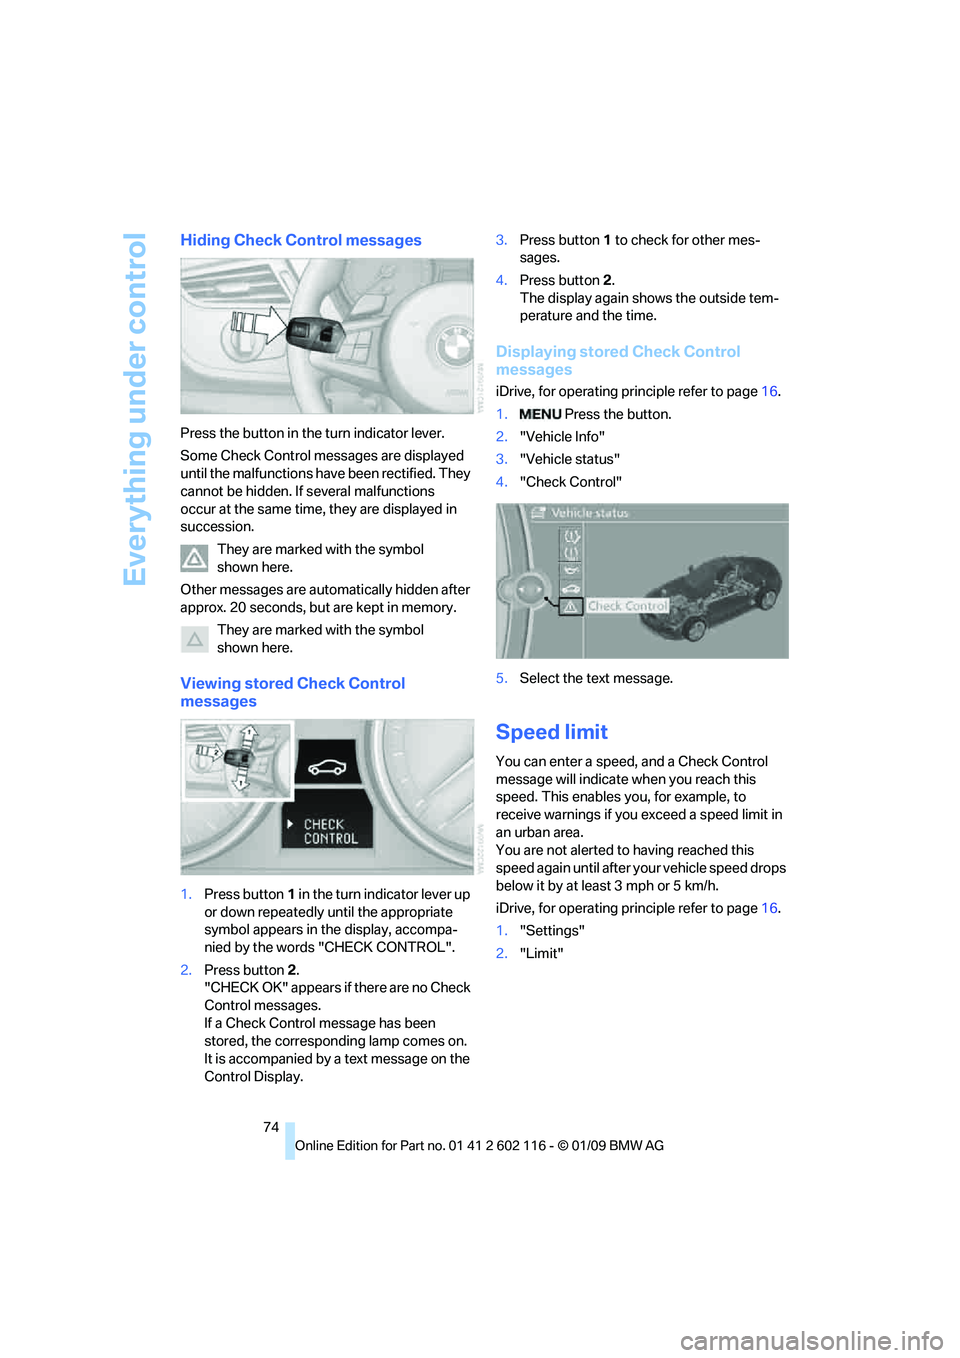
Viewing stored Check Control
messages
1.Press button 1 in the turn indicator lever up
or down repeatedly until the appropriate
symbol appears in the display, accompa-
nied by the words "CHECK CONTROL".
2. Press button 2.
"CHECK OK" appears if there are no Check
Control messages.
If a Check Control message has been
stored, the corresponding lamp comes on.
It is accompanied by a text message on the
Control Display. 3.
Press button 1 to check for other mes-
sages.
4. Press button 2.
The display again shows the outside tem-
perature and the time.
Displaying stored Check Control
messages
iDrive, for operating pr inciple refer to page16.
1. Press the button.
2. "Vehicle Info"
3. "Vehicle status"
4. "Check Control"
5. Select the text message.
Speed limit
You can enter a speed, and a Check Control
message will indicate when you reach this
speed. This enables you, for example, to
receive warnings if you exceed a speed limit in
an urban area.
You are not alerted to having reached this
speed again until after your vehicle speed drops
below it by at least 3 mph or 5 km/h.
iDrive, for operating pr inciple refer to page16.
1. "Settings"
2. "Limit"
Page 77 of 248
Controls
75Reference
At a glance
Driving tips
Communications
Navigation
Entertainment
Mobility
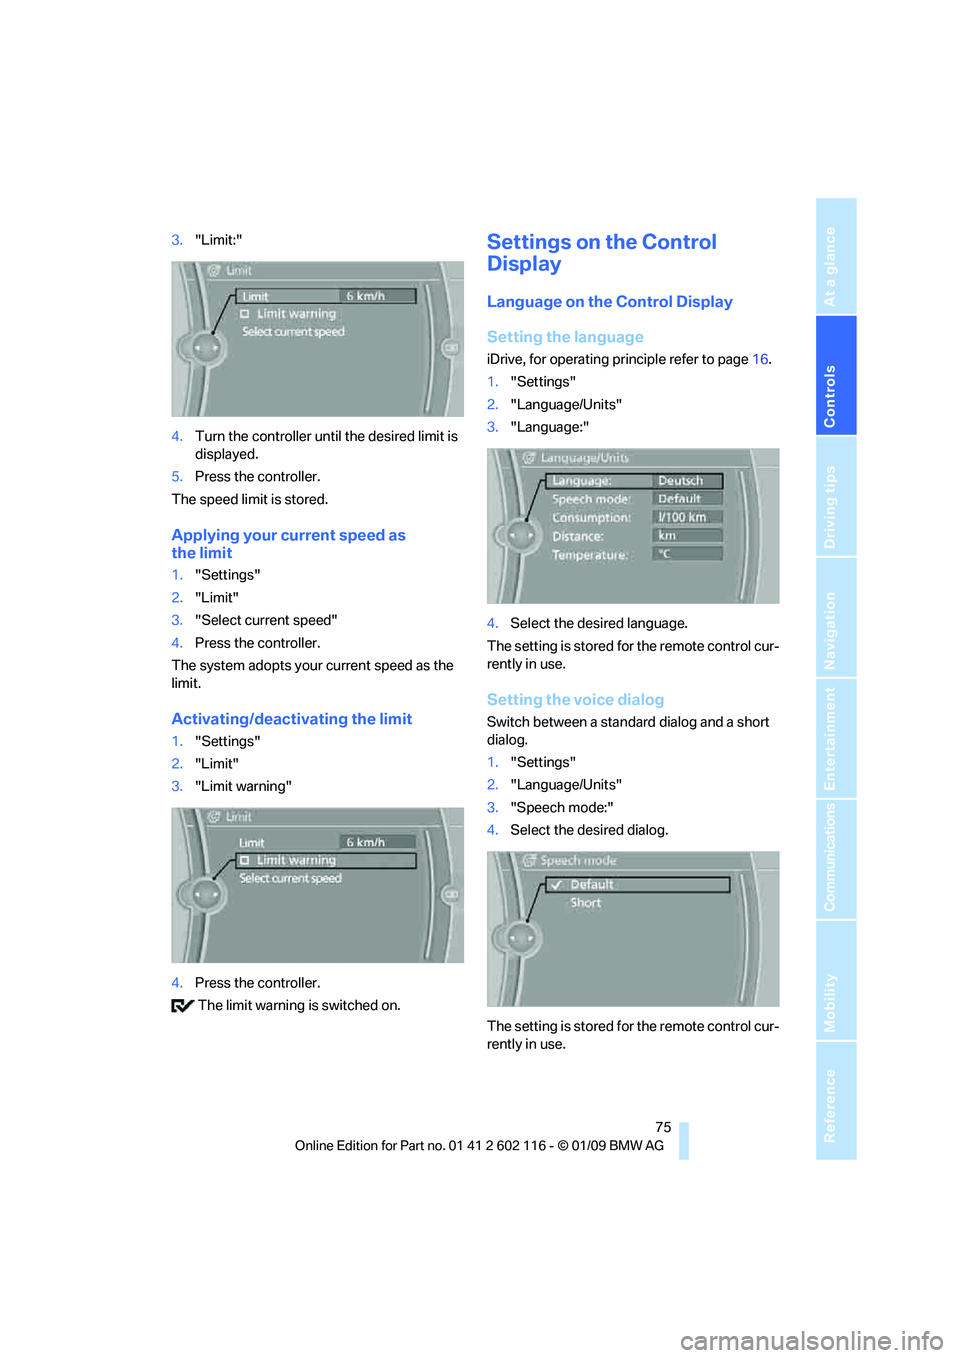
3."Limit:"
4. Turn the controller until the desired limit is
displayed.
5. Press the controller.
The speed limit is stored.
Applying your current speed as
the limit
1. "Settings"
2. "Limit"
3. "Select current speed"
4. Press the controller.
The system adopts your current speed as the
limit.
Activating/deactivating the limit
1. "Settings"
2. "Limit"
3. "Limit warning"
4. Press the controller.
The limit warning is switched on.
Settings on the Control
Display
Language on the Control Display
Setting the language
iDrive, for operating pr inciple refer to page16.
1. "Settings"
2. "Language/Units"
3. "Language:"
4. Select the desired language.
The setting is stored for the remote control cur-
rently in use.
Setting the voice dialog
Switch between a standard dialog and a short
dialog.
1. "Settings"
2. "Language/Units"
3. "Speech mode:"
4. Select the desired dialog.
The setting is stored for the remote control cur-
rently in use.
Page 78 of 248
Everything under control
76
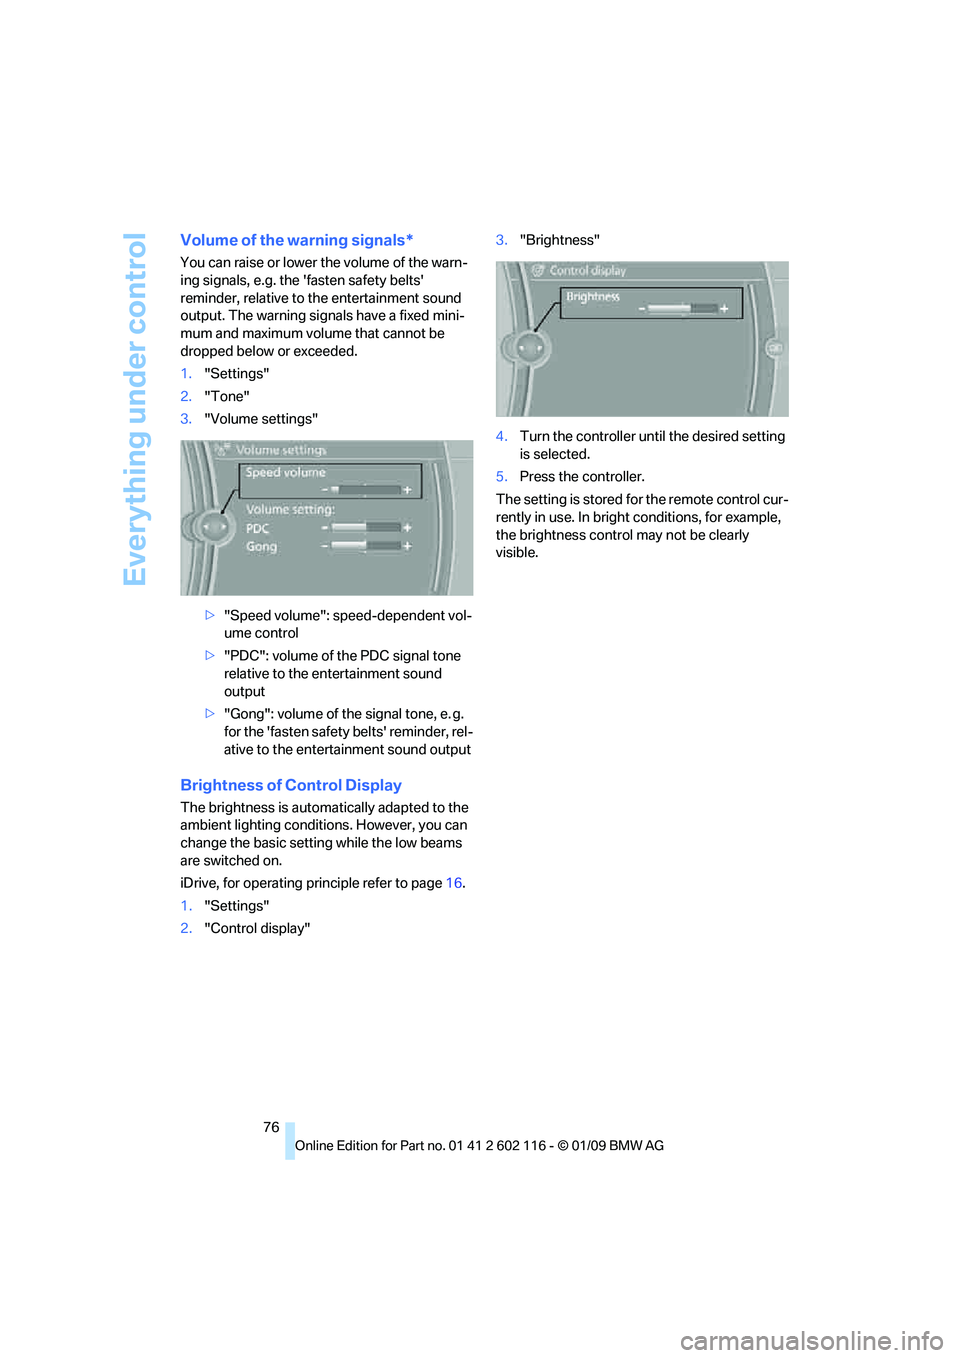
Volume of the warning signals*
You can raise or lower the volume of the warn-
ing signals, e.g. the 'fasten safety belts'
reminder, relative to the entertainment sound
output. The warning signals have a fixed mini-
mum and maximum volume that cannot be
dropped below or exceeded.
1."Settings"
2. "Tone"
3. "Volume settings"
>"Speed volume": speed-dependent vol-
ume control
> "PDC": volume of the PDC signal tone
relative to the entertainment sound
output
> "Gong": volume of the signal tone, e. g.
for the 'fasten safety belts' reminder, rel-
ative to the entertainment sound output
Brightness of Control Display
The brightness is automa tically adapted to the
ambient lighting conditio ns. However, you can
change the basic setting while the low beams
are switched on.
iDrive, for operating pr inciple refer to page16.
1. "Settings"
2. "Control display" 3.
"Brightness"
4. Turn the controller until the desired setting
is selected.
5. Press the controller.
The setting is stored fo r the remote control cur-
rently in use. In bright conditions, for example,
the brightness control may not be clearly
visible.