2009 BMW Z4 SDRIVE30I wheel
[x] Cancel search: wheelPage 196 of 248
Wheels and tires
194
Temperature
The temperature grades are A, the highest, B,
and C, representing the tire's resistance to the
generation of heat and its ability to dissipate
heat when tested under controlled conditions
on a specified indoor laboratory test wheel.
Sustained high temperature can cause the
material of the tire to degenerate and reduce
tire life, and excessive temperature can lead to
sudden tire failure. The grade C corresponds to
a level of performance which all passenger car
tires must meet under the Federal Motor Vehi-
cle Safety Standard No. 109. Grades B and A
represent higher levels of performance on the
laboratory test whee l than the minimum
required by law.
The temperature grade for this tire is
established for a tire that is properly
inflated and not overloaded. Excessive speed,
underinflation, or excessi ve loading, either sep-
arately or in combination, can cause heat
buildup and possible tire failure. <
RSC – Run-Flat Tires
You will recognize Run-Flat Tires by a circular
symbol containing the letters RSC on the side
of the tire, refer to page195.
M+S
Winter and all-season tires.
These have better winter properties than sum-
mer tires.
XL
Designation for specia lly reinforced tires.
Tire condition
Inspect your tires frequently for tread wear,
signs of damage and for foreign objects lodged
in the tread. Check the tread depth.
Minimum tread depth
The tread depth should not drop below 1/8 in/
3mm, although, for exam ple, European legisla-
tion only specifies a minimum tread depth of 1/16 in/1.6 mm. At tread depths below 1/8 in/
3 mm there is an increased risk of high-speed
hydroplaning, even when only small amounts of
water are present on the road surface.
When winter tires wear down past a tread depth
of 1/6 in/4 mm, they become perceptibly less
suitable for winter conditions. In the interest of
safety, new tires sh
ould be installed.
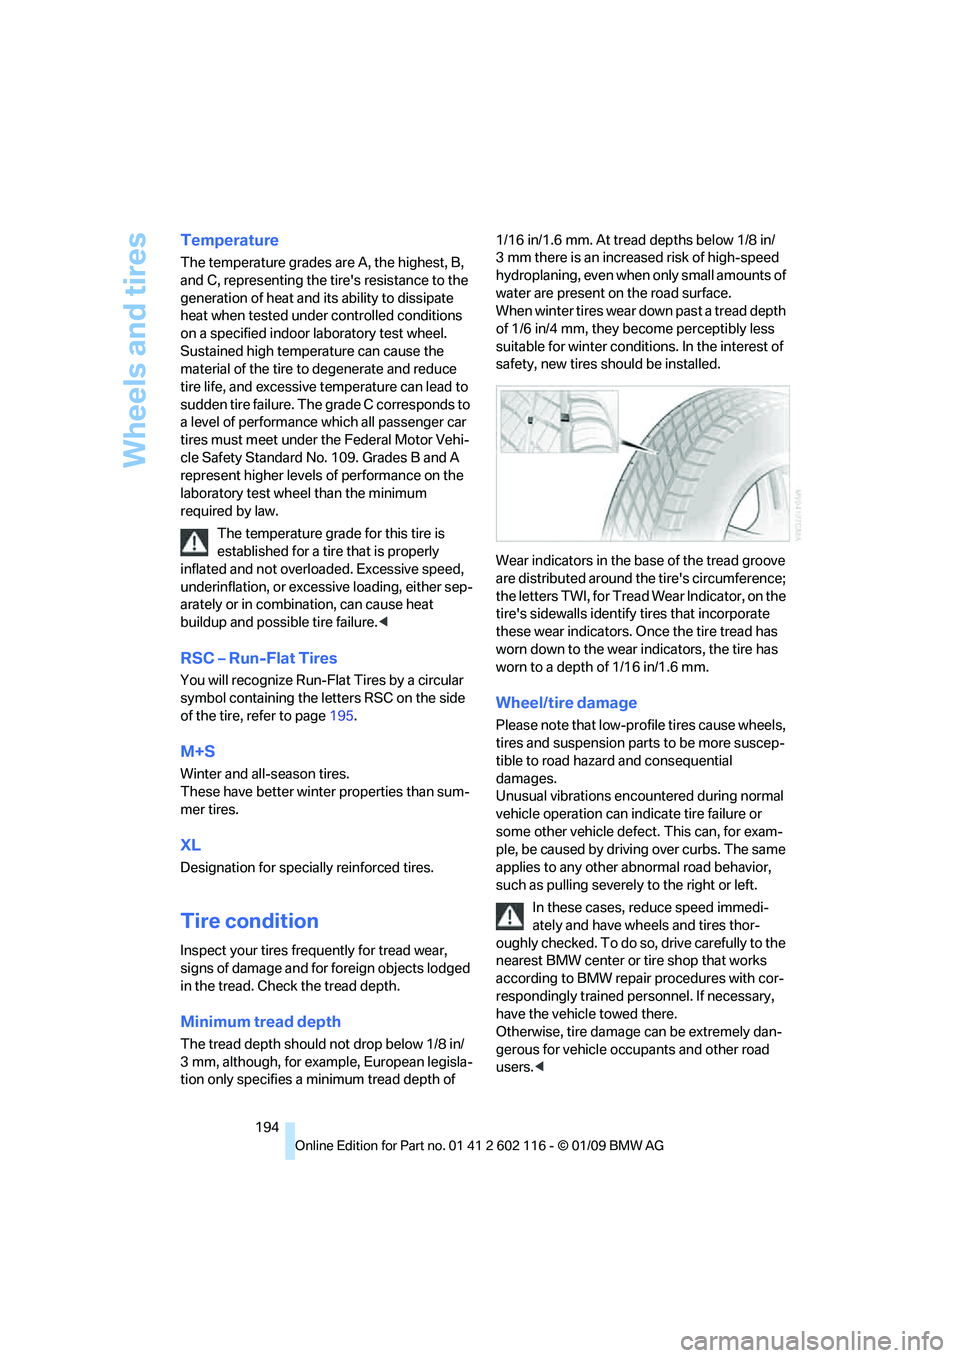
Wear indicators in the ba se of the tread groove
are distributed around th e tire's circumference;
the letters TWI, for Tread Wear Indicator, on the
tire's sidewalls identify tires that incorporate
these wear indicators. On ce the tire tread has
worn down to the wear indicators, the tire has
worn to a depth of 1/16 in/1.6 mm.
Wheel/tire damage
Please note that low-pr ofile tires cause wheels,
tires and suspension parts to be more suscep-
tible to road hazard and consequential
damages.
Unusual vibrations encountered during normal
vehicle operation can indi cate tire failure or
some other vehicle defect. This can, for exam-
ple, be caused by driving over curbs. The same
applies to any other abnormal road behavior,
such as pulling severely to the right or left.
In these cases, reduce speed immedi-
ately and have wheels and tires thor-
oughly checked. To do so, drive carefully to the
nearest BMW center or tire shop that works
according to BMW repair procedures with cor-
respondingly trained personnel. If necessary,
have the vehicle towed there.
Otherwise, tire damage can be extremely dan-
gerous for vehicle occu pants and other road
users. <
Page 197 of 248
Mobility
195Reference
At a glance
Controls
Driving tips
Communications
Navigation
Entertainment
Tire age
For various reasons, such as the development
of brittleness, BMW recommends tire replace-
ment after no more than 6 years, regardless of
the actual wear of the tires.
The manufacturing date of tires is contained in
the tire coding:
DOT ... 0709 means that the tire was manufac-
tured in week 7 of 2009.
Run-Flat Tires
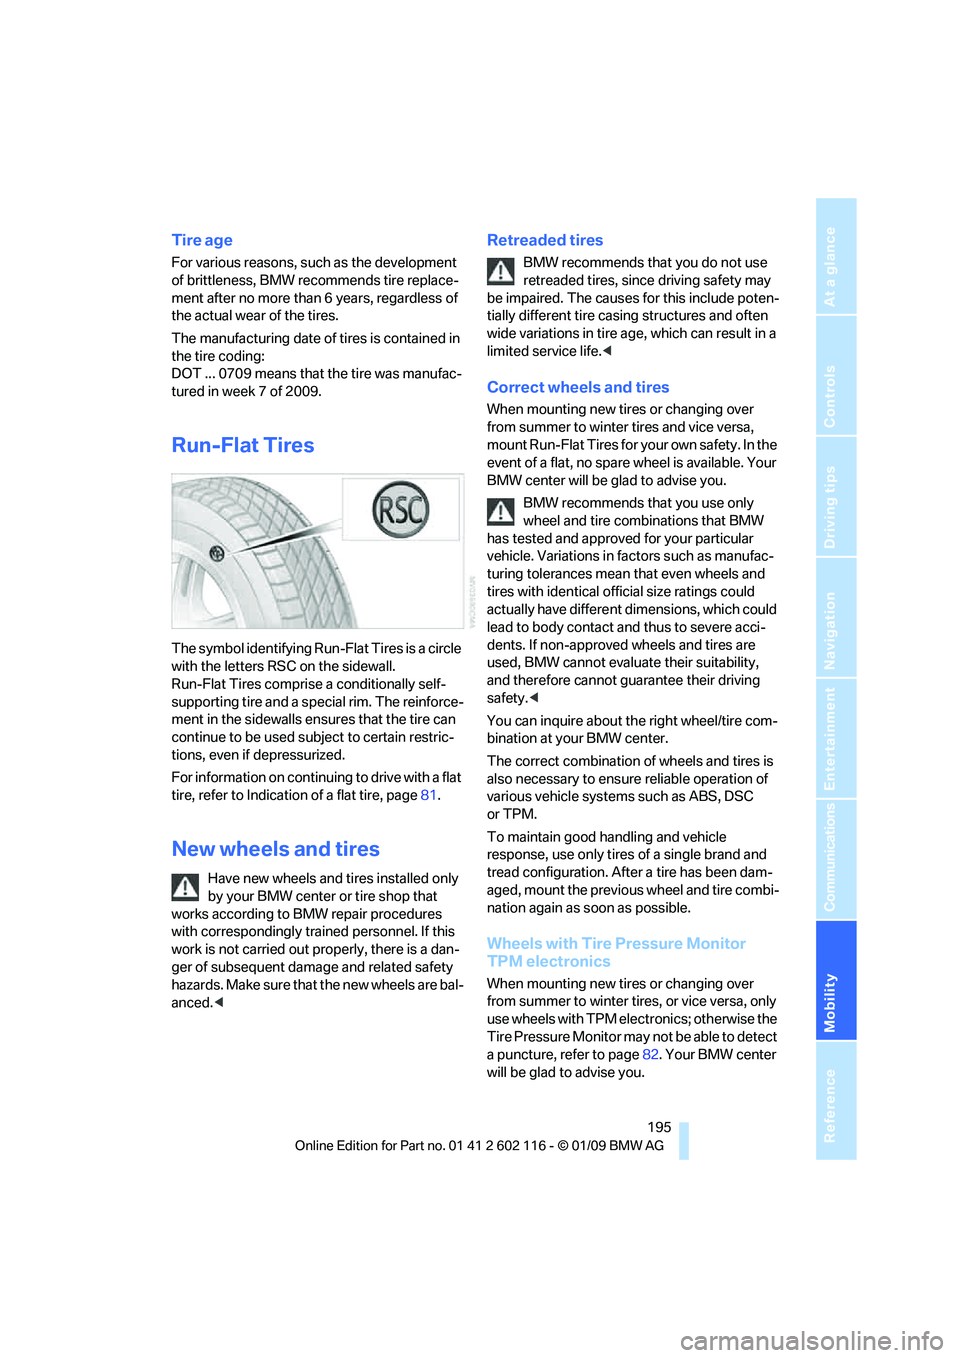
The symbol identifying Run-Flat Tires is a circle
with the letters RSC on the sidewall.
Run-Flat Tires comprise a conditionally self-
supporting tire and a special rim. The reinforce-
ment in the sidewalls ensures that the tire can
continue to be used su bject to certain restric-
tions, even if depressurized.
For information on continuing to drive with a flat
tire, refer to Indication of a flat tire, page 81.
New wheels and tires
Have new wheels and tires installed only
by your BMW center or tire shop that
works according to BMW repair procedures
with correspondingly trai ned personnel. If this
work is not carried out properly, there is a dan-
ger of subsequent dama ge and related safety
hazards. Make sure that the new wheels are bal-
anced. <
Retreaded tires
BMW recommends that you do not use
retreaded tires, since driving safety may
be impaired. The causes for this include poten-
tially different tire casi ng structures and often
wide variations in tire ag e, which can result in a
limited service life. <
Correct wheels and tires
When mounting new tires or changing over
from summer to winter tires and vice versa,
mount Run-Flat Tires for your own safety. In the
event of a flat, no spare wheel is available. Your
BMW center will be glad to advise you.
BMW recommends that you use only
wheel and tire combinations that BMW
has tested and approved for your particular
vehicle. Variations in factors such as manufac-
turing tolerances mean that even wheels and
tires with identical official size ratings could
actually have different dimensions, which could
lead to body contact and thus to severe acci-
dents. If non-approved wheels and tires are
used, BMW cannot evaluate their suitability,
and therefore cannot guarantee their driving
safety. <
You can inquire about the right wheel/tire com-
bination at your BMW center.
The correct combination of wheels and tires is
also necessary to ensure reliable operation of
various vehicle systems such as ABS, DSC
or TPM.
To maintain good handling and vehicle
response, use only tires of a single brand and
tread configuration. After a tire has been dam-
aged, mount the previous wheel and tire combi-
nation again as soon as possible.
Wheels with Tire Pressure Monitor
TPM electronics
When mounting new tires or changing over
from summer to winter tires, or vice versa, only
use wheels with TPM electronics; otherwise the
Tire Pressure Monitor may not be able to detect
a puncture, refer to page 82. Your BMW center
will be glad to advise you.
Page 198 of 248
Wheels and tires
196
Recommended tire brands
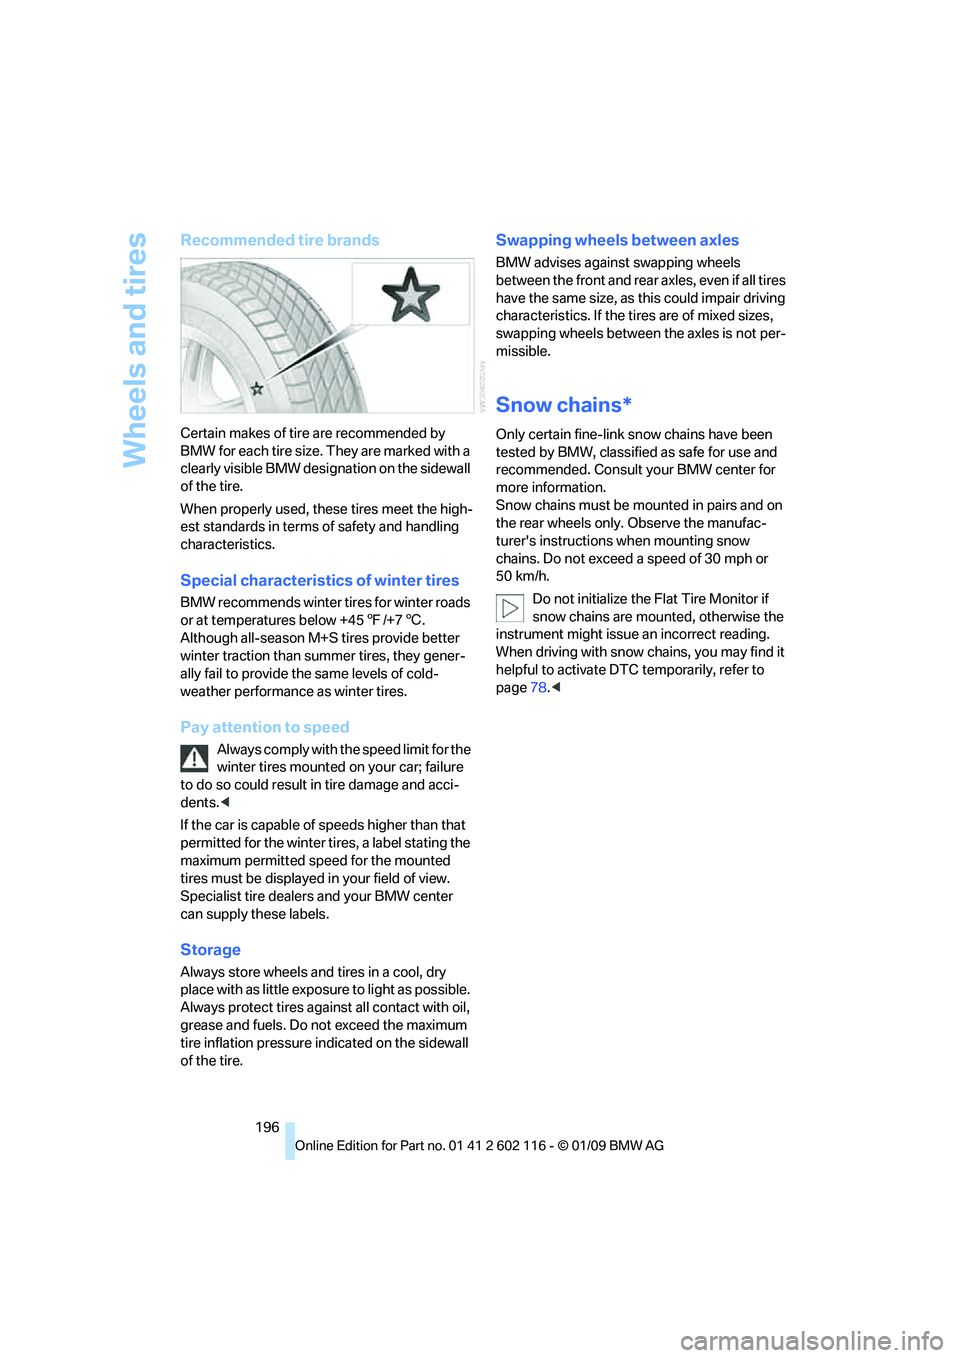
Certain makes of tire are recommended by
BMW for each tire size. They are marked with a
clearly visible BMW designation on the sidewall
of the tire.
When properly used, these tires meet the high-
est standards in terms of safety and handling
characteristics.
Special characteristics of winter tires
BMW recommends winter tires for winter roads
or at temperatures below +45 7/+7 6.
Although all-season M+ S tires provide better
winter traction than summer tires, they gener-
ally fail to provide the same levels of cold-
weather performance as winter tires.
Pay attention to speed
Always comply with the speed limit for the
winter tires mounted on your car; failure
to do so could result in tire damage and acci-
dents. <
If the car is capable of speeds higher than that
permitted for the winter ti res, a label stating the
maximum permitted speed for the mounted
tires must be displayed in your field of view.
Specialist tire dealers and your BMW center
can supply these labels.
Storage
Always store wheels and tires in a cool, dry
place with as little exposure to light as possible.
Always protect tires agains t all contact with oil,
grease and fuels. Do not exceed the maximum
tire inflation pressure indicated on the sidewall
of the tire.
Swapping wheels between axles
BMW advises against swapping wheels
between the front and rear axles, even if all tires
have the same size, as th is could impair driving
characteristics. If the tires are of mixed sizes,
swapping wheels betwee n the axles is not per-
missible.
Snow chains*
Only certain fine-link sn ow chains have been
tested by BMW, classified as safe for use and
recommended. Consult your BMW center for
more information.
Snow chains must be mounted in pairs and on
the rear wheels only. Observe the manufac-
turer's instructions when mounting snow
chains. Do not exceed a speed of 30 mph or
50 km/h.
Do not initialize the Flat Tire Monitor if
snow chains are mounted, otherwise the
instrument might issue an incorrect reading.
When driving with snow chains, you may find it
helpful to activate DTC temporarily, refer to
page 78.<
Page 208 of 248
Care
206
Preservation
A preservation treatment is necessary when
water no longer beads o ff of the clean paintwork
surface. Only use products for paintwork pres-
ervation that contain carnauba or synthetic
waxes.
Rubber seals
Treat only with water or rubber care products.
Do not use silicon-con taining care prod-
ucts on rubber seals; otherwise, noise
and damage could occur. <
Chrome parts
Carefully clean vehicle parts, such as the radia-
tor grill, door handles or window frames, with
copious quantities of water and a shampoo
additive. For additional treatment, use a chrome
polish.
Light-alloy wheels
For technical reasons, dust is generated during
braking that is deposited on the light-alloy
wheels. Remove the dust regularly using acid-
free rim cleaner.
Do not use aggressive, acidic, strongly
alkaline and abrasive cleaning agents or
steam jets over 140 7/60 6, otherwise dam-
age may occur. <
Outside sensors / cameras
Keep the sensors and cameras on the
outside of the vehicle, e.g. those of Park
Distance Control, clean and free of ice to ensure
that they remain fully functional. <
Interior care
Upholstery / cloth trim
Vacuum regularly with a vacuum cleaner to
remove superficial dirt.
To treat severe stains, e.g. from beverages, use
a soft sponge or lint-free microfiber cloth in
combination with suitable interior cleaners. Fol-
low the instructions on the packaging. Clean the upholstery
down to the seams
using a sweeping motion. Avoid strong
rubbing. <
Opened Velcro fasteners, etc., on pants
or other articles of clothing can damage
the seat covers. Ensure that Velcro fasteners
are closed. <
Leather / leather trim
The leather used by BM W is a high quality
natural product. Slight irregularities in the
leather are a typical char acteristic of natural
leather.<
Dust and road grit in th e pores and folds of the
leather have an abrasive effect, leading to
increased wear and caus ing the leather surface
to become brittle prematurely. Therefore, regu-
larly dust the leather with a cloth, for example.
In particular, ensure that light-colored leather is
cleaned regularly as it has a tendency to soil
more easily.
Treat the leather at least twice a year using a
suitable leather lotion, as dirt and grease will
gradually attack the leather's protective layer.
Rivets, etc., on pants or other articles of
clothing can damage the seat covers. <
Carpets / cargo bay
You can vacuum the carpets and floor mats or
clean them with interior cleaner if heavily soiled.
The floor mats can be removed for cleaning.
When replacing the mats, ensure that the seat
rails do not extend over the floor mats, as this
may damage the mats.
Lint on the floor mats occurs for technical rea-
sons and can be re moved by vacuuming
repeatedly.
When cleaning the interior, do not move
both seats all the wa y forward while mov-
ing them to their uppermost position and lean-
ing the backrests forward. Otherwise, the seats
could hit and damage th e seal on the wind-
shield, the sun visor or the headliner. <
Page 211 of 248
Mobility
209Reference
At a glance
Controls
Driving tips
Communications
Navigation
Entertainment
Xenon lamps
Have any work on the xenon lamp system,
including bulb replacements, performed
only by a BMW center or a workshop that works
according to BMW repair procedures with cor-
respondingly trained pers onnel. Otherwise, if
such work is carried out improperly, the high
voltage in the system presents the danger of
fatal injuries. <
Parking lamps and roadside parking
lamps, daytime running lamps
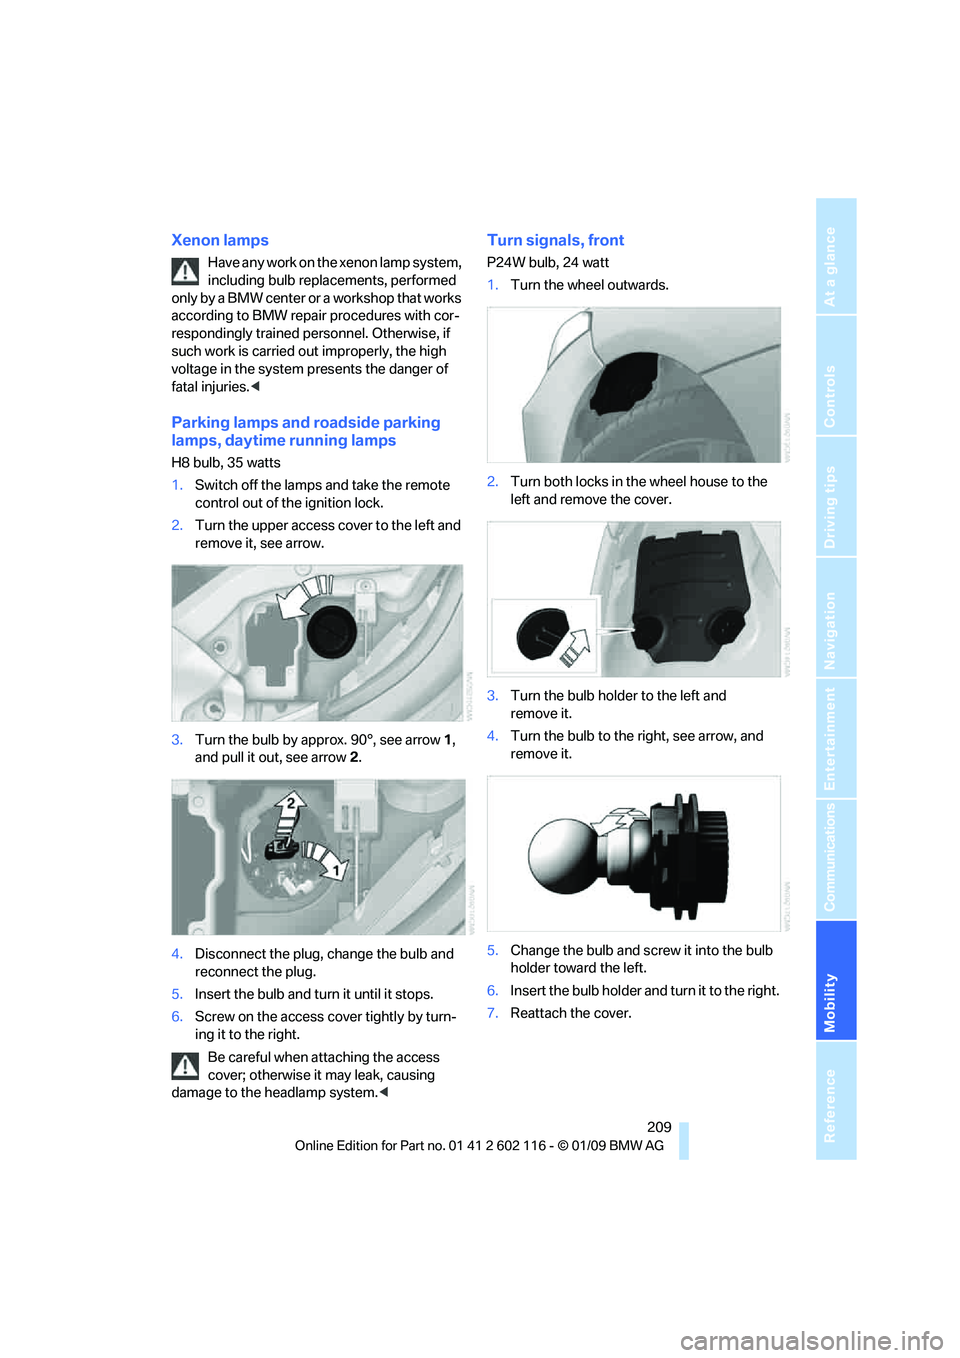
H8 bulb, 35 watts
1.Switch off the lamps and take the remote
control out of the ignition lock.
2. Turn the upper access cover to the left and
remove it, see arrow.
3. Turn the bulb by approx. 90°, see arrow 1,
and pull it out, see arrow 2.
4. Disconnect the plug, change the bulb and
reconnect the plug.
5. Insert the bulb and turn it until it stops.
6. Screw on the access co ver tightly by turn-
ing it to the right.
Be careful when attaching the access
cover; otherwise it may leak, causing
damage to the headlamp system. <
Turn signals, front
P24W bulb, 24 watt
1.Turn the wheel outwards.
2. Turn both locks in the wheel house to the
left and remove the cover.
3. Turn the bulb holder to the left and
remove it.
4. Turn the bulb to the right, see arrow, and
remove it.
5. Change the bulb and screw it into the bulb
holder toward the left.
6. Insert the bulb holder and turn it to the right.
7. Reattach the cover.
Page 213 of 248

Mobility
211Reference
At a glance
Controls
Driving tips
Communications
Navigation
Entertainment
2.Pull out the bulb holder, see arrow, and
change the bulb.
3. Attach the bulb holder.
4. Reattach the cover.
License plate lamp, rear lamp, center
brake lamp and turn signal
These lamps use LED technology for operation.
In the event of a malfunction, please contact
your BMW center or a workshop that works
according to BMW repair procedures with cor-
respondingly trained personnel.
Changing wheels
Your BMW is equipped with Run-Flat Tires as
standard. This removes the need to change a
wheel immediately in the event of a puncture.
For information on continuing to drive with a
damaged tire, refer to Indica tion of a flat tire on
page 81.
The symbol identifying Run-Flat Tires is a circle
with the letters RSC on the sidewall, refer to
Run-Flat Tires, page 195.
When mounting new tires or changing over
from summer to winter tires and vice versa,
mount Run-Flat Tires for your own safety. In the
event of a flat, no spare wheel is available. Your
BMW center will be glad to advise you. Refer
also to New wheels and tires, page 195.
The tools for changing wheels are avail-
able as optional accessories from your
BMW center. <
Jack mounting points
The jacking points are at the positions shown in
the illustration.
Lug bolt lock*
1Lug bolt for adapter
2 Adapter, in onboard tool kit
Removing the wind deflector
1.Remove the adapter 2 from the onboard
tool kit and insert it in the lug bolt.
2. Unscrew the lug bolt 1.
Remove the adapter after screwing the lug bolt
back on.
The code number is stamped on the front of the
adapter. Please note down this number and
keep it in a safe place in case the adapter should
get lost.
Page 218 of 248
Giving and receiving assistance
216
Being towed
Make sure that the ignition is switched on,
refer to page50, otherwise the low-beam
headlamps, tail lamps, turn signal indicators and
windshield wipers may be unavailable.
If the electrical system fails, do not tow-start or
tow the vehicle. The electrical steering wheel
lock cannot be released and the vehicle cannot
be steered. Jump-starting, refer to page 214.
Power steering assistance is not available when
the engine is not running. Thus, braking and
steering will requir e increased effort.<
Manual transmission
Gearshift lever in neutral position.
Automatic transmission
Selector lever in position N.
Changing selector leve r positions, refer to
page 54.
Do not exceed a towing speed of 31 mph
or 50 km/h and a towing distance of
31 miles/50 km, otherwise the automatic trans-
mission may be damaged. <
7-gear sport automatic transmission
with dual clutch
Ensure that transmission lock P is not
engaged as the rear wheels will otherwise
be blocked.
When using the car wash function, refer to
page 205, note that the parking lock P is
engaged automatically after approx. 30 min-
utes, blocking the rear wheels.
If an electrical malfunction occurs or if towing
takes longer than approx. 20 minutes, manually
release the parking lock, refer to page 58.<
Do not exceed a towing speed of 31 mph
or 50 km/h and a towing distance of
31 miles/50 km, otherwise the 7-gear sport
automatic transmission may be damaged. <
Towing methods
Do not lift the vehicle by a tow fitting or
body and chassis parts, otherwise dam-
age may result. <
With a tow bar
The towing vehicle must not be lighter
than the towed vehicle, otherwise it may
be impossible to maintain control. <
The tow fittings used should be on the same
side on both vehicles. Should it prove impossi-
ble to avoid mounting the tow bar at an angle,
please observe the following:
> Clearance and maneuvering capability will
be sharply limited during cornering.
> The tow bar will generate la teral forces if it is
attached offset.
Attach the tow bar to the tow fittings only,
as attaching it to othe r parts of the vehicle
could result in damage. <
With a tow rope
When starting off in the towing vehicle, make
sure that the tow rope is taut.
To avoid jerking and the associated
stresses on vehicle components when
towing, always use nylon ropes or nylon straps.
Attach the tow rope to the tow fittings only, as
attaching it to other pa rts of the vehicle could
result in damage. <
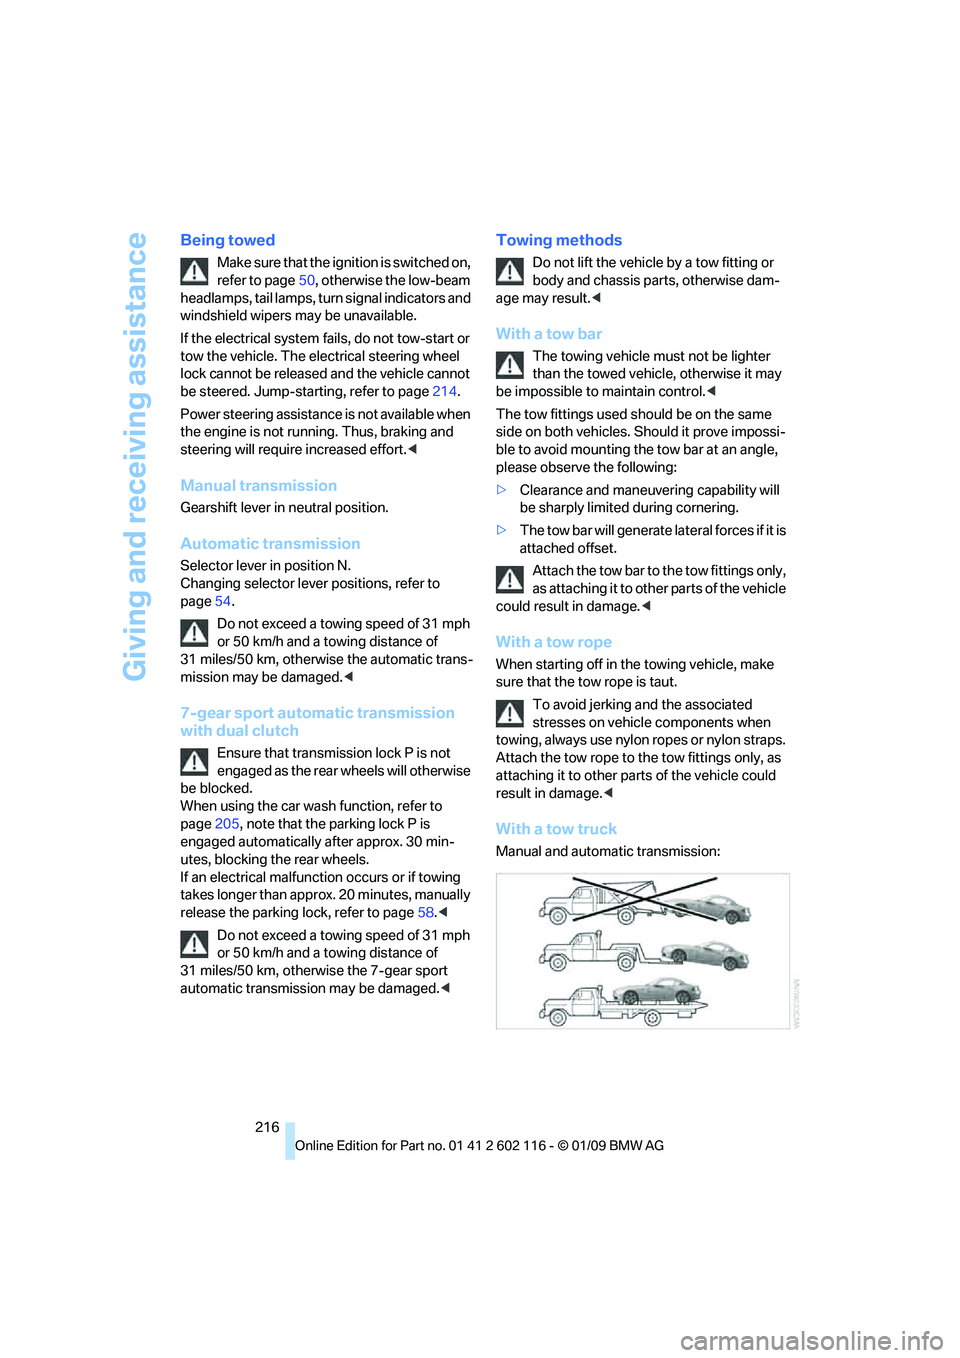
With a tow truck
Manual and automatic transmission:
Page 233 of 248
Reference 231
At a glance
Controls
Driving tips
Communications
Navigation
Entertainment
Mobility
Automatic Service Request 184
Automatic transmission with Steptronic 53
– interlock 53,54
– overriding selector lever lock 55
– shiftlock, refer to Changing
selector lever position 54
– sport program 54
– towing 215
– tow-starting 215
AUTO program for automatic
climate control 96
AUX-IN
– port 102
AUX-IN port 158
Average fuel consumption 66
– setting the units 68
Average speed 66
Avoiding unintentional alarms 34
Axle loads, refer to Weights 222
B
Backrest contour, refer to
Lumbar support 43
Backrests, refer to Seat adjustment 42
Backrest width adjustment 43
Backup lamps
– replacing bulb 210
Backup lamps, refer to Tail lamps 210
Band-aids, refer to First-aid
pouch 214
Bar, refer to Towing methods 216
Base plate for telephone or mobile phone
– refer to Snap-in adapter 174
– refer to Snap-in adapter in the center armrest storage
compartment 102
Bass, tone setting 138Battery
212
– charging 212
– disposal 36,212
– jump starting 214
– remote control 28
– temporary power failure 212
Battery for mobile phone 175
Battery renewal
– remote control 36
– remote control for vehicle 36
Being towed 216
Belts, refer to Safety belts 44
Belt tensioner, refer to Safety
belts 44
Beverage holders, refer to Cup holders 103
Blower, refer to Air flow rate 93,96
Bluetooth, activating/
deactivating 166
Bluetooth, refer to separate Owner's Manual
BMW
– car shampoo 207
BMW Assist, activating 180
BMW Assist 178
BMW center 184
BMW Homepage 4
BMW Maintenance System 202
BMW Search 180
BMW webpage 4
Bottle holders, refer to Cup holders 103
Brake
– parking brake 52
Brake assist, refer to Dynamic
Brake Control DBC 78
Brake fluid, refer to Service requirements 69
Brake lamps
– replacing bulb 210
Br
ake pads 110
– breaking in 110
Brake rotors 112
– brakes 110
– breaking in 110 Brakes
– ABS
78
– BMW Maintenance System 202
– breaking in 110
– service requirements 69
Brakes, refer to Braking safely 112
Brake system 110
– BMW Maintenance System 202
– breaking in 110
– disc brakes 112
Breakdown services, refer to Roadside Assistance 213
Breaking in the clutch 110
Breaking in the differential, refer to Engine and
differential 110
Break-in period 110
Brightness of Control Display 76
Bulb changing, refer to Lamps and bulbs 208
Button for starting the engine,
refer to Start/stop button 50
Buttons on the steering wheel 11
Buttons on the steering wheel 11
C
California Proposition 65
warning 6
Call
– accepting 167
– ending 168
– rejecting 168
Calling, refer to Phone
numbers, dialing 168
Can holders, refer to Cup holders 103
Capacities 222
Capacity of the cargo bay 222
Car battery, refer to Vehicle
battery 212
Car care, refer to Care 204