2009 BMW Z4 SDRIVE30I remote control
[x] Cancel search: remote controlPage 55 of 248

Controls
53Reference
At a glance
Driving tips
Communications
Navigation
Entertainment
Mobility
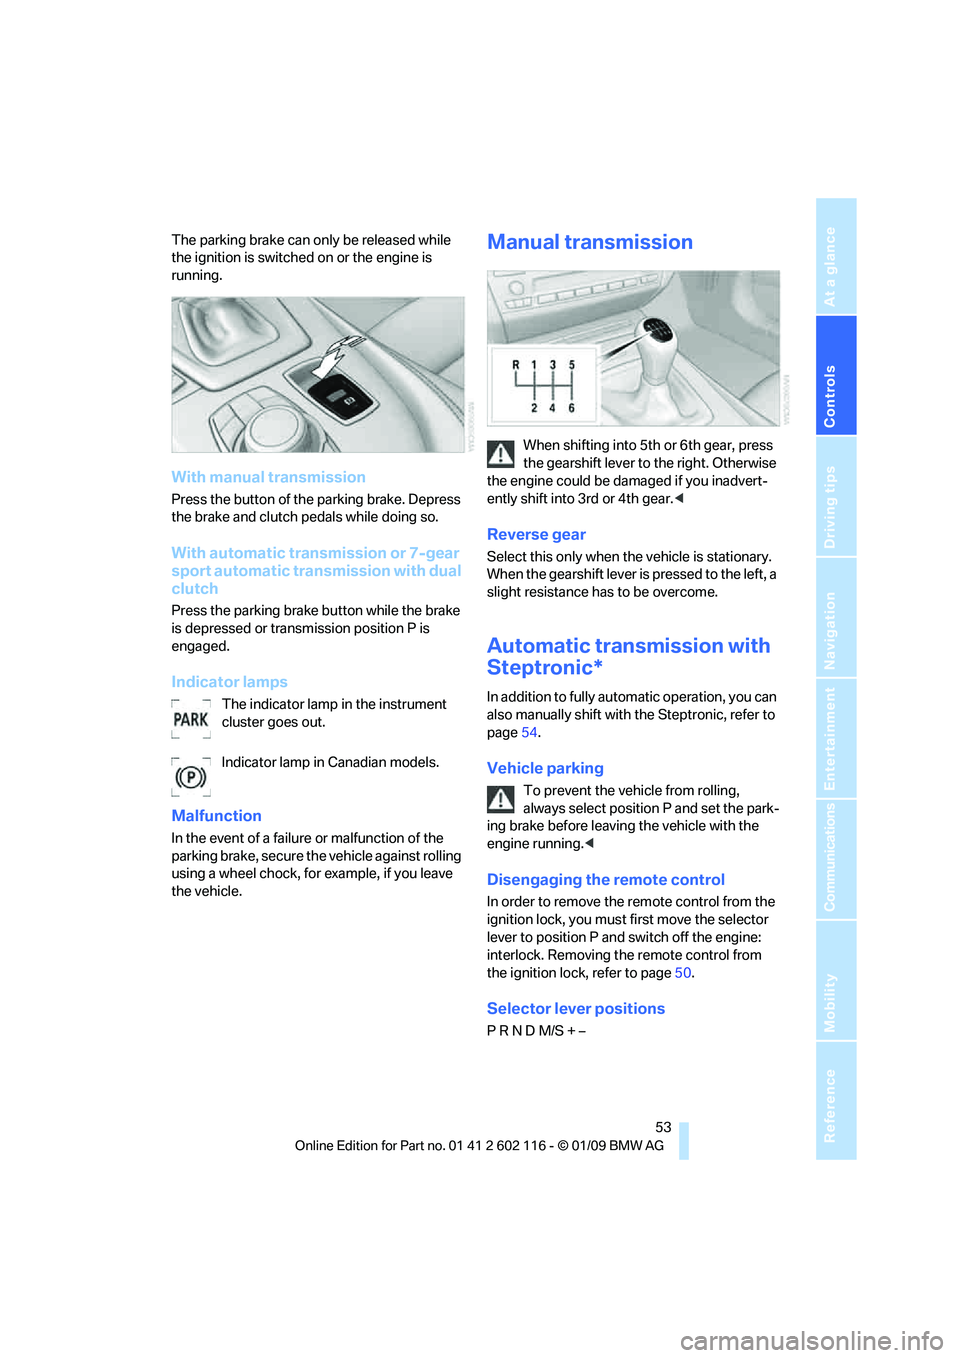
The parking brake can only be released while
the ignition is switched on or the engine is
running.
With manual transmission
Press the button of the parking brake. Depress
the brake and clutch pedals while doing so.
With automatic transmission or 7-gear
sport automatic transmission with dual
clutch
Press the parking brake button while the brake
is depressed or transmission position P is
engaged.
Indicator lamps
The indicator lamp in the instrument
cluster goes out.
Indicator lamp in Canadian models.
Malfunction
In the event of a failure or malfunction of the
parking brake, secure the vehicle against rolling
using a wheel chock, for example, if you leave
the vehicle.
Manual transmission
When shifting into 5th or 6th gear, press
the gearshift lever to the right. Otherwise
the engine could be da maged if you inadvert-
ently shift into 3rd or 4th gear. <
Reverse gear
Select this only when the vehicle is stationary.
When the gearshift lever is pressed to the left, a
slight resistance has to be overcome.
Automatic transmission with
Steptronic*
In addition to fully automatic operation, you can
also manually shift with the Steptronic, refer to
page 54.
Vehicle parking
To prevent the vehicle from rolling,
always select position P and set the park-
ing brake before leavin g the vehicle with the
engine running. <
Disengaging the remote control
In order to remove the remote control from the
ignition lock, you must first move the selector
lever to position P and switch off the engine:
interlock. Removing th e remote control from
the ignition lock, refer to page 50.
Selector lever positions
P R N D M/S + –
Page 59 of 248

Controls
57Reference
At a glance
Driving tips
Communications
Navigation
Entertainment
Mobility
R Reverse
Select this only when the vehicle is stationary.
N Neutral
You can select this in a car wash, for example.
The vehicle can roll.
N remains engaged after the engine is
switched off if you leave the remote con-
trol in the ignition lock. Use this function in an
automatic car wash, for ex ample. P is automati-
cally engaged after approx. 30 minutes. <
D drive mode
In drive mode, all forward gears are shifted auto-
matically.
Kick-down
To accelerate rapidly, e.g. when passing, press
the accelerator down past the resistance point.
This provides maximum acceleration.
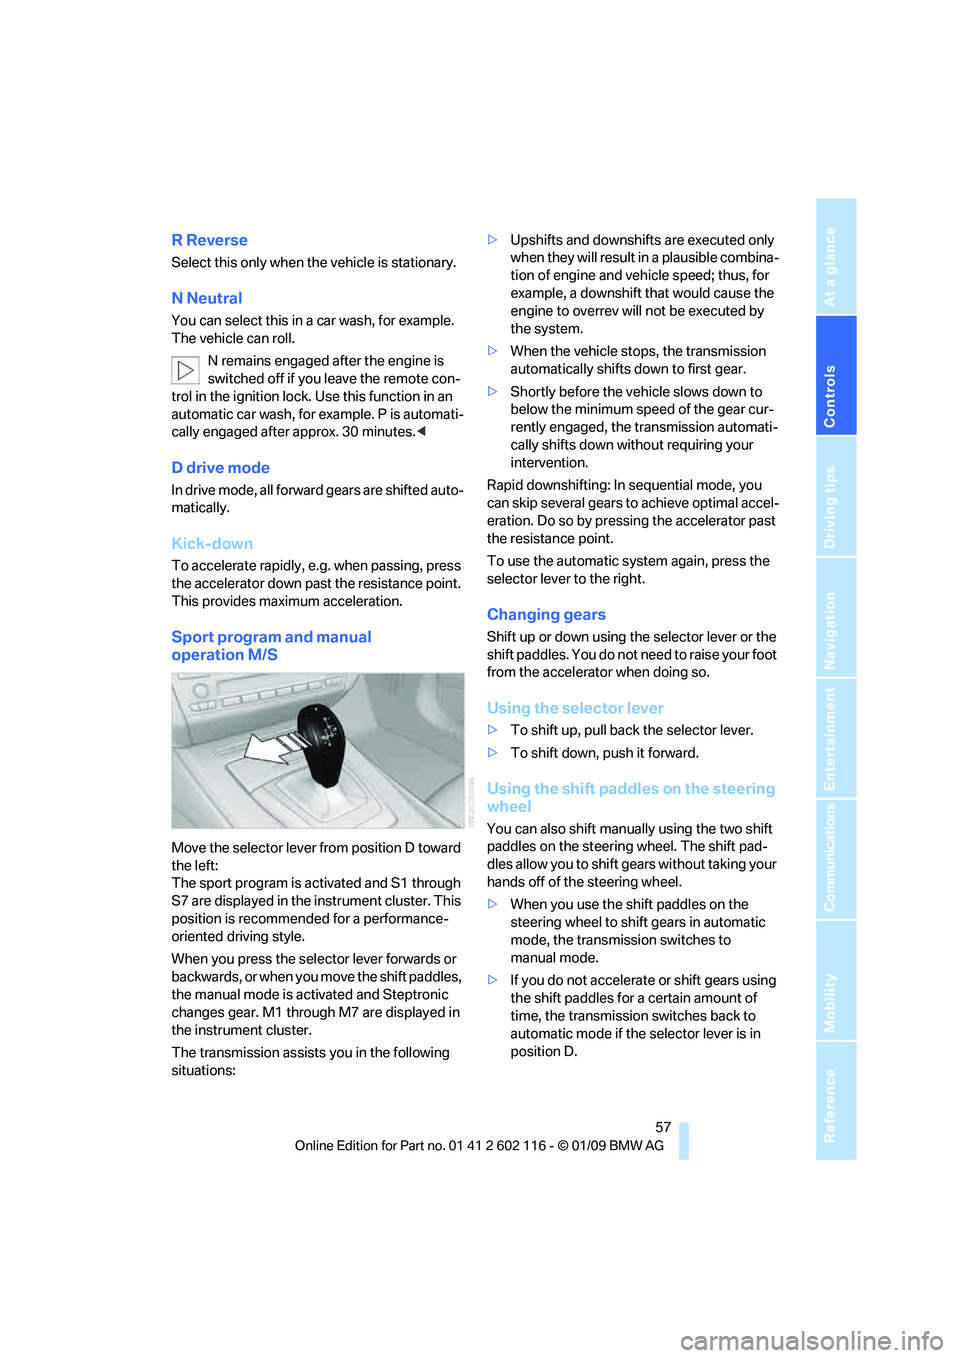
Sport program and manual
operation M/S
Move the selector lever from position D toward
the left:
The sport program is activated and S1 through
S7 are displayed in the instrument cluster. This
position is recommend ed for a performance-
oriented driving style.
When you press the selector lever forwards or
b a c k w a r d s , o r w h e n y o u m o v e t h e s h i f t p a d d l e s ,
the manual mode is ac tivated and Steptronic
changes gear. M1 through M7 are displayed in
the instrument cluster.
The transmission assists you in the following
situations: >
Upshifts and downshifts are executed only
when they will result in a plausible combina-
tion of engine and vehicle speed; thus, for
example, a downshift that would cause the
engine to overrev will not be executed by
the system.
> When the vehicle stops, the transmission
automatically shifts down to first gear.
> Shortly before the ve hicle slows down to
below the minimum speed of the gear cur-
rently engaged, the transmission automati-
cally shifts down without requiring your
intervention.
Rapid downshifting: In sequential mode, you
can skip several gears to achieve optimal accel-
eration. Do so by pressi ng the accelerator past
the resistance point.
To use the automatic system again, press the
selector lever to the right.
Changing gears
Shift up or down using th e selector lever or the
shift paddles. You do not ne ed to raise your foot
from the accelerator when doing so.
Using the selector lever
> To shift up, pull back the selector lever.
> To shift down, push it forward.
Using the shift paddles on the steering
wheel
You can also shift manually using the two shift
paddles on the steering wheel. The shift pad-
dles allow you to shift ge ars without taking your
hands off of the steering wheel.
> When you use the shift paddles on the
steering wheel to shift gears in automatic
mode, the transmission switches to
manual mode.
> If you do not accelerate or shift gears using
the shift paddles for a certain amount of
time, the transmission switches back to
automatic mode if the selector lever is in
position D.
Page 61 of 248

Controls
59Reference
At a glance
Driving tips
Communications
Navigation
Entertainment
Mobility
5.Turn the Allen wrench as far as it will go,
arrow 2. The transmission lock is released.
Do not turn the Allen wrench in the
opposite direction as this may dam-
age the mechanism.<
6. Draw the Allen wrench out of the opening.
After parking the vehicle, lock the trans-
mission lock again. Otherwise, there is a
danger of the vehicle rolling. <
Locking
1.Press the button, see arrow.
The transmission lock is locked again.
2. Clip the sleeve of the selector lever back in
place.
3. Set the parking brake.
Jump-starting and towing, refer to page 214.
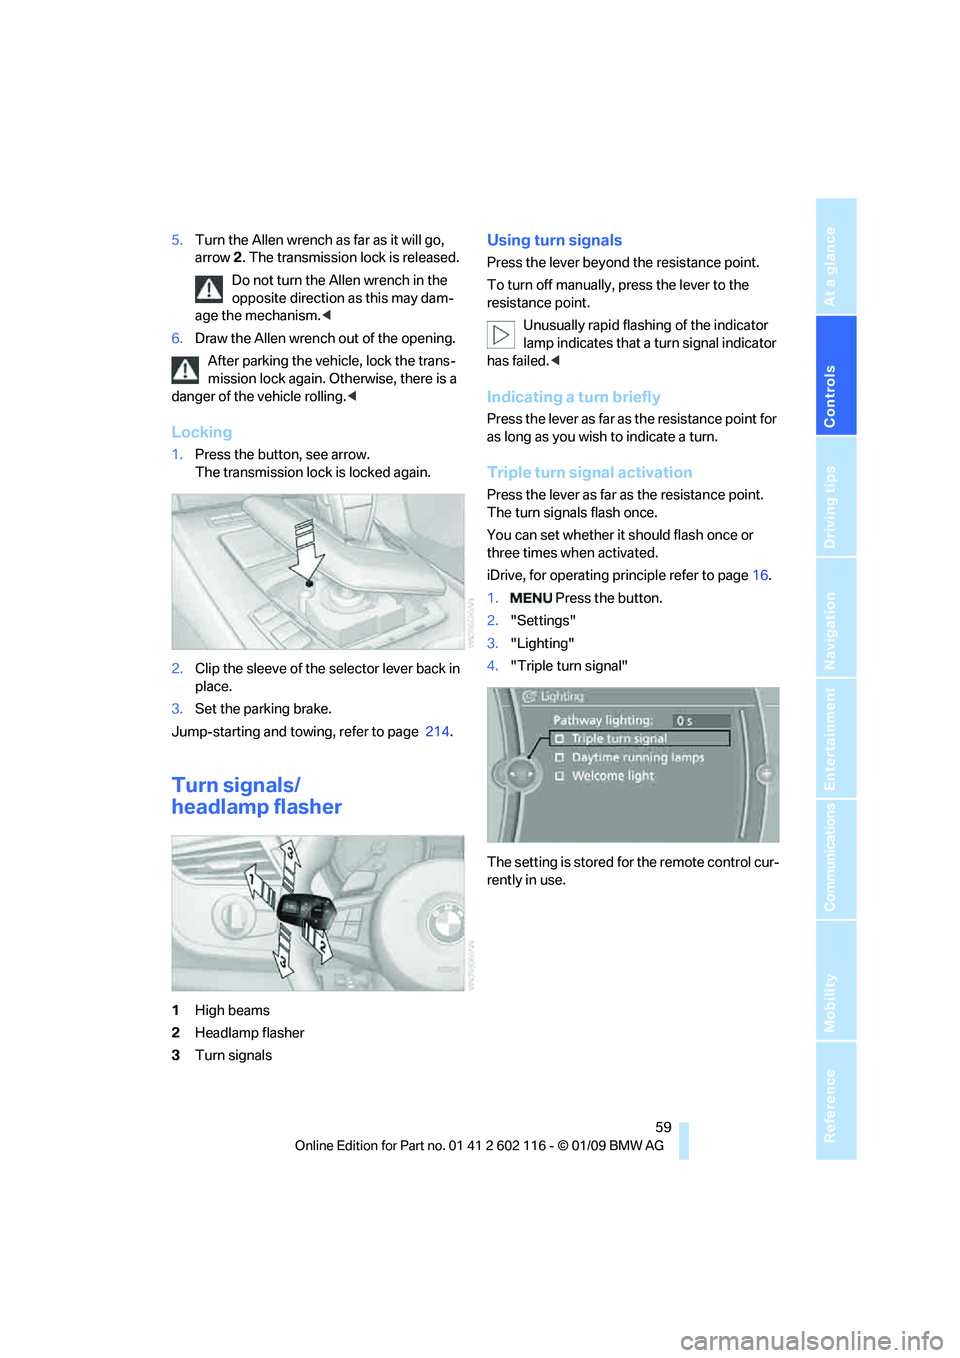
Turn signals/
headlamp flasher
1High beams
2 Headlamp flasher
3 Turn signals
Using turn signals
Press the lever beyond the resistance point.
To turn off manually, press the lever to the
resistance point.
Unusually rapid flashi ng of the indicator
lamp indicates that a turn signal indicator
has failed. <
Indicating a turn briefly
Press the lever as far as the resistance point for
as long as you wish to indicate a turn.
Triple turn signal activation
Press the lever as far as the resistance point.
The turn signals flash once.
You can set whether it should flash once or
three times when activated.
iDrive, for operating pr inciple refer to page16.
1. Press the button.
2. "Settings"
3. "Lighting"
4. "Triple turn signal"
The setting is stored for the remote control cur-
rently in use.
Page 66 of 248

Everything under control
64
Everything under control
Odometer, outside
temperature display, clock
1Knob in the instrument cluster
2 Outside temperature display and clock
3 Odometer and trip odometer
Knob in the instrument cluster
>To reset the trip odometer while the ignition
is switched on
> To display the time, outside temperature
and odometer briefly while the ignition is
switched off
Units of measure
To select the respective units of measure, miles
or km for the odometer as well as 7 or 6 for
the outside temperat ure, refer to page68.
The setting is stored fo r the remote control cur-
rently in use.
Time, outside temperature display
Setting the time, refer to page 71.
Outside temperature warning
When the displayed temperature sinks to
approx. +37 7/+3 6, a signal sounds and a
warning lamp lights up. There is an increased
risk of black ice. Black ice can also form at temperatures
above Select the symbol. +37
7/+3 6.
You should therefore driv e carefully on bridges
and shaded roads, for example, otherwise there
is an increased risk of an accident. <
Odometer and trip odometer
Resetting trip odometer:
With the ignition switched on, press button 1 in
the instrument cluster.
When the vehicle is parked
If you still want to view the time, outside tem-
perature and odometer re ading briefly after the
remote control has been taken out of the igni-
tion lock:
Press button 1 in the instrument cluster.
Tachometer
Never force the engine speed up into the red
warning field, see arrow. In this range, the fuel
supply is interrupted to protect the engine.
Page 70 of 248

Everything under control
68
Settings and information
Operating principle
1Button for:
>Selecting display
> Setting values
2 Button for:
>Confirming selected display or set
values
> Calling up computer information 65
3 When the lights are on: instrument lighting
brightness 90
4 Calling up Check Control 73
5 Checking engine oil level 198
6 Setting the time 71
7 Setting the date 72
8 Viewing service re quirement display 69
Exiting displays
The outside-temperature reading and the time
reappear when you press button 2 or if you
make no entries within approx. 15 seconds. If
required, complete the current setting first.
Units of measure
iDrive, for operating principle refer to page16.
1. "Settings"
2. "Language/Units"
3. Select the desired menu item.
4. Select the desired unit.
The settings are stored for the remote control
currently in use.
Page 71 of 248

Controls
69Reference
At a glance
Driving tips
Communications
Navigation
Entertainment
Mobility
Service requirements
The remaining driving distance and the date of
the next scheduled service are displayed briefly
immediately after you start the engine or switch
on the ignition.
The extent of service work required can
be read out from the remote control by
your BMW Service Advisor. <
For certain maintenance operations, you can
view the respective distance remaining or due
date individually in the instrument cluster.
1. Switch on the ignition, refer to page 50.
2. Press button 1 in the turn indicator lever up
or down repeatedly until the appropriate
symbol appears in the display, accompa-
nied by the words "SERVICE-INFO".
3. Press button 2.
4. Use button 1 to scroll through the individual
service items.
Page 73 of 248

Controls
71Reference
At a glance
Driving tips
Communications
Navigation
Entertainment
Mobility
Entering deadlines for legally required
inspections*
Make sure the date on the Control Display is set
correctly, refer to page 72, otherwise the effec-
tiveness of CBS Conditio n Based Service is not
ensured.
iDrive, for operating principle refer to page 16.
1. "Vehicle Info"
2. "Vehicle status"
3. "Service required"
4. "§ Vehicle inspection"
5. Open the menu for entering the deadline.
6. "Date:/"
7. Create the settings.
8. Press the controller to apply the setting.
The year is highlighted.
9. Turn the controller to make the adjustment.
10. Press the controller to apply the setting.
The date entry is stored.
To exit from the menu:
Move the controller to the left.
More information on the BMW Maintenance
System can be found on page 202.
Clock
The settings are stored for the remote control
currently in use, refer also to Personal Profile on
page 28.
Setting the time
In the instrument cluster
To set the 12h/24h mode, refer to Setting the
time format below.
1. Press button 1 in the turn indicator lever up
or down repeatedly until the appropriate
symbol appears in the display, accompa-
nied by the time and the word "SET".
2. Press button 2.
3. Use button 1 to set the hours.
4. Press button 2 to confirm the entry.
5. Use button 1 to set the minutes.
6. Press button 2 to confirm the entry.
7. Press button 2.
The system accepts the new time.
Via iDrive
iDrive, for operating pr inciple refer to page16.
1. Press the button.
The main menu is displayed.
Page 74 of 248

Everything under control
72
2.
"Settings"
Setting the time
1."Settings"
2. "Time/Date"
3. "Time:"
4. Turn the controller until the desired hours
are displayed, and then press the controller.
5. Turn the controller unt il the desired minutes
are displayed, and then press the controller.
The time is stored.
Setting the time format
1. "Settings"
2. "Time/Date"
3. "Format:"
4. Select the desired format and press the
controller.
The time format is stored.
Date
The settings are stored for the remote control
currently in use, refer also to Personal Profile on
page 28.
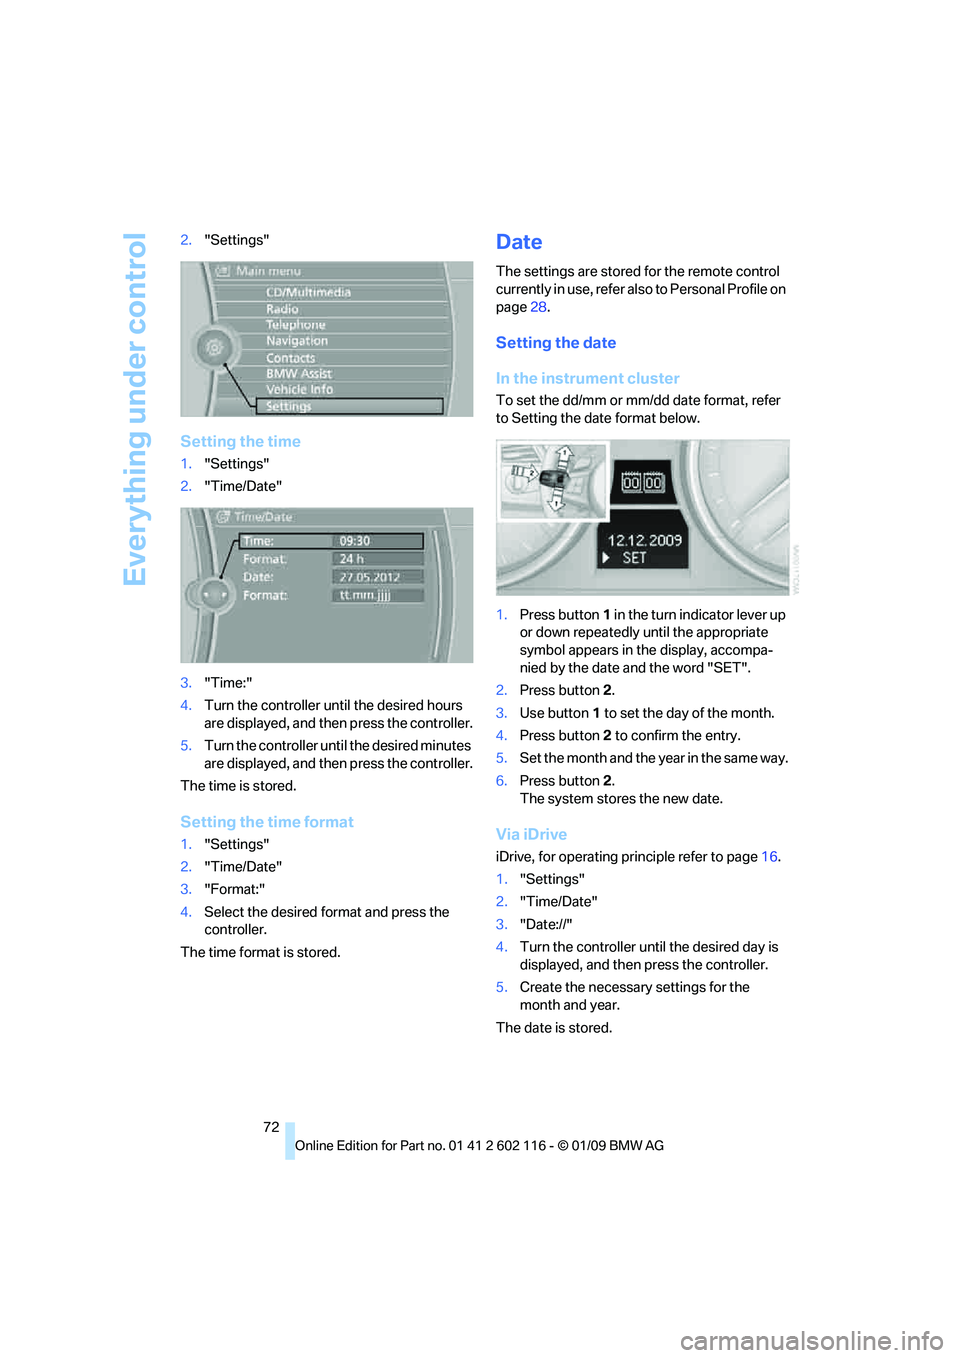
Setting the date
In the instrument cluster
To set the dd/mm or mm/dd date format, refer
to Setting the date format below.
1. Press button 1 in the turn indicator lever up
or down repeatedly until the appropriate
symbol appears in the display, accompa-
nied by the date and the word "SET".
2. Press button 2.
3. Use button 1 to set the day of the month.
4. Press button 2 to confirm the entry.
5. Set the month and the ye a r i n t he s a m e w a y .
6. Press button 2.
The system stores the new date.
Via iDrive
iDrive, for operating pr inciple refer to page16.
1. "Settings"
2. "Time/Date"
3. "Date://"
4. Turn the controller until the desired day is
displayed, and then press the controller.
5. Create the necessary settings for the
month and year.
The date is stored.