2009 BMW Z4 SDRIVE30I stop start
[x] Cancel search: stop startPage 130 of 248
Destination guidance
128
Destination guidance
Starting destination
guidance
1."Navigation"
2. "Enter address"
3. Select the destination.
4. "Start guidance"
After the route is calculated, the route is dis-
played in the map on the Control Display.
Terminating destination
guidance
1. "Navigation"
2. "Map"
3. Select the symbol
Continuing destination
guidance
If the destination was no t reached at the end of
the last trip, the system asks whether it should
continue destination guidance.
Select "Resume guidance" or "Stop guidance".
Route criteria
General information
You can influence the calculated route by
choosing certain route criteria. You can change
the route criteria as often as you like during des-
tination entry or during destination guidance.
The route is planned acco rding to fixed rules.
The type of road is ta ken into account, e.g.
whether it is a highway or a winding road. As a
result, the routes recommended by the naviga-
tion system may not always be the same ones
that you would choose based on personal
experience. The settings are stored
for the remote control
currently in use.
Changing route criteria
1. "Navigation"
2. "Map"
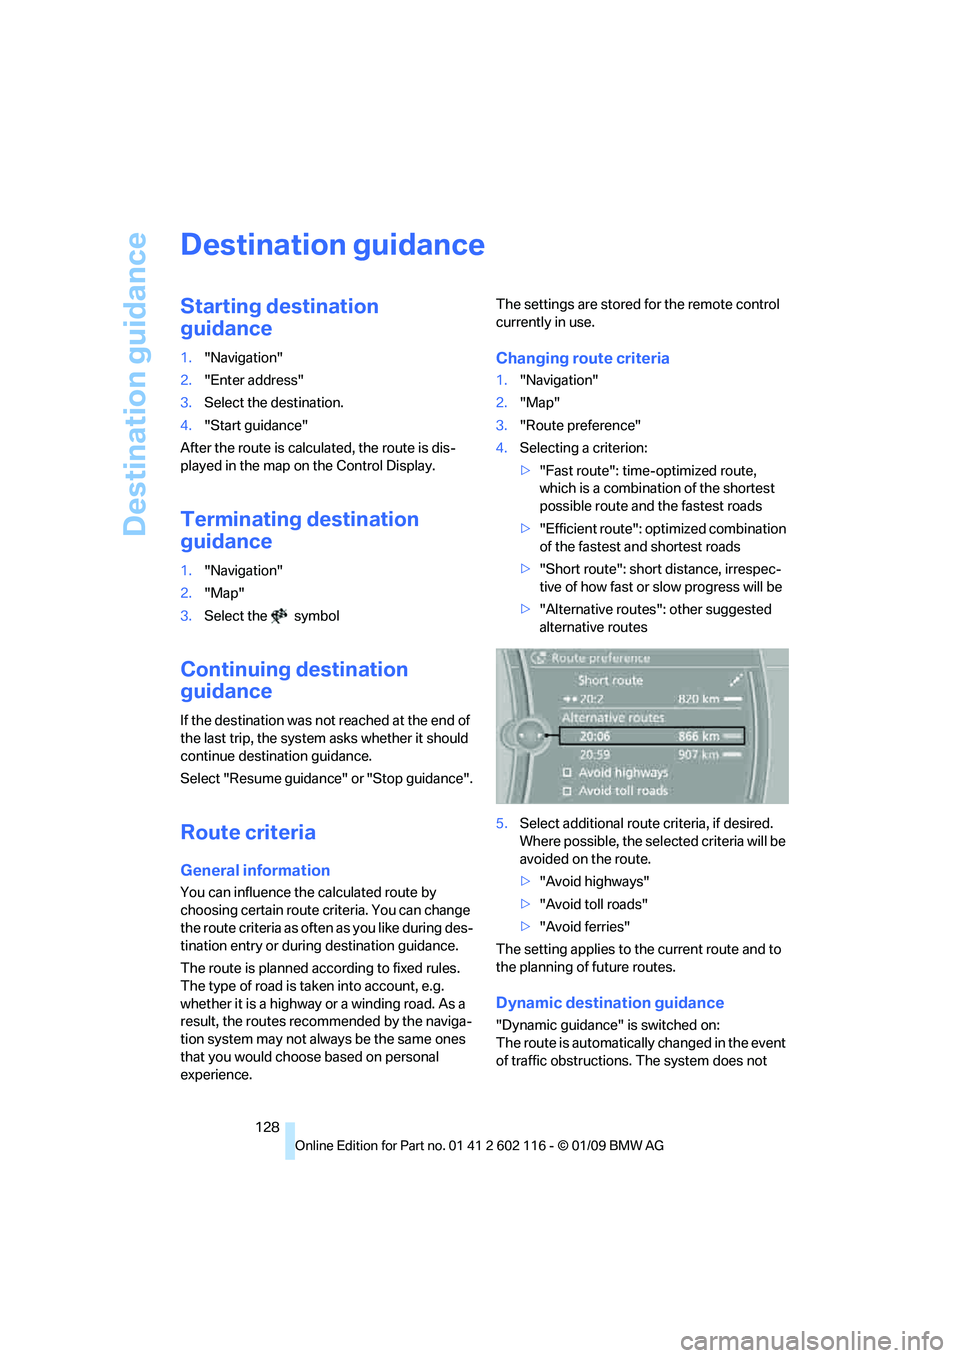
3. "Route preference"
4. Selecting a criterion:
>"Fast route": time-optimized route,
which is a combination of the shortest
possible route and the fastest roads
> "Efficient route": optimized combination
of the fastest and shortest roads
> "Short route": short distance, irrespec-
tive of how fast or slow progress will be
> "Alternative routes": other suggested
alternative routes
5. Select additional route criteria, if desired.
Where possible, the sele cted criteria will be
avoided on the route.
> "Avoid highways"
> "Avoid toll roads"
> "Avoid ferries"
The setting applies to th e current route and to
the planning of future routes.
Dynamic destination guidance
"Dynamic guidance" is switched on:
The route is automatically changed in the event
of traffic obstructions. The system does not
Page 132 of 248
Destination guidance
130
Repeating a voice instruction
1."Navigation"
2. "Map"
3. Select the symbol twice.
Adjusting volume for voice instructions
The volume can be adjust ed only while a voice
instruction is being issued.
1. Have the last voice in struction repeated, if
necessary.
2. Turn the button during the voice instruction
to select the desired volume.
The setting is stored fo r the remote control cur-
rently in use.
Map display
Map display
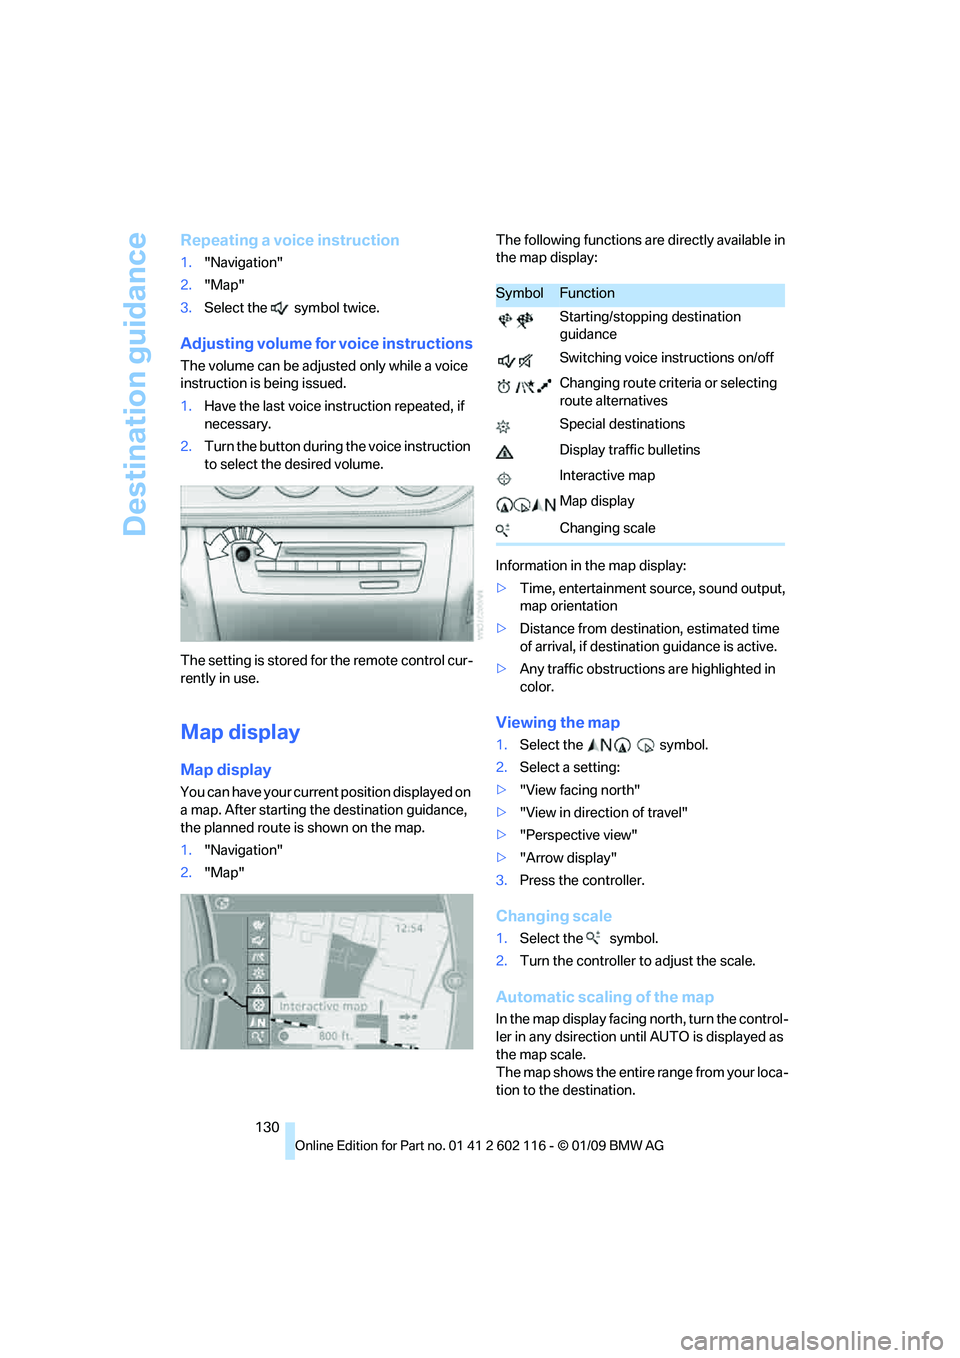
You can have your current position displayed on
a map. After starting th e destination guidance,
the planned route is shown on the map.
1. "Navigation"
2. "Map" The following functions ar
e directly available in
the map display:
Information in the map display:
> Time, entertainment so urce, sound output,
map orientation
> Distance from destination, estimated time
of arrival, if destination guidance is active.
> Any traffic obstructions are highlighted in
color.
Viewing the map
1.Select the symbol.
2. Select a setting:
> "View facing north"
> "View in direction of travel"
> "Perspective view"
> "Arrow display"
3. Press the controller.
Changing scale
1.Select the symbol.
2. Turn the controller to adjust the scale.
Automatic scaling of the map
In the map display facing north, turn the control-
ler in any dsirection until AUTO is displayed as
the map scale.
The map shows the entire range from your loca-
tion to the destination.
SymbolFunction
Starting/stopping destination
guidance
Switching voice instructions on/off
Changing route criteria or selecting
route alternatives
Special destinations
Display traffic bulletins
Interactive map
Map display
Changing scale
Page 151 of 248
Navigation
Entertainment
Driving tips
149Reference
At a glance
Controls
Communications
Mobility
The Video menu is displayed:
In fast forward/reverse: the speed increases
every time the controller is pressed. To stop,
start playback.
DVD menu
1.If necessary, turn the controller to open the
video menu.
2. "DVD menu"
The DVD menu is displayed. The display
depends on the contents of the DVD.
> To select menu items: move and press the
controller.
> To change to the Vide o menu: turn the con-
troller and select "Back".
DVD/VCD settings
For some DVDs, settings can only be made via
the DVD menu; refer also to the information on
your DVD.
Language*
1. Turn the controller during playback.
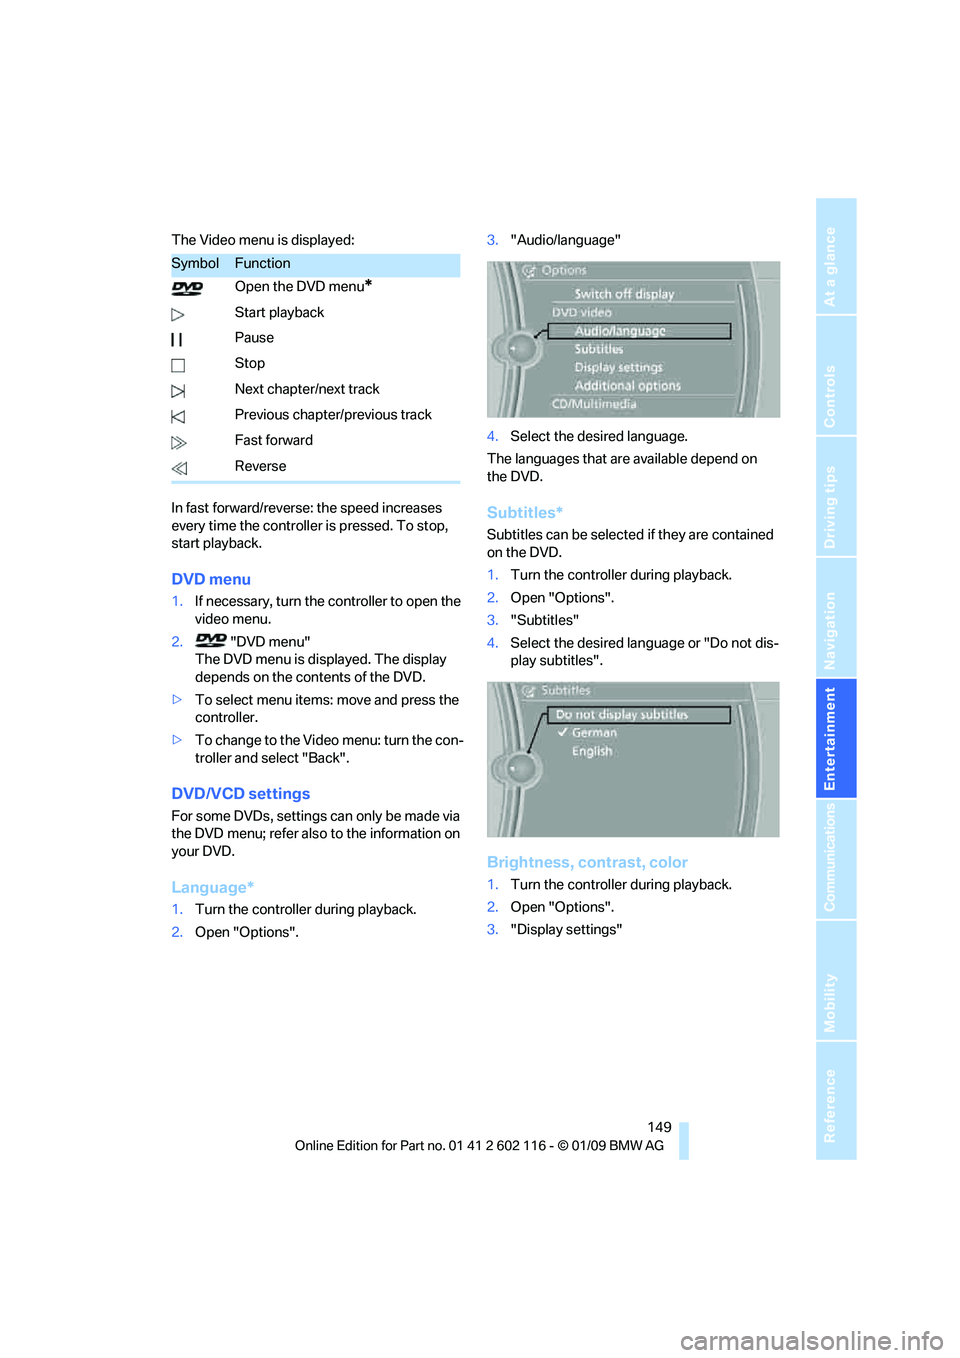
2. Open "Options". 3.
"Audio/language"
4. Select the desired language.
The languages that are available depend on
the DVD.
Subtitles*
Subtitles can be selected if they are contained
on the DVD.
1. Turn the controller during playback.
2. Open "Options".
3. "Subtitles"
4. Select the desired language or "Do not dis-
play subtitles".
Brightness, contrast, color
1.Turn the controller during playback.
2. Open "Options".
3. "Display settings"
SymbolFunction
Open the DVD menu
*
Start playback
Pause
Stop
Next chapter/next track
Previous chapter/previous track
Fast forward
Reverse
Page 167 of 248
165
Entertainment
Reference
At a glance
Controls
Driving tips
Communications
Navigation
Mobility
> Bluetooth is activated in the vehicle, refer to
page 166, and on the mobile phone.
> Certain presettings ma y be necessary on
some mobile phones: e.g. using the follow-
ing menu items:
> Bluetooth switched on
> Connection must be allowed without
requiring further confirmation
> Reconnection
> Depending on the mobile phone type, the
power-saving mode setting, for example,
may result in a paired mobile phone not
being detected by the vehicle.
> For pairing purposes, define any 4 to 16-
digit number as a Bluetooth passkey,
e.g. 123. A long and complex number offers
the best protection against unauthorized
access. This Bluetooth passkey is no longer
required after pairing has been successful.
> The ignition is switched on.
Pair the mobile phone with the vehicle
only when the car is stationary, to avoid
endangering the car's occupants and other
road users by be ing distracted.<
Switching on the ignition
1.Insert the remote contro l all the way into the
ignition lock.
2. Switch on the ignition without operating the
brake or clutch or pressing the start/stop
button.
Preparation via iDrive
iDrive, for operating principle refer to page 16.
3. "Telephone"
4. "Bluetooth" 5.
"Add new phone"
The Bluetooth name of the vehicle is dis-
played.
Preparation via the mobile phone
6.Further steps must be carried out with the
mobile phone and vary depending on the
model. Please refer to your mobile phone's
operating instructions, e.g. under the topics
of Searching for a Bluetooth device, Linking
or Pairing.
The Bluetooth name of the vehicle appears
on the mobile phone display.
7. Select the Bluetooth na me of the vehicle on
the mobile phone display.
Logging in
Depending on your mob ile phone, you will see
messages, first on the mobile phone display or
on the iDrive, requesting you to enter the same
Bluetooth passkey previously determined
by you.
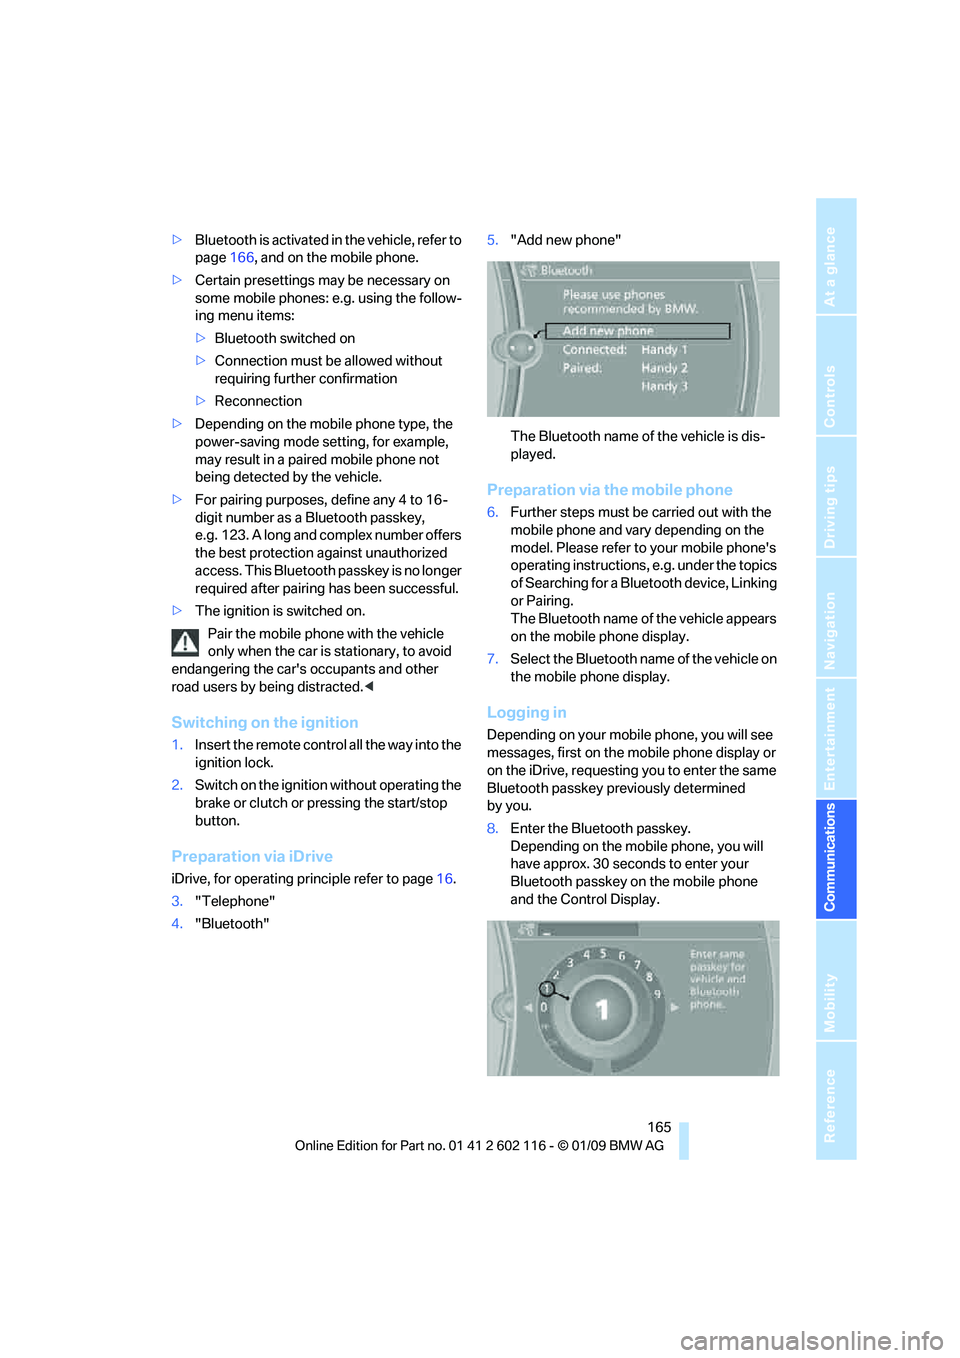
8. Enter the Bluetooth passkey.
Depending on the mobile phone, you will
have approx. 30 seco nds to enter your
Bluetooth passkey on the mobile phone
and the Control Display.
Page 217 of 248
Mobility
215Reference
At a glance
Controls
Driving tips
Communications
Navigation
Entertainment
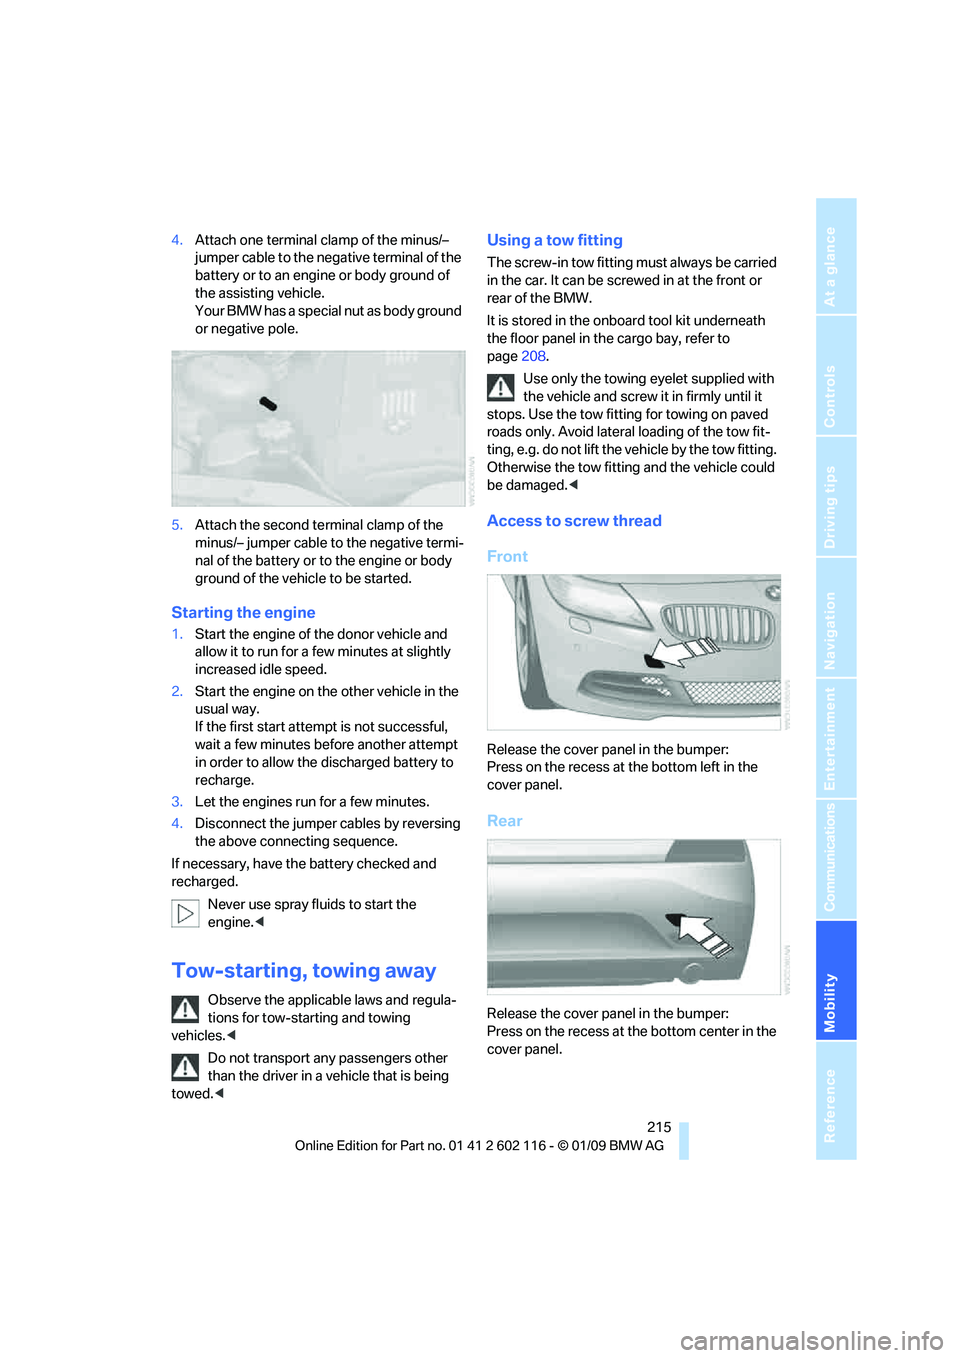
4.Attach one terminal clamp of the minus/–
jumper cable to the nega tive terminal of the
battery or to an engine or body ground of
the assisting vehicle.
Your BMW has a special nut as body ground
or negative pole.
5. Attach the second te rminal clamp of the
minus/– jumper cable to the negative termi-
nal of the battery or to the engine or body
ground of the vehicle to be started.
Starting the engine
1. Start the engine of the donor vehicle and
allow it to run for a few minutes at slightly
increased idle speed.
2. Start the engine on the other vehicle in the
usual way.
If the first start attempt is not successful,
wait a few minutes be fore another attempt
in order to allow the discharged battery to
recharge.
3. Let the engines run for a few minutes.
4. Disconnect the jumper cables by reversing
the above connecting sequence.
If necessary, have the battery checked and
recharged.
Never use spray fluids to start the
engine. <
Tow-starting, towing away
Observe the applicable laws and regula-
tions for tow-starting and towing
vehicles. <
Do not transport any passengers other
than the driver in a vehicle that is being
towed. <
Using a tow fitting
The screw-in tow fitting must always be carried
in the car. It can be sc rewed in at the front or
rear of the BMW.
It is stored in the onboard tool kit underneath
the floor panel in the cargo bay, refer to
page 208.
Use only the towing eyelet supplied with
the vehicle and screw it in firmly until it
stops. Use the tow fitting for towing on paved
roads only. Avoid lateral loading of the tow fit-
ting, e.g. do not lift the vehicle by the tow fitting.
Otherwise the tow fitting and the vehicle could
be damaged. <
Access to screw thread
Front
Release the cover panel in the bumper:
Press on the recess at the bottom left in the
cover panel.
Rear
Release the cover panel in the bumper:
Press on the recess at the bottom center in the
cover panel.
Page 219 of 248
Mobility
217Reference
At a glance
Controls
Driving tips
Communications
Navigation
Entertainment
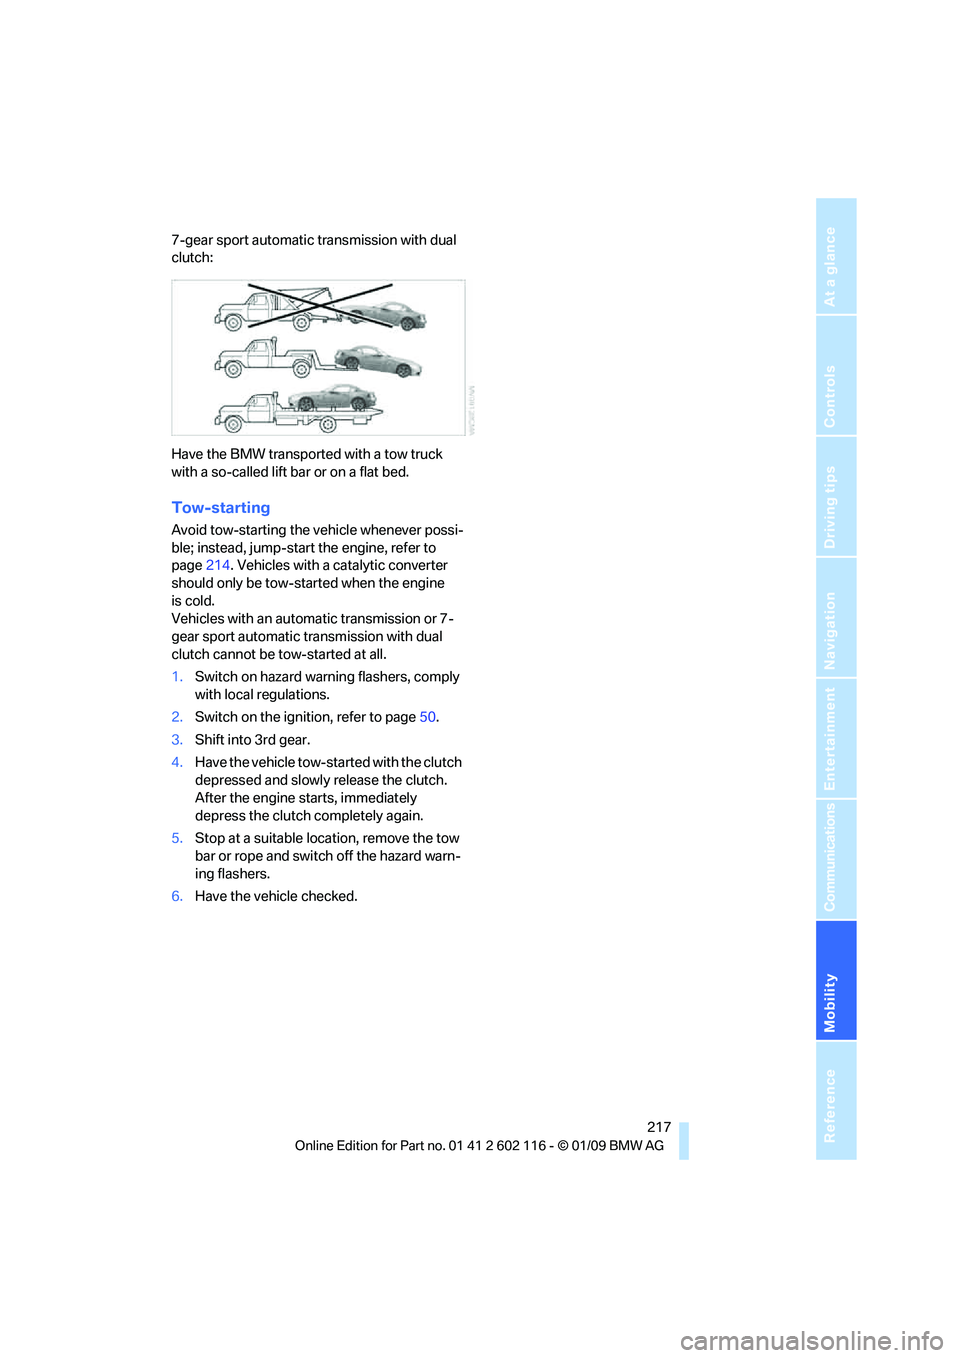
7-gear sport automatic transmission with dual
clutch:
Have the BMW transported with a tow truck
with a so-called lift bar or on a flat bed.
Tow-starting
Avoid tow-starting the vehicle whenever possi-
ble; instead, jump-start the engine, refer to
page214. Vehicles with a catalytic converter
should only be tow-st arted when the engine
is cold.
Vehicles with an automatic transmission or 7-
gear sport automatic transmission with dual
clutch cannot be tow-started at all.
1. Switch on hazard warning flashers, comply
with local regulations.
2. Switch on the ignition, refer to page 50.
3. Shift into 3rd gear.
4. Have the vehicle tow-started with the clutch
depressed and slowly release the clutch.
After the engine starts, immediately
depress the clutch completely again.
5. Stop at a suitable location, remove the tow
bar or rope and switch off the hazard warn-
ing flashers.
6. Have the vehi cle checked.
Page 227 of 248
Reference 225
At a glance
Controls
Driving tips
Communications
Navigation
Entertainment
Mobility
Satellite radio
Presets
Telephone
Navigation
General information
FunctionCommand
Calling up the satellite radio{Satellite radio}
Switching on the satellite radio {Satellite radio on }
Selecting a satellite radio channel {Satellite radio channel } e.g. channel 2
FunctionCommand
Calling up the stored stations {Presets }
Choosing a stored station {Select preset }
Selecting a stored station {Preset … } e.g. stored station 2
FunctionCommand
Opening the Telephone menu {Telephone }
Displaying the phone book {Phonebook }
Redialing {Redial }
Displaying accepted calls {Received calls }
Dialing a phone number {Dial number }
Displaying the list of messages {Messages}
Displaying Bluetooth {Bluetooth }
FunctionCommand
Navigation menu {Navigation }
Opening destination entry {Enter address }
Opening destination guidance {Guidance}
Starting destination guidance {Start guidance }
Ending destination guidance {Stop guidance }
Opening the home address {Home address }
Opening the route criteria {Route preference }
Opening the route {Route information }
Switching on the voice instructions {Switch on voice instructions }
Repeating a voice instruction {Repeat voice instructions }
Page 233 of 248
Reference 231
At a glance
Controls
Driving tips
Communications
Navigation
Entertainment
Mobility
Automatic Service Request 184
Automatic transmission with Steptronic 53
– interlock 53,54
– overriding selector lever lock 55
– shiftlock, refer to Changing
selector lever position 54
– sport program 54
– towing 215
– tow-starting 215
AUTO program for automatic
climate control 96
AUX-IN
– port 102
AUX-IN port 158
Average fuel consumption 66
– setting the units 68
Average speed 66
Avoiding unintentional alarms 34
Axle loads, refer to Weights 222
B
Backrest contour, refer to
Lumbar support 43
Backrests, refer to Seat adjustment 42
Backrest width adjustment 43
Backup lamps
– replacing bulb 210
Backup lamps, refer to Tail lamps 210
Band-aids, refer to First-aid
pouch 214
Bar, refer to Towing methods 216
Base plate for telephone or mobile phone
– refer to Snap-in adapter 174
– refer to Snap-in adapter in the center armrest storage
compartment 102
Bass, tone setting 138Battery
212
– charging 212
– disposal 36,212
– jump starting 214
– remote control 28
– temporary power failure 212
Battery for mobile phone 175
Battery renewal
– remote control 36
– remote control for vehicle 36
Being towed 216
Belts, refer to Safety belts 44
Belt tensioner, refer to Safety
belts 44
Beverage holders, refer to Cup holders 103
Blower, refer to Air flow rate 93,96
Bluetooth, activating/
deactivating 166
Bluetooth, refer to separate Owner's Manual
BMW
– car shampoo 207
BMW Assist, activating 180
BMW Assist 178
BMW center 184
BMW Homepage 4
BMW Maintenance System 202
BMW Search 180
BMW webpage 4
Bottle holders, refer to Cup holders 103
Brake
– parking brake 52
Brake assist, refer to Dynamic
Brake Control DBC 78
Brake fluid, refer to Service requirements 69
Brake lamps
– replacing bulb 210
Br
ake pads 110
– breaking in 110
Brake rotors 112
– brakes 110
– breaking in 110 Brakes
– ABS
78
– BMW Maintenance System 202
– breaking in 110
– service requirements 69
Brakes, refer to Braking safely 112
Brake system 110
– BMW Maintenance System 202
– breaking in 110
– disc brakes 112
Breakdown services, refer to Roadside Assistance 213
Breaking in the clutch 110
Breaking in the differential, refer to Engine and
differential 110
Break-in period 110
Brightness of Control Display 76
Bulb changing, refer to Lamps and bulbs 208
Button for starting the engine,
refer to Start/stop button 50
Buttons on the steering wheel 11
Buttons on the steering wheel 11
C
California Proposition 65
warning 6
Call
– accepting 167
– ending 168
– rejecting 168
Calling, refer to Phone
numbers, dialing 168
Can holders, refer to Cup holders 103
Capacities 222
Capacity of the cargo bay 222
Car battery, refer to Vehicle
battery 212
Car care, refer to Care 204